Mixed Berry Bubble-Up Cobbler

Mixed. Berry 'Bubble Up' Cobbler - My Yellow Farmhouse

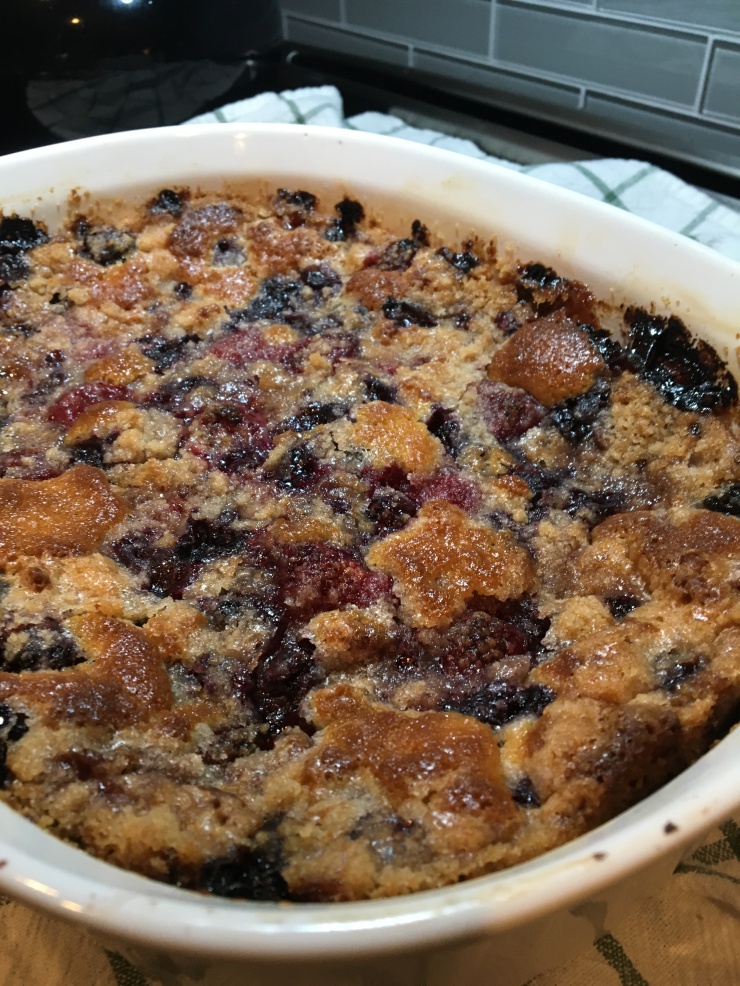
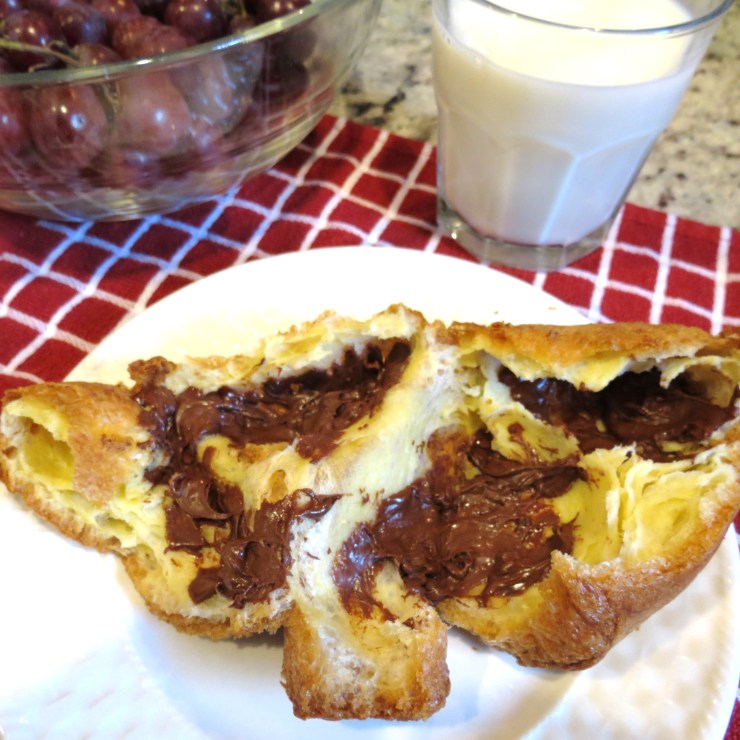
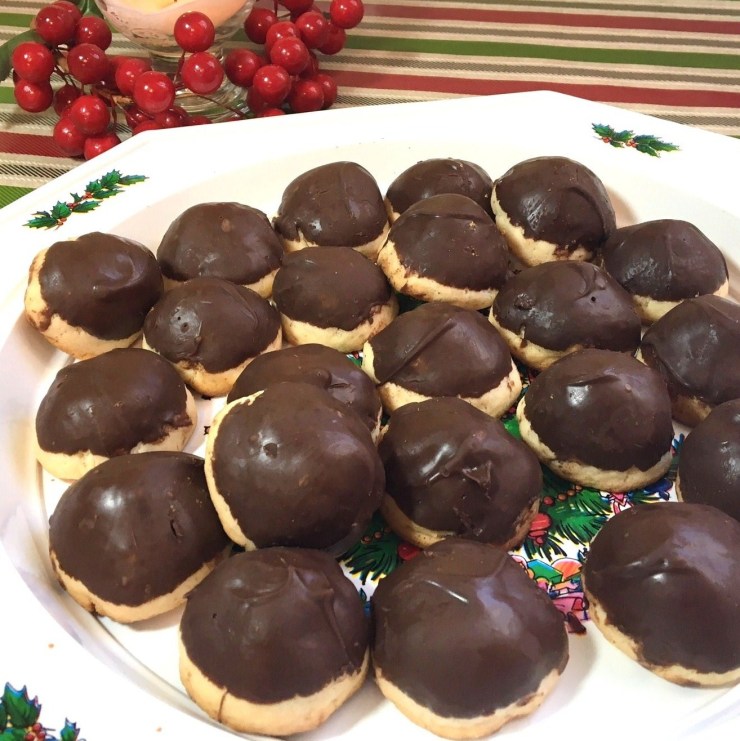
I named this recipe ‘Mixed Berry Bubble Up Cobbler’ because the batter ‘bubbles up’ from the bottom to surround the berries in yumminess.

Another great thing about this cobbler is the buttery flour, sugar & cinnamon topping!

I decided upon a mixture of blueberries, raspberries and blackberries, but you can use any mixture you chose,  If you’re really lucky, you just might have some berry bushes in your own backyard. Or have a neighbor who has so many berries ripening at once they tell you to pick all you want, like my neighbor used to do when we lived in Quebec!

Need a take-along dessert for picnics or barbecues?  This cobbler is just the thing,  (Be prepared for people asking you for the recipe.)  Enjoy!

Here I was thinking my name for this recipe was SO original… until I went online and found tons and tons of recipes with the same name!!   ; o )   

INGREDIENTS

  • 1 cup flour
  • 1 1/2 tsp baking powder
  • 1/4 tsp salt
  • 1/2 cup softened butter
  • 1/2 cup sugar
  • 1 egg
  • 1 cup milk
  • 1 tsp vanilla
  • Mixed berries – 18 oz  (by weight)  blueberries, blackberries & raspberries
  • 1/2 cup sugar
  • 1/4 cup flour
  • 1/2 tsp cinnamon
  • 3 Tb softened butter

DIRECTIONS

Oven at 375 F        Butter a 2 1/2 quart casserole dish        Bake for 1 hour

In a small bowl combine 1 cup flour, 1 1/2 tsp baking powder and 1/4 tsp salt.  Set aside.

In a medium bowl beat together 1/2 cup butter and 1/2 cup sugar until fluffy.  Add 1 egg, 1 cup milk and 1 tsp vanilla – beat until combined.  Add dry ingredients – beat until just combined. Pour batter into a 2 1/2 buttered quart casserole dish.  Spread berries evenly over batter.

Mix together 1/2 cup sugar, 1/4 cup flour, 1/2 tsp cinnamon and 3 Tb softened butter using two knives until mixture is crumbly. Sprinkle over berries.

Bake 1 hour at 375F.  Let cool on a rack for about 15 minutes.  Serve with a scoop of ice cream or some whipped cream  Enjoy!


Ricotta and Spinach Ravioli with Red Pepper, Ham & Parmesan – – Ready in 20 Minutes!!

Quick, Easy and Good!!

If you’ve been following My Yellow Farmhouse for a while, you know I call these types of recipes Quick, Easy and Good. And you may also know – at times when the ‘cupboard is bare’ – I make up with a recipe using whatever I happen to have in the house.

And – this is one of those recipes!!  Looking through my ‘almost empty fridge’ I scored some ham, a red pepper and a hunk of Parmesan cheese – plus a bag of refrigerated KANA brand Spinach & Ricotta-Filled Ravioli.  With the addition of butter and onion, I had the makings of a quick, delicious meal.

(I like KANA refrigerated pastas.  Buitoni is good as well.)

So, see what you have on hand.  Only have a green pepper… or a bit of leftover green or orange peppers, sliced those up  and throw them in.  Like a lot of onion?  Slice up a bunch.  Want a bit more butter… add it in.  Make this recipe your own.  I’m  just giving you a place to start.     PS  I highly recommend preparing this with ham because it adds  quite a bit of flavor to the dish.       ; o )


INGREDIENTS

Recipe feeds two, but is easily doubled!

  • One (10 oz.) package Spinach & Ricotta Ravioli, cooked according to package directions   ++ RANA cooks in 4 – 5 minutes!!
  • 2 Tb. – 3 Tb. butter
  • sliced red pepper.. about half a pepper
  • sliced onion..about half a large onion
  • 1 cup ham, cut into short, rather thin slices    ++ If you are going to use deli ham, have it sliced thicker than for sandwiches.
  • about a 1/2 cup freshly grated Parmesan cheese   ++ Invest in a cheese grater.  Freshly grated Parmesan tastes so much better!

While you’re waiting for the ravioli water to boil, slice the red pepper, onion and ham.

Place 2 Tb. – 3 Tb. butter in a large non-stick skillet.  ++ TIP  Add veggies once pan starts to get hot. Cook over medium-high heat, stirring often, until veggies are softened.  Add ham, and cook just until heated through. Remove skillet from heat.

Drain cooked ravioli and add to skillet.  Sprinkle on 1/2 cup freshly grated Parmesan cheese.  Stir to mix ingredients – and you’ve got dinner.  Enjoy!

COPY - Ricotta and Spanach Ravioli with Red Peppers, Ham and Freshly Grated Parmesan - My Yellow Farmhous
Ricotta and Spinach Ravioli with Ham, Red Pepper and Parmesan


Chicken Tenders Florentine

 Chicken tenders ‘all dressed up’ with a creamy Parmesan and baby spinach sauce, brightened with a hint of fresh lemon.  Wonderful served over rice!

“Tenders” are small pieces attached to chicken breasts – one on each side. They’re aptly named because they’re so tender & flavorful. 

4.1.1
Chicken tenders are usually under 2″ wide and about 5″ long.

Chickens are HUGE now compared to when I was growing up in the 50s & 60s, therefore the ‘chicken tender’ part of the breast is also much bigger.  So, when I prepared this recipe using two – 1 lb. packages of chicken tenders, I had A LOT of chicken.

If you’re cooking for 3 – 4 people, depending upon appetite, 1 pound of chicken tenders should do it.  Want more chicken, buy a 2nd package of chicken and fry in 4 batches instead of two.

++  Recipe makes enough sauce for either 1 lb. or 2 lbs. of chicken tenders.

++  Don’t have chicken tenders?  Cut skinless, boneless chicken breasts into 1 1/2″ slices.

 INGREDIENTS

I highly suggest getting all the ingredients ready before starting because once you begin cooking, everything moves along pretty quickly.  So grate that fresh Parmesan, juice the lemon and grate a tiny bit of the peel, mince your garlic & onion, measure the cream and water all before you start.    ; o )

  • 1 (or 2) 1 lb. packages chicken tenders – OR – chicken breast sliced 1 1/2″ thick
  • flour…. for dredging chicken pieces
  • 3 Tbs olive oil – divided
  • 1 bag (5 oz.) baby spinach
  • 1/8 tsp. salt
  • 2 Tbs. minced onion
  • 1 garlic clove, minced
  • 3/4 cup hot water
  • 1 bullion cube  ++ If using Knorr brand, use 1/2
  • 1 cup heavy cream
  • 1/3 cup freshly grated Parmesan – plus 2 Tbs. for topping
  • 1/4 tsp. grated lemon peel
  • 1 tsp. fresh lemon juice
  • salt & pepper to taste

METHOD

Get all ingredient measured and ready. Place about 1/4 cup flour in a ziplock bag. Dredge a few chicken tenders at a time, setting aside on a plate once covered with flour.

With heat on medium, place 1 Tbs. olive oil in a large skillet. Cook baby spinach with 1/8 tsp. salt until just wilted… less than a minute.  Remove spinach & set aside.  Add 1 Tbs. olive oil to pan. Cook one layer of chicken tenders at a time, turning once.  ++  About 4 minutes a side should do it.  Not sure, cut a tiny slit in chicken to check. Remove cooked chicken to plate and tent with aluminum foil.  Add another 1 Tbs. oil to pan. Cook rest of chicken.  ++  Bits of cooked chicken will remain, which adds flavor to the sauce.

Now for the sauce.  Add the last 1 Tbs. olive oil and briefly cook 2 Tbs. minced onion and 1 minced garlic clove until softened.  Whisk in 3/4 cup hot water, 1 bullion cube and 1 cup heavy cream, scrapping up any browned bits. Bring to a boil. Lower heat a bit. Cook for 5 – 7 minutes to reduce sauce, stirring occasionally.  

Remove pan from heat.  Add 1/3 cup freshly grated Parmesan, 1/4 tsp. grated lemon peel, 1 tsp. fresh lemon juice and cooked spinach.  Cook, stirring, about a minute. Serve chicken on individual plates or a serving platter. Pour the yummy sauce over chicken tenders and sprinkle on 2 Tbs. grated Parmesan.    Enjoy!!

++ Recipe adapted from COOK’S COUNTRY

Upside Down Cherry Almond Cake

Upside Down Cherry Almond Cake - My Yellow Farmhouse.com

Recipe features a dense German-Style cake which can also be used for Strawberry Shortcake!

As always, I couldn’t wait to finish my photos so I could cut myself a rather huge piece of this cake, loaded with an equally huge amount of whipped cream!!  I highly suggest you do the same… or place a very large scope of vanilla ice cream on top, especially while the cake is still warm!

INGREDIENTS

  • 1 (21 oz). can  cherry pie filling    ++  I like Comstock
  • ¼ cup sliced almonds
  • ¼ cup softened butter
  • 1/3 cup sugar
  • 2 large eggs
  • 1/2 tsp. almond flavoring
  • 1½ cups flour
  • 2 tsp. baking powder
  • 1/8 tsp. salt
  • 5 Tbs. milk

DIRECTIONS

As I mention at the top of this post, this is a very dense cake which would also be excellent for Strawberry Shortcake etc.

 9” round cake pan, buttered    Oven at 375F       Bake for 20 – 25  minutes

Mix cherry pie filling with ¼ cup sliced almonds in a small bowl. Pour into buttered cake pan.  Set aside.

With mixer on medium, cream 1/4 cup softened butter and 1/3 cup sugar a few minutes until fluffy.  Add 2 large eggs and 1/3 tsp. almond flavoring. Beat for about a minute until well mixed.  Add 4 Tbs. milk, 1½ cups flour, 2 tsp. baking powder and 1/8 tsp.salt.  Start beating with mixer on low, then finish mixing on medium until just blended. ++ Remember to occasionally scrape sides of bowl.

Spoon cake batter over cherries and almonds. (Batter will be thick.) Using a large spoon, drop batter over cherries and almonds.  Spread batter gently with a knife.

Bake at 375F for 20 – 25 minutes, or until toothpick inserted in the center of the cake comes out clean.  ++ No toothpicks? Use a small sharp knife.

Once cake comes out of the oven, place a serving plate on top and – remembering to use pot holders – quickly tip cake over.

A good amount of the cherries & sliced almonds might remain in the pan. Not to worry…. just scope it out with a large spoon and spread on top of the cake.         Enjoy!!

Here’s the recipe which inspired my Upside Down Cherry Almond Cake

https://www.sunnycovechef.com/home/german-cherry-or-apple-cake

German Apple cake


Chicken Breasts ‘n Rice with Roasted Red Peppers, Mushrooms and White Wine

Easy prep, then pop in the oven for 1 hour. Viola – dinner!!

When I was a young mother I discovered an I Hate to Cook Book by Peg Bracken at our local library. The author supposedly ‘hated to cook’, so her recipes are all easy to make – but delicious at the same time.  And that’s how I found the original recipe for this dish.

Years later I printed a cookbook for my twin sons and included the recipe, reminding them how it used to be my ‘go to recipe’ whenever we had company because I could do all the prep work, then clean up the the kitchen while the chicken and rice was cooking. (Some of you may remember me mentioning what a truly messy cook I am.)

The version I prepared today was based upon any ‘goodies’ I happened to have on hand.  I decided against black olives but decided for Baby Bella Mushrooms, roasted red peppers and white wine.  I think you’ll enjoy it. And, you may want to order a copy of the original I Hate to Cook Book!

Oven at 350 F            Bake (covered tightly) for 1 hour       Serves 5 – 6

INGREDIENTS

  • 3 chicken breasts – cut in half to equal 6 pieces   ++ I highly rec. using bone-in chicken breasts with the skin. Or… even part of the skin.  The flavor is just so much richer!!    ; o )
  • 1 Tbs. butter
  • 1/3 cup chopped onion
  • 1 (8 oz) package Baby Bella sliced mushrooms
  • 1 large clove garlic, minced
  • 1/3 cup jarred roasted red pepper, roughly chopped
  • 1/3 cup white wine  ++  I used Pinot Grigio 
  • 1/2 tsp. salt
  • 1/4 tsp. pepper
  • 1 1/2 cups long grain rice
  • 3 1/2 cups chicken bouillon,  boiling   ++  You can add more salt and a chicken bouillon cube if you wish.
  • paprika
  • 1 Tbs. butter

Cut three chicken breasts in half to equal six pieces. ++  If using bone-in chicken breasts, you can leave on the skin if you wish.  Set breasts aside.

Put 1 Tbs. butter in a medium skillet. Add 1/3 cup chopped onion. Cook over medium heat until softened. Add 1 (8 oz) package Baby Bella sliced mushrooms and 1 large clove minced garlic.  Cook until mushrooms are wilted.  Add 1/3 cup chopped jarred roasted red pepper, 1/3 cup white wine, 1/2 tsp. salt and 1/4 tsp. pepper. Simmer for 1 minute. Remove from heat.

Bring 3 1/2 cups chicken bouillon to a boil.  Spread 1 1/2 cups long grain rice on the bottom of a 10″ x 13″ casserole. Place cooked veggies on top of rice, trying to spread veggies somewhat evenly.  Place six (halved) chicken breasts on top of the veggies and rice.

Pour boiling chicken bouillon over everything.  Sprinkle some paprika over chicken breasts and dot with 1 Tbs. butter.  Cover tightly with foil.  Bake at 350F for an hour.  Enjoy!  

Prepare Ahead Green Beans with Browned Butter and Sesame Seeds

You may want to serve Green Beans with Browned Butter and Sesame Seeds


Wishing You All a Very Merry Christmas from St. Augustine, Florida!!

happy-new-year-2016-myyellowfarmhouse-com
Last Christmas – what a difference a year makes!!

Hello Everyone!!  I’m so sorry I haven’t posted for almost a year.  Why, you may ask? Because I had been so busy preparing to move from my beloved Yellow Farmhouse in Massachusetts to St. Augustine, Florida. (I arrived in St. Augustine in July… with, probably, 1/4 of the ‘stuff’ I used to have..)

There was a lifetime of wonderful family memories etc. stored in the attic, the cellar, the barn AND the loft in the barn. Most of it was ‘good stuff’ and I hate throwing good things away.  Luckily, there’s a well traveled road down the hill in back of the farmhouse. We put ‘stuff’ down there and off it would go, often in minutes.  I tell you, we made a lot of people very happy! One woman told me she was helping her daughter set up her new apartment with my ‘stuff’.

I’ll be flying out tomorrow so I can spend the holidays in Massachusetts, and I’m really looking forward to seeimg family and friends. There’s a lot I miss about New England – but there’s tons of things I love about living here in St. Augustine!  (More about that soon..)

In the meantime I haven’t packed a thing for my trip, which is so typical of me.  I spent today day cleaning up and reorganizing things after my very first dinner party in St. Augustine. I have a BIG problem with ‘time management’.  I tend to underestimate how just long it will take to do things, so, as usual, as my guests arrived last night my kitchen was a disaster area.  (It never matters as long as the food is good, the wine is flowing and the conversation is lively.)

Messy Kitchen ... as always..
Yup… what a mess….
lantern on porch - at night
Except for the kitchen… everything looked lovely!

Old Bureau Shines From in All It's Glory - Christmas 2017

EPIC CHRISTMAS TREE FAIL !!

I purchased this little tree when we lived in Malta.  I loved this little tree. I spent a few hours decorating it a few days ago until every little glass icicle and every treasured ornament was in the ‘best place’.  Then … I moved the tree, maybe, five inches… and the stand broke….     ; o (

EPIC TREE FAIL !
EPIC CHRISTMAS TREE FAIL !!!

New and Improved Christmas Tree!!

A nice seven footer, so ALL the ornaments fit!!  Believe me… I was ‘this close’ to saying, ‘Never-mind’… 

New Christmas Tree
Yes!  New tree and MUCH stronger stand!
guests
There’s nothing like old friends – but it’s also fun to have new friends!!

One of my twin sons and his family – plus my twin brother and his wife – were here in St. Augustine for Thanksgiving. It was wonderful!!  If you ever get a chance, come to St. Augustine during the holidays. The Nights of Lights is beautiful to behold. A large part of the city is lit up with thousands and thousands of lights – it’s gorgeous.

The night before Thanksgiving I served my Ravioli Lasagna.  Get this – I made it the day before… so no mess. Why can’t I be like that more often!!

Wishing you all the merriest of holidays!!  (And now… I guess I’ll have to get started on packing that suitcase…)

Here’s the link to the recipe for Ravioli Lasagna

Mushroom Ravioli Lasagna - My Yellow Farmhouse

++ Top Photo of St. Augustine – stock image… 

Popovers – ‘Let me count the ways…’ (A new addition to The Popover Experiment.)

These may be the easiest popovers to make – ever!

Crusty outside and drier than most popovers inside – great for filling with chicken salad etc.  Or ice cream and chocolate sauce, which tastes like an eclair!

A while back I did a series of popover recipes which I called The Popover Experiment.  I had a lot of fun – and ate a lot of popovers – while working on that series of recipes.  It’s truly amazing how many variations of popover recipes there are. And I can say with all honesty that I’ve never eaten a popover I didn’t enjoy!

Recently I made popovers for my grandchildren while visiting with my son’s family. I found this recipe in my son’s 1980’s edition of  the Good Housekeeping Illustrated Cook Book., which I used religiously when my sons were teenagers.  (Awhile ago I purchased used copies for both my sons, so they now each have their own copies of the same cookbook I used when they were growing up!)

As you can see in the photo above, these popovers are huge and crusty.  The centers are drier than most popovers, perfect for filling with chicken salad etc. – OR – ice cream and chocolate sauce!  Of course, all popovers are delicious just slathered with butter and a bit of jam.

Here’s my grandson’s idea – melted chocolate.  He was one happy boy!!  ; o )

Popovers with Melted Choc. Chips - myyellowfarmhouse.com  - COOPER'S IDEA!
We sprinkled on some chocolate chips and melted them a bit in the microwave – YUMMY!

Oven at 375 F       Bake for 50 minutes

++ Grease popover pans if they’re not ‘nonstick’.

INGREDIENTS

  •  3 eggs
  • 1 cup milk
  • 3 Tbs. butter
  • 1 cup all-purpose flour
  • ½ tsp. salt.

Beat 3 eggs, 1 cup milk and 3 Tbs. butter at high speed until foamy.  Add 1 cup all-purpose flour & ½ tsp. salt.  Beat until combined and foamy.

Bake at 375F for 50 minutes.  Pierce each popover with a knife to allow steam to escape.

++  Recipe courtesy of the 1980’s edition of the Good Housekeeping Illustrated Cook Book

Popovers - Creamy on the Inside and Crispy on the Outside n- myyellowfarmhouse.com

Crunchy, Nutty Apple Crisp with a Sprinkling of Bacon

Sprinkling on bits of crispy bacon during the last few minutes of baking is, of course, optional. But it sure is a fun option!  

5-crunchy-nutty-apple-crisp-with-a-sprinkling-of-bacon-my-yellow-farmhouse

I always have such good intentions.  I always buy lots of fruit and I always throw away some of that fruit.  This time I put those soft apples to good use and baked one of my favorite old-fashioned desserts – Apple Crisp.  Sprinkling on bits of crispy bacon towards the end of the baking time gives this dessert an new twist.

You know, I actually prefer eating apple crisp at room temperature, but that didn’t keep me from giving myself a big serving while it was still hot.

Except for coring, peeling and cutting the apples, this dessert takes very little time to prepare.

small red heart

8 – 9 inch square cake pan        Bake at 350F for 30 – 35 minutes

Add chopped, cooked bacon 5 minutes before apple crisp is ready to come out of the oven.

Ingredients

    Apple Filling

  • 7 cups peeled, sliced apples
  • 1/3 cup sugar
  • 1/4 tsp. cinnamon
  • 3 pinches nutmeg
  • 1 Tbs. flour     ++ Flour helps thicken the apple juices
  • 1/4 tsp. salt

    Topping

  • 1/2 cup brown sugar   ++  Just leveled, not ‘packed’    
  • 3/4 cup all-purpose flour
  • 4 Tbs COLD butter, cut into small pieces
  • 2 pinches salt
  • 1/2 cup chopped walnuts or pecans
  • 2 – 3 Tbs. roughly chopped cooked bacon  To be added during last few minutes of baking.

++  As the old expression goes, “Live and Learn’.  I learned that finely chopping the cooked bacon was NOT the way to go, so I recommend doing a rough chop.  Also, it’s better if the bacon is slightly crispy… not super crispy.  

Method

In a large bowl mix 7 cups peeled, sliced apples, 1/3 cup sugar, 1/4 tsp. cinnamon, 3 pinches nutmeg, 1 Tbs. flour and 1/4 tsp. salt.  Pour into a square baking pan.

Place 1/2 cup brown sugar, 3/4 cup all-purpose flour, 4 Tbs cold butter (cut into small pieces) and 2 pinches salt in a medium bowl.  Using a pastry cutter, or two knives, mix ingredients until it resembles coarse crumbs.  Add 1/2 cup chopped walnuts or pecans.  (Do NOT add the bacon!)

Sprinkle crumb mixture evenly over the sliced apples.  Bake at 350F for 30 – 35 minutes.  The apple filling should be bubbling and the topping should be browned.

++ If adding 2 – 3 Tbs. chopped cooked bacon – sprinkle it on 5 minutes before apples crisp is fully cooked.    Enjoy!

6-crunchy-nutty-apple-crisp-with-a-sprinkling-of-bacon-my-yellow-farmhouse


Indian-Inspired Chicken Stew – – Mildly Flavored with Cardamom, Coriander etc.

We had snow storm here in Western Massachusetts – only a few inches – but the streets were a disaster and I never made it to the grocery store.  (I tell you, it sure is amazing how resourceful you can be when you’re hungry.)  I dug around a bit in the old ‘larder’ and found two large half chicken breasts and peas in the freezer, a package of precooked diced potatoes, a half bag of baby carrots, a bit of ‘half and half’ cream, sour cream and cashews. I have a pretty good assortment of spices in the cupboard, so I decided to prepare a dish inspired by the spices of India.

The resulting stew has a lovely. subtle flavor because I added just a small amount of each of the spices.  So subtle in fact, that even a professed ‘disliker of Indian food’ (if there is such a person) would very much enjoy this Indian-Inspired Chicken Stew.

I used chicken, since that’s what I had on hand, but you could use whatever you happen to have – pork, for example.  Have leftover vegetables – add them in.  Want a more robust taste – add more of each spice.  Want a bit more heat – add more red pepper flakes.  Don’t have sour cream. Add more ‘half and half’.  As I like to say, “Make it yours’!

small red heart

++ For an easy and delicious homemade chicken broth, place a rotisserie chicken carcass, along with some of the skin, in a large saucepan or Dutch Oven.  Add enough water to cover. Add some chopped onion, carrots & celery.  Add a bit of poultry seasoning, salt and pepper, and simmer for about an hour – uncovered.  Stir occasionally and turn chicken carcass over once or twice.  Allow to cool.  Strain broth through a colander placed over a large bowl.  And there you are!  An excellent chicken broth to use right away – or freeze in a ziplock gallon bag for later use. 

INGREDIENTS

I used jarred spices.  If you have fresh, so much the better!

  • 1 Tbs. butter      ++  Recipe calls for a total of 3 Tbs. butter
  • 1/4 tsp. crushed red pepper
  • 4 pinches cinnamon
  • 1/2 tsp. turmeric
  • 1/2 tsp. ground coriander
  • 1/2 tsp. ground cardamon
  • 1/2 tsp. dried cilantro
  • 1/2 tsp. salt
  • 1 Tbs. butter
  • 1/3 cup chopped green pepper
  • 1 onion, roughly chopped – about 1 cup
  • 1 tsp. fresh minced garlic – 2 to 3 cloves
  • 4 cups peeled, diced and cubed potatoes       ++ You could use sweet potatoes – or a mixture of both    ++  I used a (20 oz) bag of  Just Potatoes Diced Potatoes for two reasons…. I had it in my fridge & because the potatoes have already been peeled, diced and cooked, which I really like!
  • 1 Tbs. butter
  • 2 chicken breast halves, cut into chunks
  • 2 1/2 cups cut baby carrots – cut into 1/3″ pieces
  • 2 1/2 cups frozen peas, thawed  ++ Run the peas under hot water to thaw
  • handful of  whole cashews
  • 4 cups chicken broth
  • Added at the end  …..  2/3 cups half and half cream  &   1/2 cup sour cream

METHOD

Over medium heat, allow a stockpot or Dutch Oven to heat up a bit. Add 1 Tbs. butter,  1/2 tsp. dried cilantro, 1/2 tsp. ground cardamon, 1/2 tsp. ground coriander, 1/2 tsp. turmeric, 4 pinches cinnamon, 1/4 tsp. crushed red pepper and 1/3 tsp. salt. Cook, stirring, for about 30 seconds.

Add another tablespoon butter, 1/3 cup chopped green pepper and 1 cup chopped onion. Cook, stirring occasionally, until green pepper and onions are softened.  Add 1 tsp.minced garlic. Cook just until garlic softens, then add 4 cups peeled, diced and cubed potatoes. (Potatoes do NOT have to be cooked first.)  Continue cooking and stirring occasionally for another few minutes.  Remove spice and vegetable mixture for now.

Add another 1 Tbs. butter and chicken breast chunks.  Cook until chicken is no longer pink on the outside.  (The inside can be pink because chicken will finish cooking while stew simmers.)  Add in the set-aside spice and veggies.  Add 2 1/2 cups cut baby carrots, 2 1/2 cups thawed peas, a handful of cashews and 4 cups chicken broth. Cover and simmer, stirring occasionally, for 20 minutes.

Turn off heat. Add 2/3 cups half and half cream and 1/2 cup sour cream until combined

Enjoy!    Or, in Hindi, ka aanand len.

7-indian-inspired-chicken-stew-myyellowfarmhouse-com


‘Recipe Roundup No. 2’ ….. Super Bowl Snack Ideas

I follow lots of terrific food blogs and recently I decided to ‘share the wealth’ by posting a weekly Recipe Roundup.  Each Roundup features four delicious recipes from four different bloggers. 

When I first began my little food blog the main idea was to share recipes, which we all love to do.  (I’m sure many of you have a file of recipes either copied from friends, ripped out of magazines or found online.)  What I hadn’t expected was the joy I would find in making lots of new friends! 

This week features recipes from Foodie Crush, My Favourite Pastime,  Damn Delicious  &  Chef Mimi.    Enjoy!

small red heart 

Heidi, of Foodie Crush, blogs from Salt Lake City and calls herself a ‘recipe maker, picture taker, lover of food bloggers and their recipes and photos. 

Follow this link for Heidi’s recipe for Cheesy Texas Trash Dip

Cheesy-Texas-Trash-Dip-foodiecrush.com.jpg
Cheesy Texas Crab Dip


Liz hails from Canada, hence the name of her blog is My Favourite Pastime – with that added ‘u’ we Americans no longer use for some reason.  Liz is a prolific baker but she shares great recipes of all kinds.

Follow this link to Liz’s recipe for Chicken Legs with Bacon & Ricotta Stuffing

chicken-with-bacon-and-ricotta-stuffing-myfavouritepastime-com_4648.jpg
Chicken with Bacon and Ricotta Stuffing


Mimi, whose wonderful blog is called Chef Mimi, has been involved in many aspects of ‘the food world’ including  being a personal chef, a caterer, a food columnist and a cooking school teacher etc.  etc.

Follow this link to Mimi’s recipe for crab dip.

Crab Dip - Chef Mimi.com.jpg
Crab Dip


Chungah, of Damn Delicious, resides in California with her Corgi named Butters. Chungah like to say she cooks in a closet-sized kitchen.  Closet-sized or not, she does a great job.

Follow this link to Chungah’s Cheesy Chicken and Broccoli Pockets

Cheesy-Chicken-and-Broccoli-Pockets - courtesy of Damn Delicious.jpg
Cheesy Chicken and Broccoli Pockets

See you at the next Roundup, partner!


copy-recipe-roundup

Historic and Unusual Recipes – – French Canadian Blood Pudding Recipe a.k.a Boudin

Blood Pudding (or sausages) are served in French, Belgian, German, British, Quebec, Acadian, Creole, Austrian and Cajun cuisine.

This Blood Pudding a.k.a. Boudin is baked in loaf pans instead of sausage casing. 

boudin-noir-courtesy-of-banque-dimages
Boudin Noir, or as the British say, Black Pudding. This version will look similar in color and texture.

Photo courtesy of Banque D’Images

This is my 2nd post in the category Historic and Unusual Recipes.  The first was How to Cook a Terrapin (or Turtle).  I discovered that recipe in a very old Fanny Farmer Cookbook and posted it simply because I found it interesting. Guess what?  Almost every day… week in and week out… How to Cook a Terrapin (or Turtle) appears in my list of ‘Readers Recent Favorites’. Who woulda thunk it?  And now it’s gonna be interesting to see how well received this French Canadian Blood Pudding recipe is!   ; o )

I made French Canadian Blood Pudding only once, using the blood from one of the pigs we raised. We planned to roast the pig on a special spit – and feed the neighbors, the local family, the family from Montreal and the family from the States. Luckily it was a BIG pig. So big it actually broke the rented spit… but that’s another story.

My husband’s family all told me I’d fed my pigs too much because, when butchered, they all had a lot of fat. They said I ‘babied’ all my animals.  Hey, if you were a pig… and it was hot… wouldn’t you be happy if someone gently sprayed you with cold water.  Of course you would.  I rest my case.

My husband’s aunt Therese and I prepared the Blood Pudding at the Roy Family Farm in St. Flavien, Quebec (Canada) where my husband’s family has lived/farmed for the last seven generations. It’s a huge house with a huge kitchen. There’s a wood burning stove and a modern stove – a lovely mixture of old and new.  (I remember visiting around 1970 and there was still a water pump in ‘The Summer Kitchen’.  I’ll explain about Summer Kitchens another time.)

I just deleted the paragraph about hanging the pig upside down etc.  I didn’t want to gross you out any more than necessary..  

When I arrived at the old family farm with my bucket of pig blood, Ma Tante Therese (My Aunt in French.) was armed and ready with the necessary utensils and pans. Ma Tante didn’t speak much English and my French is far from great, but I managed to write down several of her old French Canadian recipes over the years, including this one for Blood Pudding, while I either helped or watched her cook.  And an excellent cook she was.

My husband LOVED the Blood Pudding we’d made.  And I was pretty darn proud of myself, let me tell you.  I did take a tiny taste of it… Blood Pudding has an unusual texture – no surprise there. It does taste pretty good, if you can get beyond the ‘main ingredient’.

My husband loved to eat his Boudin cut into slices and fried.  He especially loved it for breakfast with scrambled eggs.  At the time I made the Blood Pudding my husband could only eat soft things due to oral cancer.  You can imagine how pleased I was, especially at that point in his life, to have prepared something for him which he’d loved his whole life.  

Life is short. Prepare your loved ones favorite dishes.  Doing so truly is a gift of love! 

small red heart

This recipe for French Canadian Blood Pudding (Boudin) is prepared in two loaf pans. 

I’m going to give you the recipe as I wrote it down – although sometimes I’ve written recipes from our French Canadian Aunts half in French and half in English.

Fresh blood from one pig

Strain the blood to get the clots out.  If clots are big, remove them with a big wooden spoon.

Add the exact same amount of milk as there is blood.

Put milk and blood into a large bowl.

Add:

1 ½ large onions   – cut up very fine

1 pound pig lard (fat)  ++  from the pig 

2 Tbs. salt

1 Tbs. pepper   ++  Not a full tablespoon.  And Ma Tante used an actual soup spoon.

1 Tbs. ground cloves   ++  Not a full tablespoon.  And Ma Tante used an actual soup spoon.

Grease two bread pans with oil.

Pour blood mixture into pans.

Cook at 400 for one hour. Enjoy!    ++ I recommend cutting the Boudin into slices or squares and frying it. 

After the rain comes the rainbow.  (Our farm in St. Antoine de Tilly, Quebec)

Rainbow-Fall 2005.jpg


‘Recipe Roundup’ – Sharing Recipes from Some of the Wonderful Bloggers I Follow ++ A new idea I hope you enjoy!!

So many recipes – so little time.  I follow about 30 fabulous food bloggers and I’ve forced myself to not add more.  I’d be perfectly content ‘checking out delicious recipes’ all day long… Recently I had an idea – to start sharing some of those great recipes by doing a weekly Roundup’.  I hope you like it.   ; o )

small red heart

From my friend John of ‘The Bartolini Kitchens’ – ‘Panettone Pain Perdu’ & ‘Panettone Bread Pudding’

John is an amazing cook who lives in Chicago & has a killer sense of humor!  I hope to make his Panettone Bread Pudding with Orange Sauce either today or tomorrow.

panettone-bread-pudding-courtesy-of-the-bartolini-kitchens

‘Easy Toffee Bars from Trish at ‘Mom on Timeout’.

Trish is another blogger who ‘does it all’. A self-described ‘Stay at Home Mom’, her blog is loaded with craft ideas and recipes etc.

Easy Toffee Bars - courtesy of 'Mom on Timeout'.jpg

From Pam of ‘Brooklyn Farm Girl’ – Easy Slow Cooker Cabbage Roll Casserole

Pam ‘does it all’.  She’s an artist in NYC who started ‘farming’ on her rooftop in Brooklyn.  This year she expanded her farming to a property in New York State. Her recipes often include her ‘couldn’t be any fresher’ produce.

Slow-Cooker-Cabbage-Rolls-Casserole - courtesy of Brooklyn Farm Girl.jpg

Here’s a simple and delicious recipe for ‘Old Fashioned Sweet Bread’ from ‘The ‘Southern Lady Cooks’

‘The Southern Lady’s’ recipes are always family-friendly, easy and delicious.

old-fashioned-sweet-bread-courtesy-of-the-southern-lady-cooks

I hope you enjoyed this ’roundup’.  See ya again soon, partner!

recipe-roundup 

Celebrating Christmas after December 25th & a Recipe for ‘Ham and Cheddar Balls with Honey Mustard Dipping Sauce’

Tonight is New Year’s Eve but my extended family and I celebrated Christmas yesterday – and a merry time it was!

snowmen-at-twilight-myyellowfarmhouse-com
Snowmen at Twilight – My Yellow Farmhouse

Christmas Traditions – making buttery sugar cookies with new & old cookies cutters.  (The angel and poinsettia cookie cutters were my mother’s.)  

Christmas, even though celebrated after December 25th, still felt like Christmas to me and my extended family two days ago. There were happy, excited children, brightly wrapped presents, rum-spiked eggnog and lots of food and Christmas cookies – plus love, laughter and Bing Crosby singing Christmas Carols.    ; o )

I kept the menu for our ‘Christmas Meal’ simple and did much of the cooking the day before.  I baked three French Canadian Meat Pies, ‘spiral cut’and roasted the ham and prepared Make-Ahead Loaded Mashed Potatoes. I served only one vegetable – Wilted Spinach with Olive Oil and Pine Nuts, which takes only minutes to prepare.

To nosh on while we opened presents I made a platter featuring good old deviled eggs, various types of olives, and sliced tomatoes & fresh mozzarella drizzled with balsamic vinegar. I also served a few old favorites like one we like to call Vito’s Dip, and Ham and Cheddar Balls with Honey Mustard Dipping Sauce.  (I think my twin brother ate half the Ham and Cheddar Cheese Balls because he loves them and I hadn’t make them in years.)

Below my directions for making Ham and Cheddar Balls you’ll find links to Grammy Brouillette’s French Canadian Meat Pies, Make Ahead Loaded Mashed Potatoes and a link to Fabulous Foods.com‘s directions for how to cut and bake a spiral ham.

small red heart

Ham and Cheddar Balls with Honey Mustard Dipping Sauce


Oven at 350F          Bake for 20 minutes

INGREDIENTS

  • 3 cups biscuit mix – such as Bisquick   ++  If Bisquick isn’t available, check online for directions to make your own.  It’s easy!
  • 1 1/2 cups diced ham
  • 4 cups shredded Cheddar cheese (16 oz.)
  • 1/2 grated Parmesan cheese
  • 1 Tbs. chopped fresh parsley
  • 1 tsp. brown mustard    ++  I use GREY POUPON’S ‘Country Mustard’
  • 2/3 cup milk

Honey Mustard Dipping Sauce

  • 3/4 cup mayonnaise
  • 3 Tbs. brown mustard
  • 1 – 2 Tbs. honey

METHOD

Lightly grease a cookie sheet ..  OR  ..  line cookie sheet with parchment paper.

In a large bowl, using a large serving spoon, mix all ingredients until well blended.

Form dough into 1″ balls. Place balls 2″ apart on cookie sheet.

Bake for 20 minutes.  Balls will be lightly browned

While balls are baking, prepare sauce.  In a small serving bowl mix 3/4 cup mayonnaise, 3 Tbs. brown mustard and 1 2 Tbs. honey until blended.

++  ‘Ham and Cheese Balls may be baked the day before, placed in a big ziplock bag, refrigerated and reheated on a cookie sheet for a 6 – 7 minutes at 350F.

Recipe adapted from Bisquick brand’s Holiday Ham Balls.

Directions for preparing Grammy Brouillette’s French Canadian Meat Pies

Recipe for ‘Make Ahead Loaded Mashed Potatoes’

slow-cooker-loaded-mashed-potatoes-myyellowfarmhouse-com

Fabulous Foods tells you everything you need to know to spiral and cook a ham.  My ham sure didn’t look quite as ‘pretty’ as this one, but it was delicious!

http://www.fabulousfoods.com/articles/957827/how-to-spiral-carve-ham

spiral-cut-ham-courtesy-of-farmpac
Photo courtesy of FARMPAC.

christmas-2016-myyellowfarmhouse-com

Love chocolate covered cherries? Then you’ll love these cookies!

copy-chocolate-covered-cherry-cookies-myyellowfarmhouse-com

The new ‘thing’ on Pinterest seems to be baking cookies with a Hershey’s Kiss in the center, which is a fabulous idea.  So … I thought, “Why not wrap rich cookie dough around a maraschino cherry & cover the cookie with melted semi-sweet chocolate”?  Yup – Yummy!

Here’s how you get that maraschino cherry in the center. Take a tablespoon of dough, flatten it and wrap dough around the cherry.  It’s fun and easy – as is dipping the cooled cookies in the melted chocolate.

You can make the cookie dough ahead and refrigerate it.  Recently I divided the dough in half, brought half  to my son’s house and made cookies with my grandchildren.  A week later I baked the other half and mailed those cookies to my godmother and uncle. (At the last minute… typical me.  It cost me almost $60.00 to make sure the package would get to Florida by Christmas..)

My grandchildren had fun forming snowmen and candy canes etc.  –  but the dough is far too soft to use for cut-out cookies.

small red heart

Yield – about 4 dozen cookies 

Oven at 350F      Bake cookies for 15 – 16 minutes – until bottoms are lightly browned.  (The cookies themselves will be very, very lightly browned at the edges.)

Ingredients and Method

  • 1 1/2 cups butter  ++ Three sticks allowed to come to room temperature   ++ Here’s a ‘cheat’ – place the three sticks of butter on a small plate. Microwave in 10 second increments. DO NOT overdo it …. or you’ll end up with melted butter. Two times at ’10 seconds each’ should do it.     ; o )
  • 1 (8 oz.) package softened cream cheese
  • 2 1/2 cups confectioner’s sugar   ++ Also know as ‘powdered sugar’ or ‘icing sugar
  • 1 egg at room temperature  ++ I  put the egg in some warm water for a minute
  • 2 tsp. vanilla extract
  • 1 tsp almond extract
  • 4 cups all-purpose flour
  • 1/2 tsp. baking powder
  • 1/4 tsp. salt
  • red maraschino cherries, drained on a paper towel
  • 1 (12 oz.) bag semi-sweet chocolate chips
  • 2 Tbs. shortening

Method

In a large mixing bowl, beat 1 1/2 cups softened butter, 8 oz. softened cream cheese, 2 1/2 cups confectioners sugar, 1 room-temperature egg, 2 tsp. vanilla extract and 1 tsp. almond extract until thoroughly blended, then continue beating for another minute.

Add 4 cups all-purpose flour, 1/2 tsp. baking powder and 1/4 tsp. salt.  Mix until thoroughly combined.

Dough will be sticky, so I suggest dividing dough into two parts, wrapping in plastic wrap & refrigerating for about 20 minutes.

++ If preparing dough ahead – divide dough into two parts, wrap dough in plastic wrap and refrigerate. Remove dough and let it warm up a bit before you begin forming cookies.

Using a measuring tablespoon, scoop out a tablespoon of dough and flatten it in your hand a bit. Place a maraschino cherry (don’t forget to put the cherries on a paper towel to dry a bit) in the center and fold up the dough to cover the cherry.  Roll the dough in your hand to form a rough ball.  Place balls about two inches apart on a parchment-lined cookie sheet.

cherries-and-dough-chocolate-covered-cherry-cookies-myyellowfarmhouse-com

Bake cookies for 15 – 16 minutes in a 350F oven until cookies are a lightly browned on the bottom.  Cookies will be very, very lightly browned at the edges.  Remove cookies immediately and allow to cool on a rack.

++ Here’s what I learned… if you pick up a cookie to see if the bottom is browned and it falls apart… it’s not ready yet!   ; o )

Melting the Semi-Sweet Chocolate

Place 1 bag (12 ounces) of semi-sweet chips and  2 Tbs shortening in a microwavable bowl.  Melt chocolate at either half-power or the defrost setting.  Keep checking –  and stirring  – until chocolate is melted and well blended.  Dip each cookie ‘face down’ into the melted chocolate and give it a little shake. Set cookie on rack – repeat.  Enjoy!

++  Try not to overheat chocolate or it may harden up.  Here’s h.e.lp. if that ever happens to you – http://www.sheknows.com/food-and-recipes/articles/977613/in-a-pickle-how-to-salvage-overheated-chocolate

All the cookies but two made it into the Christmas package I sent to my aunt and uncle in Florida.  I  dare YOU to eat just one…!!

2-chocolate-covered-cherry-cookies-myyellowfarmhouse-com

Forget Take-Out … Thirty-Minute Pizza with Homemade Crust

Two versions of Thirty-Minute Pizza –  Thin OR Thick Crust !!

Yup – takes about 30 minutes!  You make the pizza crust, let the dough rise for 10 minutes, add your favorite pizza toppings and you’ll be eating hot, fresh, delicious homemade pizza in less time than it takes to wait for delivery!  

Having a party which includes children?  Prepare dough ahead and let each child make their own individual pizzas.  They’ll have a great time!

Here’s my Latest Thing – invite The Girls over for a night of wine & fresh pizza. Soo much fun!

small red heart

From our last party…fresh mozzarella, sauteed red peppers & onions, pepperoni and arugula   

thirty-minute-pizza-myyellowfarmhouse-com

Meatball Version – Got leftover meatballs & sauce….?     

My Grandchildren’s Version – Each put on exactly what they wanted on their half of the pizza.  And just look at those flying hands!  

Fresh Mozzarella and Fresh Basil – The first Thirty Minute Pizza I ever made.

Follow this link to ‘Popover Pizza’ a.k.a. ‘Upside Down Pizza’, which was one of my twins sons favorites when they were young!

6 - Popover Pizza a.k.a. Upside-Down Pizza - myyellowfarmhouse.com

For the meatball pizza I used whatever I had in the fridge; some meatballs, spaghetti sauce and various cheeses.  Once my pizza was fully ‘fitted out’, it was popped onto the lowest shelf in the oven. After 14 minutes I was happily stuffing my face with hot, delicious pizza. And, get this, I’m not usually a big pizza fan.  But I’ve been known to have three pieces of Thirty Minute Pizza.

Recently I doubled the pizza crust dough recipe, put the dough in two large resealable plastic bags and refrigerated them. Actually, I made the dough two days ahead, so on the night of the party, the dough had risen so much that the bags were near to bursting.

My plan was for each of the four ‘kiddos’ who attended the party to make their own individual pizzas.  And it worked like a charm.  I gave each child a small piece of parchment paper, a hunk of dough and some ‘pizza fixings’. The mini individual pizzas, still on the parchment paper, were placed on a cookie sheet and baked on the lowest rack of the oven for about 13 minutes. The kids had a great time making their pizzas AND they actually ate almost all of them – which was pretty unusual since they usually eat like birds..    ; o )

small red heart

Thin Crust Version – note cooking time is slightly less than Thick Crust Version !

To double the Thin Crust Version – do NOT double salt. Use 1 tsp. ..  double all other ingredients

Oven at 425F     Bake on lowest rack for 12 – 14 minutes.

Ingredients and Method          

  • 2 cups all-purpose flour   – plus a bit extra when kneading the dough
  • 3/4 tsp. salt
  • 1 1/2 tsp. sugar
  • 2 1/4 tsp. quick rise (or bread machine) yeast – OR 1 packet
  • 3 Tbs olive oil    ++  I used olive oil infused with basil
  • 1/2 cup very warm water   –  120 to 130 degrees    ++  Water should feel very warm..but not quite hot.

Sauce & Toppings of Your Choice!

  • pizza sauce or spaghetti sauce or  etc.
  • meatballs, cut in half or thirds
  • pepperoni
  • cooked ground beef
  • peppers, onions etc.
  • fresh mozzarella, grated mozzarella, grated Parmesan, grated Romano etc .  OR – pepper jack cheese, grated 5-cheese Italian mix…. whatever you have
  • Don’t be afraid to try things like ham and slices of canned pineapple etc. YUMMY!
  • Or make a White Pizza with Alfredo sauce & cheese.   Or mix it up and add sliced tomatoes and fresh basil.

Method

In a good-sized bowl place 2 cups all-purpose flour, 3/4 tsp. salt, 1 tsp. sugar and 1 packet quick rise (or bread machine) yeast, which equals 2 1/4 tsp.  Mix dry ingredients with a fork.

Add 3 Tbs olive oil and 1/2 cup very warm water   –  120 to 130 degrees  ++  Water should feel very warm..but not quite hot.  Mix ingredients together with a large spoon.  Towards the end it might seem as if there’s not enough water but just keep mixing in the rest of the flour and it’ll turn in a really nice dough.  ++  Dough will be a stiff.

Sprinkle a little flour on the counter or a clean dish towel.  Knead dough for about four minutes. Dough should be nice and elastic by this time.  Place the bowl you were using over the ball of dough and let rest for 10 minutes.

++   You’re going to find this dough easy to work with.  Because the dough is warm and fresh, it won’t keep shrinking back every time you try to form the it.  

After letting dough rest, I suggest using your fingers to press dough into shape.  Add whatever toppings you wish.  Bake pizza at 425F – ON THE LOWEST SHELF OF YOUR OVEN – for 12 to 14 minutes, or until bottom is slightly browned and the crust is just a bit brown.  ++ I cook the Thin Crust pizza for about 12 minutes but ovens differ.

++  I like to use a 11 1/2 inch nonstick pizza pan with holes on the bottom because it makes a crisper crust.  You can also use a cookie sheet.  If your cookie sheet isn’t nonstick, I recommend using parchment paper – it makes it much easier to remove the cooked pizza.

Thicker Crust Version – note cooking time is slightly different !

To double the Thicker Crust Version – do NOT double salt.   Use 1 tsp. ..  double all other ingredients

Ingredients and Method          

  • 2 1/4 cups all-purpose flour   – plus a bit extra when kneading the dough
  • 3/4 tsp. salt
  • 1 1/2 tsp. sugar
  • 2 1/4 tsp. quick rise (or bread machine) yeast – OR 1 packet
  • 3 Tbs olive oil    ++  I used olive oil infused with basil
  • 2/3 cup very warm water   –  120 to 130 degrees    ++  Water should feel very warm..but not quite hot.

See TOPPINGS & METHOD above

++  Bake on lowest rack of oven set at 425F – for 12 – 15 minutes.  

++ I cook the Thicker Crust pizza for 15 minutes but ovens differ.  The pizza dough should be slightly browned on the bottom and the crust will just be a bit brown.  

++  I like to use a 11 1/2 inch nonstick pizza pan with holes on the bottom because it makes a crisper crust.  You can also use a cookie sheet.  If your cookie sheet isn’t nonstick, I recommend using parchment paper – it makes it much easier to remove the cooked pizza.

 thirty-minute-pizza-meatball-version-myyellowfarmhouse-com

‘Not Your Grandmother’s’ Turkey (or Chicken) Tetrazzini – Prepared with Tortellini Instead of Spaghetti

One of the great things about this recipe is you do NOT have to bake it – just pop it under the broiler to melt the cheese and brown the almonds!  

Or –  you can make it ahead & reheat it in the oven! 

Not too long ago I made a scrumptious lasagna using ravioli – and was very happy with the the results. So I thought, “How about preparing my usual Turkey (Chicken) Tetrazzini with tortellini”?

My son M. and I prepared this dish the day after Thanksgiving, which I spent in Philadelphia. (I always ask his mother-in-law for the turkey carcass AND the glorious turkey drippings.)  My daughter-in-law picked up cheese-filled tortellini, but, of course, you can use any type of tortellini you like.

I think you’ll enjoy this new twist on an old favorite.  I know we did.

++ I have this recipe in a cookbook I made for my twin sons and their wives.. and that made posting this recipe a bit quicker because I could just ‘cut and paste’ the ingredients and instructions!!   : o )

Follow this link for “Mushroom Ravioli Lasagna with a Light Basil & Bell Pepper Tomato Sauce”

Ingredients and Method

++  Set oven at broil – if serving this right away – broil until shredded Parmesan is melted and and almonds are slightly browned. ++  Place oven rack so that casserole is about five inches below broiler. ++ PREHEAT BROILER !! 

++  OR –  put casserole in the oven at 350F until the filling is bubbling – about a half hour.

++  OR – refrigerate casserole for a day or two, allow casserole to come to room temp, then bake at 350F until filling is bubbling – may take a bit more than a half hour.

++  Casserole is baked UNCOVERED.

Ingredients

  • 3 (9 oz.) packages refrigerated tortellini – cooked per package direction
  • PREFER TO USE PASTA –  1 (16 oz.) package spaghetti or fettuccine, cooked & use HALF the sauce recipe.
  • 2 cans chicken-mushroom soup, undiluted  ++ OR cream of chicken soup OR mushroom soup 
  • 2 cups  turkey or chicken stock    ++  Or 2 cups boiling water and 2 bullion cubes
  • 2 cup freshly grated sharp cheddar cheese
  • 1 tsp. Worcestershire sauce
  • 1 1/2 tsp. salt
  • 1/2 tsp. pepper
  • 2 cups cooked chicken or turkey, cut into small pieces
  • 1/4 – 1/3 cup slivered almonds
  • 1/2 – 3/4 cup grated Parmesan cheese  ++ My daughter in-law, who did the shopping, bought a bag of refrigerated, shredded Parmesan cheese. I usually recommend freshly grated cheese but the refrigerated cheese was very good.   ; o )
  • sprinkle of paprika, for color

In medium saucepan combine 2 cans chicken-mushroom soup, 2 cups chicken/turkey stock (or 2 cups boiling water and 2 bullion cubes), 2 cups freshly grated sharp cheddar cheese, 1 tsp. Worcestershire sauce, 1 1/2 tsp.salt and  1/2 tsp.pepper.  Cook, stirring, over medium heat until mixture comes almost to a boil. Add 2 cups cooked turkey (or chicken) cut into small pieces. Remove pan from heat.  Add cooked tortellini and mix well.

Pour mixture into a 10” x 13” casserole or pan.  Sprinkle with grated Parmesan cheese, then slivered almonds and a bit of paprika, just for color.

TO SERVE IMMEDIATELY – Place casserole under broiler for about 4 minutes or until Tetrazzini is browned and bubbly.  ++  Be sure to watch it.  One second you have a lovely, bubbling casserole with toasted almonds… but within a few seconds you can have a disaster.

TO SERVE LATER – OR TO COOK CASSEROLE IN THE OVEN – see directions above.   Enjoy! 


Cranberry Sauce with Crushed Pineapple and a Hint of Oranges

cranberry-sauce-with-pineapple-myyellowfarmhouse-com

The addition of crushed pineapple mellows out the tartness of the cranberry sauce without changing that great cranberry taste.  

This is another one of those recipes I like to call ‘Quick, Easy and Good’.  Like all cranberry sauces, it can be made ahead, which is always a good thing, right?

I don’t know about you, but I am a cranberry sauce FREAK.  I just love cranberry sauce!  I also love pineapple. So for me, this Cranberry Sauce with Crushed Pineapple is a win-win situation. And adding 1/4 tsp. grated orange peel (..no pith allowed..) adds just the right bit of zip.

This recipe makes a thick and chunky cranberry sauce. It’s like ‘all fruit.. all the time’.

++  If you prefer your cranberry sauce a bit more saucy, just add 1 – 2 Tbs. more water to the ingredients.

++  If you prefer your cranberry sauce less sweet, add a bit less sugar.


small red heart

INGREDIENTS AND METHOD

  • 12 oz. fresh cranberries  ++  Did you know cranberries can be frozen. I learned that when we lived in Malta and cranberries were only sold during the Christmas season.                                                                      ++ 12 oz. fresh cranberries equals about 3 cups
  •  1 (8 oz) can crushed pineapple – DRAINED
  • 1 cup sugar
  • 3 tbs water    ++ Want a bit more ‘sauce’… add 1 – 2 more Tbs. water
  • 1/8 tsp finely grated orange peel ++ DO NOT grate into the pith – the white part.

Pick through cranberries, eliminating any ‘squishy’ ones and taking off any little stems. Rinse in a colander.

Place cranberries into a medium saucepan. Add 1 cup sugar, 3 tablespoons water and 1/8 tsp. finely grated orange peel.  ++ Remember – no pith!

Simmer over low heat, stirring occasionally, until sugar dissolves and cranberries are soft – about 10 minutes.

Raise heat to medium and cook until the cranberries burst – about 12 minutes. Allow to cool. Refrigerate leftover cranberry sauce.

As I like to say, “It doesn’t get much easier than that.”  Enjoy!

A Blast from the Past – Make Ahead Holiday Recipes


Make Ahead Turkey Dinner - My Yellow Farmhouse.com

I’m leaving for the Philadelphia area Tuesday, so I’m in a hurry today – just like everyone else.  Here are several great ‘make ahead’ dishes from 2014.  Preparing several dishes ahead of The Big Day makes everything so much easier.  Enjoy!!

Click on recipe title, which will bring you to that recipe!

small red heart

Here’s the one thing you DON’T make ahead – Roasted Turkey Breast (or Turkey) with White Wine, Apples & Oranges – and Savory Gravy

Roasted Turkey Bre

Make Ahead Mashed Potatoes with Sour Cream and Chives

Make-Ahead Sour Cream Mashed Potatoes - My Yellow Farmhouse.com

Make Ahead Sweet Potatoes with Cinnamon, Nutmeg and a Splash of Brandy

Sweet Potatoes with Cinnamon, Nutmeg and a Dash of Bourbon - My Yellow Farmhouse.com

Make Ahead Herbed Stuffing with Baby Bella Mushrooms

Make-Ahead Turkey Dinner - "Herb Stuffing with Baby Bella Mushrooms" - My Yellow Farmhouse.com

Green Beans with Browned Butter and Sesame Seeds – Browned Butter Can Be Prepared Ahead

Prepare Ahead Green Beans with Browned Butter and Sesame Seeds

Homemade Cranberry Sauce with Apple and a Touch of Cinnamon

Homemade Whole-Berry Cranberry Sauce with Apple and a Hint of Cinnamon - My Yellow Farmhouse.com

Make Ahead Loaded Mashed Potatoes – Tastes Like Loaded Baked Potatoes!

my-yellow-farmhouse-autumn-2016
Happy Thanksgiving from My Yellow Farmhouse

These potatoes can served immediately or they can be made a day ahead.  

You have two choices for heating them the next day.

Potato mixture can be warmed in a slow cooker for 3 – 3 1/2 hours before serving –  OR  –  baked in a 3 quart COVERED casserole at 350F for about an hour. 

Sometimes we make a Happy Mistake, as I just did.  The recipe I was adapting called for 1/2 cup shredded Cheddar cheese and 1/2 cup Monterey Jack cheese. But.. I put in THREE cups of cheese.  Guess what? It’s tastes AWESOME – just like loaded baked potatoes.

So now you have two ways to prepare this. The original version, with one cup shredded cheese-  OR –  the ‘Tastes Like Loaded Baked Potatoes’ version with three cups shredded cheese!  And two ways to heat the potatoes the next day!

small red heart

Ingredients & Method

  • 3 ½ – 4  lbs. white peeled potatoes, cut into small pieces  (About 10 good-sized potatoes.)      OR –  3 packages  (20 oz. each) precooked, diced potatoes like “Simply Potatoes”  ++  I used these for the first time and loved the convenience – no peeling… no cutting!
  • 8 oz. cream cheese, softened and cut into chunks
  • 1 cup (8 oz) sour cream
  • ½ cup butter, softened and cut into chunks
  • 1/2 cup milk
  • ½ lb. bacon, cooked and crumbled   ++ Reserve 2 Tbs.bacon crumbles for serving      ++  I cut the bacon into pieces using kitchen shears before cooking it  ; o )
  • ½ cup shredded Cheddar cheese
  • ½ cup shredded Monterey Jack cheese  ++ I purchased a mixture of both cheeses
  • ++ Add 3 cups shredded cheese for the ‘Tastes Like Loaded Baked Potatoes’ version
  • 3 green onions, sliced thin  ++ Use the green part as well
  • 1/4 tsp. garlic salt
  • 1 tsp salt
  • 1/4 pepper

Place  peeled and diced potatoes in a Dutch Oven.  Cover potatoes with water. Bring to a boil. Reduce heat to a simmer.  Cook potatoes, uncovered, until tender – between 10 to 15 minutes. ++ The more well-cooked the potatoes, the less the likely-hood of having lumpy potatoes.

Dutch Oven - Walmart

Drain potatoes and return to pan. Mash with cream cheese, sour cream, butter and milk. Add bacon crumbles (Reserve 2 Tbs.bacon crumbles for serving.), ½ cup shredded Cheddar cheese, ½ cup shredded Monterey Jack cheese, 3 green onions, 1/4 tsp. garlic salt, 1 tsp salt and 1/4 pepper.

++ Add a total of 3 cups shredded cheese for the ‘Tastes Just Like Baked Potatoes’ version.  

If serving immediately, made sure potato mixture is heated through.  Sprinkle on 2 Tbs bacon bits and serve.  OR – cover and refrigerator overnight.  

You have two choices for heating the potatoes the next day:

 1.  Potato mixture can be warmed in a slow cooker for 3 – 3 1/2 hours.  Sprinkle on 2 Tbs. crumbled bacon right before serving.  

2.  Bake in a 3 quart COVERED casserole at 350F for about an hour – or until heated through.  ++ Stir potatoes midway through cooking. Sprinkle on 2 Tbs. crumbled bacon right before serving.  ++ I suggest taking the prepared potato mixture out of the fridge about an hour before reheating in the oven.


Moist and Light Honey Pecan Wholewheat Bread – Bread Maker Version

moist-and-delicious-honey-and-pecan-whole-wheat-bread-breadmachine-versiion-2

The dough for Moist and Light Honey Pecan Wholewheat Bread, as it was being kneaded in my bread maker, looked super sticky.  I added two tablespoons of white flour and was tempted to add more. I’m glad I didn’t.  This bread cooked up beautifully with a moist and light texture.  Nothing ‘cardboard’ about it, unlike some wholewheat breads.  ++  Recipe does include some all purpose white flour.

A recent blood test showed I have a touch of hypoglycemia which means I need to eat protein with every meal – and watch my carbs.  So, I believe the carbs I do eat should be healthy – healthy and delicious of course!!  (Of course, I’ll still be eating desserts… I just can’t over indulge.)

++  About that bit of ‘Extra Flour’.  When making bread dough, the amount of flour needed can vary depending upon the humidity of the flour etc.  If the dough looks more like glue than dough, add a tablespoon or so of flour.  After the bread maker kneads for awhile, the dough should come away from the sides and form a ball. If it doesn’t, add another tablespoon of flour.  There’s NO way you can screw it up!

small red heart

  ++  Loaf Ready in About 4 1/2 hours  ++


 2-LB. Loaf       ++  For 1 1/2-LB. Loaf…. continue scrolling down

            ADD INGREDIENTS TO BREAD MAKER IN THE FOLLOWING ORDER

  • 1 1/3 cups milk
  • 1/4 cup water
  • 2 Tbs. honey  ++  Or sugar
  • 4 tsp. butter
  • 2 cups whole wheat flour
  • 2 cups white bread flour
  • 1 tsp. salt
  • 1 1/4 tsp. active dry yeast/bread maker yeast
  • 1/4 cup chopped pecans   ++  If your bread maker alerts you when to add ‘extras’, add pecans then. If not, add nuts after dough has been kneaded for about 10 minutes.

++  Want to add chia seeds, flax seeds etc.?  Just remove an equal amount of flour from the recipe

Set bread maker cycle to ‘GRAIN’ if possible.  Otherwise, set bread maker cycle to ‘BASIC’.  It doesn’t get much easier than that!  ; o )  Enjoy!

– – – – – – – – –

1 1/2 Lb. Loaf

++  About that bit of ‘Extra Flour’.  When making bread dough, the amount of flour needed can vary depending upon the humidity of the flour etc.  If the dough looks more like glue than dough, add a tablespoon or so of flour.  After the bread maker kneads for awhile, the dough should come away from the sides and form a ball. If it doesn’t, add another tablespoon of flour.  There’s NO way you can screw it up!

ADD INGREDIENTS TO BREAD MAKER IN THE FOLLOWING ORDER

  • 1 cup milk
  • 3 Tbs. water
  • 4 tsp. honey  ++  Or sugar
  • 1 Tbs. butter
  • 1 1/2 cups whole wheat flour
  • 1 1/2 cups white bread flour
  • 3/4 tsp. salt
  • 1 tsp. active dry yeast/bread maker yeast
  • 3 Tbs. chopped pecans   ++  If your bread maker alerts you when to add ‘extras’, add pecans then. If not, add nuts after dough has been kneaded for about 10 minutes.

++  Want to add chia seeds, flax seeds etc.?  Just remove an equal amount of flour from the recipe

Set bread maker cycle to ‘GRAIN’ if possible.  Otherwise, set bread maker cycle to ‘BASIC’.  It doesn’t get much easier than that!  ; o )  Enjoy!


++ Recipe adapted from Better Homes and Gardens ‘The Complete Guide to Bread Machine Baking’ – 1999.


Pumpkin Slab Pie – Bakes in a 15″ x 10″ Pan (Sided Cookie Sheet)

Pumpkin pie is not just for Thanksgiving anymore – especially when you serve pumpkin pie in a whole new way … like this slab pie!  I couldn’t wait to finish my photos ’cause I couldn’t wait to try this. (I ate three pieces!)

A ‘no-roll’ homemade crust – which comes together in minutes – is pressed into a 15″ x 10″ sided cookie sheet. (Also known as a jelly roll pan.)  The crust is covered with aluminum foil and baked for 10 minutes.  The filling is quick to prepare – brown sugar, pumpkin spice, brown sugar, half and half and eggs are stirred and poured over the partially baked crust.  After baking for a half hour the pan pie is cut into 16 pieces and, if you’re like me, smothered with whipped cream

‘Nuff Said – I think you’re gonna love this!

small red heart

Love the taste of ginger?  Add a bit to the filling before baking.

++  Preheat oven to 400 F      Line pan with aluminum foil   

++  Note – crust bakes (covered with two layers of foil) for 10 minutes.  Filling is then poured in and pie bake for 30 minutes.

++  Filling is fully cooked when a knife, inserted in the middle, comes out clean.

++  Pie should be refrigerated within two hours.

Ingredients

   Pie Crust

  • 2 1/2 cups all-purpose flour
  • 1 tsp. salt
  • 1/2 cup shortening
  • 1/2 cup COLD butter – OR – 1/2 cup additional shortening
  • ice water  ++ Add ice cubes to 2/3 cup water.  ++ You probably will NOT use all the water.

   Pumpkin Filling

  • 1 ( 15 oz.) can pumpkin  ++  1 3/4 cups pumpkin
  • 3/4 cup PACKED brown sugar
  • 1 1/4 tsp. pumpkin pie spice
  • 1/2 tsp. salt
  • 4 eggs, lightly beaten with fork until combined
  • 1 1/2 cups half and half
  • sweetened whipped cream – for topping

METHOD

Line 10″ x 15″ pan with aluminum foil.

In a large bowl stir – using a fork – combine 2 1/2 cups all-purpose flour and 1 tsp. salt. Using a pastry blender (or two forks), cut in 1/2 shortening and 1/2 COLD butter until mixture resembles oatmeal, and butter/shortening is fully mixed in.

Sprinkle part of the flour mixture with 1 Tbs. ice water and mix gently with a fork. Push moistened pastry to side of bowl. Repeat until mixture begins to come together.  Gather pastry into a ball, kneading gently until it holds together.

++ You will probably only need 5 – 6 tablespoons ice water. You do NOT want a sticky pastry.

Divide pastry into two balls.  Starting at one end, press half the pastry onto bottom and sides of half the pan.  ++ At first, I thought, “This is NOT going to be enough. But it was!   ; o ) Repeat using second ball of pastry.  ++ Do NOT prick pastry.  Cover pastry with TWO layers of aluminum foil.  Bake for 10 minutes. Remove foil.

In a large bowl combine 1 3/4 cups pumpkin, 3/4 cup PACKED brown sugar, 1 1/4 tsp. pumpkin pie spice and 1/2 tsp. salt.  Stir in 4 slightly beaten eggs until just combined. Gradually stir in  1 1/2 cups half and half. Pour filling over partially baked pastry.  Bake for 30 minutes, or until knife inserted in middle comes out clean.  Cool on wire a rack.  ++  Pie should be refrigerated within two hours.

Dollop on some whipped cream, sprinkle on a tiny bit of pumpkin pie spice and enjoy!

Recipe adapted from ‘Good Housekeeping’ magazine – Oct 2016.

pumpkin-slab-pie-my-yellow-farmhouse

Mini Chocolate Cupcakes with Reese’s Peanut Butter Cup Centers – “Autumn/Halloween Version”

mini-chocolate-halloween-cupcakes-with-reeses-candy-centers

These ‘surprise in the center’ cupcakes are extra chocolaty and delicious – frosting is always optional.

I like to call these types of recipes A Little Help From My Friends because I used a purchased cake mix and canned decorating cake icing. I know most people don’t have a lot of extra time, so A Little Help From My Friends always helps.

I think you’re gonna find these cupcakes a bit addictive.  Once you pop one in your mouth, you just can’t stop!  Extra cocoa, brown sugar and a bit of vanilla are added to a dark chocolate cake mix, giving these mini cupcakes an extra BAM of chocolate flavor.  And the goodness of mini Reese’s peanut butter cups really puts these little treasures over the top in the taste department.

The trick to making these is placing a mini peanut butter cup in each lined cupcake section before adding the batter.  ++ In this particular instance, mini cupcake tins were used, but these special cupcakes can also be prepared using regular sized cupcake tins.

I prepared these Autumn/Halloween cupcakes last weekend when my twin brother and his family came for dinner. We cooked chicken breasts and thighs on a grate suspended over my fire pit. (I’d been wanting to grill chicken this way for a long, long time.)  The chicken turned out really tender and the smoky flavor reminded me of when my dad used to cook hamburgers over an open fire.  The flavor of those hamburgs has stayed with me entire life. Let me tell you, grilling with today’s charcoal briquettes, which now often contain bits of charcoal PLUS coal, starch, sawdust, and sodium nitrate, can’t even come close to the taste of grilling over a wood fire.

After the meal, these mini Autumn/Halloween cupcakes .. and  S’Mores .. were enjoyed by all. (None of the adults had any of the S’mores but they couldn’t stop eating these cupcakes…) After my guests departed, I wrapped up a few baking potatoes in several layers of aluminum foil and nestled them in the fire. The next morning those potatoes made the BEST home fries.  Oh yeah – the best things in life are free!

small red heart

++  Yield – 50 or so mini cupcakes

++  Heat oven to 350F

++  Bake mini cupcakes 12 minutes   (Bake average sized cupcakes according to package directions.)

Ingredients

++ I highly recommend using cupcake liners

  • 1 box Dark Chocolate cake mix – prepared according to the package directions
  • 1  Tbs. cocoa powder
  • 1 Tbs.  brown sugar
  • 1/2 tsp. vanilla extract

  Here’s what I used to decorate my Autumn/Halloween cupcakes

  • 2 cans green Decorating Cake Icing   ++ I used Betty Crocker brand
  • 1 (1 lb.) bag candy pumpkins  ++  You’ll have some leftover to nibble on!!

Method

Line cupcake tins.  Unwrap mini Reese’s peanut butter cups and place one in each section.

Prepare cake mix according to the package directions. Add  1 Tbs. cocoa powder, 1 Tbs. brown sugar and 1/2 tsp. vanilla extract. Beat for another 30 seconds or so.  Using a tablespoon, fill each section 2/3s full of cake batter. Using a small spoon, spread batter so peanut butter cups are fully covered.

Bake for about 12 minutes. Cupcakes will be slightly rounded and, when tapped with a finger, should not dent in.  Remove cupcakes and cool on a rack. Repeat until all batter is used up.  It’ll take a little while to make so many cupcakes but it’s easy and fun   ; o )

When cupcakes are fully cooled, frost with canned decorating icing.  ++  Use the star tip which is included with the icing.  Lightly press a candy pumpkin on the top of each cupcake. Enjoy!

TIP — While one batch of cupcakes is baking, remove wrapping from additional peanut butter cups.  Children love to help with this… but be prepared to lose several candies in the process!   

mini-chocolate-halloween-cupcakes-with-reeses-candy-centers-7

Chocolate and Pistachio Swirl Cake

How the chocolate layer goes from the top to the bottom is a mystery to me!!

A dear friend of mine shared this recipe with me back in the 80s, when bundt cakes were the ‘in thing’.  Chocolate and Pistachio Swirl Cake  baked in a bundt pan does make a beautiful presentation, but I wanted something to bring to a Fourth of July picnic that could be eaten ‘out of hand’, so I went for the good old 13′ x 9′ pan and cut the cake into squares.

Because Chocolate and Pistachio Swirl Cake is prepared with a boxed cake mix, it’s really quick to put together. Once the cake was cooled and cut into squares, a little dusting of confectionery (icing) sugar was all that was needed and off I went to the barbecue.

3 - Chocolate and - Pistachio and  Swirl Cake - myfarmhouse.com

new type bundt cake pan
In case you’ve never heard of a bundt pan – here’s an example.

We had a wonderful time the Fourth of July at my cousin’s home on Lake George (Massachusetts), which a small lake and not the big, big Lake George in New York State.  And everyone very much liked what I brought for dessert!

Fourth of July - David's - 2016
Lake George, Massachusetts (USA)  Don’t you just LOVE having friends/family who live on the water AND who own a boat??!!

small red heart

Oven at 350F      

++  13″ x 9″ pan  (buttered & floured) – bake for 35 – 40 mins. 

++ bundt pan (buttered & floured) – bake for 55 – 60 mins.

++  Cake is cooked when it pulls away from the sides of the pan – and when a sharp knife (or toothpick) inserted in the middle comes out clean

INGREDIENTS

  • 1 yellow cake mix
  • 1 package instant pistachio pudding
  • 1/2 cup orange juice
  • 1/2 cup water
  • 1/3 cup oil
  • 4 eggs
  • 3/4 cup chocolate syrup  ++  I use Hershey’s.  Be sure not to buy thick fudge topping.  You want the chocolate syrup used to make chocolate milk.

METHOD

In a large bowl beat yellow cake mix, 1 package instant pistachio pudding, 1/2 cup orange juice, 1/2 cup water, 1/3 cup oil and 4 eggs for two minutes on medium speed.  Pour half the batter into buttered and floured pan.

++  To ‘flour a pan’, put some flour into the buttered pan.  Shake the pan around so that the butter is totally covered with a light coating of flour.  Turn the pan upside and hit the bottom of the pan so the extra flour falls out. 

Mix remaining batter with 3/4 cup chocolate syrup.  Pour batter on top of the pistachio layer.

Bake for 37 – 40 minutes (or so) if using a 13″ x 9″ pan.  (Oven temperatures vary.)

Bake 55 – 60 minutes (or so) if using a bundt pan.  (Oven temperatures vary.)

Allow cake to cool – in the pan – on a cake rack for 20 – 30 minutes.  ++  Allowing  the cake to cool thoroughly makes it easier to cut because this cake is very moist.

++  Here’s a trick to get that ‘dusting’ of confectionery sugar (icing) sugar on prettily – use a small strainer.  

small strainer
Photo courtesy of WebstaurantStore

3 - Chocolate and - Pistachio and  Swirl Cake - myfarmhouse.com

Double Chocolate Black-Bottom Strawberry Pie – If You Love Chocolate Covered Strawberries, You’ll Love This Pie!

Love Chocolate-Dipped Strawberries - Then You'll Love This Pie!
Finished Pie – with a bit of drizzled semisweet chocolate which, I decided, isn’t worth the bother!!   ; o )

strawberries

Double Chocolate Black-Bottom Strawberry Pie is best eaten the day it’s made!

You get a double dose of chocolate in this scrumptious strawberry pie! Your first dose of chocolate begins with a purchased chocolate cookie crust, over which is poured a rich layer of melted chocolate and cream.    

While the chocolate and cream layer is cooling in the fridge you prepare the strawberry glaze.  Once the glaze has cooled a bit you gently mix in the sliced strawberries, pour the pie filling over the chocolate and cream layer and refrigerate for several hours.  It’s doesn’t get much easier – or delicious – than that my friends!

small red heart

1 quart of strawberries = 1 1/2 lbs.    1 pint of strawberries = 3/4 lb. 

Ingredients 

  • 1 purchased chocolate cookie pie crust
  • 2 lbs. strawberries     ++  You’ll need 1/4 cup mashed strawberries for the glaze – – and 4 cups sliced strawberries for the filling.
  • 1/2 cup heavy (whipping) cream
  • 1 cup semisweet chocolate chips

UPDATE:  The ingredients for the glaze – listed below – are half of what I’d posted yesterday because a purchased cookie crust only holds 4 cups of sliced strawberries and a full cup of sugar made the filling overly sweet for my taste.    ; o )

  • 1/4 cup mashed strawberries
  • 1/2 cup sugar
  • 1 1/2 tsp. cornstarch
  • 1/4 cup water   ++ Mixture will be REALLY thick but it will get a bit watered down by the berry juice.  
  • 2 tsps. lemon juice – optional
  • 1 – 2 drops red food coloring – optional

Method

Chocolate & Cream Layer

In a microwave – or small saucepan on top of the stove – heat cream until steaming.  Add chocolate chips.  Let stand for 2 minutes, then whisk until chocolate is melted and mixture is thick.  Spread evenly over bottom of the pie crust.  Refrigerate while you prepare the strawberry glaze.

Strawberry Glaze   

Place in a small saucepan 1/4 cup mashed strawberries, 1/2 cup sugar, 1 1/2 tsp. cornstarch and 1/4 cup water. (Optional 2 tsp. lemon juice and 1 – 2 drops red food coloring.) Boil, stirring occasionally, for about 3 minutes until glaze is very thick and deep red.  Place glaze in a bowl and allow to cool while you slice the strawberries.

Once the strawberry glaze has cooled, gently mix in the sliced strawberries (about 4 cups) and pour into the pie crust.  Chill for several hours. Dollop on lots of whipped cream and enjoy!

Love Chocolate-Dipped Strawberries - Then You'll Love this Strawberry Pie
Start with a chocolate cookie crust.
Love Chocolate-Dipped Strawberries - Then You'll Love This Strawberry Pie (2)
Chocolate & Cream Mixture is spread over the chocolate cookie crust.
Love Chocolate-Dipped Strawberries - Then You'll Love This Strawberry Pie (3)
You’ll need 1/2 cup mashed strawberries for the glaze.
Love Chocolate-Dipped Strawberries - Then You'll Love This Strawberry Pie (4)
Strawberry Glaze – waiting for it to boil.
Love Chocolate-Dipped Strawberries - Then You'll Love This Strawberry Pie!
Strawberry Glaze – cooled and ready to mix with the sliced strawberries.
Love Chocolate-Dipped Strawberries - Then You'll Love This Pie!
Finished Pie – with a bit of drizzled semisweet chocolate, which I wouldn’t bother doing again! ; o )

Love Chocolate Covered Strawberries - Then You're Goona Love This Pie!

Quick and Delicious Popover Pizza – a.k.a. Upsidedown Pizza

Back in 1999, when I was such a neophyte with computers that I didn’t even know how to use spell check, I made a cookbook containing many of my twin sons’ favorite recipes. The cookbook, aptly named The Roy Family’s Favorite Recipes, was a big hit with my guys and they  still use it, and a subsequent Christmas cookbook, fairly often.

Popover Pizza was always a big favorite of my sons’ – and their friends.  If you happen to have leftover meatballs and sauce, prepare the Popover Pizza with that. Don’t happen to have leftovers?  All you’ll need is a pound of ground beef, a jar of prepared spaghetti sauce and an onion. Plus a few spices like oregano – whatever you’d like.

The meat and sauce are spread on the bottom of 9′ x  13′ pan, lots of shredded mozzarella cheese is sprinkled on top, then the popover batter is poured over the mozzarella, followed by a sprinkling of shredded Parmesan.  Pop the Popover Pizza into the oven for 30 – 45 minutes, or until the the popover ‘crust’ is puffed and  lightly browned. Et voila, dinner is served.

PS  – As I type this I’m staying with two of my grandchildren while my son M. and his wife are vacationing in Spain. Yesterday I broke out my son’s copy of The Roy Family’s Favorite Recipes and made Popover Pizza.  Judging from the stains and drips on the page, it seems Popover Pizza is  big hit with the new generation of Roys as well.  Enjoy!!

Follow this link to ‘Forget Takeout Pizza – Thirty Minute Pizza with Homemade Crust

thirty-minute-pizza-meatball-version-myyellowfarmhouse-com

small red heart

Oven at 400F         Buttered 9′ x 13′ pan            Bake for 35 – 45 minutes

INGREDIENTS

  • 2 – 3 cups leftover meatballs and sauce     ++  chop meatballs into chunks
  •      Don’t have leftover meatballs and sauce?
  •                1 lb. ground beef
  •                1 small onion, chopped
  •                1 jar purchased spaghetti sauce
  •                1 /2 tsp. dried oregano, basil or Italian herbs
  • 2 cups shredded Mozzarella cheese
  • 1 cup milk     ++ Full fat or 2% is best
  • 2 large eggs
  • 1 Tbs. olive oil
  • 1 cup all-purpose flour
  • 1/2 tsp. salt
  • 1/2 grated Parmesan cheese

METHOD

Butter a 9′ x 13′ pan

– If you have leftover sauce and meatballs, spread 2 – 3 cups of sauce and chopped up meatballs on bottom pan.

– No Leftovers?  —  Fry 1 lb. ground beef and one onion, chopped, in a large skillet. Remove any fat from pan and discard.  Add one jar spaghetti sauce, some herbs, such as 1 /2 tsp. dried oregano, basil or Italian herbs –  any herbs and spices you wish.   Simmer sauce, uncovered, for 10 minutes to 15 minutes – stirring occasionally.  Spread beef and sauce mixture on bottom of pan.

Sprinkle two cups shredded Mozzarella cheese over meat and sauce.

  Popover Topping

In a medium bowl beat -on high – 1 cup milk, 2 large eggs and 1 Tbs. olive oil until foamy, about a minute.  Add 1 cup all-purpose flour and 1/2 tsp salt   Beat on high until mixture is thoroughly blended. Slowly pour batter over mozzarella cheese.  Sprinkle with 1/4 cup shredded Parmesan.

Bake at 400F for between 35- 45 minutes.  The meat and sauce with be bubbling and the popover topping should be lightly browned and puffy.  If you check and the popover topping isn’t puffy and lightly browned, just bake it a bit longer.  ++  The amount of time needed will depend upon your oven – and your pan. If using a glass pan, you will probably need the full 45 minutes simply because glass doesn’t conduct heat in the same way as metal.  (I’m making a note to myself to tell my son that!)   

6 - Popover Pizza a.k.a. Upside-Down Pizza - myyellowfarmhouse.com

Coconut Joy Cheesecake Bars with Chocolate Wafer Crust

Believe it or not, I’ve never made a cheesecake… ever!  My sister-in-law Doris makes a killer cheesecake, so I get my ‘cheesecake thrills’ whenever we’re all together.  But when I saw this recipe, I knew just had to make it.  I’m so glad I did because these cheesecake bars taste like a candy bar in cheesecake form.

My Very First Cheesecake Ever is in the oven right now.  It’s gonna be interesting to see if it comes out a bit lopsided.  The kitchen floors here in My Yellow Farmhouse are old and slant down a bit, especially right in the corner where the stove resides.  My Man of All Work (my brother-in-law Mike) did his best to level out the floor, but since I moved here I’ve never baked a cake that was absolutely level.  ++  The cheesecake actually came out level – hurrah!

I recommend baking these cheesecake bars the night before, or early in the morning of the day you plan to serve it because once the cheesecake is cooled completely, it’s refrigerated for 4 hours.  Then a simple creamy chocolatey topping is prepared using chocolate chips and Cool Whip, then toasted almonds and coconut are sprinkled on top.  Yummy!

INGREDIENTS

Chocolate Wafer Crust

  • 1 ¼ cups finely crushed chocolate wafer cookies   ++   About 25 – I used Nabisco ‘Famous Chocolate Wafers. 
  • 2 Tbs. granulated sugar
  • ¼ cup melted butter

Cheesecake Filling

  • 4 packages (8 oz.) cream cheese – SOFTENED
  • 1 cup sugar
  • ½ tsp. vanilla  AND  ½ tsp. almond flavoring
  • ½ cup coconut milk   ++ Due to my broken ankle I accidentally ordered an Almond Milk/Coconut Milk blend to be delivered via Pea Pod …. luckily, it worked great!!
  • 4 eggs

Creamy Chocolatey Topping with Toasted Almonds and Coconut

  • 1/2 cup chocolate chips  ++  I used mini-chocolate chips.  
  • 1 (8 0z.) container of FROZEN whipped topping, such as Cool Whip
  • 2 drops almond extract
  • 1 cup flaked sweetened coconut
  • 1/2 cup sliced almonds  – OR – 1/2 cup almond pieces  ++ I had whole almonds, so I put some in a food bag & ‘smacked them down’ a bit.  ; o )

small red heart

       Line a 10″ x 9″ pan with aluminum foil          Bake at 325F  for 45 minutes

Once cheesecake is fully cooked, turn off oven – leaving door open –  and let cheesecake sit in oven for 20 minutes.

METHOD

In a small bowl, thoroughly mix 1 ¼ cups finely crushed chocolate waferS, 2 Tbs. granulated sugar and ¼ cup melted butter.  Using your fingers, press chocolate wafer mixture into bottom of a 13 x 9” pan, which you’ve covered with aluminum foil – edges hanging over.  ++ This will help will when removing the cheesecake bars.

In a medium bowl, using mixer, thoroughly blend 4 packages (8 oz.) SOFTENED cream cheese, 1 cup sugar, ½ tsp. vanilla  AND  ½ tsp. almond flavoring.  Slowly add in 1/2 cup coconut milk.  ++ Or.. Almond Milk/Coconut Milk Blend.  Add 4 eggs – one at a time, mixing on low until well blended.  Pour over chocolate wafer crust.

Bake at 325F for 45 minutes – or until center is almost set.  Turn off oven.  Open door and leave cheesecake in oven for 20 minutes.  ++ If you’re like me and you’ve never made a cheesecake before, you’ll be pleased to see that, after 20 minutes sitting in the still-warm oven, the center will be fully set!!  Remove cheesecake from oven, place on a cooling rack and cooled completely.   Refrigerate 4 hours – or overnight.

The Finishing Touches — microwave 2 oz. chocolate chips and 1 cup FROZEN whipped topping (such as Cool Whip) in a medium bowl – on high – for 1 minute.  Stir and heat on high for another minute.  ++ The whipped topping will melt down… don’t worry. That’s the way it should be!  Add in 2 drops almond extract. Whisk hot mixture until chocolate chips are completely melted, then mix a bit more until you get a nice dark chocolate color.  Pour over cheesecake and spread evenly. Sprinkle on  1 cup flaked coconut and 1/2 cup almond bits – or sliced almonds. Cut into squares and refrigerate until its time to serve.   Enjoy!


Coconut Joy Cheesecake Bars with Chocolate Cookie Crust - myyellowfarmhouse.com
Coconut Joy Cheesecake Bars with Chocolate Cookie Crust

A New Spin on an Old Favorite – Mushroom Ravioli Lasagna with a Light Basil & Bell Pepper Tomato Sauce

Mushroom Ravioli Lasagna  - My Yellow Farmhouse

My son Dan recently dropped by and I told him I’d made a new dish called Mushroom Ravioli Lasagna.  He wanted to try it for himself… and the first words out of his mouth were, “Why did you make so much”?  Hey, I prefer to make A LOT.  It’s just as easy to make a lot as it is too make a little.  And everyone loves leftovers, especially if you have children who seem to eat 18 hours a day.  I guess I’m still thinking like the woman who used to feed twin sons…. plus all their friends.  And now I just feed the neighbors!   ; 0 )

Mushroom Ravioli Lasagna with a Light Basil & Bell Pepper Tomato Sauce is easier, at least to me, than preparing a regular lasagna with lasagna noodles.  And the mushroom ravioli gives this Italian staple a whole new spin.  The tomato sauce has a fresh, light taste and is a cinch to prepare. I used several types of bell pepper, a bit of red onion, two cans of VERY good quality crushed tomatoes, one can of tomato sauce, some roughly chopped basil – plus salt and pepper.  Then I let the sauce simmer for about an hour, which thickened it up perfectly and allowed the flavors to meld.

While the sauce was simmering I mixed the ricotta, parmesan, eggs and fresh Italian parsley, and cooked the mushroom ravioli al dente.  All that was left to do was make the layers, which I thought was a lot of fun.  (Maybe I need to get out more, huh?)


A few of my sister-in-laws (I have six) visited Saturday night, when I prepared this lasagna. The wine was flowing and we had a lot of fun.  Due to my broken ankle, one of them had to drain the ravioli and place the lasagna in the oven… And take it out, of course.

I hope you like this Mushroom Ravioli Lasagna with a Light Basil & Bell Pepper Tomato Sauce as much as we did.  Enjoy!

Follow this link to -‘Not Your Grandmother’s’ Turkey (or Chicken) Tetrazzini – Prepared with Tortellini Instead of Spaghetti !

larger-photo-chicken-tetrazzini-with-a-twist-tortellini-instead-of-spaghetti

small red heart

Oven at 425 degrees F  for 45 minutes           13″ x 10″ deep casserole dish

Do NOT Cover Lasagna with Foil !    

Allow lasagna to stand for 10 minutes after removing it from the oven.

     INGREDIENTS

Sauce

  • 1 Tbs. olive oil
  • ½ cup each; chopped red pepper, chopped green pepper, chopped orange pepper ++ Or any combination – to equal  1 1/2 cups.
  • ¾ cup chopped red onion
  • 2 cans (28 oz.) crushed tomatoes ++  I used Sclafani brand for the first time & was very impressed with the quality.
  • 1 (8 oz.) can tomato sauce  ++  I used Hunts – Basil, Garlic & Oregano
  • 2 Tbs. roughly chopped fresh basil
  • 1 tsp. salt
  • ground fresh pepper – to taste

Filling

  • 4 cups (32 ounces) ricotta cheese
  • 1 (16 oz.) package shredded Mozzarella  ++ DIVIDED  Mix 2 1/2 cups into the ricotta mixture – the rest will be sprinkled top. 
  • 1/2 cup grated Parmesan (or Romano) cheese
  • 2 eggs
  • 1 Tbs. chopped fresh flat leaf parsley (a.k.a. Italian parsley)
  • 1 tsp. salt
  • 1/2 – 3/4 tsp. black pepper

Ravioli

  • 3 packages (9 0z.) fresh mushroom-stuffed ravioli, cooked according to package directions    ++ I used Buitoni Riserva Pasta Agnolotti Wild Mushroom, located in the refrigerator aisle of your grocery store.
  • 1 tsp. salt and 1 Tbs. olive oil in water
  • 2 Tbs. olive oil… to mix with cooked ravioli.  Helps it not to stick. (I forgot to do this…)

     METHOD

Add 1 Tbs. olive oil to a large stock pot or Dutch Oven.  Add ½ cup each; chopped red pepper, chopped green pepper, chopped orange pepper ++ Any combination – to equal  11/2 cups and ¾ cup chopped red onion.  Cook, stirring occasionally, over medium heat until peppers and onion begin to soften. (They’ll cook more in the oven.)

Add 2 cans (28 oz.) crushed tomatoes, 1 (8 oz.) can tomato sauce, 2 Tbs. roughly chopped fresh basil, 1 tsp tsp. salt and ground fresh pepper, to taste.  Simmer sauce, stirring occasionally, for one hour. Do NOT cover pan.  Sauce will reduce by about 1/3.

I highly  recommend using a splatter guard!

splatter guard

While sauce is simmering, prepare ricotta/mozzarella mixture.  In a medium bowl mix 4 cups (32 ounces) ricotta cheese, 2 1/2 cups shredded Mozzarella, 1/2 cup grated Parmesan cheese, 2 eggs, 1 Tbs. chopped fresh flat leaf parsley (a.k.a. Italian parsley), 1 tsp. salt and 1/2 – 3/4 tsp. black pepper.  Set aside.

Ravioli

Cook al dente, according to package directions.  Drain well and mix with 2 Tbs. olive oil so the ravioli won’t stick together.  Set aside.

Putting It All Together    ++  See photos below !

In a large casserole – or 13″ x 10″ pan – spread about 1  cups tomato sauce.  Layer about 14 mushroom ravioli on top, depending upon the size of the ravioli.  Spread HALF the ricotta/mozzarella mixture on top of ravioli.  Cover with more tomato sauce. Add your second layer of ravioli, other half of ricotta/mozzarella mixture and your final layer of ravioli.  Spread remaining tomato sauce on top.

At this time you can sprinkle on the remaining shredded mozzarella BUT I suggest you wait until the lasagna has been cooking for about 25 minutes, then sprinkle on the shredded mozzarella because this helps the mozzarella to not overcook and turn brown.  Enjoy!

Mushroom Ravioli Lasagna - My Yellow Farmhouse

Dear Fellow Food Blogger – Never Quit!!

UPDATE – I heard from my friend at Cottage Grove House (formally Tiny White Cottage) and she’s going to return to blogging this summer.  As I mentioned, life just got in her way, but she’ll be back.  HURRAH !!!  https://cottagegrovehouse.com/

Like any writer, the working life of a food blogger can be a lonely calling.  Especially for someone like me, who no longer has a family to feed. Of course, my friends and neighbors are always thrilled to accept a dessert, a casserole or some baked goods which I am unable to consume myself.  BUT – it’s always possible to host a party so your friends and family can enjoy the fruits of your labor!  And that, as will not surprise you, is my first choice!!

But, as I sometimes say, “Life gets in the way” and, as I just discovered, some of my very favorite food bloggers… people I’d come to think of as friends… no longer have the time, or inclination, to blog.

How I miss them.. How I miss being a part of their lives.  And how I miss their observations about life… and news of their lives.  We’d come to know each other. Some as they prepared for their own weddings – others as they prepared for their children’s weddings. Each and every blog was/is unique.  And, like any good friend, I want to know that they’re happy – that they’re alright.  Sure, I miss the recipes, which is, in theory, a recipe blog’s main purpose.  But more than that…. so much more than that… I miss the friendship and the sharing.

So – fellow food blogger… don’t ever think no one cares.  Never think that you and your blog will not be missed. Because that’s not true.  You may feel as if you’re throwing your most recent post out into the Big Void… that no one cares.  But you have no idea… even if you only reach a handful of people … what your blog and you sharing your life… both the good and the bad… means to others.

I just love these Matryoshka dolls (Nesting Dolls) from Russia!  They’re a bit like your grandmother saying, “Never quit”!!  

Russian Nesting Dolls

Of Spring, Outdoor Parties & a Broken Ankle

I just don’t do well two seasons of the year… autumn and winter – and that takes a pretty big chunk out of the year, doesn’t it?  But recently I’d been feeling energetic and full of that old spring time joy.  The garden beds were all cleaned out just waiting for the weather to warm up, all the outdoor furniture had been moved outside and washed, and the fire pit was all set for late night soirees.

Then I broke my ankle…as many of you already know.  The party went on nevertheless and was a big success.  Everyone loved the Shredded Chicken Sandwiches and the Chicken Tortellini Soup with Italian Sweet Sausage and Baby Spinach. (I’ll post both recipes soon.) My granddaughter was really happy with her birthday cake, which I posted last Saturday. And after dark the fire pit roared with searing heat thanks to a few of my pyromaniac male friends.

Tired of Thin Layer Cakes – Here’s a Trick to Fix That! Yellow Layer Cake with Mini Chocolate Chips and English Toffee Bits

Tired of Thin Layer Cakes - Here's a Trick to Fix That!  Yellow Layer Cake with Mini Chocolate Chips and English Toffee - My Yellow

I didn’t really feel encumbered until the next day when I realized how much I can NOT do on crutches, such as going outside to finish cleaning up.  In fact, I’m not able to do half of what I could manage 20 years ago when I broke my other ankle.   ; o (

Example, I put about 12 solar lights in my front garden just to see which ones worked… They’re all still out there… some shining with light after dark and the others… just kind of sitting there…

To the rescue – my trusty little rented scooter. And mine has a basket!!

scooter for broken legs

I love new conveniences like my little scooter – and being able to order groceries online and have them delivered – hurrah!  Tomorrow between 10:00 and 12:00 the Pea Pod truck will be pulling into the driveway here at my old yellow farmhouse and lots of wonderful food items will issue forth. I’m sooo happy!!  Me and my little scooter are gonna get busy preparing and posting two recipes this coming week – Coconut Joy Cheesecake Cake Bars – and – Mushroom Ravioli Lasagna with Creamy Tomato Sauce.  At least that’s the plan.  As we know, life sometimes gets in the way!

My Yellow Farmhouse.com - Tulips in Spring -2016


Tired of Thin Layer Cakes – Here’s a Trick to Fix That! Yellow Layer Cake with Mini Chocolate Chips and English Toffee Bits

I don’t know about other parts of the world, but the cake mixes in the States have been getting smaller and smaller – which is so wrong.  I’d rather pay a bit more and have a nice, fat layer cake..  We have no control over what the stupid cake mix companies do, but luckily there’s a few things you can add to be sure your layer cakes come out bigger.  (You may decide it’s just easier to make a cake from scratch – and that works too!)

BREAKING DEVELOPMENT  – –  I broke my ankle last night… Not a bad break, luckily, but still inconvenient.  And – get this – I’m having a party today because one of my twin sons and his family will be visiting from the Philadelphia area.

I’ve been cooking, and cleaning, for the last few days. Yesterday my other son and I put out all the outdoor furniture… and dragged out all the cushions and lanterns etc.  I was so pleased when I finished washing the final table and chairs… But cruel fate intervened… As I stepped down from our deck (to dump out the bucket of water) my foot caught on a huge, thick stepping stone… Over I went, like Jill of Jack & Jill fame, bucket, gloves and sponges flying all over.

And I heard my ankle break.  I crawled to where I thought I’d left my phone…. then remembered I’d brought it to the porch… so I crawled some more.  In any event, my brother-in-law and a neighbor got in me the car… but not until I directed them to find my comb, get my make-up kit and bring me clean clothes.  Being men… they started getting impatient – but I was married for almost 40 years… so I’m used to it!

Luckily, the cake (which is for my granddaughter’s birthday) was baked before I fell – so I got up early this morning so I could frost it and post the recipe.   ; o )

UPDATE — My Granddaughter was very happy with her birthday cake.  And the party was a great success as well !!

small red heart

Directions for a ‘Bigger and Better’ Layer Cake with Mini Chocolate Chips and English Toffee Bits  

Oven at 350F        Bake for 30 – 35 minutes      Two greased 9” round cake pans

Dry Ingredients for ‘Add-In’ Batter

  • 3/4 cup flour
  • 1/4 cup brown sugar or granulated sugar   ++  I used brown
  • 1 teaspoon baking powder
  • 2 pinches salt

In a medium bowl mix together flour, sugar baking powder and salt with a fork

Liquid Ingredients for ‘Add-In’ Batter

  • 1/2 cup water
  • 1/4 cup oil
  • 1 egg

Add liquid ingredients to dry ingredients. Beat with mixer for about 30 seconds until well blended.  Set bowl aside.

  • 1/2 cup mini chocolate chips
  • 1/2 cup English Toffee Bits  ++  I used ‘Heath’ Brand 
  • 1 Tbs. all purpose flour

Mix 1/2 cup mini chocolate chips, 1/2 cup English Toffee Bits and 1 Tbs. flour in a small bowl.  Set aside.

  • 1 yellow cake mix, prepared according to package directions    ++  I used Duncan Hines Butter Yellow – ‘Classic’

Once cake mix is prepared, pour in ‘Add-On’ batter.  Beat with mixer for about 30 seconds until well blended.  Gently mix in mini chocolate chips, English Toffee Pieces and flour mixture.

Divide batter equally between two greased 9” round cake pans.  Bake at 350F for 30 – 35 minutes – or until toothpick or sharp knife inserted in center comes out clean.   ++  Because of the ‘Add-In’ batter, your layers may take 3 – 5 minutes more time than usual.  

Cool cakes on wire rack for 15 minutes. Remove cake from pans and cool completely before frosting.

Due to my broken ankle – and the fact that I have no crutches because the ER ran out of ‘short people crutches’, I frosted my cake with purchased frosting BUT soon I’ll post my recipe for a really delicious homemade chocolate frosting ‘to die for’.   Enjoy!!

P.S.  My son who lives locally is arriving in a few minutes with some crutches – HURRAH!! And I am not cancelling the party …however, I won’t be the one bringing out trays of food.. not for several weeks.

1 - Morgan's Birthday Cake - My Yellow Farmhouse

Add-In Batter – Ready to Go

2 - Morgan's Birthday Cake - My Yellow Farmhouse
Add-In Batter & Cake Mix Batter Mixed – Chocolate Chips and English Toffee Added
3 = Morgan's Birthday Cake - My Yellow Farmhouse
Divide Batter Equally Between 2 Greased 9″ Pans
Morgan's birthday cake - My Yellow Farmhouse
I Like to Level the Layers Using a Sharp Knife

Tired of Thin Layer Cakes - Here's a Trick to Fix That!  Yellow Layer Cake with Mini Chocolate Chips and English Toffee - My Yellow 


Parmesan and Basil Spiral Dinner Rolls – Short on Time? Buy Prepared Dough!

Parmesan and Basil Dinner Rolls - myyellowfarmhouse.com (6)

Parmesan and Basil Dinner Rolls would be a delicious addition to any meal but, at least for me, these babies are the perfect accompaniment for spaghetti and meatballs or lasagna … actually, pretty much anything Italian.

I used my bread machine, which makes a 2 lb. loaf, to prepare the dough for these rolls. Since I only needed half the dough to make 12 rolls, I used the rest to bake a loaf of bread. Of course, you could use the dough to prepare 24 Parmesan and Basil Rolls instead of 12!

Yesterday I lost a life-long friend to pancreatic cancer.  Angela adored bread, in any form.  My dear friend, I dedicate today’s post to you. And I like to imagine you and your mom busy preparing the best lasagna heaven has ever seen.

small red heart

++  You can purchase 1 lb. of bread dough, prepare the dough the ‘old fashioned way’ or use a bread machine, set on the ‘dough’ setting – it’s up to you.

This bread machine recipe makes a 2 lb. loaf.  One lb. makes 12 rolls plus one bread.  Or, if you chose, you could make 24 ‘Parmesan and Basil Rolls’.  For 24 rolls, you’ll need two 8 1/2″ – 9″ round cake pans.

DOUGH INGREDIENTS

  • 1 ¼ cup lukewarm milk
  • ¼ cup lukewarm water
  • 2 Tbs. butter or olive oil
  • 4 cups bread flour
  • 1 Tbs. AND 1 tsp. sugar
  • 1 tsp. salt
  • 1 ¼ tsp. bread machine (quick rise) yeast

Add ingredients and set bread machine for ‘dough’.  Should take about 2 hours.

FILLING INGREDIENTS

  • 1/4 cup grated Parmesan cheese
  • 2 Tbs. softened butter
  • 2 Tbs. mayonnaise
  • ¼ tsp. dried Italian seasonings – or oregano
  • ¾ tsp. minced fresh basil leaves
  • 2 – 3 fresh garlic cloves, crushed     OPTIONAL

TO SPRINKLE ON TOP OF ROLLS AT END OF BAKING

  • 1 heaping Tbs. grated Parmesan

METHOD      

Oven at 375F      8 1/2″ to 9″ round cake pan     Bake rolls for approximately 25 minutes

Mix 1/4 cup grated Parmesan, 2 Tbs. softened butter, 2 Tbs. mayonnaise and herbs in a small bowl.  Set aside.

On a lightly floured surface, roll 1 lb. (16 oz.) bread dough into a 12” by 14” rectangle.

+  If using frozen bread dough, allow it to thaw and warm up a bit so dough will be easier to roll.

 ++  Dough may have the tendency to spring back – just let it rest for a minute and then ‘give it another go’.  Also, don’t be afraid to take a bit of dough from one place and stick it onto another place in order to get the rectangular shape.  

Spread Parmesan/butter/mayonnaise/spice mixture evenly on the 12″ x 14″ rectangle.  ++ I like to drop small amounts all over – I think it makes it easier to spread the filling.

Starting at the 12” end, roll up dough and cut into 12 equal sections.

Place sections in an 8½” to 9” round cake pan.  (Pan does NOT have to be greased.)  Cover pan with a dish (tea) towel and allow dough to rise until almost double – between 40 minutes to over an hour.

++  I recommend placing the dough in the oven to rise, and I place a 10” x 13” pan filled with hot water on the lowest shelf because the hot water helps the dough rise evenly – and usually faster.  

Once rolls are risen, remove from oven and set oven temperature to 375F.Bake rolls for 20 minutes – remove from oven and sprinkle on 1 heaping Tbs. grated Parmesan.  Bake 4 – 5 minutes more.

Allow rolls to cool for a minute or two, then remove from pan with a spatula.  Enjoy! 

 Parmesan and Basil Dinner Rolls - myyellowfarmhouse.com (7)


Spaghetti Carbonara à la St. Julians Bay (Malta)

St Julians Bay - Malta   myyellowfarmhouse.com
The view from one of our favorite restaurants in St Julians Bay (Malta), where I, almost always, ordered Spaghetti Carbonara.

According to food lore, Spaghetti Carbonara is a relatively new addition to Italian cooking.. In fact, one of the theories is that Spaghetti Carbonara came about due to food shortages during World War II.  Another theory is that coal miners may have invented the dish.  (I’m not buying that theory.) Or… that the black specs of freshly ground black pepper – and you should add a good amount of pepper – resemble coal dust lying atop a bed of spaghetti mixed with eggs and cheese.  Actually, who cares where or why the recipe originated?  We love it because it’s easy to make and delicious!

Like spaghetti and meatballs, there’s an unlimited number of ways to prepare Spaghetti Carbonara.  While living in Malta I found a recipe very much like the ‘Popeye’s Spaghetti Carbonara’ served at our favorite restaurant, to which I added peas simply because that’s how it was served.  WHAT??… you’re probably thinking.  Yup – peas. And now I have to tell you how the making of the movie Popeye in the small island country of Malta led to a chef naming his version of Spaghetti Carbonara “Popeye’s.

If you’re not familiar with the character called Popeye, you may not know he always eats a can of spinach (yuck..) to give him strength.  It seems the chef preferred adding peas, as opposed to Popeye’s spinach, to the Spaghetti Carbonara dish named Popeye’s, and I think he made the right call.  Enjoy!!

Spaghetti Carbonara a la St. Julian's Bay, Malta
Popeye Village (Anchor Bay, Malta) for which ‘Popeye’s Spaghetti Carbonara’ was named.

small red heart

INGREDIENTS             Serves 4 – 5, depending upon your appetite         ; o )

  • ¾ cup cut-up bacon or pancetta  (about 4 ounces)     ++ Use kitchen shears!
  • ¾ package spaghetti  (12 ounces)   ++  I used ‘rigati’ – it has ridges to hold the sauce.
  •  2 tsp. salt
  • 1 Tbs. olive oil
  • 1/3 cup finely chopped onion    ++  Optional
  • 2 whole eggs – and – 2 egg YOLKS       ++  Take eggs out early – OR – place eggs in a bowl with very warm water.
  • 2/3 cup grated good-quality Parmesan cheese      ++  Or Romano …….. Or a combination of both.
  • ½ tsp. salt
  • lots of freshly ground black pepper
  • 1/2 cup WARMED heavy (whipping) cream    ++  Optional – but I recommend using it!!
  • 1/3 cup frozen peas   ++  Optional

++  Reserve some of the pasta water.

METHOD

Eggs should be room temperature, so either take them out earlier – or place them in small bowl with very hot water.

Following the directions on the box, cook 12 ounces (3/4 of a 16 oz. package) al dente, which means the pasta shouldn’t be too soft.  Add 2 tsp. salt to the cooking water.

While waiting for the water to boil and the pasta to cook,  cut up the bacon (or pancetta). If using bacon, cook in a skillet over medium-high heat until crisp. If using pancetta , it should be lightly brown but not crisp. Place cooked bacon or pancetta on a paper towel lined plate.  Drain skillet of bacon grease and wipe skillet with paper towel.

Add 1 Tbs. olive oil to skillet. Cook 1/3 cup chopped onion over medium heat until cooked through and just beginning to brown.  Put onions on the plate with the bacon.

Now it’s time to make the sauce.  In a medium bowl whisk together 2 whole eggs – and 2 egg YOLKS, 2/3 cup grated good-quality Parmesan cheese, ½ tsp. salt and lots of freshly ground black pepper.   ++ If you chose to include the 1/2 cup WARMED heavy (whipping) cream, whisk that in now.   Set bowl aside.

Microwave 1/3 cup peas with a small amount of water (about 3 Tbs.) and cook for 3 minutes.

When spaghetti is ready, drain it – reserving some of the pasta water.  Place drained spaghetti back in the pot. Replace pot on turned off burner.  Add onions, bacon and peas. Pour on the egg & cheese mixture and stir to combine.

Think the sauce is too thick?  Add a bit of the reserved pasta water.

After you’ve plated your spaghetti, remember to add a generous amount of freshly ground black pepper!  And there you go – dinner is served!

As you can see below, the sauce should be creamy and stick to the pasta.  Unlike Spaghetti Alfredo, the pasta will not be swimming in sauce.

Spaghetti Carbonara a la St Julians Bay (Malta) myyellowfarmhouse.com
Spaghetti Carbonara a la St Julians Bay (Malta)


Pub-Inspired Shepherds Potato Skins

USE - Shepherds Potato Skins (3)

Sometimes a new recipe can be inspired by the happy occasion of finding something special on a menu  – and then realizing you already have the main ingredients at home!

Yesterday, as I sipped a frosty cold beer at our local Irish pub (Murphy’s), I spied something called Shepherds Potato Skins – which I’d never heard of in my life.  That sounded pretty darn delicious… potato skins filled with shredded simmered beef, corn (or peas) smothered with melted Cheddar cheese. Yummy!!

Hey, I happen to have some ‘shredded simmered beef’ at home… namely, pot roast which had been simmered in a red wine sauce. And I also have potatoes and I can easily pick up some Cheddar cheese.  But let’s go that extra step… let’s dollop on some sour cream and add a bit o’ chopped green onion. Now we’re talking!    ; o )

Get two meals!!     First make ‘Good Old-Fashioned Yankee Pot Roast with Red Wine & Thyme Gravy’ and then use the leftovers for ‘Pub-Inspired Potato Skins’!!

USE - Good Old-Fashioned Yankee Pot Roast -myyellowfarmhouse.com (2)

Incidentally, I had already ordered regular potato skins – which were AWESOME – before spying the Shepherds Potato Skins on the menu… so I have no idea what they look like or taste like, but I’ll find out next time I go to Murphy’s.   (Don’t you just LOVE Irish pubs??!!)

++ UPDATE – I returned to Murphy’s Pub and tried their Shepherd’s Potato Skins, which weren’t potato skins at all but slices of fried potato with a bit of a mixture of meat, corn and peas sprinkled with cheese.  I like mine MUCH better!!

small red heart

INGREDIENTS & METHOD

  • 4 large baking potatoes, such as Russet
  • 2 tsp. olive oil
  • ¼ tsp salt
  • 2 – 2 1/2 cups leftover shredded meat – such as leftover pot roast or pulled pork
  •      ++  Could also use leftovers from Sloppy Joes etc. etc. 
  • ½ cups frozen peas – cooked
  • 1/2 cup frozen corn – cooked –  OR –  drained canned corn 
  • 2 tsp. tomato paste      ++ Freeze extras in small portions in a freezer bag
  • 1/2  salt
  • 1/4 pepper
  • 1/8 – 1/4 tsp. paprika
  • cooked potato scrapped from potato skins
  • ½ cup sour cream     ++ Plus more to dollop on top right before serving. 
  • 2 Tbs. SOFTENED butter
  • 1/2 tsp. salt
  • 1/4 tsp. pepper
  • 2 Tbs. chopped green onions – top part only       ++ a.k.a spring onions
  •    ++  Plus more to sprinkle on before serving
  • 2 cups shredded SHARP American cheese  ++ I recommend shredding it yourself. I recently learned that ‘stuff’ is added to the ‘already shredded cheese’ to prevent it from clumping.  So now I know why the pre-shredded cheese never tastes as good…
  • Toppings – sour cream & chopped green onions

METHOD

Oven at 350 F

Scrub potatoes thoroughly under running water & dry.  Place potatoes in a medium bowl. Pour on 2 tsp. olive oil and sprinkle on 1/4 tsp. salt. Toss potatoes with olive oil and salt. Pierce potatoes in several places with a fork – which allows the steam to escape.  Place potatoes on the middle rack of oven.  Bake for an hour – or until a knife goes into potatoes easily.  ++  Place a large piece of foil on the bottom rack to catch any drips from the potatoes.

While waiting for the potatoes to bake, mix together the shredded meat, peas, corn, tomato paste, salt, pepper and paprika. Cover and set aside.

In a small bowl mix ½ cup sour cream, 2 Tbs. SOFTENED butter, 1/2 tsp. salt, 1/4 tsp. pepper and 2 Tbs. chopped green onions – top part only.  Cover and set aside.

Once potatoes are cooked, remove from the oven and cut potatoes in half lengthwise.   Scoop out most of the potato, leaving about 1/4’” around the edges of the potato.

++ Leave oven on at 350F !!

Mash the cooked potato you’ve removed from the potato skins with a fork. Add sour cream mixture and blend until well mixed.

Warm up meat and veggies mixture a few minutes in a microwave until heated through. Divide equally among the 8 potato halves.

Divide the potato/sour cream mixture in the same way.  Sprinkle tops with 2 cups shredded cheese.  ++  Don’t worry about being too fancy when you add the potato mixture – it’s sticky!

Bake at 350F – again on the middle rack – f0r 20 – 25 minutes.   ++ They’ll probably be ready in 20 minutes because everything is already hot.  

Dollop on lots of sour cream and sprinkle on some chopped green onion. ++ I suggest enjoying a cold beer in a frosty mug so you can pretend you’re at your favorite pub!!

Good Old-Fashioned Yankee Pot Roast with Red Wine & Thyme Gravy

USE - Good Old-Fashioned Yankee  Pot Roast -myyellowfarmhouse.com (2)

I’ve had a real ‘hankerin’ for Yankee Pot Roast recently.  The delicious smells wafting from the pan as the chuck roast is seared reminds of Sunday mornings when I was a child. My mother would brown the roast and then simmer it for hours to serve for our Sunday dinner (or ‘din-na’ as my mother used to say with her Boston accent.)  And she always served her pot roast with creamy mashed potatoes, which I highly recommend!  (We always had mashed potatoes – and I mean always – even with Chicken Pot pie because my father was a Mashed Potato Freak!) 

I discovered this recipe in a cookbook called ‘The New Best Recipe’ from the editors of ‘Cooks Illustrated’. It really is a jewel of a cookbook.  Every single recipe was prepared over and over again until they arrived at what they believed was the absolute BEST.

This Yankee Pot Roast so tender you can cut it with a fork – no kidding!  The secret, according to ‘The New Best Recipe’, is in cooking the chuck roast in the oven at 300F,  and for a longer time than most pot roast recipes call for simply because the long, slow cooking breaks down the collagen which can make some cuts of beef, like chuck, tough. They also discovered cooking a pot roast in the oven maintains the same temperature far better than can be achieved on top of the stove.

‘The New Best Recipe’ makes a great read because they inform you what they did and how they did it… and what they didn’t like and why. I did make few changes, such as adding red wine to the cooking liquid, and thickening the gravy because, personally, I like my gravy to ‘stay where I put it’.

small red heart

Got leftover pot roast? I suggest Pub-Inspired Shepherds Potato Skins

USE - Shepherds Potato Skins - myyellowfarmhouse.com

INGREDIENTS

  • 3 1/2 lbs. Chuck Roast OR Chuck-Eye Roast   ++  I purchased a 2 1/2 lb. roast 
  • salt and pepper – to sprinkle on all sides of the chuck roast
  • 2 Tbs. olive oil
  • 1 medium onion, roughly chopped
  • 1 small carrot, roughly chopped
  • 1 small celery rib, roughly chopped
  • 2 medium garlic cloves, minced
  • 2 tsp. sugar
  • 1 cup chicken broth
  • 1 cup beef broth   ++  I didn’t have beef broth, so I used 2 cups chicken broth
  • 1/2 cup dry red wine
  • 1 – 1 1/3 cups water  ++  Liquid should come up to the middle of the roast.  If your roast is small, you may not need much water at all. 
  • 1 sprig fresh thyme    ++  Or 2 tsp. dried thyme – not ‘crushed’.  If you do use crushed thyme, use less.

For the Gravy

  • 1/4 cup dry red wine
  • 2 pinches dried thyme
  • 1/4 cup cold water
  • 2 Tbs. cornstarch
  • salt and pepper to taste

          Oven at 350F      

 Place rack in middle of oven…. (I had to lower my rack to accommodate my Dutch Oven).

For a smaller (2 1/2 lb.) roast – cook for about 3 hours

For a larger (3 1/2 lb) roast – cook for about 4 hours

Dutch Oven - Walmart

METHOD

Generously sprinkle roast – on both sides – with salt and pepper.  (I like to press the S & P in.)

Heat 2 Tbs. olive oil in a large Dutch Oven over medium-high heat.++  Don’t have a Dutch oven – use an oven-proof skillet and cover skillet with foil.  Brown meat on all sides. The meat will produce some steam as it cooks.  Don’t confuse steam with smoke BUT if your pan does smoke, reduce the heat immediately.  And don’t worry if the bottom of your pan blackens.  Mine does but it’s not ‘burnt’.

Remove meat to a platter while you cook the vegetables.

Reduce heat to medium.  Add 1 medium onion, roughly chopped, 1 small carrot, roughly chopped and 1 small celery rib, roughly chopped.  (Don’t add the garlic and sugar just yet.) Continue cooking vegetables, stirring, until they begin to brown.

Add in 2 medium garlic cloves, minced & 2 tsp. sugar and cook, stirring, about 30 seconds. Add 1 cup chicken broth and 1 cup beef broth – or 2 cups of either chicken or beef broth, it won’t matter all that much in the end!

Now add 1/2 cup dry red wine, salt and pepper to taste and a sprig of thyme (or 2 tsp. dried thyme.)  Return the roast to the pan.  Add 1 – 1 1/3 cups water – just enough to bring liquid to the middle of the roast.  (There was no need for me to add any water.)

Bring contents to a simmer over medium heat.  Cover Dutch Oven and place in 300F oven.

Cook, turning roast every 30 – 40 minutes, until fully tender.  Remember, the longer the roast cooks, the more tender it becomes.  ++  Meat should be very tender.  A fork or knife should slip easily into the roast.

Remove roast from Dutch Oven and place it on a platter.  Cover with foil while you make your gravy.

Making the Gravy    

++  Get out all the ingredients for the gravy while the pot roast is cooking.

  • 1/4 cup dry red wine
  • 2 pinches dried thyme  ++  As I mentioned above, if you are using crushed thyme, use less
  • 1/4 cup COLD water
  • 2 Tbs. cornstarch
  • salt and pepper to taste

Pour pan juices through a strainer to remove cooked vegetables & sprig of thyme.  Allow juices to sit about five minutes so any fat rises to the top.  Using a large spoon, remove as much fat as you can.  Put pan juices in a medium-sized saucepan. Cook over medium heat until reduced to about 2 cups or so. (May take several minutes.) Add 1/4 cup dry red wine and 2 pinches dried thyme and continue to reduce until you’re back to about 2 cups.

In a small measuring cup mix 1/4 cup COLD water with 2 Tbs. cornstarch until smooth. Slowly add to hot pan juices. Start whisking (or stirring) right away. Bring liquid to a boil and boil for about a minute until thickened.  Add salt and pepper to taste.

Slice roast into thick slices – or use a large fork and break meat into large chunks. Transfer meat to serving platter. Pour about half the gravy over roast and pass the remainder separately.  And don’t forget those creamy mashed potatoes.     Enjoy!!


USE - Good Old-Fashioned Yankee Pot Roast -myyellowfarmhouse.com (2)


‘Request Bread’ – A Heartier Version of “Five-Star Bread’. Loaded with ‘Good Stuff’ Like Whole Wheat, Honey, Steel Cut Oats, Wheat Germ and Walnuts!

USE - A Heartier Version of 'Five-Star Bread' - myyellowfarmhouse.com
Just look at those yummy chunks of walnuts!

I sure didn’t plan on posting another bread recipe so soon but a Reddit follower asked if Five-Star Bread could be prepared with whole wheat flour.  So, I made some adjustments and added a lot of Good Stuff like honey, wheat germ (which has Vitamin A and Folic Acid) and 1/3 cup steel cut oats. (Steel cut oats are a whole grain, like wheat, rye and barley, but contain higher levels of protein than other grains – how about that?)

I love nuts so I added 1/2 cup chopped walnuts.  Walnuts are actually very good for your health.  Among other things, they’re are packed with omega-3 fatty acids, and contain antioxidants that boost heart health and help with stress.

++  I’m pleased to report my Reddit follower is happy with this new, healthier version of Five Star Bread. And, after enjoying some toasted Request Bread with butter and jam, I’m pretty darn pleased with it myself!

small red heart


Enter the ingredients in the order written and set your bread machine for ‘grain’.

  • 1 cup lukewarm water – PLUS an extra 1 Tbs.   ++  If dough seems too stiff when the machine is kneading – add another tablespoon. Bread making isn’t an exact science!  ; o )
  • 1/3 cup lukewarm milk
  • 3 Tbs. butter – softened just a bit
  • 2 Tbs. honey
  • 1/3 cup Steel-Cut Oats
  • 1 1/2 cups whole wheat flour
  • 2 cups bread flour
  • 2 Tbs. wheat germ   ++ There’s a new one out with honey!!
  • 1 1/4 tsp. salt
  • 2 tsp. rapid rise (bread machine) yeast
  • 1/2 cup chopped walnuts OR pecans    ++ To be added about 15 minutes after bread machine has started to knead the dough.


‘Five-Star’ White Sandwich Bread – Prepared in a Bread Maker

COPY -Five Star Bread - King Arthur Flour - Made in a Bread Machine

UPDATE!! 

One of my ‘Reddit’ followers made Italian bread with this recipe!!

“I made this recipe, but substituted the milk with more water, and instead of letting the machine bake the bread, I used the dough program, then made a ball and let it rise in a greased bowl for an hour.  After that I formed an Italian loaf and placed it in a cold oven.  I turned the oven up to 450 F and baked the bread until it was done. It came out great! (The important thing of the recipe is the ratios, they’re spot on.)”  

++  If you’re an experienced bread baker, give this a try.  I know I will!   

small red heart

King Arthur Flour Company calls this  recipe ‘Bread Machine Bread – Easy as Can Be’, but I prefer the name ‘Five-Star Bread’ because this recipe is so highly rated! The loaf bakes up super high with a lovely, springy texture – great for sandwiches, toast and French Toast.

Because ‘Five-Star Bread’ is made with a bread maker, you just add the ingredients, press a button and, in a few hours, you’ll be making sandwiches with freshly baked bread.

Judging from the reviews on the King Arthur Flour web site, it seems people have fallen in love with this sandwich bread. In fact a few people said they make this bread two to three times a week.  You can’t have a better recommendation than that!

King Arthur Flour, based in Vermont (USA), has been in existence as a flour mill since 1790 – that’s a long, long time.  I truly love their products.  When we had our farm in Quebec we traveled back and forth between our ‘Yellow Farmhouse’ here in Massachusetts and our farmhouse ‘up north’ – and I loved to drop by King Arthur’s Flagship Store, aptly named The Baker’s Store, in Norwich, Vermont.  If you’re ever in the New England area, I highly recommend dropping by!!

King Arthur Flour - Store- Norwich, Vermont
King Arthur Flour’s Flagship Store – Norwich, Vermont

The King Arthur Flour’s Baker’s Hotline can answer and & all of your baking questions!     1-855-371-2253.

Directions for Large Loaf  (1  1/2 – 2 lb.)

++  For a Smaller (1 lb.) Loaf — continue scrolling down.)

INGREDIENTS

  • 1 cup lukewarm water
  • 1/3 cup lukewarm milk     ++ warm, briefly, in microwave
  • 3 Tbs. butter – slightly softened
  • 3 3/4 cups all-purpose or bread flour
  • 3 Tbs. sugar
  • 1 1/2 tsp. salt
  • 1 1/2 tsp. active dry yeast OR instant (bread machine) yeast  ++ I used bread machine yeast

Follow your bread maker’s instructions for basic white bread.  With my bread maker I set the machine to ‘Regular/Basic’, which takes 3 hours and 50 minutes.  Enjoy !!

Instructions for Smaller  (1 lb.) Loaf  

  • 2/3 cup lukewarm water
  • 1/4 lukewarm milk     ++ warm, briefly, in microwave
  • 2 Tbs. butter
  • 2 1/2 cups all-purpose or bread flour
  • 5 tsp. sugar
  • 1 1/4 tsp. salt
  • 1 tsp. active dry yeast OR instant (bread machine) yeast

Follow your bread maker’s instructions for basic white bread. I know with my bread maker I set the machine to ‘Regular/Basic’.  Enjoy !!

Follow this link for baking recipes of all kinds. King Arthur Flour even has a Help Line!

Crispy Sesame Pork with Spring Greens, Cherry Tomatoes & Teriyaki Salad Dressing

Topped with a quickly-simmered salad dressing of soy sauce, teriyaki sauce and brown sugar, this meal comes together very quickly.  The crispy sesame pork takes just a few minutes to cook after being dipped in beaten egg and bread crumbs.  Add cherry tomatoes – or whatever else you wish – and dinner is served.

I had a bit of a hard time photographing this salad.  Who knew photographing a simple salad could be so difficult?  (And I thought soup was hard to photograph.)  Salad, by nature, is loaded with bold colors.  So why was it so hard?

Well . . the salad flattened down a bit once the dressing was poured on – the greens just lay there looking like they’d been caught in a deluge.  So I added more spring greens and mixed them in. Big bummer, all those carefully placed bits of crispy sesame pork and cherry tomatoes got lost amongst the greens, which meant I had to ‘artfully arrange’ things once again. I do think, in the end, the above photo, though not award winning, captures a bit of how  good this main dish salad really is!

Have chicken, ham, fish etc.?  Substitute the pork for whatever you have on hand!

small red heart

INGREDIENTS            Serves 4

  • 3 Tbs. canola oil or olive oil – for frying
  • 4 thin boneless pork chops (about 1 lb.)   ++  You can cut thick pork chops in half lengthwise – but if you do, don’t cook pork as long. Maybe 2 minutes on each side.
  • 1 egg, beaten
  • 2 cups (more or less) Italian bread crumbs  ++  Or ‘Panko’ with Italian seasoning!
  • 2 Tbs. sesame seeds
  • SALAD DRESSING     ++ Teriyaki Salad Dressing is very rich and delicious – but a little goes a long way.  I recommend ‘drizzling’ rather than ‘pouring’ this dressing!!    ; o )
  • 2 Tbs.soy sauce
  • 1 Tbs. teriyaki sauce
  • 2 Tbs. brown sugar
  • 2 Tbs. oil oil
  • 3 Tbs. water
  • freshly cracked pepper, to taste
  • ‘Spring Mix’ salad greens
  • cherry tomatoes, cut in half
  • sesame seeds to sprinkle on top

METHOD

In a small saucepan over medium heat whisk together 2 Tbs.soy sauce, 1 Tbs. teriyaki sauce, 2 Tbs. brown sugar, 2 Tbs. oil oil, 3 Tbs. water and freshly cracked pepper, to taste. Heat to simmering, lower heat and simmer on low for 2 minutes. Allow to cool while you prepare the pork chops. Makes 1/2 cup.

In a shallow bowl beat 1 egg.  Add a bit of salt and pepper.  Place 2 cups Italian bread crumbs on a plate. One by one, dip boneless a pork chop into beaten egg, then coat with bread crumbs.  ++ I find it helps the bread crumbs to adhere if you press them down a bit with your hand.

Set pork chops aside.  Add 3 Tbs. canola or olive oil in a large skillet and heat over medium-high heat until hot.  ++ Here’s a trick for checking if the pan is hot enough – sprinkle in a bit of water.  If the water sizzles, the pan is hot enough.

Add your pork chops to the pan and cook  approximately 3 minutes per side, depending upon the thickness of the chop.  ++  You may have to lower heat after a few minutes.

++ You want the pork to be slightly pink on the inside so it’s juicy and flavorful. 

++  Here’s a trick which helps the bread crumb coating stay on – try not move the pork chops around in the pan until the time to turn them over.  This gives the bread crumb coating time to set.

While pork is cooking, arrange salad greens, either in 4 plates or a large serving bowl.  Add cherry tomatoes, cut in half.

Drain cooked pork on a paper towel lined plate.  Cut pork into bite-sized chunks and add to the salad.

Drizzle on the teriyaki dressing and sprinkle salad with sesame seeds.    Enjoy!                     ++ Remember to ‘drizzle’ rather than ‘pour’ – you can always add more.

I cut thicker boneless pork chops in half ’cause that’s what I had on hand.

Crispy Sesame Pork with Mixed Greens, Cherry Tomatoes & Teriyaki Salad Dressing - myyellowfarmhouse.com

Recipe adapted from “Good Housekeeping – 20-MINUTE MEALS”, April 2015.


Got Leftovers? Make a ‘One Pan’ Biscuit Topped Pie!

Got Leftovers - Make a Pie with Biscuit Crust - myyellowfarmhouse.com (2)
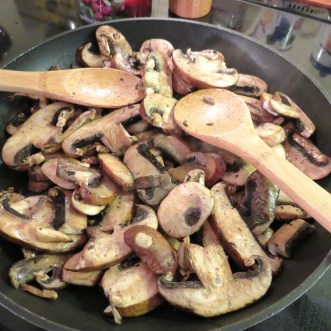
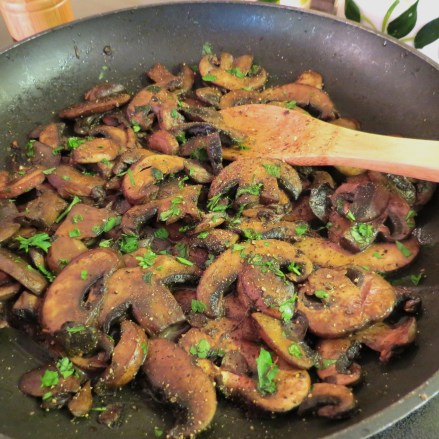
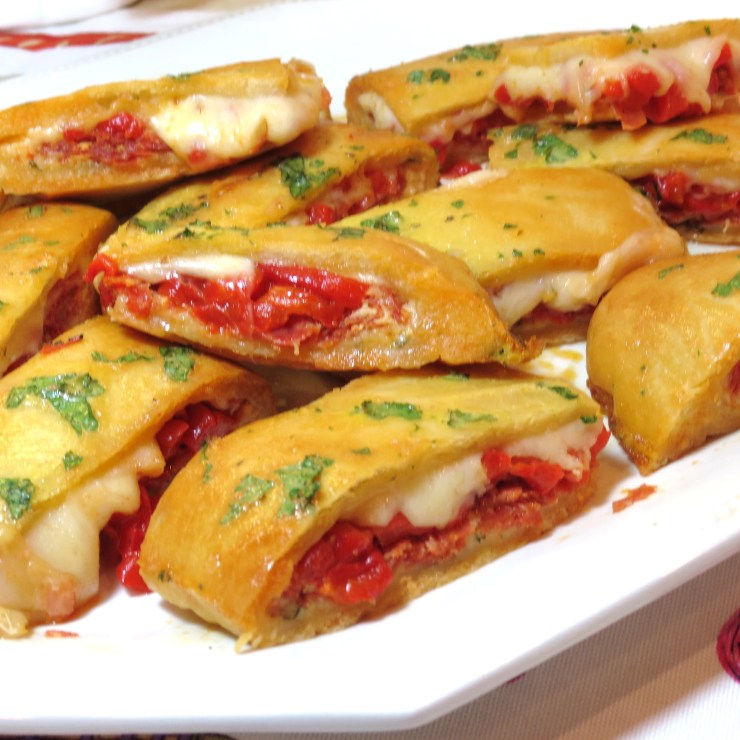
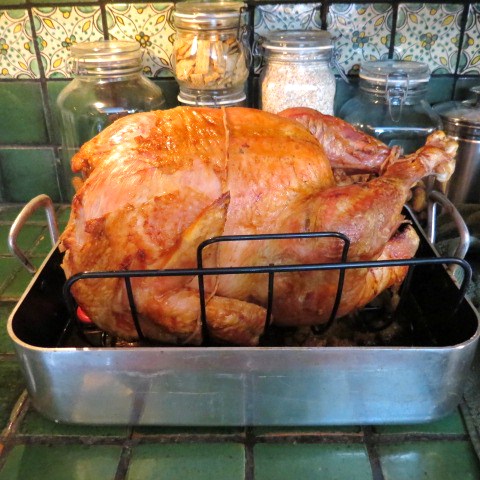
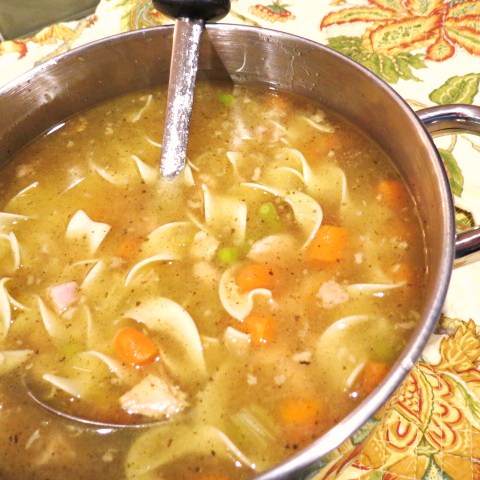
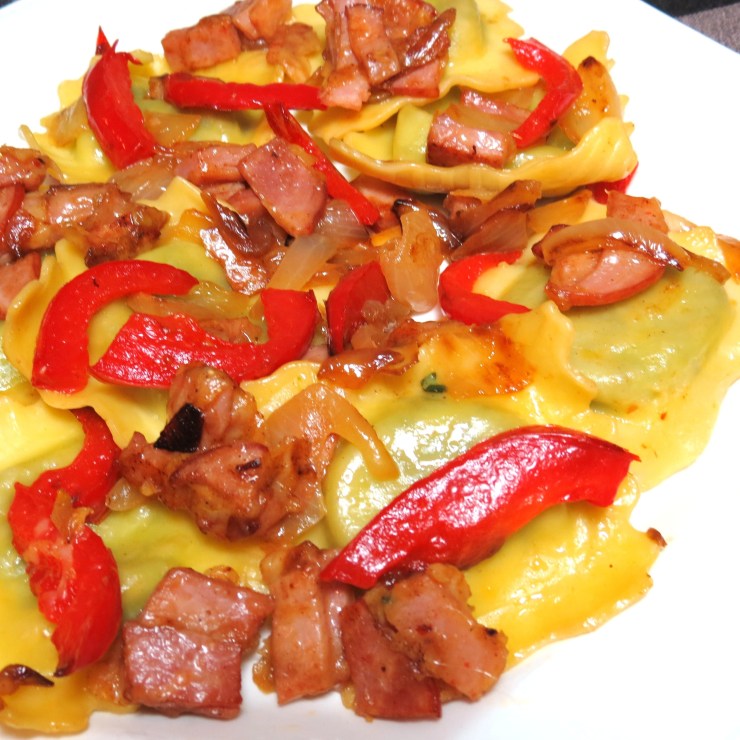
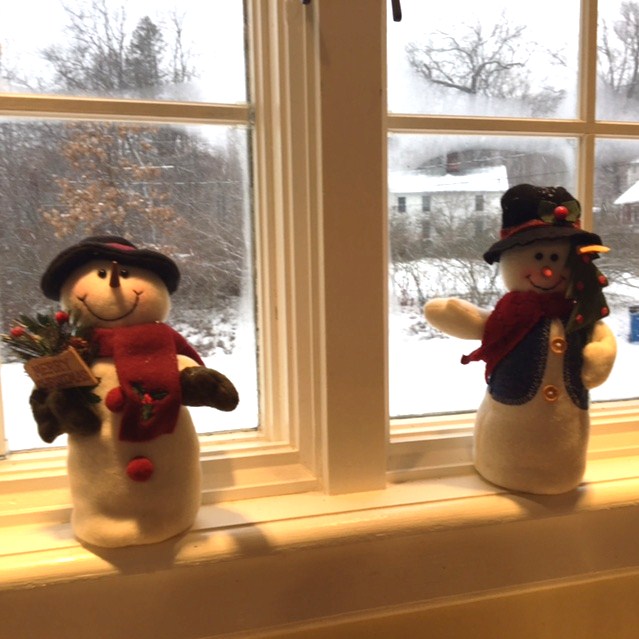
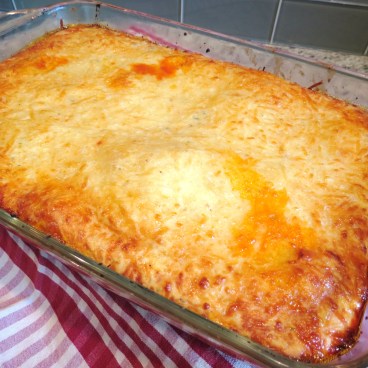
Don’t have time to shop?  Or, perhaps, its snowing and you prefer, like me today, just staying inside all snuggly?   Maybe you need to put a meal together in a hurry?  Never fear!! You can prepare a pretty darn delicious meal with whatever you find in your fridge, freezer or cupboard.  I promise!

Example, this yummy One-Pan Biscuit Topped Pie was prepared with leftovers and a few items I found in my pantry and fridge. Found – two cans of tuna, so that’s what I used. Have leftover chicken?  Use that.  Have leftover ham or pork?  Use that.  You get the picture!

What else did I find .. a can of mushroom soup and a container of turkey broth. I also had lots of all-purpose flour, so I decided to prepare a ‘One Pan’ Pie topped with biscuit strips, which I hadn’t made in years.

My friend, Chef Mimi, reminded me that leftover stew would be wonderful made into a biscuit topped pie.  Thanks Mimi!   Check out Mimi’s latest recipe – Thai Chicken Curry with Zucchini ‘Noodles’.

I believe the inspiration to top the pie with biscuit strips came from this recent post!

Follow this link to recipe for not one – but two – biscuit recipes!

USE - Southern-Style Biscuits No. 2 - myyellowfarmhouse.com

OK, now for the refrigerator.  I found some chunks of cooked potato and just a bit of fresh Italian parsley. So out they came.  ++ If you find some cooked rice or cooked macaroni, add that to your collection of ‘found things’.  I also dug up half a bag of frozen mixed vegetables- perfect.  ++  Now’s a good time to use-up any leftover peas or cooked broccoli you have lying around !!

Oh yeah!  I could already imagine the finished casserole coming out of the oven … the filling all hot and bubbly with lightly browned strips of biscuits crisscrossing the top.

small red heart

INGREDIENTS      Oven at 375 F

       Pie Filling

++  I used a 9 1/2″ cast iron skillet but any oven-proof skillet would work just as well.  OR – a medium oven-proof casserole.

  • olive oil – about 1 Tbs.
  • 1 medium onion, chopped
  • about a cup of cooked potatoes — or rice — or macaroni ++   Use whatever you have.  And if you have more than a cup – so much the better!
  • 2 cups veggies   ++ Veggies should be cooked or you can use frozen, but uncooked veggies won’t work.
  • 2 cans DRAINED tuna  – OR – about 1 cup cooked meat or fish   ++ Again, if you have more than a cup, that’s fine.
  • 1 can cream of mushroom soup  ++ Hey – it’s leftovers.. whatever works, right?
  • 1/2 cup turkey or chicken stock – OR – 1/2 cup hot water and 1 bullion cube
  • 1/2 – 3/4 tsp. salt
  • freshly ground pepper – to taste
  • 1/2 tsp. garlic salt with parsley
  • 1 1/2 tsp. Worcestershire sauce
  • 2 tsp. fresh parsley, minced
  • 1/4 tsp. browning sauce   ++  I use ‘Gravy Master’.  Browning sauce adds flavor and color.

       Biscuit Crust

++   To save time you can just drop scant tablespoons of biscuit dough on top of hot filling instead of cutting it into strips. 

  • 1 cup flour
  • 1/2 tsp. salt
  • 1/2 tsp. sugar
  • 1 1/2 tsp. baking powder
  • 1/4 cup CHILLED butter  (1/2 stick)
  • 6 Tb. milk
  • 1 egg, beaten
  • sesame seeds – optional

METHOD

Add about 1 Tbs. olive oil to skillet. On medium heat cook 1 medium onion, chopped, until tender.  Add 1 cup (or so) cooked potatoes, rice… whatever you may have.  Add 2 cups veggies, two cans tuna – OR – 1 cup cooked chicken, pork, ham, fish etc., 1 can cream of mushroom soup, 1/2 cup turkey or chicken stock, (OR – 1/2 cup hot water and 1 bullion cube), 1/2 – 3/4 tsp. salt, freshly ground pepper, 1/2 tsp. garlic salt with parsley, 1 1/2 tsp. Worcestershire sauce, 2 tsp. fresh parsley, minced and 1/4 tsp. browning sauce.

++  If you add cooked rice – or more of some of the ingredients – add a bit more stock.

Gently stir the ingredients until well mixed, lower heat and allow to simmer about 5 minutes.  Turn off heat but leave skillet on burner.

Got Leftovers?  Make a 'One Pan' Biscuit Crust Pie!   myyellowfarmhouse.com

Now for the biscuits – this is super quick and easy!!  In a medium bowl place 1 cup flour, 1/2 tsp. salt, 1/2 tsp. sugar and 1 1/2 tsp. baking powder. Mix briefly with a fork. Add 1/4 cup CHILLED butter  (1/2 stick), cut into large pieces. Using either your fingers or a pastry blender (a.k.a. a pasty cutter), cut the butter into the flour until the mixture looks crumbly.  (I recently learned its not necessary to have every single smidge of butter mixed in.  The biscuits are actually flakier if you can see tiny bits of butter.)   Add 6 Tb. milk and mix until just combined.

pastry blender
Pastry cutter


Don’t have time to bother making the strips?  Drop biscuit dough by scant tablespoons onto hot filling.


Place dough on a well-floured surface – either a dish towel (tea towel) or even the counter. Pat into a 9″ circle (if you’re using a 9 1/2″ – 10” skillet) and cut into 8 strips.

Got Leftovers?   Make a 'One Pan' Biscuit Topped Pie! - myyellowfarmhouse.com.jpg

Starting with the middle strip – ‘cause it’s the longest – place it in the middle of the skillet on top of the hot filling.   Add 2 biscuit strips to the right and 2 strips to the left of the first – for a total of 5 strips. Now add the three remaining strips diagonally to the first 5.

++  You don’t have to do the ‘over and under thing’, I just wanted to ’cause it reminded me of my Memere – who was an AWESOME cook and baker.  And she also had an amazing green thumb!

Got Leftovers?   Make a 'One Pan' Biscuit Topped Pie! - myyellowfarmhouse.com.jpg

Beat 1 egg in a small bowl and brush over biscuit strips.  ++  I couldn’t find my brush, so I used my fingers, which worked just as well !!  Sprinkle with sesame seeds.

I baked my ‘One Pan’ Biscuit Crust Pie for 22 minutes until the filling was bubbling and the biscuits strips were browned.  ++ I’d ere on the side of cooking the pie a bit longer if you’re not sure – just keep your eye on the biscuit crust to make sure it’s not over-browning.  Enjoy!!

I’ve got my Cranky Pants on at the moment simply because I spent the whole day trying to work on this post.  Between the site crashing and then not saving my work…. well, you can just imagine . . .

 The good thing is, I’m enjoying a beer AND I’m going to eat more of this pie!    ; o )


Hearty Cornmeal Pancakes with Cinnamon & Walnuts

This morning I woke up to about two inches of lovely, fluffy snow covering the ground and clinging to the tree branches.  We haven’t had much snow here in Western Massachusetts this winter and I was just thrilled when I opened my shades to such splendor!

Winter 2016  - My Yellow Farmhouse.com
These trees have grown sooo much since we moved here in 2004.
Winter 2016 - My Yellow Farmhouse.com
Sophie, the stray cat, lives in the barn.

Padding around the kitchen in my favorite red plaid slippers, I decided a hearty, and delicious, breakfast was in order on this lovely snowy morning.  Hearty Cornmeal Pancakes with Cinnamon and Walnuts fit that bill perfectly – and they were one of my sons absolute favorites for breakfast when they were growing up.

Photographing something as bland as pancakes is a real challenge, so I came up with the idea of thickening the maple syrup.  Otherwise the syrup would disappear into the pancakes, which would result in a very boring photo. First I boiled the syrup… but that didn’t make it thick enough.  So I added a bit of cornstarch, mixed in water.  Still not thick enough…  A bit more cornstarch and water was added, then I got caught up doing something else.. and forgot the maple syrup boiling away. (The older I get, the more forgetful I get..)

The end result of my forgetfulness was a REALLY thick syrup which photographed beautifully and I was happy with the results.  However, I was a bit less happy a few minutes later, once the unused portion of thickened syrup cooled and stuck to the pan with an vigorous tenacity!  (If this ever happens to you, just add water, heat to a boil and allow to sit for a while.)

Recipe makes about 12 small pancakes – enjoy!

small red heart

INGREDIENTS   

  • 1 cup yellow cornmeal
  • 2 Tbs. sugar     ++  You can substitute brown sugar
  • 1 tsp. salt
  • 1 cup boiling water
  • ½ cup flour
  • 2 tsp. baking powder
  • 1 tsp cinnamon
  • 1 egg
  • ½ cup milk
  • 2 Tbs. butter, melted
  • 1/2 cup chopped walnuts

METHOD

Mix 1 cup cornmeal, 2 Tbs sugar and 1 tsp. salt in a large bowl.  Add 1 cup boiling water and stir briefly.  Cover bowl and let stand for 10 minutes.  ++  I usually put a dinner plate on top.

After 10 minutes add ½ cup flour, 2 tsp. baking powder, 1 tsp cinnamon to the softened cornmeal. In a small bowl, beat 1 egg, 1/2 milk and 2 Tbs butter until smooth and add to bowl. Stir ingredients quickly until just combined.  Add 1/2 cup chopped walnuts.

Heat a buttered skillet over medium heat.  (I use an electric skillet, which I love, because the heat is even throughout.)

++  I suggest using a 1/4 cup measure so each pancake is about the same size.

Cook pancakes until bubbles form on the surface and edges appear dry, then flip and cook just a bit little longer.

Hearty Cornmeal Pancakes with Cinnamon and Walnuts are especially delicious with a side of bacon and lots of maple syrup.   ; o )


Big, Fat, Fluffy Southern Style Biscuits – Prepared Two Ways!

USE - Southern-Style Biscuits No. 2 - myyellowfarmhouse.com
Makes 11 – 12 yummy biscuits!

This Massachusetts Yankee (of French Canadian descent) has been searching for a long, long time for a really good recipe for Southern Style Biscuits. I’m talking biscuits that are soft and flaky inside, with a slightly crunchy, buttery top.

Believe me, I’ve prepared enough ‘so so’ biscuits to know when I’ve finally found a great recipe – and, actually I found (and adapted just a bit) two excellent recipes! To quote a series of books – these recipes could be called ‘Southern Style Biscuits for Dummies’!

++ In true ‘Cecile Style’, the first time I prepared the 2nd biscuit recipe I didn’t have any vinegar.  So I substituted ‘Newman’s Own Balsamic Vinaigrette Dressing’.  And, how about this, the biscuits were wonderful !

Quick Story About My Cast Iron Skillet.

We usually went camping for our vacations when I was a child…. that is, when we actually went on a vacation.  (I grew up during the 1950s in a working class neighborhood.)  During one of those trips we woke up to find our cast iron skillet missing.

My Old Cast Iron Skillet - myyellowfarmhouse.com

My father followed the trail of the raccoon who had absconded with it.  At the end of the trail he found not only our cast iron skillet but another one as well, which he brought back.  And that’s the story of the cast iron skillet I use today – – which is the one my father found in the woods laying along side ours!

TIPS !!

Learn from my mistakes…..  1. Make sure the butter is super cold  2.  Ignore directions telling you to ‘ cut slivers of butter with a potato peeler’ … simply because the butter is far too warm (from your hands) by the time you’re done  3.  Cut the butter into the flour, baking powder, salt mixture quickly. If there’s tiny hunks of butter, so much the better.   4.  Keep the kneading down to a minimum.  The more you knead, the softer the dough  gets as the butter warms up.  5.  The VERY best way to bake Southern Style Biscuits is in a cast iron skillet.  I tried… several times… using a cookie sheet but I just wasn’t happy with the results.

biscuit cutter
Biscuit Cutter
pastry blender
Pastry Blend


 Biscuit Recipe No. 1 – ‘Southern Style Baking Powder Biscuits’

INGREDIENTS                     Yield = 11 – 12 biscuits

  • 2 cups flour
  • 1 tsp. salt
  • 1 tsp. sugar
  • 1 Tbs. baking powder
  • 1/2 cup (1 stick) butter, chilled
  • 3/4 cup milk  ++ At least 2%
  • ++ butter for greasing cast iron skillet – and for brushing on top of uncooked biscuits.

METHOD                 Preheat oven to 425 (F)           Butter a  cast iron skillet      

++  I used a 10″ cast iron skillet but a 12″ will work just as well !!    

In a medium bowl mix 2 cups flour, 1 tsp salt, 1 tsp sugar & 1 Tbs. baking powder.  Cut in 1/2 cup (1 stick) chilled butter, either with your fingers, a pastry blender or two table knives.  Mix milk (at least 2%) into flour mixture until just combined.

Turn dough out onto a floured surface.  I have a dish towel (tea towel) I use just for this. I shake it out after each use and put it away until the next time.  Knead dough very briefly… perhaps 30 – 40 seconds.

Pat down the dough using your fingers to form an 8″ circle.  Cut with 2 1/2″ biscuit cutter – or a glass of similar size.  Place biscuits around the edges of a buttered 9 1/2″ to 10″ cast iron skillet, then add others in the middle. (For this recipe, you should have three biscuits in the middle.)  Brush tops with melted butter.

Bake 18 – 20 minutes.  (Mine were ready in 18 minutes.)  To check for doneness, insert a knife or toothpick in the middle biscuits.  No dough should stick.  Let biscuits cool for a few minutes… that is… IF YOU CAN !!  Enjoy!!

 Biscuit Recipe No 2 – ‘Southern Style Biscuits’  

Recipe includes vinegar, baking powder & baking soda.

But…. if you have buttermilk.. or dried buttermilk, as shown below, then skip the vinegar!


No buttermilk?  This is a great product.  Just remember to refrigerate after opening!

SACO Cultured - DRIED - Buttermilk -

USE -Southern-Style Biscuits No. 1 - myyellowfarmhouse.com

USE - Southern-Style Biscuits No 1 - myyellowfarmhouse.com (2)
Makes 11 – 12 yummy biscuits!

INGREDIENTS               Yield = 11 – 12 biscuits

  • 2 cups all-purpose flour
  • 2 1/2 tsp. baking powder
  • 1/2 tsp. baking soda
  • 1/2 tsp. salt
  • 1 Tbs. white sugar
  • 1/2 cup (1 stick) butter, chilled
  • 1 Tbs. vinegar – plus enough milk (at least 2%) to make 3/4 cup
  •   ++ OR 3/4 cup buttermilk    
  •   ++ OR 3/4 cup 2% milk & add I Tbs. dried buttermilk to dry ingredients
  • butter for greasing cast iron skillet – and for brushing on top of uncooked biscuits.


METHOD              Preheat oven to 425 (F)           Butter a cast iron skillet

++  I used a 10″ cast iron skillet but a 12″ will work just as well !!

In a medium bowl mix 2 cups all-purpose flour, 2 1/2 tsp. baking powder, 1/2 tsp. baking soda, 1/2 tsp. salt and 1 Tbs. white sugar.  Cut in 1/2 cup (1 stick) chilled butter, either with your fingers, a pastry blender or two table knives.  Pour in 3/4 cup buttermilk.  (OR place 1 Tbs. vinegar (I used apple cider vinegar) in a measuring cup and add enough milk (not less than 2%) to make 3/4 cup).  Mix milk/vinegar (or buttermilk) into flour mixture until just combined.

Turn dough out onto a floured surface.  I have a dish towel (tea towel) I use just for this. I shake it out after each use and put it away until the next time.  Knead dough very briefly… perhaps 30 – 40 seconds.

Pat down the dough using your fingers to form an 8″ circle.  Cut with 2 1/2″ biscuit cutter – or a glass of similar size.  Place biscuits around the edges of a buttered 9 1/2″ to 10″ cast iron skillet, then add others in the middle. (For this first recipe, you should have two biscuits in the middle.)  Brush tops with melted butter.

Bake 18 – 20 minutes.  (Mine were ready in 18 minutes.)  To check for doneness, insert a knife or toothpick in the middle biscuits.  No dough should stick.  Let biscuits cool for a few minutes… that is… IF YOU CAN !!  Enjoy!!

Need a bit of inspiration for what to serve with your biscuits?   

How about Salisbury Steak from ‘Rufus’ Guide’ ?  

Greg - 'Rufus Guide' - Salisbury Steak

Here’s the link for the delicious Salisbury Steak recipe!

Breakfast Time?  Perfect white gravy from ‘Mom of the South’.

Gravy Over Biscuits - Mom of the South

Here’s the link to ‘Mom of the South’ and her recipe for perfect white gravy!

++ Biscuit recipe No. 1 adapted from ‘Mom of the South’.     Biscuit recipe No. 2 adapted from ‘Allrecipes.com’.  

Cookies ‘n Cream Ice Cream Cupcakes

I made these Cookies ‘n Cream Ice Cream Cupcakes with Oreo cookies but they can be made with whatever cookies you choose.

Cookies 'n Cream ice Cream Cupcakes - myyellowfarmhouse.com

Cookies ‘n Cream Ice Cream Cupcakes are so very easy to put together – and you’re going to make every Ice Cream Lover in your life very happy!  (I can’t wait to make these with my grandchildren – speaking of Ice Cream Lovers.)

The east coast of the United States is bracing for a BIG snow storm, arriving here in Massachusetts in a few hours.  I plan to take advantage of being socked in by working on a few new recipes!  I’ve been attempting to perfect a recipe I’m calling Shake, Pour and Bake Pizza Crust.  I’ve prepared it twice so far and the crust is almost right.  Another one or two tweaks and I think I’ll have the results I’m looking for.  In the meantime, both myself and my neighbors are enjoying the results of my ‘pizza crust experiments’.  ; o )

Here’s photos of the two Shake, Pour and Bake Pizzas I’ve prepared so far.  On the left – black and green olives topped with 5-cheese Italian mix.  The 2nd – a Margherita pizza with slices of fresh mozzarella and Parmesan.  (Didn’t have any basil leaves – sprinkled on a bit of fresh Italian parsley.)

small red heart

Here’s how to put-together today’s recipe – Cookies ‘n Cream Ice Cream Cupcakes

INGREDIENTS

  • 1  (1.5 quart container ice cream  (Don’t they sell ‘gallons’ anymore?? )    ++  I used French Vanilla
  • 3 Tbs. chocolate syrup     ++  Optional 
  • 2  (7.5 oz)  containers chocolate shell topping  ++ There’ll be some left over.
  • 3/4 cup Oreo cookies, broken into small pieces   ++  You can use any cookie you chose

METHOD         Line a 12-cup cupcake pan with paper liners

First Layer – Half the ice cream 

Cut the ice cream in half.  Place HALF in a medium bowl.  (Return the rest of the ice cream to the freezer.)  Optional – add 3 Tbs. chocolate syrup and mix to combine.  Drop  1 1/2 Tbs. into each section of the cupcake pan.  ++ Don’t forget to line with paper liners.   ++  Allow ice cream to soften just a bit – it makes it easier to fill the sections.  Freeze ice cream cupcakes for at least 30 minutes.

Second Layer – Warmed chocolate shell topping

Place VERY HOT water in a small bowl.  Stand the 7.5 oz container of chocolate shell topping in the hot water for about 4 minutes.  Squeeze chocolate shell topping over each ice cream cupcake until you have a layer of chocolate topping.  Freeze for at least 30 minutes.  ++  I didn’t warm the chocolate shell topping for this layer – it didn’t spread out very well, as you can see in the photo below.

Third Layer – 1/4 of the rest of the ice cream and 3/4 cup broken up cookies

Briefly chop 6 Oreo cookies in a food processo.  Or – put 6 Oreo cookies in a small baggy and ‘smack up’ up the cookies to break them into small pieces.  You should have about 3/4 cup small cookie bits.   ++  You don’t want ‘cookie dust’, so don’t over do it.

Take out the remaining ice cream.  Remove half the ice cream… in other words,  you only need 1/4 of the 1.5 quart container for this layer. Place ice cream in a bowl, mix in 3/4 cup cookie bits.  Again, the softer the ice cream, the easier it will be to fill each section.  You should have enough for 1 Tbs. in each section.  Smooth ice cream a bit using a spoon. Freeze for at least another 30 minutes.

Fourth and Final Layer – Warmed chocolate shell topping and 1/2 a cookie

—  About 5 minutes before you you’re ready to remove ice cream cupcakes for their final layer, place the 2nd container of chocolate shell topping in a bowl with HOT water.  And – cut 6 Oreo cookies in half to use as a garnish.  ++  The best way to avoid breaking the cookies is to cut straight down with a sharp knife.  I went through LOTS of cookies until I figured that out!

Squeeze warmed chocolate shell topping onto each ice cream cupcake – use enough to cover the layer below .  Gently push a cookie half into the middle of each ice cream cupcake.  Freeze for about an hour.

++  Squeeze the warmed chocolate topping onto only one ice cream cupcake at a time, then gently push in a cookie half.  Otherwise, the chocolate shell on the ice cream cupcakes will be hardened by the time you do the rest.  Guess how I learned that??

Enjoy!!

++  Adapted from Good Housekeeping – June 2015 

Butter Brickle Cake Frosted with Whipped Cream & Topped with Crushed Milk Chocolate Toffee

3b - Butter Brickle Cake - My Yellow Farmhouse.com 025

‘Butter Brickle Cake Frosted with Whipped Cream & Topped with Crushed Milk Chocolate Toffee’ was chosen by ‘Bernideen’s Tea Time’ as a special feature!!!

http://blog.bernideens.com/2016/02/special-features-from-bttcg-blog-party_20.html

small red heart

Butter Brickle Cake Frosted with Whipped Cream & Topped with Crushed Milk Chocolate Toffee starts with a yellow cake mix to which melted butter, milk, eggs, butter brickle baking bits and vanilla are added.  After baking, the two layers are cut in half to form four, and each layer is frosted with whipped cream and sprinkled with crushed milk chocolate toffee.  Yummy!!!

I love the idea that such a delicious – and rather impressive looking dessert – starts with a ‘jazzed up’ cake mix!!

Ingredients

CAKE

  • 1 box yellow cake mix   ++  I used Betty Crocker
  • 1 cup WHOLE milk  ++ You can use 1% or 2%, the cake just won’t be as rich.
  • 1 stick (1/2 cup) melted butter  ++  Butter replaces the oil in the recipe.
  • 3 eggs
  • 1/2 tsp. vanilla and 1/2 tsp. almond extract
  • 1/2 cup butter brickle baking bits  ++   I used to ‘Heath’ toffee baking bits

WHIPPED CREAM FROSTING

  • 2 cups COLD whipping cream  (1 pint)
  • 1/3 – 1/2 cup confectionery (icing) sugar  ++  I used 1/2 cup  conf. sugar but think I will use 1/3 cup next time.  It all depends how sweet you like your whipped cream. 
  • 1-4 – 1/2 tsp. vanilla and 1/4 – 1/2 tsp. almond extract.  ++ Start out with 1/4 tsp. vanilla extract and 1/4 tsp. almond extract, then if you wish, add a bit more.  It’s all a matter of personal taste.
  • about 2 cups crushed milk chocolate covered toffee candy – such as SKOR or HEATH bars – about 4 – 5 candy bars.  ++  I used 5.

Method      

 2 (9″) greased and floured (nonstick) round cake pans   Bake at 350F for 25 – 30 mins.

Place 1 box yellow cake mix, 1 cup WHOLE milk, 1 stick (1/2 cup) melted butter, 3 eggs and 1/2 tsp. vanilla and 1/2 tsp. almond extract in a medium bowl.  Blend the ingredients first, then beat at medium speed for 2 minutes.  Stir in butter brickle bits.

Divide batter equally between two greased and floured 9″ round pans.  Smooth tops with a spatula.  Bake for 25 – 30 minutes.  Allow pans to cool for 10 minutes on a cake rack before removing and allow layers to cool throughly before frosting with whipped cream.

PREPARING WHIPPED CREAM

With mixer set at medium speed, beat 2 cups whipping cream and 1/2 cup confectionery (icing) sugar until  thickened.  Add 1/2 tsp. vanilla and 1/2 tsp. almond extract and continue beating until cream is thick enough to hold its shape. ++  When you pull the beaters out, the cream should stand in stiff peaks

PUTTING CAKE TOGETHER

Here’s a trick I learned when I took a cake decorating course A LONG TIME AGO – place a blob of whipped cream in the middle of your serving platter. Place the first layer on top of the cream.  The whipped cream (or, in other cases, frosting, helps keep the cake from sliding.

You’ll be frosting 4 layers, so imagine that you’d divided the whipped cream into quarters so you’ll have enough for the whole cake.  You’ll also be sprinkling on 1/4 of the crushed toffee candy for each of the 4 layers.

Spread a layer of whipped cream on top of the first layer.  Sprinkle on a 1/4 of of the crushed toffee candy bars.

++  Here’s another tip from that cake decorating course.  1. Start frosting by placing a good-sized amount of whipped cream in the center of the layer.  2. Make the whipped cream layer a little thicker when you come to the edge of the cake – almost like a rim.

1 - Butter Brickle Cake - My Yellow Farmhouse.com 020

Place your 2nd layer on top of first.  Repeat – spreading on a layer of whipped cream and sprinkling 1/4  of the crushed candy bar for each remaining layer.

I love how this cake looks pretty darn impressive, yet is so easy to make.  And it tastes as good as it looks.  Enjoy!!

++  Recipe adapted from Taste of Home.

3a - Butter Brickle Cake - My Yellow Farmhouse.com 024

Too Cold to Grill Outside? Try Italian Sausages Baked in the Oven – Perhaps with a Side of Baby Bella Mushrooms with Balsamic and Sage . . . Two Ideas Too Easy to Even Be Called ‘Recipes’!

Sausages cooked this way make excellent grinders, subs or po’boys!!

baby bella mushrooms with balsamic and sage (2)

I was pleased with how delicious these oven-baked Italian sausages turned out!  As you can see in the photo, the sausages were brown and juicy.  I am never again going to bother browning sausages in a skillet again!  No matter how hard I tried, even with a splatter guard, I’d always end up with grease splattered all over my kitchen.

To cook sausages in the oven, simply place sausages on a broiler pan and pierce each one a few times with a sharp knife.  Bake at 400 (F) for 30 minutes.  (It sure beats making a big mess!)

++ Line the bottom of the broiler pan with foil for an easy clean up.         

Baked Italian Sausages 001

 ++  If you don’t own a broiler pan, line a cookie sheet with foil and place a cooling rack on top. cooling rack


Place broiler pan containing sausages in a preheated 400(F) degree oven for 30 minutes.  ++  Don’t forget to ‘prick’ the sausages at least on one side so the fat can drain out.

You can turn the sausages once, but it’s not necessary. I turned them the first time I tried this, the day before Christmas, but yesterday I forgot simply because I was on my computer .. checking on ‘My Yellow Farmhouse’.

++  If you do turn the sausages, you might want to cook them a bit longer – until both sides are nicely browned and crisped, but its not necessary.

I prepared a spaghetti sauce last night with some of the oven baked Italian sausages (I used both sweet and hot), plus the ‘Baby Bella Mushrooms with Balsamic and Sage’. I’m keeping some of the sauce for myself and sharing some with one of my neighbors. She’s Italian-American – I hope she likes it!!   

How to Prepare ‘Baby Bella Mushrooms with Balsamic and Sage’

baby bella mushrooms with balsamic and sage (2)
Baby Bella Mushrooms with Balsamic and Sage

I think you’ll like the earthy flavor the dried sage adds to this dish.  And a bit of balsamic adds a whole other level of flavor.

INGREDIENTS

  • 1 Tbs. butter
  • 1 Tbs. olive oil
  • 1 (16 oz.) package sliced Baby Bella Mushrooms  
  • 2 Tbs. good-quality balsamic vinegar
  • 1/2 – 3/4 tsp. dried sage 
  • 1 Tbs. roughly chopped Italian parsley
  • freshly ground pepper 

++ See if you can find a package of good-sized Baby Bella Mushrooms.  The ones I found were large and meaty, a bit like Portabella mushrooms. In fact, Portabella mushrooms would be wonderful prepared this way!

Put 1 Tbs. butter and 1 Tbs. olive oil in a large skillet.  Allow butter and olive oil to heat a bit before adding 16 oz. sliced Baby Bella (or Portabella) mushrooms.  Cook, stirring often, until mushrooms begin to soften.

Baby Bella Mushrooms with Balsamic and Sage

Add 2 Tbs. good-quality balsamic vinegar and 1/2 – 3/4 tsp. dried sage, 1 Tbs. roughly chopped Italian parsley and some freshly ground pepper. 

Continue to cook just a few minutes more, stirring often, until mushrooms are fully cooked.  That’s it!!  

++ Don’t make the mistake of over-cooking mushrooms.  If juice starts pouring out of the mushrooms, you’ve cooked them too long.

A terrific hogie, sub or po’boy can be made with a combination of sweet and hot Italian sausage and these mushrooms. Or, the sausages and mushrooms could be added to a big pot of spaghetti sauce, as I did last night. (I’m planning to serve ‘Baby Bella Mushrooms with Balsamic and Sage’ as a side for a nice, fat steak or a juicy chicken breast.)  Enjoy!

Baked Italian Sausages 003
Quick ‘n Easy Oven Baked Italian Sausage
baby bella mushrooms with balsamic and sage (2)
Baby Bella Mushrooms with Balsamic and Sage


Cheesy Roasted Red Pepper and Pepperoni Calzone – Quick, Easy & Good ! (Uses pre-rolled and pre-formed pizza dough!!)

10 - Cheesy Roasted Red Pepper and Pepperon Calzone

Cheesy Roasted Red Pepper and Pepperoni Calzone is loaded with several types of Italian cheeses, roasted red peppers and pepperoni.  And better yet, its prepared with pizza dough found in the refrigerator section of your market and jarred roasted red peppers, which makes this calzone ‘Quick, Easy and Good’!

There is a bit of chopping, and about two seconds spent mixing the two eggs with a few spices and the Italian five-cheese mix, then it’s simply a matter of layering the ingredients on one half of the pizza dough, folding up the calzone and baking it.

INGREDIENTS              

  • 2 large eggs
  • 2 Tbs. roughly chopped Italian parsley
  • 1 cup Italian five-cheese mix –  OR – 1 cup mozzarella
  • 1/8 tsp. Italian seasonings
  • 1/8 tsp. salt
  • 1 tube refrigerated pizza dough

++  I used ‘Wewalka Classic Crust’. The dough is rolled in a layer of parchment, so you don’t have to worry about cutting a piece of parchment paper.  

 ++  If you can’t find ‘Wewalka’, use a tubed refrigerated pizza dough. Of course, you could make your own pizza dough but the cooking times may be slightly different.  (You will need a 9″ x 12″ rectangle.)    

  • 4 ounces thinly sliced pepperoni, sliced into strips
  • 1 1/2 cups jarred fire-roasted red peppers- sliced and drained
  • 9 slices provolone cheese

TIPS

I placed the pizza dough on the baking sheet when I first began preparing the topping ingredients, but found the dough had dried out a bit on the edges.  I suggest placing the pizza dough on the parchment-lined baking sheet a few minutes before you’re ready to put on the toppings.  ++ If the dough does become dry on the edges, it won’t hold together.  Just moisten one of the edges with a bit of water using your fingers and it’ll hold just fine!

As I mentioned above, I used the new pizza dough which comes rolled in parchment paper.  If you buy another type of prepared dough, be sure to line your baking sheet with a piece of parchment paper.  You’ll be glad you did because the parchment paper will contain any drips and keep the calzone from sticking.

METHOD      Oven at 400F        Bake for a total of 30 minutes

In a small bowl, briefly beat two eggs.  Mix in 1/8 tsp. Italian seasonings and 1/8 tsp. salt.  Set aside half the egg mixture.  To the other half, add 1 cup shredded Italian five-cheese mix (or 1 cup shredded mozzarella).  ++  You’ll be using half the egg mixture as the first layer of the calzone.  The second half is brushed on top of the uncooked calzone.

Chop 4 oz. thinly sliced pepperoni into strips.  Chop the roasted red pepper into strips.  You should have 1 1/2 cups. Drain in a colander and place strips on a few sheets of paper towels.

On one side of the pizza dough spread  the egg and shredded cheese mixture, being sure to to leave a 1″ border around the edges free of filling. Next place pepperoni strips, followed by the drained, roasted red pepper strips.  And finally add the 9 pieces of provolone.  ++  SEE PHOTOS BELOW   

Fold over the other half of the pizza dough, making sure the edges meet.  Using your fingers, press dough down so both sides stick together – fold edges under.  Using a sharp knife, cut a few vent slits on the top of the calzone.

Bake calzone for only 15 minutes.  Remove from oven and brush with reserved egg mixture.  ++ You don’t have to use every single drop of the remaining egg mixture.

Return calzone to oven and bake until crust is golden – about another 15 minutes.  By this time the filling should be bubbling.  ++  A bit of oil from the pepperoni may bubble out but the parchment paper will catch it.

Allow calzone to rest  5 – 8 minutes, which helps the melted cheeses to set up a bit.  Cut into 12 pieces and – enjoy!!

++  If you chose, you can serve your creation with some marinara dipping sauce.  

Step-by-Step Photos – ‘Cheesy Roasted Red Pepper and Pepperoni Calzone’


Wishing You the Merriest of Holidays!!

I had planned to post various recipes for sugar cookies – and was going to call the series ‘The Sugar Cookie Experiment’, but as sometimes happens, life & The Holidays just got in the way.  

I didn’t return from my trip to Italy until late November and, before we could even begin thinking about Christmas, my son and I had to clean out the barn and put away all my outdoor furniture  …. a big and ‘not fun’ project.

Then began the lugging to and fro of lots and lots of Christmas stuff from the 2nd floor of the barn, such as lots of extra chairs and leaves for two tables, wrapping paper, bows and ribbons, plates and platters, tree decorations and lights etc. etc.  (Hay had been kept, many years ago, on the 2nd floor of the barn.  It’s so cute up there with all the gables and the quaint ‘tack room’ from the days when the barn housed horses that I’d love to fix it up sometime with a pool table etc.)

For the first time in years I have a real, live Christmas Tree. I am so in love with it!  This year I had an ‘assistant’ in the form of one of my sons, who helped me pick out a lovely tree and set it up. The decorating he left to me, which was fine ’cause I love decorating for Christmas.  

The lamp my friend Frank made me, based on A Christmas Story, still ‘blazes forth in all it’s glory’!

Christmas 2015 002

As you may remember, our moth-eaten but much beloved angel is placed at the top of the tree by one of my grandchildren.  

Our Traditional Christmas Angel - My Yellow Farmhouse.com

Every year our family celebrates what we call Our Roy Christmas in the middle of December.  This year it was Saturday, December 12th and entailed lots of gift buying, gift wrapping, decorating and cooking which had to be done almost two weeks before the 25th!  Somehow – we manage to pull it off each year – and it’s always so much fun.  

Christmas 2015 - 4 001

My yellow farmhouse looked so festive and just so downright happy that I decided to host another party this past weekend.  As I often do, I prepare several heavy appetizers and ask others to also bring something to share.  We always end up with copious amounts of delicious things to eat!

++  A few photos from my December 19th party!  ++  

The cage with my parakeets, Linda (who’s a boy..) and Skye can be seen in the background.  They loved all the noise!

christmas party -1 2015

Christmas pary 2015

Christmas party 2015 2a

 I promise to post a few of the recipes from this year’s parties before New Year’s Eve!!

Christmas 2015 - copy

Happy Thanksgiving from ‘My Yellow Farmhouse’!

Wishing all my American friends a happy Thanksgiving.  (My Canadian friends celebrated their Thanksgiving a month ago, which I think is a really good idea – its FREEZING here in Massachusetts today.)

While running errands yesterday afternoon I saw car after car lined up at various gas stations, preparing to head out to grandma’s or wherever they were going.  I’m staying here in Massachusetts today.  I usually drive – or take the train – down to the Philadelphia area where I spend a truly joyous Thanksgiving with my son and his family.

My son’s in-laws always host Thanksgiving and there’s such a crowd that T. always cooks two turkeys.  (Love you T.!!!)

This browned and beautiful turkey was quickly turned into nothing but a carcass. – from which I made my Saturday-After-Thanksgiving Turkey Noodle Soup.  

THE TURKEY - 'My Yellow Farmhouse.com"

Saturday-After-Thanksgiving Turkey Noodle Soup - My Yellow Farmhouse.com

'Saturday After Thanksgiving' Turkey Soup - My Yellow Farmhouse.com

For the last few years my son has been in charge of preparing the sweet potatoes following my daughter-in-law’s grandmother’s tried and true recipe.  And I, for the last several years, have been in charge of the gravy and the green beans. Oh, and the homemade cranberry sauce.  (I wonder what they’ll do without me this year?!) P.S. My son informed me that my ‘turkey gravy expertise’ WAS greatly missed !! 

I returned home Monday night from a nine-day trip to Italy – it was fabulous! When we lived in Malta we often went to Italy for either business or pleasure – but Italy’s a place you can visit over and over again and never, ever tire of the food, the sights and the Italian people with their generous hearts and ready smiles.

Today I’m heading over to one of my sister-in-law’s homes to celebrate Turkey Day.  I wanted to make sweet potatoes following my daughter-in-law’s grandmother’s recipe, but I didn’t have any dark Karo syrup.  So I ‘doctored’ the recipe with what I did have – namely regular Karo syrup, 1/2 cup apple sauce, brown sugar, butter, cinnamon and nutmeg.  Plus three cut up apples.  I love how it turned out and I’ll be posting the recipe after Turkey Day!!

This magnificent photo of Venice was taken by a wonderful young woman named Cecilia whom we met on our tour.

Venice - by Cecilia Ramirez

Me… in front of the French Embassy in Rome, following the disaster in Paris.  Our hearts were breaking…

French Embassy in Rome

++  Clipart courtesy of www.hdlatestimages.com  

‘Quick ‘n Easy’ – Rustic One Crust Apple Pie with Maple Whipped Cream

'A Little Help from My Friends'-Rustic One Crust Apple Pie - myyellowfarmhouse

Quick and easy to prepare, ‘Rustic One Crust Apple Pie with Maple Whipped Cream’ features thin apple slices bathed in sugar, cinnamon and nutmeg, enveloped in a lovely, crunchy crust. Extra yummy with a big dollop of Maple Whipped Cream!

My first attempt, a few weeks ago, preparing this Rustic One Crust Pie yielded great results … BUT … I added too much sugar and butter, which overflowed the crust.  The pie tasted wonderful, just ask my son!  But the crust stuck to the parchment paper and I had a hard time getting the pie onto the serving plate.  I wouldn’t want that to happen to you, so adjustments were made and ‘All is Well’.  This time the pie slid right off the baking sheet!

I few of my friends saw photos of the ‘mistake’ pie on Facebook, and asked me to ‘bring some over’ or told me they were coming to my house for a piece.  They weren’t fast enough.  My son had eaten the last two pieces. My friend, Sue, hearing I was preparing another rustic apple pie today, told me I could NOT allow my son to eat the rest of the pie until she first got a piece.  So I made her a promise.  I won’t let my son have the last piece – I’ll eat it !!  (Only kidding…. that would be really mean.)

  INGREDIENTS         Oven at 450 (F)    Bake pie for 25 minutes…. until apples are tender  

++ If you chose to add chopped nuts, wait until the pie has baked 15 minutes.  Sprinkle on the nuts and bake the pie a further 10 minutes.

  • 1 refrigerated pie crust  ++ Take crust out of refrigerator about 15 minutes before.
  • 4 cups thinly sliced peeled apples
  • 4 tsp. cornstarch
  • 2 tsp. cinnamon
  • 1/3 cup granulated sugar
  • 2 Tbs. brown sugar     ++ Not ‘packed’ – just leveled off
  • 1/8 tsp. nutmeg
  • 1 Tbs. melted butter
  • some water in a glass – to wet the crust folded over the apples, before sprinkling on the sugar
  • 1 tsp. granulated sugar – to be sprinkled on crust before baking
  • 2 Tbs. chopped pecans or walnuts    ++  I didn’t put any in the pie, but I think chopped nuts would be nice sprinkled on top of the Maple Whipped Cream!
  • 2 cups whipping (heavy) cream
  • 2 Tbs.REAL maple syrup
   METHOD

Remove purchased refrigerated pie crust from refrigerator about 15 minutes before. ++  This helps the crust unroll easily.  Peel and thinly slice 4 cups of apples – about 4 large.

In small bowl mix 4 tsp. cornstarch, 2 tsp. cinnamon, 1/3 cup granulated sugar, 2 Tbs. brown sugar and 1/8 tsp. nutmeg.  In another small bowl melt (in microwave) 1 Tbs. butter.  Pour sugar mixture into bowl containing melted butter – mix well with a fork & mix with 4 cups thinly sliced apples.

Place unrolled crust on an ungreased baking sheet – you don’t have to use parchment paper, but I prefer to.  Spoon apples onto the center of the crust.  Arrange apples so they’re 2″ from the edge of  crust.

Bake at 450 (F) for 25 minutes – until apple slices are tender.  Let pie rest a few minutes.  Loosen with a spatula just to be sure the crust doesn’t stick.  ++ It shouldn’t – now that I’ve adjusted the recipe.  ; o )

++  If you wish to add 2 Tbs chopped pecans or walnuts to your rustic pie, do so after the pie has baked 15 minutes – then bake pie 10 minutes more.

Whip 2 cups whipping (heavy) cream until thick.  Add 2 Tbs. REAL maple syrup.  Beat just until maple syrup is combined with cream.  Place a big dollop on each piece of Rustic One Crust Apple Pie, top with chopped pecans or walnuts and ENJOY!!!!

This little scarecrow made his first appearance November 2012. Click here for ‘Cecile’s Apple Pie Recipe’!

My Yellow Farmhouse - Apple Pie

—-

'A Little Help from My Friends' - Rustic One Crust Apple Pie - myyellowfarmhouse

'A Little Help from My Friends' - Rustic One Crust Apple Pie - myyellowfarmhouse

—-

'A Little Help from My Friends' - Rustic One Crust Apple Pie with Maple Whipped Cream - myyellowfarmhouse

Rustic One-Crust Apple Pie - myyellowfarmhouse

++  Recipe adapted from ‘Pillsbury Apple Crostata’.

Thick ‘n Creamy Charred Red Bell Pepper and Potato Chowder

red pepper - courtesy of Re Della Produce

The mellow flavor of charred (blackened) red bell peppers adds a big flavor boost to this chowder. Don’t worry – charring the red bell peppers isn’t a lengthy process, as it can sometimes be. The chopped peppers are charred right in the pan, then chopped onions and potatoes are added, along with chicken broth, fresh parsley and a good amount ‘half and half’ cream….  plus a dash of cayenne pepper.  Add some crusty bread – and you’ll have dinner on the table in about 45 minutes!

I made a few changes from the original recipe simply because I’m from the part of the States we call New England.  Massachusetts to be exact, where a chowder (chow-da) should be thick and creamy, full of chunks of potatoes, onions and, quite often, clams. So I substituted ‘half and half’ cream for the milk AND there is no ‘mashing down’ of the potatoes, onions and red bell peppers as suggested in the original.     ; o )

++  Whole milk, 2% milk or 1% can be used instead of the ‘half and half’

++  “Half and half” is a mixture of half heavy cream and milk commonly found in the States.  In Canada, half-and-half is 10% cream.

   INGREDIENTS

  • non-stick cooking spray
  • 3 cups roughly chopped red bell peppers     ++ approx. 2 large 
  • 2 cups roughly chopped yellow onion       ++ approx. 1  1/2 large 
  • 2 cups peeled russet potatoes, chopped into 1/2′ cubes     ++ approx. 1 russet potato
  • 2 cups chicken broth   ++ vegetable broth can be substituted
  • 2 cups ‘half and half’ OR milk    ++  If using milk, you may want to use more cornstarch to thicken the chowder.  
  • 1 Tbs. chopped fresh parsley  –  ++ plus some to sprinkle on top of chowder
  • 1/8 – 1/4 tsp. cayenne pepper
  • 1/2 to 3/4 tsp. salt
  • 1/4 tsp. pepper
  • 1 Tbs. cornstarch

  METHOD                   ‘Dutch Oven’ – – A large heavy cooking pot with a lid.

Dutch Oven - Walmart

Spray bottom of a 4-quart Dutch Oven with non-stick cooking spray – heat over medium-high heat for a few minutes.  Add 3 cups roughly chopped red bell peppers. Cook, UNCOVERED, 12 – 15 minutes until peppers are charred, stirring occasionally.

Lower heat a bit.  Add 2 cups roughly chopped yellow onion.  Cook, stirring occasionally, for 5 to 6 minutes, until onion becomes translucent.  Add 2 cups peeled russet potatoes, chopped into 1/2′ cubes, and 2 cups chicken broth.  ++ Vegetable broth may be substituted.  

Bring to a boil – reduce heat.  Simmer, COVERED, 12 minutes – or until potatoes are tender.

Add 2 cups ‘half and half’ (or milk), 1 Tbs. chopped fresh parsley, 1/8 – 1/4 tsp. cayenne pepper, 1/2 – 3/4 tsp. salt and 1/4 tsp. pepper.  Simmer, UNCOVERED, until chowder is heated through, stirring occasionally.

Place 3/4 cup of the chowder liquid in a mug and mix in 1 Tb. cornstarch.  Slowly add to chowder, stirring slowly until chowder thickens. ++ If using milk, you may want to use more than 1 Tbs. cornstarch.

Serve with some chopped fresh parsley sprinkled on top of chowder.  (Thick ‘n Creamy Charred Red Bell Pepper and Potato Chowder is even better when eaten the next day.)  Enjoy!

Follow this link for recipe – ‘No Name Bread’ – A Hearty, Moist Loaf, Perfect with Stew, Chili and Chowder

'No Name Bread' - myyellowfarmhouse.com

Creamy Charred Red Bell Pepper and Potato Chowder - myyellowfarmhouse.com

Creamy Charred Red Bell Pepper and Potato Chowder - myyellowfarmhouse.com

—-

Creamy Charred Red Bell Pepper and Potato Chowder - myyellowfarmhouse.com

Creamy Charred Red Bell Pepper and Potato Chowder - myyellowfarmhouse.com

—-

Creamy Charred Red Bell Pepper and Potato Chowder - myyellowfarmhouse.com

 ++ Recipe adapted from Better Homes and Gardens (Sept. 2105).

‘No Name Bread’ – – A dense, round loaf made with flour & cornmeal. Perfect with chili, soup or stew!

No Name Bread is delicious, but what makes it really special is how little ‘hands on’ time is needed. You mix flour, salt, water and instant yeast, then let the dough sit overnight. (Or a total of 12 – 18 hours.) About an hour before you plan to eat, add some cornmeal & some seasonings and knead dough for about 5 minutes.  Cover dough and allow to rest for a half hour.  Bake for a half hour and ‘et voila’ – a dense moist bread which holds up to being dunked in soup, chili or stew.  ; o )

I’ll let you in a secret.  This loaf of bread is NOT the bread I intended to make.  I won’t go into a lot of detail about The Problem.  I’ll just mention that ‘all flours are not made equal’, meaning Canadian flour is slightly different than flour used in the States. Due to that difference, the dough ended up being sticky and soft. But the yeast worked it’s magic and that’s the most important thing!!

I thought of adding a bit more flour to the dough but was out of flour. (Thank you flour moths…)  But I did have cornmeal – and the rest of the story will go down in history as How ‘No Name Bread’ Came to Be!

INGREDIENTS       ++  Remember to start the dough the afternoon or night before!!

  • 3 cups unbleached all purpose flour
  • 1 3/4 tsp. salt
  • 1/2 tsp. instant OR rapid rise yeast    ++  Bread machine yeast IS rapid rise yeast
  • 1 1/2 cups lukewarm water    ++ Run your hands under the water to check.  If the water feels  slightly warmer than your hand – it’s perfect!
  • 1 cup cornmeal.
  • 1/2 tsp. Italian seasoning
  • 1/3 tsp. garlic salt with herbs
  •  2 Tbs. pine (pignolia) nuts    ++  optional
  • parchment paper
  • RIGHT BEFORE BAKING….
  • olive oil
  • 1/4 tsp. Italian seasonings

METHOD

Oven at 450 (F)       Bake on a parchment paper-lined cookies sheet for 25 mins.

In a large bowl, whisk together 3 cups flour, 1 3/4 tsp. salt and 1/2 tsp. instant (rapid rise) yeast.  Mix in 1 1/2 cups lukewarm water.  Cover bowl with plastic wrap and allow to sit for 12 – 18 hours.  (You can peek it at… I know I did!)

About an hour before you plan to serve the bread, turn out dough… which will be VERY sticky… onto a heavily floured work surface.  Roll dough around a bit so it picks up some of the flour.  Add 1 cup cornmeal.  Work the dough with your hands until cornmeal is thoroughly mixed in.  Add 1/2 tsp. Italian seasonings, 1/3 tsp. garlic salt with herbs and 2 Tbs. pine nuts and work into dough.

Knead dough for about 5 minutes. Scrape dough onto the middle of a parchment paper-lined cookie sheet.  Form into a 7 1/2″ circle.  Cover dough with the same large bowl, turned upside down, and allow to rest for 30 minutes.

No Name Bread - myyellowfarmhouse.com (2)

See, it’s bubbling again!

Drizzle dough with olive oil (you can be generous with the olive oil) and sprinkle with 1/4 tsp. Italian seasonings.

Bake in a preheated 450 (F) oven for 25 minutes.  ++  Loaf will look more ‘golden’ than brown.  I recommend letting the loaf of ‘No Name Bread’ sit for 5 – 10 minutes…. if you can wait that long!!

Follow this link for my recipe ‘Thick ‘n Creamy Charred Red Bell Pepper and Potato Chowder’

Creamy Charred Red Bell Pepper and Potato Chowder - myyellowfarmhouse.com

—-

'No Name Bread' - myyellowfarmhouse.com

Good Grief Charlie Brown – It’s a Pumpkin Patch Ice Cream Cake !!

All you need to make ‘Pumpkin Patch Ice Cream Cake’ is ice cream (no surprise there), two packages of chocolate cookies, pumpkin shaped candy and purchased green frosting!

This year marks the 60th anniversary of the American comic strip Peanuts.  Created by Charles M. Shultz, Peanuts  features delightful characters and a dog named Snoopy.   Adults are never seen – ever – which I believe is every child’s dream!

The Great Pumpkin, who, like Santa Claus arrives bearing gifts only to disappear once his task is done, made his first appearance in 1959.  Linus is the only person who believes in The Great Pumpkin and the other children laugh to see Linus sitting in a pumpkin patch year after year …. waiting for The Great Pumpkin …. who never shows up.  Yet Linus remains undeterred and has great faith The Great Pumpkin will show up next year.  What an optimist!!

Every year since 1996 families have gathered around their TVs to watch It’s the Great Pumpkin, Charlie Brown, knowing full well that Linus will only be humiliated once again.  I dedicate this pumpkin patch ice cream cake to Linus, Charlie Brown, Snoopy (the dog) and all the Peanuts gang.

Great Pumpkin Charlie Brown

++ I just learned the first Peanuts movie (not a cartoon) is arriving at theaters in States on November 6th.  How’s THAT for timely??  (I had no idea….)

   Ingredients and Method       See ‘how to photos’ at the bottom of this page!!

Use a 9’x 13′ pan or casserole       If using a slightly bigger or smaller pan, adjust ingredients

  • 2  (1.5 quart)  containers ice cream        ++I used chocolate and fudge swirl ice cream   
  • 5 cups chocolate cookie crumbs     ++  About 1 1/2  packages chocolate cookies with vanilla cream centers such as Oreo Chocolate Sandwich Cookies    oreo cookie
  • candy pumpkins – – –  22 – or so….
  • 1 container purchased cake icing with ‘cake decorating tips’ –  OR about 1/2 cup homemade icing, dyed green

 Remove ice cream from freezer and allow to warm up a bit while you prepare chocolate cookies crumbs.

Using a food processor or blender, chop up approximately 1 1/2 packages of chocolate cookies with vanilla cream centers.  You will need 5 cups chocolate cookie crumbs total.

++  If you don’t have a food processor or blender available, place cookies in a large plastic bag and ‘smash’ cookies using a rolling pin, meat tenderizer or a can.

Spread 1 1/2 cups chocolate cookie crumbs on the bottom of pan.

Open one ice cream container. Using a knife, go around edge of ice cream cartoon to loosen ice cream.  Tip ice cream onto a plate.  Cutting one slice at a time, cut ice cream into 3/4′ slices and lay slices on top of crumbs.  Continue until there is one full layer of ice cream.  ++  You may have a bit of ice cream left over if you’ve used a smaller size pan.

++ Don’t ‘fret yourself’ over the placement of the ice cream layers.  Make sure your hands are freshly washed & use your fingers to push the ice cream into the corners etc.  (If you follow this blog, you know I’m a BIG fan of just using my (clean) hands at times!)

Sprinkle 1 1/2 cups of chocolate cookie crumbs on top of ice cream.

Repeat ice cream layer using second container of ice cream.

Sprinkle on remaining 2 cups of cookie crumbs.

Pumpkin Patch Ice Cream Cake - myyellowfarmhouse.com

Arrange the candy pumpkins here and there on top of the chocolate cookies crumbs.  Add vines and leaves – and there you are..  A Pumpkin Patch Ice Cream Cake that would make The Great Pumpkin proud.  Enjoy!

We grew both orange and white pumpkins at our farm in St. Antoine de Tilly, Quebec

Pumpkins and Our Horse Ben - myyellowfarmhouse.com

Autumn – My Yellow Farmhouse – 2015

Fall Photo - myyellowfarmhouse.com

Pumpkin Patch Ice Cream Cake - myyellowfarmhouse.com