Chicken Breasts ‘n Rice with Roasted Red Peppers, Mushrooms and White Wine

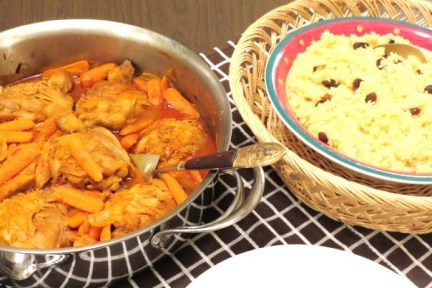
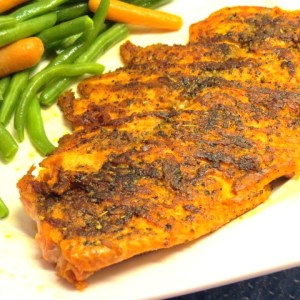
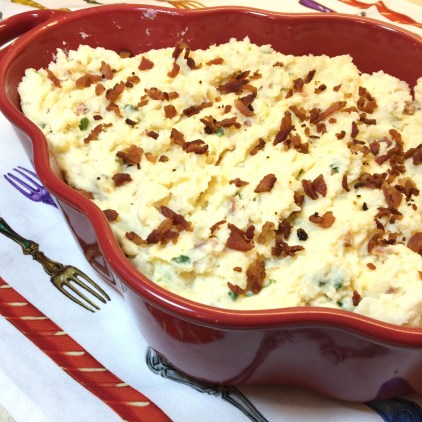
Easy prep, then pop in the oven for 1 hour. Viola – dinner!!

When I was a young mother I discovered an I Hate to Cook Book by Peg Bracken at our local library. The author supposedly ‘hated to cook’, so her recipes are all easy to make – but delicious at the same time.  And that’s how I found the original recipe for this dish.

Years later I printed a cookbook for my twin sons and included the recipe, reminding them how it used to be my ‘go to recipe’ whenever we had company because I could do all the prep work, then clean up the the kitchen while the chicken and rice was cooking. (Some of you may remember me mentioning what a truly messy cook I am.)

The version I prepared today was based upon any ‘goodies’ I happened to have on hand.  I decided against black olives but decided for Baby Bella Mushrooms, roasted red peppers and white wine.  I think you’ll enjoy it. And, you may want to order a copy of the original I Hate to Cook Book!

Oven at 350 F            Bake (covered tightly) for 1 hour       Serves 5 – 6

INGREDIENTS

  • 3 chicken breasts – cut in half to equal 6 pieces   ++ I highly rec. using bone-in chicken breasts with the skin. Or… even part of the skin.  The flavor is just so much richer!!    ; o )
  • 1 Tbs. butter
  • 1/3 cup chopped onion
  • 1 (8 oz) package Baby Bella sliced mushrooms
  • 1 large clove garlic, minced
  • 1/3 cup jarred roasted red pepper, roughly chopped
  • 1/3 cup white wine  ++  I used Pinot Grigio 
  • 1/2 tsp. salt
  • 1/4 tsp. pepper
  • 1 1/2 cups long grain rice
  • 3 1/2 cups chicken bouillon,  boiling   ++  You can add more salt and a chicken bouillon cube if you wish.
  • paprika
  • 1 Tbs. butter

Cut three chicken breasts in half to equal six pieces. ++  If using bone-in chicken breasts, you can leave on the skin if you wish.  Set breasts aside.

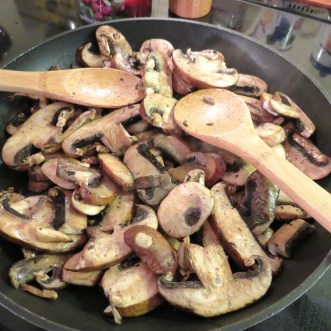
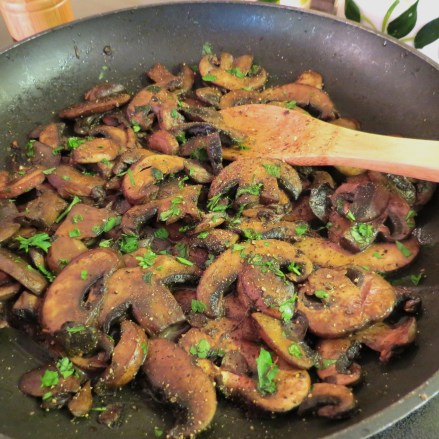
Put 1 Tbs. butter in a medium skillet. Add 1/3 cup chopped onion. Cook over medium heat until softened. Add 1 (8 oz) package Baby Bella sliced mushrooms and 1 large clove minced garlic.  Cook until mushrooms are wilted.  Add 1/3 cup chopped jarred roasted red pepper, 1/3 cup white wine, 1/2 tsp. salt and 1/4 tsp. pepper. Simmer for 1 minute. Remove from heat.

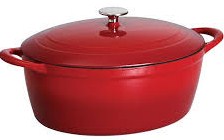
Bring 3 1/2 cups chicken bouillon to a boil.  Spread 1 1/2 cups long grain rice on the bottom of a 10″ x 13″ casserole. Place cooked veggies on top of rice, trying to spread veggies somewhat evenly.  Place six (halved) chicken breasts on top of the veggies and rice.

Pour boiling chicken bouillon over everything.  Sprinkle some paprika over chicken breasts and dot with 1 Tbs. butter.  Cover tightly with foil.  Bake at 350F for an hour.  Enjoy!  

Prepare Ahead Green Beans with Browned Butter and Sesame Seeds

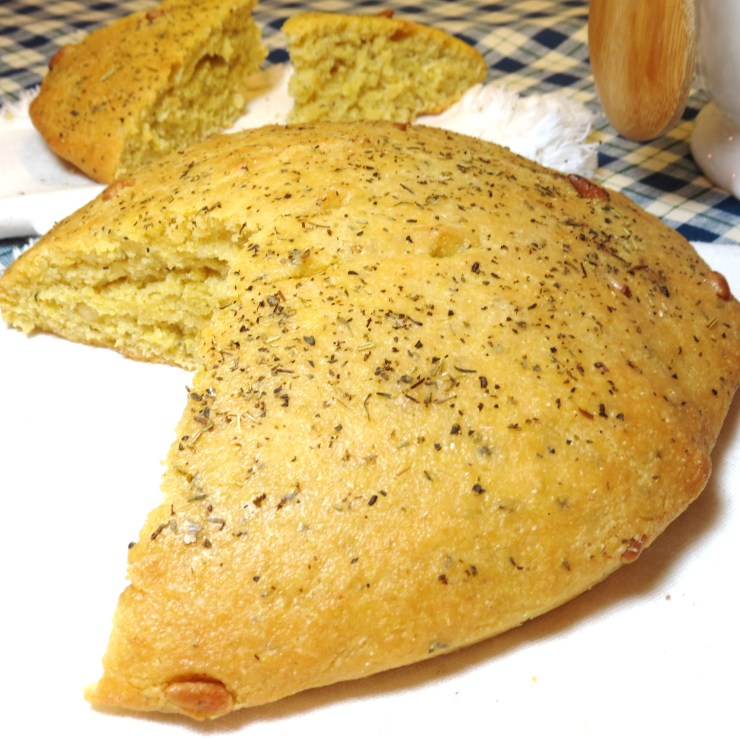
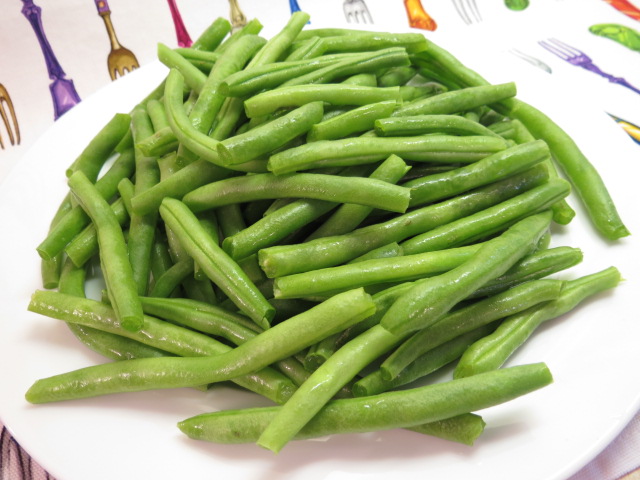
You may want to serve Green Beans with Browned Butter and Sesame Seeds


Celebrating Christmas after December 25th & a Recipe for ‘Ham and Cheddar Balls with Honey Mustard Dipping Sauce’

Tonight is New Year’s Eve but my extended family and I celebrated Christmas yesterday – and a merry time it was!

snowmen-at-twilight-myyellowfarmhouse-com
Snowmen at Twilight – My Yellow Farmhouse

Christmas Traditions – making buttery sugar cookies with new & old cookies cutters.  (The angel and poinsettia cookie cutters were my mother’s.)  

Christmas, even though celebrated after December 25th, still felt like Christmas to me and my extended family two days ago. There were happy, excited children, brightly wrapped presents, rum-spiked eggnog and lots of food and Christmas cookies – plus love, laughter and Bing Crosby singing Christmas Carols.    ; o )

I kept the menu for our ‘Christmas Meal’ simple and did much of the cooking the day before.  I baked three French Canadian Meat Pies, ‘spiral cut’and roasted the ham and prepared Make-Ahead Loaded Mashed Potatoes. I served only one vegetable – Wilted Spinach with Olive Oil and Pine Nuts, which takes only minutes to prepare.

To nosh on while we opened presents I made a platter featuring good old deviled eggs, various types of olives, and sliced tomatoes & fresh mozzarella drizzled with balsamic vinegar. I also served a few old favorites like one we like to call Vito’s Dip, and Ham and Cheddar Balls with Honey Mustard Dipping Sauce.  (I think my twin brother ate half the Ham and Cheddar Cheese Balls because he loves them and I hadn’t make them in years.)

Below my directions for making Ham and Cheddar Balls you’ll find links to Grammy Brouillette’s French Canadian Meat Pies, Make Ahead Loaded Mashed Potatoes and a link to Fabulous Foods.com‘s directions for how to cut and bake a spiral ham.

small red heart

Ham and Cheddar Balls with Honey Mustard Dipping Sauce


Oven at 350F          Bake for 20 minutes

INGREDIENTS

  • 3 cups biscuit mix – such as Bisquick   ++  If Bisquick isn’t available, check online for directions to make your own.  It’s easy!
  • 1 1/2 cups diced ham
  • 4 cups shredded Cheddar cheese (16 oz.)
  • 1/2 grated Parmesan cheese
  • 1 Tbs. chopped fresh parsley
  • 1 tsp. brown mustard    ++  I use GREY POUPON’S ‘Country Mustard’
  • 2/3 cup milk

Honey Mustard Dipping Sauce

  • 3/4 cup mayonnaise
  • 3 Tbs. brown mustard
  • 1 – 2 Tbs. honey

METHOD

Lightly grease a cookie sheet ..  OR  ..  line cookie sheet with parchment paper.

In a large bowl, using a large serving spoon, mix all ingredients until well blended.

Form dough into 1″ balls. Place balls 2″ apart on cookie sheet.

Bake for 20 minutes.  Balls will be lightly browned

While balls are baking, prepare sauce.  In a small serving bowl mix 3/4 cup mayonnaise, 3 Tbs. brown mustard and 1 2 Tbs. honey until blended.

++  ‘Ham and Cheese Balls may be baked the day before, placed in a big ziplock bag, refrigerated and reheated on a cookie sheet for a 6 – 7 minutes at 350F.

Recipe adapted from Bisquick brand’s Holiday Ham Balls.

Directions for preparing Grammy Brouillette’s French Canadian Meat Pies

Recipe for ‘Make Ahead Loaded Mashed Potatoes’

slow-cooker-loaded-mashed-potatoes-myyellowfarmhouse-com

Fabulous Foods tells you everything you need to know to spiral and cook a ham.  My ham sure didn’t look quite as ‘pretty’ as this one, but it was delicious!

http://www.fabulousfoods.com/articles/957827/how-to-spiral-carve-ham

spiral-cut-ham-courtesy-of-farmpac
Photo courtesy of FARMPAC.

christmas-2016-myyellowfarmhouse-com

Quick and Delicious Popover Pizza – a.k.a. Upsidedown Pizza

Back in 1999, when I was such a neophyte with computers that I didn’t even know how to use spell check, I made a cookbook containing many of my twin sons’ favorite recipes. The cookbook, aptly named The Roy Family’s Favorite Recipes, was a big hit with my guys and they  still use it, and a subsequent Christmas cookbook, fairly often.

Popover Pizza was always a big favorite of my sons’ – and their friends.  If you happen to have leftover meatballs and sauce, prepare the Popover Pizza with that. Don’t happen to have leftovers?  All you’ll need is a pound of ground beef, a jar of prepared spaghetti sauce and an onion. Plus a few spices like oregano – whatever you’d like.

The meat and sauce are spread on the bottom of 9′ x  13′ pan, lots of shredded mozzarella cheese is sprinkled on top, then the popover batter is poured over the mozzarella, followed by a sprinkling of shredded Parmesan.  Pop the Popover Pizza into the oven for 30 – 45 minutes, or until the the popover ‘crust’ is puffed and  lightly browned. Et voila, dinner is served.

PS  – As I type this I’m staying with two of my grandchildren while my son M. and his wife are vacationing in Spain. Yesterday I broke out my son’s copy of The Roy Family’s Favorite Recipes and made Popover Pizza.  Judging from the stains and drips on the page, it seems Popover Pizza is  big hit with the new generation of Roys as well.  Enjoy!!

Follow this link to ‘Forget Takeout Pizza – Thirty Minute Pizza with Homemade Crust

thirty-minute-pizza-meatball-version-myyellowfarmhouse-com

small red heart

Oven at 400F         Buttered 9′ x 13′ pan            Bake for 35 – 45 minutes

INGREDIENTS

  • 2 – 3 cups leftover meatballs and sauce     ++  chop meatballs into chunks
  •      Don’t have leftover meatballs and sauce?
  •                1 lb. ground beef
  •                1 small onion, chopped
  •                1 jar purchased spaghetti sauce
  •                1 /2 tsp. dried oregano, basil or Italian herbs
  • 2 cups shredded Mozzarella cheese
  • 1 cup milk     ++ Full fat or 2% is best
  • 2 large eggs
  • 1 Tbs. olive oil
  • 1 cup all-purpose flour
  • 1/2 tsp. salt
  • 1/2 grated Parmesan cheese

METHOD

Butter a 9′ x 13′ pan

– If you have leftover sauce and meatballs, spread 2 – 3 cups of sauce and chopped up meatballs on bottom pan.

– No Leftovers?  —  Fry 1 lb. ground beef and one onion, chopped, in a large skillet. Remove any fat from pan and discard.  Add one jar spaghetti sauce, some herbs, such as 1 /2 tsp. dried oregano, basil or Italian herbs –  any herbs and spices you wish.   Simmer sauce, uncovered, for 10 minutes to 15 minutes – stirring occasionally.  Spread beef and sauce mixture on bottom of pan.

Sprinkle two cups shredded Mozzarella cheese over meat and sauce.

  Popover Topping

In a medium bowl beat -on high – 1 cup milk, 2 large eggs and 1 Tbs. olive oil until foamy, about a minute.  Add 1 cup all-purpose flour and 1/2 tsp salt   Beat on high until mixture is thoroughly blended. Slowly pour batter over mozzarella cheese.  Sprinkle with 1/4 cup shredded Parmesan.

Bake at 400F for between 35- 45 minutes.  The meat and sauce with be bubbling and the popover topping should be lightly browned and puffy.  If you check and the popover topping isn’t puffy and lightly browned, just bake it a bit longer.  ++  The amount of time needed will depend upon your oven – and your pan. If using a glass pan, you will probably need the full 45 minutes simply because glass doesn’t conduct heat in the same way as metal.  (I’m making a note to myself to tell my son that!)   

6 - Popover Pizza a.k.a. Upside-Down Pizza - myyellowfarmhouse.com

Coconut Joy Cheesecake Bars with Chocolate Wafer Crust

Believe it or not, I’ve never made a cheesecake… ever!  My sister-in-law Doris makes a killer cheesecake, so I get my ‘cheesecake thrills’ whenever we’re all together.  But when I saw this recipe, I knew just had to make it.  I’m so glad I did because these cheesecake bars taste like a candy bar in cheesecake form.

My Very First Cheesecake Ever is in the oven right now.  It’s gonna be interesting to see if it comes out a bit lopsided.  The kitchen floors here in My Yellow Farmhouse are old and slant down a bit, especially right in the corner where the stove resides.  My Man of All Work (my brother-in-law Mike) did his best to level out the floor, but since I moved here I’ve never baked a cake that was absolutely level.  ++  The cheesecake actually came out level – hurrah!

I recommend baking these cheesecake bars the night before, or early in the morning of the day you plan to serve it because once the cheesecake is cooled completely, it’s refrigerated for 4 hours.  Then a simple creamy chocolatey topping is prepared using chocolate chips and Cool Whip, then toasted almonds and coconut are sprinkled on top.  Yummy!

INGREDIENTS

Chocolate Wafer Crust

  • 1 ¼ cups finely crushed chocolate wafer cookies   ++   About 25 – I used Nabisco ‘Famous Chocolate Wafers. 
  • 2 Tbs. granulated sugar
  • ¼ cup melted butter

Cheesecake Filling

  • 4 packages (8 oz.) cream cheese – SOFTENED
  • 1 cup sugar
  • ½ tsp. vanilla  AND  ½ tsp. almond flavoring
  • ½ cup coconut milk   ++ Due to my broken ankle I accidentally ordered an Almond Milk/Coconut Milk blend to be delivered via Pea Pod …. luckily, it worked great!!
  • 4 eggs

Creamy Chocolatey Topping with Toasted Almonds and Coconut

  • 1/2 cup chocolate chips  ++  I used mini-chocolate chips.  
  • 1 (8 0z.) container of FROZEN whipped topping, such as Cool Whip
  • 2 drops almond extract
  • 1 cup flaked sweetened coconut
  • 1/2 cup sliced almonds  – OR – 1/2 cup almond pieces  ++ I had whole almonds, so I put some in a food bag & ‘smacked them down’ a bit.  ; o )

small red heart

       Line a 10″ x 9″ pan with aluminum foil          Bake at 325F  for 45 minutes

Once cheesecake is fully cooked, turn off oven – leaving door open –  and let cheesecake sit in oven for 20 minutes.

METHOD

In a small bowl, thoroughly mix 1 ¼ cups finely crushed chocolate waferS, 2 Tbs. granulated sugar and ¼ cup melted butter.  Using your fingers, press chocolate wafer mixture into bottom of a 13 x 9” pan, which you’ve covered with aluminum foil – edges hanging over.  ++ This will help will when removing the cheesecake bars.

In a medium bowl, using mixer, thoroughly blend 4 packages (8 oz.) SOFTENED cream cheese, 1 cup sugar, ½ tsp. vanilla  AND  ½ tsp. almond flavoring.  Slowly add in 1/2 cup coconut milk.  ++ Or.. Almond Milk/Coconut Milk Blend.  Add 4 eggs – one at a time, mixing on low until well blended.  Pour over chocolate wafer crust.

Bake at 325F for 45 minutes – or until center is almost set.  Turn off oven.  Open door and leave cheesecake in oven for 20 minutes.  ++ If you’re like me and you’ve never made a cheesecake before, you’ll be pleased to see that, after 20 minutes sitting in the still-warm oven, the center will be fully set!!  Remove cheesecake from oven, place on a cooling rack and cooled completely.   Refrigerate 4 hours – or overnight.

The Finishing Touches — microwave 2 oz. chocolate chips and 1 cup FROZEN whipped topping (such as Cool Whip) in a medium bowl – on high – for 1 minute.  Stir and heat on high for another minute.  ++ The whipped topping will melt down… don’t worry. That’s the way it should be!  Add in 2 drops almond extract. Whisk hot mixture until chocolate chips are completely melted, then mix a bit more until you get a nice dark chocolate color.  Pour over cheesecake and spread evenly. Sprinkle on  1 cup flaked coconut and 1/2 cup almond bits – or sliced almonds. Cut into squares and refrigerate until its time to serve.   Enjoy!


Coconut Joy Cheesecake Bars with Chocolate Cookie Crust - myyellowfarmhouse.com
Coconut Joy Cheesecake Bars with Chocolate Cookie Crust

Tired of Thin Layer Cakes – Here’s a Trick to Fix That! Yellow Layer Cake with Mini Chocolate Chips and English Toffee Bits

I don’t know about other parts of the world, but the cake mixes in the States have been getting smaller and smaller – which is so wrong.  I’d rather pay a bit more and have a nice, fat layer cake..  We have no control over what the stupid cake mix companies do, but luckily there’s a few things you can add to be sure your layer cakes come out bigger.  (You may decide it’s just easier to make a cake from scratch – and that works too!)

BREAKING DEVELOPMENT  – –  I broke my ankle last night… Not a bad break, luckily, but still inconvenient.  And – get this – I’m having a party today because one of my twin sons and his family will be visiting from the Philadelphia area.

I’ve been cooking, and cleaning, for the last few days. Yesterday my other son and I put out all the outdoor furniture… and dragged out all the cushions and lanterns etc.  I was so pleased when I finished washing the final table and chairs… But cruel fate intervened… As I stepped down from our deck (to dump out the bucket of water) my foot caught on a huge, thick stepping stone… Over I went, like Jill of Jack & Jill fame, bucket, gloves and sponges flying all over.

And I heard my ankle break.  I crawled to where I thought I’d left my phone…. then remembered I’d brought it to the porch… so I crawled some more.  In any event, my brother-in-law and a neighbor got in me the car… but not until I directed them to find my comb, get my make-up kit and bring me clean clothes.  Being men… they started getting impatient – but I was married for almost 40 years… so I’m used to it!

Luckily, the cake (which is for my granddaughter’s birthday) was baked before I fell – so I got up early this morning so I could frost it and post the recipe.   ; o )

UPDATE — My Granddaughter was very happy with her birthday cake.  And the party was a great success as well !!

small red heart

Directions for a ‘Bigger and Better’ Layer Cake with Mini Chocolate Chips and English Toffee Bits  

Oven at 350F        Bake for 30 – 35 minutes      Two greased 9” round cake pans

Dry Ingredients for ‘Add-In’ Batter

  • 3/4 cup flour
  • 1/4 cup brown sugar or granulated sugar   ++  I used brown
  • 1 teaspoon baking powder
  • 2 pinches salt

In a medium bowl mix together flour, sugar baking powder and salt with a fork

Liquid Ingredients for ‘Add-In’ Batter

  • 1/2 cup water
  • 1/4 cup oil
  • 1 egg

Add liquid ingredients to dry ingredients. Beat with mixer for about 30 seconds until well blended.  Set bowl aside.

  • 1/2 cup mini chocolate chips
  • 1/2 cup English Toffee Bits  ++  I used ‘Heath’ Brand 
  • 1 Tbs. all purpose flour

Mix 1/2 cup mini chocolate chips, 1/2 cup English Toffee Bits and 1 Tbs. flour in a small bowl.  Set aside.

  • 1 yellow cake mix, prepared according to package directions    ++  I used Duncan Hines Butter Yellow – ‘Classic’

Once cake mix is prepared, pour in ‘Add-On’ batter.  Beat with mixer for about 30 seconds until well blended.  Gently mix in mini chocolate chips, English Toffee Pieces and flour mixture.

Divide batter equally between two greased 9” round cake pans.  Bake at 350F for 30 – 35 minutes – or until toothpick or sharp knife inserted in center comes out clean.   ++  Because of the ‘Add-In’ batter, your layers may take 3 – 5 minutes more time than usual.  

Cool cakes on wire rack for 15 minutes. Remove cake from pans and cool completely before frosting.

Due to my broken ankle – and the fact that I have no crutches because the ER ran out of ‘short people crutches’, I frosted my cake with purchased frosting BUT soon I’ll post my recipe for a really delicious homemade chocolate frosting ‘to die for’.   Enjoy!!

P.S.  My son who lives locally is arriving in a few minutes with some crutches – HURRAH!! And I am not cancelling the party …however, I won’t be the one bringing out trays of food.. not for several weeks.

1 - Morgan's Birthday Cake - My Yellow Farmhouse

Add-In Batter – Ready to Go

2 - Morgan's Birthday Cake - My Yellow Farmhouse
Add-In Batter & Cake Mix Batter Mixed – Chocolate Chips and English Toffee Added
3 = Morgan's Birthday Cake - My Yellow Farmhouse
Divide Batter Equally Between 2 Greased 9″ Pans
Morgan's birthday cake - My Yellow Farmhouse
I Like to Level the Layers Using a Sharp Knife

Tired of Thin Layer Cakes - Here's a Trick to Fix That!  Yellow Layer Cake with Mini Chocolate Chips and English Toffee - My Yellow 


Parmesan and Basil Spiral Dinner Rolls – Short on Time? Buy Prepared Dough!

Parmesan and Basil Dinner Rolls - myyellowfarmhouse.com (6)

Parmesan and Basil Dinner Rolls would be a delicious addition to any meal but, at least for me, these babies are the perfect accompaniment for spaghetti and meatballs or lasagna … actually, pretty much anything Italian.

I used my bread machine, which makes a 2 lb. loaf, to prepare the dough for these rolls. Since I only needed half the dough to make 12 rolls, I used the rest to bake a loaf of bread. Of course, you could use the dough to prepare 24 Parmesan and Basil Rolls instead of 12!

Yesterday I lost a life-long friend to pancreatic cancer.  Angela adored bread, in any form.  My dear friend, I dedicate today’s post to you. And I like to imagine you and your mom busy preparing the best lasagna heaven has ever seen.

small red heart

++  You can purchase 1 lb. of bread dough, prepare the dough the ‘old fashioned way’ or use a bread machine, set on the ‘dough’ setting – it’s up to you.

This bread machine recipe makes a 2 lb. loaf.  One lb. makes 12 rolls plus one bread.  Or, if you chose, you could make 24 ‘Parmesan and Basil Rolls’.  For 24 rolls, you’ll need two 8 1/2″ – 9″ round cake pans.

DOUGH INGREDIENTS

  • 1 ¼ cup lukewarm milk
  • ¼ cup lukewarm water
  • 2 Tbs. butter or olive oil
  • 4 cups bread flour
  • 1 Tbs. AND 1 tsp. sugar
  • 1 tsp. salt
  • 1 ¼ tsp. bread machine (quick rise) yeast

Add ingredients and set bread machine for ‘dough’.  Should take about 2 hours.

FILLING INGREDIENTS

  • 1/4 cup grated Parmesan cheese
  • 2 Tbs. softened butter
  • 2 Tbs. mayonnaise
  • ¼ tsp. dried Italian seasonings – or oregano
  • ¾ tsp. minced fresh basil leaves
  • 2 – 3 fresh garlic cloves, crushed     OPTIONAL

TO SPRINKLE ON TOP OF ROLLS AT END OF BAKING

  • 1 heaping Tbs. grated Parmesan

METHOD      

Oven at 375F      8 1/2″ to 9″ round cake pan     Bake rolls for approximately 25 minutes

Mix 1/4 cup grated Parmesan, 2 Tbs. softened butter, 2 Tbs. mayonnaise and herbs in a small bowl.  Set aside.

On a lightly floured surface, roll 1 lb. (16 oz.) bread dough into a 12” by 14” rectangle.

+  If using frozen bread dough, allow it to thaw and warm up a bit so dough will be easier to roll.

 ++  Dough may have the tendency to spring back – just let it rest for a minute and then ‘give it another go’.  Also, don’t be afraid to take a bit of dough from one place and stick it onto another place in order to get the rectangular shape.  

Spread Parmesan/butter/mayonnaise/spice mixture evenly on the 12″ x 14″ rectangle.  ++ I like to drop small amounts all over – I think it makes it easier to spread the filling.

Starting at the 12” end, roll up dough and cut into 12 equal sections.

Place sections in an 8½” to 9” round cake pan.  (Pan does NOT have to be greased.)  Cover pan with a dish (tea) towel and allow dough to rise until almost double – between 40 minutes to over an hour.

++  I recommend placing the dough in the oven to rise, and I place a 10” x 13” pan filled with hot water on the lowest shelf because the hot water helps the dough rise evenly – and usually faster.  

Once rolls are risen, remove from oven and set oven temperature to 375F.Bake rolls for 20 minutes – remove from oven and sprinkle on 1 heaping Tbs. grated Parmesan.  Bake 4 – 5 minutes more.

Allow rolls to cool for a minute or two, then remove from pan with a spatula.  Enjoy! 

 Parmesan and Basil Dinner Rolls - myyellowfarmhouse.com (7)


‘Request Bread’ – A Heartier Version of “Five-Star Bread’. Loaded with ‘Good Stuff’ Like Whole Wheat, Honey, Steel Cut Oats, Wheat Germ and Walnuts!

USE - A Heartier Version of 'Five-Star Bread' - myyellowfarmhouse.com
Just look at those yummy chunks of walnuts!

I sure didn’t plan on posting another bread recipe so soon but a Reddit follower asked if Five-Star Bread could be prepared with whole wheat flour.  So, I made some adjustments and added a lot of Good Stuff like honey, wheat germ (which has Vitamin A and Folic Acid) and 1/3 cup steel cut oats. (Steel cut oats are a whole grain, like wheat, rye and barley, but contain higher levels of protein than other grains – how about that?)

I love nuts so I added 1/2 cup chopped walnuts.  Walnuts are actually very good for your health.  Among other things, they’re are packed with omega-3 fatty acids, and contain antioxidants that boost heart health and help with stress.

++  I’m pleased to report my Reddit follower is happy with this new, healthier version of Five Star Bread. And, after enjoying some toasted Request Bread with butter and jam, I’m pretty darn pleased with it myself!

small red heart


Enter the ingredients in the order written and set your bread machine for ‘grain’.

  • 1 cup lukewarm water – PLUS an extra 1 Tbs.   ++  If dough seems too stiff when the machine is kneading – add another tablespoon. Bread making isn’t an exact science!  ; o )
  • 1/3 cup lukewarm milk
  • 3 Tbs. butter – softened just a bit
  • 2 Tbs. honey
  • 1/3 cup Steel-Cut Oats
  • 1 1/2 cups whole wheat flour
  • 2 cups bread flour
  • 2 Tbs. wheat germ   ++ There’s a new one out with honey!!
  • 1 1/4 tsp. salt
  • 2 tsp. rapid rise (bread machine) yeast
  • 1/2 cup chopped walnuts OR pecans    ++ To be added about 15 minutes after bread machine has started to knead the dough.


Crispy Sesame Pork with Spring Greens, Cherry Tomatoes & Teriyaki Salad Dressing

Topped with a quickly-simmered salad dressing of soy sauce, teriyaki sauce and brown sugar, this meal comes together very quickly.  The crispy sesame pork takes just a few minutes to cook after being dipped in beaten egg and bread crumbs.  Add cherry tomatoes – or whatever else you wish – and dinner is served.

I had a bit of a hard time photographing this salad.  Who knew photographing a simple salad could be so difficult?  (And I thought soup was hard to photograph.)  Salad, by nature, is loaded with bold colors.  So why was it so hard?

Well . . the salad flattened down a bit once the dressing was poured on – the greens just lay there looking like they’d been caught in a deluge.  So I added more spring greens and mixed them in. Big bummer, all those carefully placed bits of crispy sesame pork and cherry tomatoes got lost amongst the greens, which meant I had to ‘artfully arrange’ things once again. I do think, in the end, the above photo, though not award winning, captures a bit of how  good this main dish salad really is!

Have chicken, ham, fish etc.?  Substitute the pork for whatever you have on hand!

small red heart

INGREDIENTS            Serves 4

  • 3 Tbs. canola oil or olive oil – for frying
  • 4 thin boneless pork chops (about 1 lb.)   ++  You can cut thick pork chops in half lengthwise – but if you do, don’t cook pork as long. Maybe 2 minutes on each side.
  • 1 egg, beaten
  • 2 cups (more or less) Italian bread crumbs  ++  Or ‘Panko’ with Italian seasoning!
  • 2 Tbs. sesame seeds
  • SALAD DRESSING     ++ Teriyaki Salad Dressing is very rich and delicious – but a little goes a long way.  I recommend ‘drizzling’ rather than ‘pouring’ this dressing!!    ; o )
  • 2 Tbs.soy sauce
  • 1 Tbs. teriyaki sauce
  • 2 Tbs. brown sugar
  • 2 Tbs. oil oil
  • 3 Tbs. water
  • freshly cracked pepper, to taste
  • ‘Spring Mix’ salad greens
  • cherry tomatoes, cut in half
  • sesame seeds to sprinkle on top

METHOD

In a small saucepan over medium heat whisk together 2 Tbs.soy sauce, 1 Tbs. teriyaki sauce, 2 Tbs. brown sugar, 2 Tbs. oil oil, 3 Tbs. water and freshly cracked pepper, to taste. Heat to simmering, lower heat and simmer on low for 2 minutes. Allow to cool while you prepare the pork chops. Makes 1/2 cup.

In a shallow bowl beat 1 egg.  Add a bit of salt and pepper.  Place 2 cups Italian bread crumbs on a plate. One by one, dip boneless a pork chop into beaten egg, then coat with bread crumbs.  ++ I find it helps the bread crumbs to adhere if you press them down a bit with your hand.

Set pork chops aside.  Add 3 Tbs. canola or olive oil in a large skillet and heat over medium-high heat until hot.  ++ Here’s a trick for checking if the pan is hot enough – sprinkle in a bit of water.  If the water sizzles, the pan is hot enough.

Add your pork chops to the pan and cook  approximately 3 minutes per side, depending upon the thickness of the chop.  ++  You may have to lower heat after a few minutes.

++ You want the pork to be slightly pink on the inside so it’s juicy and flavorful. 

++  Here’s a trick which helps the bread crumb coating stay on – try not move the pork chops around in the pan until the time to turn them over.  This gives the bread crumb coating time to set.

While pork is cooking, arrange salad greens, either in 4 plates or a large serving bowl.  Add cherry tomatoes, cut in half.

Drain cooked pork on a paper towel lined plate.  Cut pork into bite-sized chunks and add to the salad.

Drizzle on the teriyaki dressing and sprinkle salad with sesame seeds.    Enjoy!                     ++ Remember to ‘drizzle’ rather than ‘pour’ – you can always add more.

I cut thicker boneless pork chops in half ’cause that’s what I had on hand.

Crispy Sesame Pork with Mixed Greens, Cherry Tomatoes & Teriyaki Salad Dressing - myyellowfarmhouse.com

Recipe adapted from “Good Housekeeping – 20-MINUTE MEALS”, April 2015.


Cookies ‘n Cream Ice Cream Cupcakes

I made these Cookies ‘n Cream Ice Cream Cupcakes with Oreo cookies but they can be made with whatever cookies you choose.

Cookies 'n Cream ice Cream Cupcakes - myyellowfarmhouse.com

Cookies ‘n Cream Ice Cream Cupcakes are so very easy to put together – and you’re going to make every Ice Cream Lover in your life very happy!  (I can’t wait to make these with my grandchildren – speaking of Ice Cream Lovers.)

The east coast of the United States is bracing for a BIG snow storm, arriving here in Massachusetts in a few hours.  I plan to take advantage of being socked in by working on a few new recipes!  I’ve been attempting to perfect a recipe I’m calling Shake, Pour and Bake Pizza Crust.  I’ve prepared it twice so far and the crust is almost right.  Another one or two tweaks and I think I’ll have the results I’m looking for.  In the meantime, both myself and my neighbors are enjoying the results of my ‘pizza crust experiments’.  ; o )

Here’s photos of the two Shake, Pour and Bake Pizzas I’ve prepared so far.  On the left – black and green olives topped with 5-cheese Italian mix.  The 2nd – a Margherita pizza with slices of fresh mozzarella and Parmesan.  (Didn’t have any basil leaves – sprinkled on a bit of fresh Italian parsley.)

small red heart

Here’s how to put-together today’s recipe – Cookies ‘n Cream Ice Cream Cupcakes

INGREDIENTS

  • 1  (1.5 quart container ice cream  (Don’t they sell ‘gallons’ anymore?? )    ++  I used French Vanilla
  • 3 Tbs. chocolate syrup     ++  Optional 
  • 2  (7.5 oz)  containers chocolate shell topping  ++ There’ll be some left over.
  • 3/4 cup Oreo cookies, broken into small pieces   ++  You can use any cookie you chose

METHOD         Line a 12-cup cupcake pan with paper liners

First Layer – Half the ice cream 

Cut the ice cream in half.  Place HALF in a medium bowl.  (Return the rest of the ice cream to the freezer.)  Optional – add 3 Tbs. chocolate syrup and mix to combine.  Drop  1 1/2 Tbs. into each section of the cupcake pan.  ++ Don’t forget to line with paper liners.   ++  Allow ice cream to soften just a bit – it makes it easier to fill the sections.  Freeze ice cream cupcakes for at least 30 minutes.

Second Layer – Warmed chocolate shell topping

Place VERY HOT water in a small bowl.  Stand the 7.5 oz container of chocolate shell topping in the hot water for about 4 minutes.  Squeeze chocolate shell topping over each ice cream cupcake until you have a layer of chocolate topping.  Freeze for at least 30 minutes.  ++  I didn’t warm the chocolate shell topping for this layer – it didn’t spread out very well, as you can see in the photo below.

Third Layer – 1/4 of the rest of the ice cream and 3/4 cup broken up cookies

Briefly chop 6 Oreo cookies in a food processo.  Or – put 6 Oreo cookies in a small baggy and ‘smack up’ up the cookies to break them into small pieces.  You should have about 3/4 cup small cookie bits.   ++  You don’t want ‘cookie dust’, so don’t over do it.

Take out the remaining ice cream.  Remove half the ice cream… in other words,  you only need 1/4 of the 1.5 quart container for this layer. Place ice cream in a bowl, mix in 3/4 cup cookie bits.  Again, the softer the ice cream, the easier it will be to fill each section.  You should have enough for 1 Tbs. in each section.  Smooth ice cream a bit using a spoon. Freeze for at least another 30 minutes.

Fourth and Final Layer – Warmed chocolate shell topping and 1/2 a cookie

—  About 5 minutes before you you’re ready to remove ice cream cupcakes for their final layer, place the 2nd container of chocolate shell topping in a bowl with HOT water.  And – cut 6 Oreo cookies in half to use as a garnish.  ++  The best way to avoid breaking the cookies is to cut straight down with a sharp knife.  I went through LOTS of cookies until I figured that out!

Squeeze warmed chocolate shell topping onto each ice cream cupcake – use enough to cover the layer below .  Gently push a cookie half into the middle of each ice cream cupcake.  Freeze for about an hour.

++  Squeeze the warmed chocolate topping onto only one ice cream cupcake at a time, then gently push in a cookie half.  Otherwise, the chocolate shell on the ice cream cupcakes will be hardened by the time you do the rest.  Guess how I learned that??

Enjoy!!

++  Adapted from Good Housekeeping – June 2015 

Butter Brickle Cake Frosted with Whipped Cream & Topped with Crushed Milk Chocolate Toffee

3b - Butter Brickle Cake - My Yellow Farmhouse.com 025

‘Butter Brickle Cake Frosted with Whipped Cream & Topped with Crushed Milk Chocolate Toffee’ was chosen by ‘Bernideen’s Tea Time’ as a special feature!!!

http://blog.bernideens.com/2016/02/special-features-from-bttcg-blog-party_20.html

small red heart

Butter Brickle Cake Frosted with Whipped Cream & Topped with Crushed Milk Chocolate Toffee starts with a yellow cake mix to which melted butter, milk, eggs, butter brickle baking bits and vanilla are added.  After baking, the two layers are cut in half to form four, and each layer is frosted with whipped cream and sprinkled with crushed milk chocolate toffee.  Yummy!!!

I love the idea that such a delicious – and rather impressive looking dessert – starts with a ‘jazzed up’ cake mix!!

Ingredients

CAKE

  • 1 box yellow cake mix   ++  I used Betty Crocker
  • 1 cup WHOLE milk  ++ You can use 1% or 2%, the cake just won’t be as rich.
  • 1 stick (1/2 cup) melted butter  ++  Butter replaces the oil in the recipe.
  • 3 eggs
  • 1/2 tsp. vanilla and 1/2 tsp. almond extract
  • 1/2 cup butter brickle baking bits  ++   I used to ‘Heath’ toffee baking bits

WHIPPED CREAM FROSTING

  • 2 cups COLD whipping cream  (1 pint)
  • 1/3 – 1/2 cup confectionery (icing) sugar  ++  I used 1/2 cup  conf. sugar but think I will use 1/3 cup next time.  It all depends how sweet you like your whipped cream. 
  • 1-4 – 1/2 tsp. vanilla and 1/4 – 1/2 tsp. almond extract.  ++ Start out with 1/4 tsp. vanilla extract and 1/4 tsp. almond extract, then if you wish, add a bit more.  It’s all a matter of personal taste.
  • about 2 cups crushed milk chocolate covered toffee candy – such as SKOR or HEATH bars – about 4 – 5 candy bars.  ++  I used 5.

Method      

 2 (9″) greased and floured (nonstick) round cake pans   Bake at 350F for 25 – 30 mins.

Place 1 box yellow cake mix, 1 cup WHOLE milk, 1 stick (1/2 cup) melted butter, 3 eggs and 1/2 tsp. vanilla and 1/2 tsp. almond extract in a medium bowl.  Blend the ingredients first, then beat at medium speed for 2 minutes.  Stir in butter brickle bits.

Divide batter equally between two greased and floured 9″ round pans.  Smooth tops with a spatula.  Bake for 25 – 30 minutes.  Allow pans to cool for 10 minutes on a cake rack before removing and allow layers to cool throughly before frosting with whipped cream.

PREPARING WHIPPED CREAM

With mixer set at medium speed, beat 2 cups whipping cream and 1/2 cup confectionery (icing) sugar until  thickened.  Add 1/2 tsp. vanilla and 1/2 tsp. almond extract and continue beating until cream is thick enough to hold its shape. ++  When you pull the beaters out, the cream should stand in stiff peaks

PUTTING CAKE TOGETHER

Here’s a trick I learned when I took a cake decorating course A LONG TIME AGO – place a blob of whipped cream in the middle of your serving platter. Place the first layer on top of the cream.  The whipped cream (or, in other cases, frosting, helps keep the cake from sliding.

You’ll be frosting 4 layers, so imagine that you’d divided the whipped cream into quarters so you’ll have enough for the whole cake.  You’ll also be sprinkling on 1/4 of the crushed toffee candy for each of the 4 layers.

Spread a layer of whipped cream on top of the first layer.  Sprinkle on a 1/4 of of the crushed toffee candy bars.

++  Here’s another tip from that cake decorating course.  1. Start frosting by placing a good-sized amount of whipped cream in the center of the layer.  2. Make the whipped cream layer a little thicker when you come to the edge of the cake – almost like a rim.

1 - Butter Brickle Cake - My Yellow Farmhouse.com 020

Place your 2nd layer on top of first.  Repeat – spreading on a layer of whipped cream and sprinkling 1/4  of the crushed candy bar for each remaining layer.

I love how this cake looks pretty darn impressive, yet is so easy to make.  And it tastes as good as it looks.  Enjoy!!

++  Recipe adapted from Taste of Home.

3a - Butter Brickle Cake - My Yellow Farmhouse.com 024

Too Cold to Grill Outside? Try Italian Sausages Baked in the Oven – Perhaps with a Side of Baby Bella Mushrooms with Balsamic and Sage . . . Two Ideas Too Easy to Even Be Called ‘Recipes’!

Sausages cooked this way make excellent grinders, subs or po’boys!!

baby bella mushrooms with balsamic and sage (2)

I was pleased with how delicious these oven-baked Italian sausages turned out!  As you can see in the photo, the sausages were brown and juicy.  I am never again going to bother browning sausages in a skillet again!  No matter how hard I tried, even with a splatter guard, I’d always end up with grease splattered all over my kitchen.

To cook sausages in the oven, simply place sausages on a broiler pan and pierce each one a few times with a sharp knife.  Bake at 400 (F) for 30 minutes.  (It sure beats making a big mess!)

++ Line the bottom of the broiler pan with foil for an easy clean up.         

Baked Italian Sausages 001

 ++  If you don’t own a broiler pan, line a cookie sheet with foil and place a cooling rack on top. cooling rack


Place broiler pan containing sausages in a preheated 400(F) degree oven for 30 minutes.  ++  Don’t forget to ‘prick’ the sausages at least on one side so the fat can drain out.

You can turn the sausages once, but it’s not necessary. I turned them the first time I tried this, the day before Christmas, but yesterday I forgot simply because I was on my computer .. checking on ‘My Yellow Farmhouse’.

++  If you do turn the sausages, you might want to cook them a bit longer – until both sides are nicely browned and crisped, but its not necessary.

I prepared a spaghetti sauce last night with some of the oven baked Italian sausages (I used both sweet and hot), plus the ‘Baby Bella Mushrooms with Balsamic and Sage’. I’m keeping some of the sauce for myself and sharing some with one of my neighbors. She’s Italian-American – I hope she likes it!!   

How to Prepare ‘Baby Bella Mushrooms with Balsamic and Sage’

baby bella mushrooms with balsamic and sage (2)
Baby Bella Mushrooms with Balsamic and Sage

I think you’ll like the earthy flavor the dried sage adds to this dish.  And a bit of balsamic adds a whole other level of flavor.

INGREDIENTS

  • 1 Tbs. butter
  • 1 Tbs. olive oil
  • 1 (16 oz.) package sliced Baby Bella Mushrooms  
  • 2 Tbs. good-quality balsamic vinegar
  • 1/2 – 3/4 tsp. dried sage 
  • 1 Tbs. roughly chopped Italian parsley
  • freshly ground pepper 

++ See if you can find a package of good-sized Baby Bella Mushrooms.  The ones I found were large and meaty, a bit like Portabella mushrooms. In fact, Portabella mushrooms would be wonderful prepared this way!

Put 1 Tbs. butter and 1 Tbs. olive oil in a large skillet.  Allow butter and olive oil to heat a bit before adding 16 oz. sliced Baby Bella (or Portabella) mushrooms.  Cook, stirring often, until mushrooms begin to soften.

Baby Bella Mushrooms with Balsamic and Sage

Add 2 Tbs. good-quality balsamic vinegar and 1/2 – 3/4 tsp. dried sage, 1 Tbs. roughly chopped Italian parsley and some freshly ground pepper. 

Continue to cook just a few minutes more, stirring often, until mushrooms are fully cooked.  That’s it!!  

++ Don’t make the mistake of over-cooking mushrooms.  If juice starts pouring out of the mushrooms, you’ve cooked them too long.

A terrific hogie, sub or po’boy can be made with a combination of sweet and hot Italian sausage and these mushrooms. Or, the sausages and mushrooms could be added to a big pot of spaghetti sauce, as I did last night. (I’m planning to serve ‘Baby Bella Mushrooms with Balsamic and Sage’ as a side for a nice, fat steak or a juicy chicken breast.)  Enjoy!

Baked Italian Sausages 003
Quick ‘n Easy Oven Baked Italian Sausage
baby bella mushrooms with balsamic and sage (2)
Baby Bella Mushrooms with Balsamic and Sage


Cheesy Roasted Red Pepper and Pepperoni Calzone – Quick, Easy & Good ! (Uses pre-rolled and pre-formed pizza dough!!)

10 - Cheesy Roasted Red Pepper and Pepperon Calzone

Cheesy Roasted Red Pepper and Pepperoni Calzone is loaded with several types of Italian cheeses, roasted red peppers and pepperoni.  And better yet, its prepared with pizza dough found in the refrigerator section of your market and jarred roasted red peppers, which makes this calzone ‘Quick, Easy and Good’!

There is a bit of chopping, and about two seconds spent mixing the two eggs with a few spices and the Italian five-cheese mix, then it’s simply a matter of layering the ingredients on one half of the pizza dough, folding up the calzone and baking it.

INGREDIENTS              

  • 2 large eggs
  • 2 Tbs. roughly chopped Italian parsley
  • 1 cup Italian five-cheese mix –  OR – 1 cup mozzarella
  • 1/8 tsp. Italian seasonings
  • 1/8 tsp. salt
  • 1 tube refrigerated pizza dough

++  I used ‘Wewalka Classic Crust’. The dough is rolled in a layer of parchment, so you don’t have to worry about cutting a piece of parchment paper.  

 ++  If you can’t find ‘Wewalka’, use a tubed refrigerated pizza dough. Of course, you could make your own pizza dough but the cooking times may be slightly different.  (You will need a 9″ x 12″ rectangle.)    

  • 4 ounces thinly sliced pepperoni, sliced into strips
  • 1 1/2 cups jarred fire-roasted red peppers- sliced and drained
  • 9 slices provolone cheese

TIPS

I placed the pizza dough on the baking sheet when I first began preparing the topping ingredients, but found the dough had dried out a bit on the edges.  I suggest placing the pizza dough on the parchment-lined baking sheet a few minutes before you’re ready to put on the toppings.  ++ If the dough does become dry on the edges, it won’t hold together.  Just moisten one of the edges with a bit of water using your fingers and it’ll hold just fine!

As I mentioned above, I used the new pizza dough which comes rolled in parchment paper.  If you buy another type of prepared dough, be sure to line your baking sheet with a piece of parchment paper.  You’ll be glad you did because the parchment paper will contain any drips and keep the calzone from sticking.

METHOD      Oven at 400F        Bake for a total of 30 minutes

In a small bowl, briefly beat two eggs.  Mix in 1/8 tsp. Italian seasonings and 1/8 tsp. salt.  Set aside half the egg mixture.  To the other half, add 1 cup shredded Italian five-cheese mix (or 1 cup shredded mozzarella).  ++  You’ll be using half the egg mixture as the first layer of the calzone.  The second half is brushed on top of the uncooked calzone.

Chop 4 oz. thinly sliced pepperoni into strips.  Chop the roasted red pepper into strips.  You should have 1 1/2 cups. Drain in a colander and place strips on a few sheets of paper towels.

On one side of the pizza dough spread  the egg and shredded cheese mixture, being sure to to leave a 1″ border around the edges free of filling. Next place pepperoni strips, followed by the drained, roasted red pepper strips.  And finally add the 9 pieces of provolone.  ++  SEE PHOTOS BELOW   

Fold over the other half of the pizza dough, making sure the edges meet.  Using your fingers, press dough down so both sides stick together – fold edges under.  Using a sharp knife, cut a few vent slits on the top of the calzone.

Bake calzone for only 15 minutes.  Remove from oven and brush with reserved egg mixture.  ++ You don’t have to use every single drop of the remaining egg mixture.

Return calzone to oven and bake until crust is golden – about another 15 minutes.  By this time the filling should be bubbling.  ++  A bit of oil from the pepperoni may bubble out but the parchment paper will catch it.

Allow calzone to rest  5 – 8 minutes, which helps the melted cheeses to set up a bit.  Cut into 12 pieces and – enjoy!!

++  If you chose, you can serve your creation with some marinara dipping sauce.  

Step-by-Step Photos – ‘Cheesy Roasted Red Pepper and Pepperoni Calzone’


‘Quick ‘n Easy’ – Rustic One Crust Apple Pie with Maple Whipped Cream

'A Little Help from My Friends'-Rustic One Crust Apple Pie - myyellowfarmhouse

Quick and easy to prepare, ‘Rustic One Crust Apple Pie with Maple Whipped Cream’ features thin apple slices bathed in sugar, cinnamon and nutmeg, enveloped in a lovely, crunchy crust. Extra yummy with a big dollop of Maple Whipped Cream!

My first attempt, a few weeks ago, preparing this Rustic One Crust Pie yielded great results … BUT … I added too much sugar and butter, which overflowed the crust.  The pie tasted wonderful, just ask my son!  But the crust stuck to the parchment paper and I had a hard time getting the pie onto the serving plate.  I wouldn’t want that to happen to you, so adjustments were made and ‘All is Well’.  This time the pie slid right off the baking sheet!

I few of my friends saw photos of the ‘mistake’ pie on Facebook, and asked me to ‘bring some over’ or told me they were coming to my house for a piece.  They weren’t fast enough.  My son had eaten the last two pieces. My friend, Sue, hearing I was preparing another rustic apple pie today, told me I could NOT allow my son to eat the rest of the pie until she first got a piece.  So I made her a promise.  I won’t let my son have the last piece – I’ll eat it !!  (Only kidding…. that would be really mean.)

  INGREDIENTS         Oven at 450 (F)    Bake pie for 25 minutes…. until apples are tender  

++ If you chose to add chopped nuts, wait until the pie has baked 15 minutes.  Sprinkle on the nuts and bake the pie a further 10 minutes.

  • 1 refrigerated pie crust  ++ Take crust out of refrigerator about 15 minutes before.
  • 4 cups thinly sliced peeled apples
  • 4 tsp. cornstarch
  • 2 tsp. cinnamon
  • 1/3 cup granulated sugar
  • 2 Tbs. brown sugar     ++ Not ‘packed’ – just leveled off
  • 1/8 tsp. nutmeg
  • 1 Tbs. melted butter
  • some water in a glass – to wet the crust folded over the apples, before sprinkling on the sugar
  • 1 tsp. granulated sugar – to be sprinkled on crust before baking
  • 2 Tbs. chopped pecans or walnuts    ++  I didn’t put any in the pie, but I think chopped nuts would be nice sprinkled on top of the Maple Whipped Cream!
  • 2 cups whipping (heavy) cream
  • 2 Tbs.REAL maple syrup
   METHOD

Remove purchased refrigerated pie crust from refrigerator about 15 minutes before. ++  This helps the crust unroll easily.  Peel and thinly slice 4 cups of apples – about 4 large.

In small bowl mix 4 tsp. cornstarch, 2 tsp. cinnamon, 1/3 cup granulated sugar, 2 Tbs. brown sugar and 1/8 tsp. nutmeg.  In another small bowl melt (in microwave) 1 Tbs. butter.  Pour sugar mixture into bowl containing melted butter – mix well with a fork & mix with 4 cups thinly sliced apples.

Place unrolled crust on an ungreased baking sheet – you don’t have to use parchment paper, but I prefer to.  Spoon apples onto the center of the crust.  Arrange apples so they’re 2″ from the edge of  crust.

Bake at 450 (F) for 25 minutes – until apple slices are tender.  Let pie rest a few minutes.  Loosen with a spatula just to be sure the crust doesn’t stick.  ++ It shouldn’t – now that I’ve adjusted the recipe.  ; o )

++  If you wish to add 2 Tbs chopped pecans or walnuts to your rustic pie, do so after the pie has baked 15 minutes – then bake pie 10 minutes more.

Whip 2 cups whipping (heavy) cream until thick.  Add 2 Tbs. REAL maple syrup.  Beat just until maple syrup is combined with cream.  Place a big dollop on each piece of Rustic One Crust Apple Pie, top with chopped pecans or walnuts and ENJOY!!!!

This little scarecrow made his first appearance November 2012. Click here for ‘Cecile’s Apple Pie Recipe’!

My Yellow Farmhouse - Apple Pie

—-

'A Little Help from My Friends' - Rustic One Crust Apple Pie - myyellowfarmhouse

'A Little Help from My Friends' - Rustic One Crust Apple Pie - myyellowfarmhouse

—-

'A Little Help from My Friends' - Rustic One Crust Apple Pie with Maple Whipped Cream - myyellowfarmhouse

Rustic One-Crust Apple Pie - myyellowfarmhouse

++  Recipe adapted from ‘Pillsbury Apple Crostata’.

Thick ‘n Creamy Charred Red Bell Pepper and Potato Chowder

red pepper - courtesy of Re Della Produce

The mellow flavor of charred (blackened) red bell peppers adds a big flavor boost to this chowder. Don’t worry – charring the red bell peppers isn’t a lengthy process, as it can sometimes be. The chopped peppers are charred right in the pan, then chopped onions and potatoes are added, along with chicken broth, fresh parsley and a good amount ‘half and half’ cream….  plus a dash of cayenne pepper.  Add some crusty bread – and you’ll have dinner on the table in about 45 minutes!

I made a few changes from the original recipe simply because I’m from the part of the States we call New England.  Massachusetts to be exact, where a chowder (chow-da) should be thick and creamy, full of chunks of potatoes, onions and, quite often, clams. So I substituted ‘half and half’ cream for the milk AND there is no ‘mashing down’ of the potatoes, onions and red bell peppers as suggested in the original.     ; o )

++  Whole milk, 2% milk or 1% can be used instead of the ‘half and half’

++  “Half and half” is a mixture of half heavy cream and milk commonly found in the States.  In Canada, half-and-half is 10% cream.

   INGREDIENTS

  • non-stick cooking spray
  • 3 cups roughly chopped red bell peppers     ++ approx. 2 large 
  • 2 cups roughly chopped yellow onion       ++ approx. 1  1/2 large 
  • 2 cups peeled russet potatoes, chopped into 1/2′ cubes     ++ approx. 1 russet potato
  • 2 cups chicken broth   ++ vegetable broth can be substituted
  • 2 cups ‘half and half’ OR milk    ++  If using milk, you may want to use more cornstarch to thicken the chowder.  
  • 1 Tbs. chopped fresh parsley  –  ++ plus some to sprinkle on top of chowder
  • 1/8 – 1/4 tsp. cayenne pepper
  • 1/2 to 3/4 tsp. salt
  • 1/4 tsp. pepper
  • 1 Tbs. cornstarch

  METHOD                   ‘Dutch Oven’ – – A large heavy cooking pot with a lid.

Dutch Oven - Walmart

Spray bottom of a 4-quart Dutch Oven with non-stick cooking spray – heat over medium-high heat for a few minutes.  Add 3 cups roughly chopped red bell peppers. Cook, UNCOVERED, 12 – 15 minutes until peppers are charred, stirring occasionally.

Lower heat a bit.  Add 2 cups roughly chopped yellow onion.  Cook, stirring occasionally, for 5 to 6 minutes, until onion becomes translucent.  Add 2 cups peeled russet potatoes, chopped into 1/2′ cubes, and 2 cups chicken broth.  ++ Vegetable broth may be substituted.  

Bring to a boil – reduce heat.  Simmer, COVERED, 12 minutes – or until potatoes are tender.

Add 2 cups ‘half and half’ (or milk), 1 Tbs. chopped fresh parsley, 1/8 – 1/4 tsp. cayenne pepper, 1/2 – 3/4 tsp. salt and 1/4 tsp. pepper.  Simmer, UNCOVERED, until chowder is heated through, stirring occasionally.

Place 3/4 cup of the chowder liquid in a mug and mix in 1 Tb. cornstarch.  Slowly add to chowder, stirring slowly until chowder thickens. ++ If using milk, you may want to use more than 1 Tbs. cornstarch.

Serve with some chopped fresh parsley sprinkled on top of chowder.  (Thick ‘n Creamy Charred Red Bell Pepper and Potato Chowder is even better when eaten the next day.)  Enjoy!

Follow this link for recipe – ‘No Name Bread’ – A Hearty, Moist Loaf, Perfect with Stew, Chili and Chowder

'No Name Bread' - myyellowfarmhouse.com

Creamy Charred Red Bell Pepper and Potato Chowder - myyellowfarmhouse.com

Creamy Charred Red Bell Pepper and Potato Chowder - myyellowfarmhouse.com

—-

Creamy Charred Red Bell Pepper and Potato Chowder - myyellowfarmhouse.com

Creamy Charred Red Bell Pepper and Potato Chowder - myyellowfarmhouse.com

—-

Creamy Charred Red Bell Pepper and Potato Chowder - myyellowfarmhouse.com

 ++ Recipe adapted from Better Homes and Gardens (Sept. 2105).

‘No Name Bread’ – – A dense, round loaf made with flour & cornmeal. Perfect with chili, soup or stew!

No Name Bread is delicious, but what makes it really special is how little ‘hands on’ time is needed. You mix flour, salt, water and instant yeast, then let the dough sit overnight. (Or a total of 12 – 18 hours.) About an hour before you plan to eat, add some cornmeal & some seasonings and knead dough for about 5 minutes.  Cover dough and allow to rest for a half hour.  Bake for a half hour and ‘et voila’ – a dense moist bread which holds up to being dunked in soup, chili or stew.  ; o )

I’ll let you in a secret.  This loaf of bread is NOT the bread I intended to make.  I won’t go into a lot of detail about The Problem.  I’ll just mention that ‘all flours are not made equal’, meaning Canadian flour is slightly different than flour used in the States. Due to that difference, the dough ended up being sticky and soft. But the yeast worked it’s magic and that’s the most important thing!!

I thought of adding a bit more flour to the dough but was out of flour. (Thank you flour moths…)  But I did have cornmeal – and the rest of the story will go down in history as How ‘No Name Bread’ Came to Be!

INGREDIENTS       ++  Remember to start the dough the afternoon or night before!!

  • 3 cups unbleached all purpose flour
  • 1 3/4 tsp. salt
  • 1/2 tsp. instant OR rapid rise yeast    ++  Bread machine yeast IS rapid rise yeast
  • 1 1/2 cups lukewarm water    ++ Run your hands under the water to check.  If the water feels  slightly warmer than your hand – it’s perfect!
  • 1 cup cornmeal.
  • 1/2 tsp. Italian seasoning
  • 1/3 tsp. garlic salt with herbs
  •  2 Tbs. pine (pignolia) nuts    ++  optional
  • parchment paper
  • RIGHT BEFORE BAKING….
  • olive oil
  • 1/4 tsp. Italian seasonings

METHOD

Oven at 450 (F)       Bake on a parchment paper-lined cookies sheet for 25 mins.

In a large bowl, whisk together 3 cups flour, 1 3/4 tsp. salt and 1/2 tsp. instant (rapid rise) yeast.  Mix in 1 1/2 cups lukewarm water.  Cover bowl with plastic wrap and allow to sit for 12 – 18 hours.  (You can peek it at… I know I did!)

About an hour before you plan to serve the bread, turn out dough… which will be VERY sticky… onto a heavily floured work surface.  Roll dough around a bit so it picks up some of the flour.  Add 1 cup cornmeal.  Work the dough with your hands until cornmeal is thoroughly mixed in.  Add 1/2 tsp. Italian seasonings, 1/3 tsp. garlic salt with herbs and 2 Tbs. pine nuts and work into dough.

Knead dough for about 5 minutes. Scrape dough onto the middle of a parchment paper-lined cookie sheet.  Form into a 7 1/2″ circle.  Cover dough with the same large bowl, turned upside down, and allow to rest for 30 minutes.

No Name Bread - myyellowfarmhouse.com (2)

See, it’s bubbling again!

Drizzle dough with olive oil (you can be generous with the olive oil) and sprinkle with 1/4 tsp. Italian seasonings.

Bake in a preheated 450 (F) oven for 25 minutes.  ++  Loaf will look more ‘golden’ than brown.  I recommend letting the loaf of ‘No Name Bread’ sit for 5 – 10 minutes…. if you can wait that long!!

Follow this link for my recipe ‘Thick ‘n Creamy Charred Red Bell Pepper and Potato Chowder’

Creamy Charred Red Bell Pepper and Potato Chowder - myyellowfarmhouse.com

—-

'No Name Bread' - myyellowfarmhouse.com

Good Grief Charlie Brown – It’s a Pumpkin Patch Ice Cream Cake !!

All you need to make ‘Pumpkin Patch Ice Cream Cake’ is ice cream (no surprise there), two packages of chocolate cookies, pumpkin shaped candy and purchased green frosting!

This year marks the 60th anniversary of the American comic strip Peanuts.  Created by Charles M. Shultz, Peanuts  features delightful characters and a dog named Snoopy.   Adults are never seen – ever – which I believe is every child’s dream!

The Great Pumpkin, who, like Santa Claus arrives bearing gifts only to disappear once his task is done, made his first appearance in 1959.  Linus is the only person who believes in The Great Pumpkin and the other children laugh to see Linus sitting in a pumpkin patch year after year …. waiting for The Great Pumpkin …. who never shows up.  Yet Linus remains undeterred and has great faith The Great Pumpkin will show up next year.  What an optimist!!

Every year since 1996 families have gathered around their TVs to watch It’s the Great Pumpkin, Charlie Brown, knowing full well that Linus will only be humiliated once again.  I dedicate this pumpkin patch ice cream cake to Linus, Charlie Brown, Snoopy (the dog) and all the Peanuts gang.

Great Pumpkin Charlie Brown

++ I just learned the first Peanuts movie (not a cartoon) is arriving at theaters in States on November 6th.  How’s THAT for timely??  (I had no idea….)

   Ingredients and Method       See ‘how to photos’ at the bottom of this page!!

Use a 9’x 13′ pan or casserole       If using a slightly bigger or smaller pan, adjust ingredients

  • 2  (1.5 quart)  containers ice cream        ++I used chocolate and fudge swirl ice cream   
  • 5 cups chocolate cookie crumbs     ++  About 1 1/2  packages chocolate cookies with vanilla cream centers such as Oreo Chocolate Sandwich Cookies    oreo cookie
  • candy pumpkins – – –  22 – or so….
  • 1 container purchased cake icing with ‘cake decorating tips’ –  OR about 1/2 cup homemade icing, dyed green

 Remove ice cream from freezer and allow to warm up a bit while you prepare chocolate cookies crumbs.

Using a food processor or blender, chop up approximately 1 1/2 packages of chocolate cookies with vanilla cream centers.  You will need 5 cups chocolate cookie crumbs total.

++  If you don’t have a food processor or blender available, place cookies in a large plastic bag and ‘smash’ cookies using a rolling pin, meat tenderizer or a can.

Spread 1 1/2 cups chocolate cookie crumbs on the bottom of pan.

Open one ice cream container. Using a knife, go around edge of ice cream cartoon to loosen ice cream.  Tip ice cream onto a plate.  Cutting one slice at a time, cut ice cream into 3/4′ slices and lay slices on top of crumbs.  Continue until there is one full layer of ice cream.  ++  You may have a bit of ice cream left over if you’ve used a smaller size pan.

++ Don’t ‘fret yourself’ over the placement of the ice cream layers.  Make sure your hands are freshly washed & use your fingers to push the ice cream into the corners etc.  (If you follow this blog, you know I’m a BIG fan of just using my (clean) hands at times!)

Sprinkle 1 1/2 cups of chocolate cookie crumbs on top of ice cream.

Repeat ice cream layer using second container of ice cream.

Sprinkle on remaining 2 cups of cookie crumbs.

Pumpkin Patch Ice Cream Cake - myyellowfarmhouse.com

Arrange the candy pumpkins here and there on top of the chocolate cookies crumbs.  Add vines and leaves – and there you are..  A Pumpkin Patch Ice Cream Cake that would make The Great Pumpkin proud.  Enjoy!

We grew both orange and white pumpkins at our farm in St. Antoine de Tilly, Quebec

Pumpkins and Our Horse Ben - myyellowfarmhouse.com

Autumn – My Yellow Farmhouse – 2015

Fall Photo - myyellowfarmhouse.com

Pumpkin Patch Ice Cream Cake - myyellowfarmhouse.com

‘Frightfully Delicious Halloween Bars’ with Candy Corn, Mini-Marshmallows, Nuts and Chocolate Chips

Not Halloween?  Skip the Candy Corn and use full cup of chocolate chips, M&Ms or broken-up candy bars.    ; o )

Frightfully Delicious Halloween Bars are gooey, chewy and chocolatey.  Imagine combining a recipe for brownies with a recipe for chocolate cake (which includes a stick of butter) – then sprinkling on mini-marshmallows, nuts and chocolate chips – and you’ll have a good idea of how good these taste.

Oven at 350 (F)        Greased 9′ x 9′ pan       Yield – 20 pieces

Bake for 22 minutes, remove pan from oven.  Add toppings – bake for a further 4 to 5 minutes

    INGREDIENTS

       Topping

  • 1 1/4 cups miniature marshmallows
  • 1/2 cup dark chocolate chips      ++  I use ‘Hershey’s Special Dark Chocolate
  • 1/2 cup candy corn
  • 1/2 cup chopped nuts  –  your choice

      Cake

  • 1/2 cup butter (or margarine)    ++ 1 stick
  • 1 cup sugar
  • 2 eggs
  • 1 tsp. vanilla extract
  • 1/2 cup flour
  • 1/3 cup cocoa powder
  • 1/2 tsp. baking powder
  • 1/2 tsp. salt

  METHOD

Place 1 1/4 cups mini-marshmallows in a small bowl.  In another small bowl, combine 1/2 cup dark chocolate chips, 1/2 cup candy corn and 1/2 cup chopped nuts.  Set aside both bowls.

Place 1/2 cup butter or margarine in a microwavable bowl.  Melt butter for 30 seconds, until melted. Add 1 cup sugar, 2 eggs and 1 tsp. vanilla extract.  Mix with a fork or whisk until well-blended and lemon-colored.

Add 1/2 cup all-purpose flour, 1/3 cup cocoa powder, 1/2 tsp. baking powder and 1/2 tsp. salt.  Mix with a whisk or spoon until well blended.  Pour batter into greased 9′ x 9″ pan.

Bake at 350 (F) for 22 minutes.

Remove pan from oven.  Sprinkle on 1 1/4 cups miniature marshmallows, then sprinkle on mixture of 1/2 cup candy corn, 1/2 cup dark chocolate chips and 1/2 cup chopped nuts.

Return pan to oven for 4 – 5 minutes, until mini-marshmallows are softened and slightly puffed.  Cool completely on wire rack.  Fill a mug with very hot water.  Cut into 16 or 20 pieces.

++ Dip a sharp knife into hot water before each new cut.       ++   Between each cut you may need to wipe off knife.     ++  Don’t get frustrated by the stickiness of the marshmallows,  just take your time!  And keep rewetting the knife in the hot water!   Enjoy!!!

Frightfully Delicious Halloween Bars with Candy Corn- My Yellow Farmhouse.com

Frightfully Delicious Halloween Bars with Candy Corn -myyellowfarmhouse.com

—-

Frightfully Delicious Halloween Bars with Candy Corn - myyellowfarmhouse.com

Frightfully Delicious Halloween Bars with Candy Corn myyellowfarmhouse.com

—-

Frightfully Delicious Halloween Bars with Candy Corn - myyellowfarmhouse.com (2)

++  Adapted from http://www.hersheys.com/recipes

Pizza Bread Swirls – with Pepperoni, Red Peppers, Onions and Mozzarella

Pizza Bread Swirls - myyellowfarmhouse.com

Great for dinner, a snack or as appetizers!!  

The days and nights are getting colder and it’s pretty cool right now inside My Yellow Farmhouse, so I simply placed my leftover Pizza Bread Swirls in a zip-lock bag and left them on the counter.  Those of you who, like me, sometimes eat pizza for breakfast will be happy to know these were still soft and delicious the next day.

A new recipe often starts as a small nugget of an idea which percolates in your head until you think, “I’ve Got It.”  Then, as people used to say, ‘The Proof is in the Pudding’ – meaning “What does the final product taste like”?  It’s great pleasure when the final product tastes even more delicious than you had imagined!

Ingredients

  • 1 1/2 to 1 1/3 lb. purchased pizza dough     ++ “A Little Help from My Friends” !
  • 1 Tbs. olive oil
  • 1 Tbs. olive oil
  • 1/2 cup onion
  • 1/2 cup red pepper
  • 4 Tbs. tomato paste  ++  I use ‘Hunts’ with basil, garlic and oregano
  • 1/2 tsp. Italian seasonings  ++  Oregano can be substituted but the flavor won’t be the same
  • 1 pkg. (6 oz.) sliced pepperoni  — DIVIDED – – 3/4 cup chopped — rest left in slices
  • 3 Tbs. grated Parmesan cheese
  • 1 pkg. (8 oz.) Whole Milk shredded Mozzarella
  • olive oil… to brush on stuffed & rolled bread
  • chopped fresh basil leaves – about 1 Tb. —-  to sprinkle on baked Pizza Bread Swirls

 ++   “How to” photos can be found at the end of the recipe    ++

Preheat oven to 375 F       Bake for 30 – 35 minutes      Yield – 12 Pizza Bread Swirls

Use a large cookie sheet lined with parchment paper     

  Method          

  Forming the Pizza Roll 

Remove pizza dough from packaging and place in a large bowl.  Spread 1 Tbs. olive oil on top of dough.  Flip dough over.  Cover with a dish towel (tea towel) and allow dough to come to room temperature, about an hour or so if you have the time.  It’s much, much easier to roll out pizza dough when it’s more elastic and pliable.

Meanwhile prepare filling;  pour 1 Tbs. olive oil in a medium skillet. Add 1/2 cup chopped onion and 1/2 cup chopped red pepper. Cook, stirring often, until veggies are softened.  Add 1/2 tsp. Italian seasonings, 4 Tbs. tomato paste with basil, garlic & oregano and 3/4 cup chopped pepperoni.  Cook, stirring, for 4 – 5 minutes.  Set aside.

Sprinkle a bit of flour on a dish towel.  ++ I like to spread the flour around with my hands so most of the surface is covered with flour – the dough sticks less!  Roll out dough until you have a rectangle approximately 12″ wide by 14″ long.   ++ I flip the dough over about half way through the rolling process so both sides are slightly covered in flour and the dough doesn’t stick to the dish cloth.  

Divide onion/red pepper/pepperoni filling approximately in half – spread filling evenly over dough.  Place rest of pepperoni slices evenly over filling.  Sprinkle with 3 Tbs. grated Parmesan cheese and entire (8 oz.) bag shredded Mozzarella cheese.

Beginning at one of the long ends of dough, roll dough towards opposite end.  ++ The roll doesn’t have to be super tight… just tight enough to hold together when you cut it into sections.

  Cutting and Baking the Swirls

Turn roll so seam is on the bottom.  Brush with some olive oil.  Cut roll in half – then cut each half into 5 pieces, which gives you 10 pieces total.  ++  Use a sharp knife and cut slowly with a downward sawing motion.  I did a rather rotten job of cutting the swirls into equal sizes but they were fine!!   ; o )

Using a spatula – or your hands (which I do) – place swirls on a large cookie sheet covered with parchment paper. Bake in at 375(F) for 30 – 35 minutes.  ++ To check if the swirls are done, use a fork & lift up the middle of one.  If looks cooked – they’re ready.  

Sprinkle with grated Parmesan cheese and some chopped fresh basil.  ++ I highly recommend using some fresh basil – it really adds a whole other level of flavor     Enjoy  !!

Pizza Bread Swirls - myyellowfarmhouse.com

Pizza Bread Swirls - myyellowfarmhouse.com

Pizza Bread Swirls - myyellowfarmhouse.com

Pizza Bread Swirls - myyellowfarmhouse.com

Pizza Bread Swirls - myyellowfarmhouse.comPizza Bread Swirls- myyellowfarmhouse.com

Pizza Bread Swirls - myyellowfarmhouse.comPizza Swirl Bread - myyellowfarmhouse.com.

Pizza Bread Swirls - myyellowfarmhouse.com

Pizza Swirl Bread - myyellowfarmhouse.com

Pizza Bread Swirls - myyellowfarmhouse.com

Cream Cheese and Chocolate Filled Monkey Bread (Uses a 9 x 13 pan)

Monkey Bread Bread Filled with Cream Cheese & Chocolate - myyellowfarmhouse.com (2)

These are so good you might want to ‘slap your own self ‘ in the head !!  

Cream Cheese and Chocolate Filled Monkey Bread is baked in a 9″ x 13″ pan.  Unlike typical monkey bread, there’s only one layer rather than several and the pieces are bigger.  Think of these as ‘cinnamon roll meets monkey bread’!

A friend of mine is in the hospital and I brought two plates of my monkey bread to share with the nurses. They gave it rave reviews and several blamed me for their lack of will-power.  (Actually, I didn’t do so well in the will power department myself.)

Oven at 350F  (175C)       Greased 9″ x 13″ pan

Bake for 35 minutes – or until top is golden and center biscuits are fully cooked.

    INGREDIENTS 

  • 2 (16 oz.) packages of LARGE biscuits, such as Pillsbury ‘Grands’ Biscuits, found in the dairy case

    Cream Cheese Filling

  • 2 ( 8 oz.) packages of cream cheese – softened
  • ½ tsp. almond extract
  • 1 ½ tsp. sugar
  • chocolate chips, such as Nestles    ++  You’ll need about 1/2 cup or more    ++  I recommend using dark chocolate 

    Chopped Nuts, White Sugar & Cinnamon  … to be sprinkled over filled biscuits

  • ½ cup chopped walnuts or pecans
  • ½ cup white sugar
  • 2 tsp. ground cinnamon

    Caramel Sauce

  • ½ cup (1 stick) butter – cut into cubes
  • ¾ cup PACKED brown sugar

METHOD      ++  See photos at bottom of post !

Open 2 packages of large refrigerated biscuits – allow to warm up a bit.  Soften 2 packages of cream cheese by bringing them to room temperature OR by microwaving each UNWRAPPED block of cream cheese on high for about 10 seconds.

In a medium bowl, beat softened cream cheese with ½ tsp. almond extract and 1 ½ tsp. white sugar until combined.

Place about a 1/2 cup dark chocolate chips in a small bowl.

Here’s how I formed the biscuits; take out four at a time.  Cut each biscuit in half.  Fold the cut halves together to form a circle.  (See photo below).  Using your palms, flatten each biscuit half until you have a 3″ circle.  Drop 2 heaping measuring teaspoons in the middle of each flattened biscuit and place several chocolate chips on top.   ++  I used about 4 for each, but next time I’m going to add more!! 

Bring the edges together to form something resembling a ball.  The shape does NOT matter, so don’t be fussy.  Place biscuit balls into a greased 9” x 13″.  Repeat….

++ I allowed the biscuits to rest a few minutes so the dough could rise a bit.  While dough is resting, sprinkle with 1/2 cup chopped walnuts or pecans.  In a small bowl mix ½ cup white sugar with 2 tsp. ground cinnamon.  Sprinkle sugar/cinnamon mixture over biscuits.

Place ½ cup (1 stick) butter, cut into cubes, and ¾ cup PACKED brown sugar in a small microwavable bowl.  Heat on high for 30 seconds.  Stir.  Heat for another 30 seconds.  Mix butter and brown sugar well with a fork or a whisk.  Pour over biscuits.

Bake in a 350F (175C) oven for 35 minutes.  Biscuits should be golden brown and center biscuits should be fully cooked.

Invert onto a serving platter…. it IS a bit tricky.  Immediately remove pan.  There will be bits of yummy melted brown sugar and butter left – scrape it out before it cools and put it in the nooks and crannies between the biscuits. (If no one is looking, you have my permission to just eat it!)  ; o )

++  If you don’t have a large enough serving platter, use a cookie sheet.   

Cream Cheese and Chocolate Filled Monkey Bread  is soooo good when eaten fresh from the oven – and I was pleasantly surprised to see how good these were a day later. Enjoy!

Monkey Bread Filled with Cream Cheese & Chocolate - myyellowfarmhouse.com

Monkey Bread Filled with Cream Cheese & Chocolate - myyellowfarmhouse.com (2)

– – –

Monkey Bread Filled with Cream Cheese and Chocolate - myyellowfarmhouse.com (3)

Monkey Bread Filled with Cream Cheese and Chocolate - myyellowfarmhouse.com

– – –

Monkey Bread Bread Filled with Cream Cheese & Chocolate - myyellowfarmhouse.com 2

Monkey Bread Bread Filled with Cream Cheese & Chocolate - myyellowfarmhouse.com (2)

– – –

Monkey Bread Filled with Cream Cheese and Chocolate - myyellowfarmhouse.

An Oldie but a Goody !! Old-Fashioned Apple Squares – Just in Time for Apple Picking Season

Old-Fashioned Apple Squares - - myyellowfarmhouse.com

The recipe for these ‘Old-Fashioned Apple Squares’ was one of the first recipes I ever posted – back in November of 2012.  There’s a ‘bumper crop’ of apples this year, so I thought I’d repost this once again. These apple squares are yummy!

– – – – – –

You know you’re getting o.l.d when the recipe you’re searching for is over 30 years old !! Imagine how pleasantly surprised I was when I actually found it – not filed under “bars” but filed under “apples” – but found, nevertheless!!

These apple squares (or bars) are even tastier than I remember!! They’re loaded with apples, nuts and raisins, and have a buttery, cinnamony goodness – so you can even eat them for breakfast!!

                                              MAKES ABOUT 24 SQUARES – or BARS

  • Oven at 350 F
  • Lightly grease a 9″ x !0″ pan
  • Bake 45 – 50 minutes, or until a knife inserted in the center comes out clean.

                                                                          INGREDIENTS

  • 2 tsp. vanilla
  • 1 cup sugar
  • 1/2 packed brown sugar
  • 2 eggs
  • 2 cups flour
  • 2 tsp baking soda
  • 2 tsp. cinnamon
  • 1 tsp. nutmeg
  • 1/2 tsp. salt
  • 4 cups roughly chopped peeled and cored apples
  • 1/2 cup walnuts, chopped
  • 1/2 raisins (Try the raisins even if you don’t always like raisins. They kind of “melt away” into the batter, and give the resulting bars a lovely sweetness and golden dark color.)

In a medium-sized bowl – using a mixer – cream together the vanilla, both sugars and 2 eggs until creamy and throughly mixed.

In a large bowl, mix together the flour, baking soda, cinnamon, salt & nutmeg. Add the creamed mixture to the dry mixture, and mix by hand until throughly blended.

Add the apples, walnuts and raisins – mix by hand until throughly blended

Pour into the greased pan, spreading with the spoon to get the mixture even.

Bake at 350 F for between 45 – 50 minutes.  When cooled, cut with a sharp knife. Enjoy!

Old-Fashioned Apple Squares - - myyellowfarmhouse.com

Chocolate ‘n Walnut Streusel Coffee Cake

 The ingredients for ‘Chocolate ‘n Walnut Streusel Coffee Cake’ are probably already in your cupboard. Plus, it’s quick and easy to prepare!

This recipe makes enough for breakfast or ‘tea time’, with a bit left-over for snacking …. any time of the day.  Coffee cake is not ‘just for breakfast anymore’! ++ YIELD –  approximately 12 pieces   Greased 9 x 9 pan    Oven at 350 F      Bake for 25 – 30 minutes

Ingredients

  • 1/3  to 1/2 cup chopped walnuts  ++ I like a LOT of nuts, so I added 1/2 cup.
  • 1 Tbs. cocoa powder
  • 1/4 cup packed brown sugar   ++ Packed means the brown sugar is pressed down in the measuring cup – not lightly spooned in.
  • 1/2 cup sugar
  • 2 Tbs. softened butter
  • 1 tsp. vanilla
  • 1 egg
  • 2 cups Bisquick baking mix  ++ I’ve included a recipe for making your own ‘baking mix’ at the end of this post.
  • 3/4 cup milk

small strainer - for coffee cake recipe++ I highly recommend putting a small amount of confectionery (icing) sugar in a strainer and then gently shaking it over the baked & cooled coffee cake. Not only will your coffee cake look nicer but the sugar adds a bit more sweetness. (‘Chocolate ‘n Walnut Streusel Coffee Cake’ isn’t overly sweet.)

Method

Combine 1/3  to 1/2 cup chopped walnuts, 1 Tbs. cocoa powder and 1/4 cup packed brown sugar in a small bowl.  Set aside. In a medium bowl beat 1/2 cup sugar, 2 Tbs. softened butter and 1 tsp. vanilla. Add egg and beat until fully combined. Add 1 (of the 2 cups) of Bisquick to sugar/butter/egg mixture and beat to combine. Add 1/2 the milk and beat to combine, scraping bowl occasionally. Repeat with remaining 1 cup of Bisquick and and rest of the milk.

Spoon half the batter into a greased 9′ x 9′ baking pan.  Sprinkle on the walnut/cocoa powder/brown sugar mixture.  Spoon remaining batter on top. Using a knife, swirl the batter to make a marble pattern.

1 - Chocolate-Walnut Streusel Coffee Cake - myyellowfarmhouse.com2 - Chocolate-Walnut Streusel Coffee Cake  myyellowfarmhouse.com

Spoon remaining batter on top. Using a knife, swirl the batter to make a marble pattern.

3 - Chocolate-Walnut Streusel Coffee Cake myyellowfarmhouse.com4 - Chocolate-Walnut Streusel Coffee Cake myyellowfarmhouse.com

Bake at 350F for 25 – 30 minutes. Check for doneness at 25 minutes by inserting a sharp knife into the center of the coffee cake.  If the knife comes out clean, your coffee cake is fully cooked.

5 - Chocolate-Walnut Streusel Coffee Cake  myyellowfarmhouse.com

Place baking pan on a wire rack to cool coffee cake a bit. ++ The coffee cake doesn’t have to be totally cool before you cut into it…. which is a BIG PLUS!!  (I am sooo bad – I ate three pieces in one go!  The coffee cake was warm, delicious and perfect with a glass of cold milk.)     ENJOY!!

6 - Chocolate-Walnut Streusel Coffee Cake  myyellowfarmhouse.com

– – – – – – – – –

SUBSTITUTE FOR ‘BISQUICK’ BAKING MIX

Yield 6 cups  /   Units US

Ingredients

• 6 cups all-purpose flour • 3 Tbs.baking powder • 2 Tbs. powdered sugar • 1 1/2 tsp. salt • 3⁄4 tsp. baking soda • • 9 Tbs. canola oil

Method

Whisk together 6 cups all-purpose flour, 3 Tbs. baking powder,  2 Tbs. powdered (icing) sugar, 1 1/2 tsp. salt and 3⁄4 tsp. baking soda. Using an electric mixer set on low, slowly mix in canola oil until no lumps remain and mixture is a uniform texture – about a minute.  Store in an airtight container. ++ Recipe for preparing substitute for Bisquick Baking Mix courtesy of – – http://www.food.com/recipe/original-bisquick-baking-mix-copycat-357101

What Happens When Arugula, Baby Spinach, Artichoke Hearts, Kalamata Olives & Parmesan Meet Bowtie Pasta – Creamy Caesar Pasta Salad !

This is NOT one of those Plain-Jane Pasta Salads! There’s tons of flavor from the artichoke hearts, Kalamata olives and Caesar dressing!

I attended a fun Kentucky Derby party yesterday.  Luckily the weather cooperated and it was lovely and sunny outside.  The guests were asked to bring a dish to share and I decided to make some type of salad.  Liking the looks of the Kale Caesar Pasta Salad in the May issue of Good Housekeeping magazine, I riffed off that – and ended up changing pretty much everything.  However, I did stick pretty close to their caesar dressing ingredients ’cause it’s easy and delicious.  (In fact, yesterday one guy returned three times for more of this salad. Now THAT’S a recommendation!!)

I used spinach and arugula instead of the kale called for in the original recipe.  I HIGHLY recommend being sure to add arugula – no matter what other greens you may decide to use!!  The slight peppery flavor of arugula is perfect combined with the artichoke hearts, Kalamata olives and red onion.

+ I know this isn’t a traditional Caesar Salad dressing but it’s not a good idea to eat raw eggs. +

++  Arugula, also known as salad or garden rocket, is one of the nutritious green leafy vegetables of Mediterranean origin.  In fact, when we lived in Malta, we could pick arugula in a meadow or the side of the road. And I believe the British simply call it ‘rocket’.  ++  The young leaves are tender and less peppery than those of a mature plant.

Ingredients
  • 1 (12 oz.) box Farfalle (bowtie) pasta, cooked according to directions –  drained and cooled.
  • 1 Tbs. olive oil
  • 1 tsp. salt
  • 6 Tbs. mayonnaise
  • 2 Tbs. fresh lemon juice
  • 1/3 freshly grated Parmesan
  • 1 Tbs. olive oil
  • 1 Tbs. milk
  • 1 clove garlic, minced
  • 1/2 tsp. salt
  • 1/2 tsp. pepper
  • 1 (5 oz.) bag spinach/arugula mix  ++  This is the first time I’ve found this mixture.  Otherwise, purchase spinach and mix with equal parts arugula.  
  • 1 (6 oz.) jar brined, PITTED Kalamata olive – drained
  • 1 (12 oz.) jar marinated artichoke hearts – drained and cut into bite-size pieces
  • 1/3 cup chopped red onion
Method

Cook Farfalle (bowtie) pasta according to package directions but add 1 Tbs. olive oil and 1 tsp. salt to cooking water.  ++ I recommend covering cooked, drained pasta once or twice with cold water to eliminate any heat.   ++ Be sure to drain pasta well.

In a small bowl whisk together 6 Tbs. mayonnaise, 2 Tbs. fresh lemon juice, 1/3 freshly grated Parmesan, 1 Tbs. olive oil, 1 Tbs. milk, 1 clove garlic, minced, 1/2 tsp. salt and 1/2 tsp. pepper.  Set aside.

Place 1 (5 oz.) bag spinach/arugula mix, 1 (6 oz.) jar brined, PITTED Kalamata olive – drained, 1 (12 oz.) jar marinated artichoke hearts – drained and 1/3 cup chopped red onion in a large salad bowl.

Add cooled cooked pasta.  Mix pasta with greens.  Pour the caesar dressing over all and mix to cover all your salad ingredients.  And that’s all there is to it – your Creamy Caesar Pasta Salad is ready.    ENJOY!!

 Spinach-Arugula Ceasar Pasta Salad with Artichoke Hearts etc  myyellowfarmhouse.com

‘S’Mores Cupcakes’ …. Buttery, Chocolatey, Marshmallow Goodness – No Frosting Needed !!

S'Mores Cupcakes - myyellowfarmhouse.com

These S’Mores Cupcakes are so rich and yummy that I found it very hard to wait ’til I’d finished taking photos so I could have one. (Actually…. I ate  two!!)  As you can see, the milk chocolate pieces on top of the cupcakes are melting. I just couldn’t wait!

I was pleasantly surprised how dense, moist and buttery the cupcakes turned out, and there’s the added yumminess of Marshmallow Fluff and Hershey Bars.  If you like S’Mores – you’re gonna LOVE these!!  In fact, I’d take one (or two) of these S’Mores Cupcakes over actual S’Mores anytime.

I actually baked a totally different recipe for S’Mores Cupcakes last week – but I did NOT like them at all.  So this time I tried something totally different – and something totally unexpected happened.  The Marshmallow Fluff slowly worked its way to the top of the cupcakes – while the milk chocolate chunks sunk to the bottom, which was actually perfect… albeit unplanned!

++ Recipe makes 12 cupcakes!   To make 24, double ingredients BUT do NOT double the salt.  Add 3/4 tsp. salt.
Ingredients
  • 12 paper cupcake tin liners
  • 1 cup graham crackers
  • 1 cup flour
  • 1 1/2 tsp. baking powder
  • 1/2 tsp. salt
  • 1/2 cup room-temperature butter
  • 1/2 cup sugar
  • 1/4 cup brown sugar   ++ NOT packed, just spooned into measuring cup
  • 2 large eggs
  • 1 tsp. vanilla extract
  • 3/4 cup milk  ++ I used 2 %
  • 12 heaping tsp. Marshmallow Fluff (marshmallow cream)
  • 4 Hershey bars total  – – 3 broken into pieces and 1 broken into rectangles to be placed on top.
  • ++ Any milk chocolate bar may be substituted for Hershey bars.
Method          Heat oven to 350F   Line 12-cup cupcake tin with paper liners

In medium bowl, whisk together 1 cup graham crackers, 1 cup flour, 1 1/2 tsp. baking powder and 1/2 tsp. salt.  Set aside.

In a large bowl, with mixer set at medium-high, beat butter, 1/2 cup sugar and 1/4 cup (NOT packed) brown sugar until light and fluffy – about 2 minutes.

Beat in two eggs – one at a time – then add 1 tsp. vanilla.   ++  Scrape sides of bowl if necessary.

++  I goofed and used a small bowl to beat the eggs & sugar etc.

S'Mores Cupcakes - myyellowfarmhouse.com

Reduce mixer speed to low.  Beginning with dry ingredients, alternate adding dry ingredients and milk to butter/sugar mixture.  Mix until just combined.  Mix in the broken up pieces of Hershey milk chocolate bars.

Put a heaping tablespoon of batter into each paper-lined section.  Place 1 heaping teaspoon Marshmallow Fluff (marshmallow cream) on top of batter – followed by 1 heaping tablespoon of batter.  ++  Divide cupcake batter evenly for best results.

3 - S'Mores Cupcakes - myyellowfarmhouse.com (2)3 - S'Mores Cupcakes - myyellowfarmhouse.com

+

Bake at 350F for 20 – 24 minutes.  ++  My cupcakes were ready in 20 minutes.  The marshmallow cream will have risen to the top and browned slightly.  These S’Mores Cupcakes are so moist they may not look done when they actually are. To test for doneness insert a toothpick, or sharp knife, into the center. If the toothpick comes out clean, the cupcakes are fully cooked.

5 - S'Mores Cupcakes - myyellowfarmhouse.com

Leave cupcakes in tin and allow to cool – on a wire rack – for 10 minutes.  Remove S’Mores Cupcakes  from tin and cool fully…. unless you’re like me and just can’t wait!  When cupcakes are fully cooled, place a rectangle of milk chocolate into the marshmallow topping.  ENJOY!!

Final - S'Mores Cupcakes - myyellowfarmhouse.com

++ Recipe inspired by ‘s’mores cupcakes’ – REALSIMPLE.com – –  July 2014

Balsamic, Honey, Soy Sauce & Garlic Marinated Chicken Thighs

Balsamic, Honey, Soy Sauce and Garlic Chicken

Balsamic, Honey, Soy Sauce and Garlic Marinated Chicken (thighs and breast) can be served at room temperature – perfect for a picnic or buffet !  Prefer to grill the chicken – the marinade will help keep the meat juicy.

You know, I’d never really cooked with balsamic vinegar until today – so this recipe is my very first time preparing anything with balsamic vinegar… and I’m seriously wondering What Took Me So Long?  (My son M. prepares a delicious pasta dish featuring a balsamic vinegar reduction and fresh asparagus.  I’m gonna have to ask him to do a Guest Post for me so I can share his excellent recipe.)

As with many things, the higher the price –  the better the product.  And so it is with balsamic vinegar.   I suggest buying a good quality vinegar, even if you have to pay more.  It will be worth it !  Here’s a link to Andrew Wheeler’s blog Serious Eats which provides some valuable information regarding balsamic vinegar.

http://www.seriouseats.com/2014/05/everything-you-need-to-know-guide-to-balsamic-vinegar.html

I used skinless chicken thighs today because, to me, the meat much more flavorful than chicken breast.  And don’t be put off by thinking you’ll be eating dark meat – chicken thigh is, pretty much, white meat!  If you prefer chicken breast, cut each piece in half.

For grilling, chicken pieces with the skin attached will help keep the meat from drying out – as will marinating the chicken.

small red heart

Oven at 400F          Bake chicken pieces for about 30 minutes. 

INGREDIENTS

  • 3 Tbs. balsamic vinegar
  • 2 Tbs. honey
  • 4 Tbs. soy sauce
  • 4 Tbs. olive oil
  • 2 – 3 Tbs. minced garlic     ++   I use 3 Tbs.because I LOVE garlic!
  • 3 Tbs. finely chopped fresh parsley   ++  I chop it and then freeze it in a ziploc bag.
  • a bit of freshly ground pepper
  • 8 chicken thighs – skin removed
  • Prefer Chicken Breasts?   4 large boneless chicken breasts – cut in half to equal 8 pieces
  • some toasted sesame seeds – perhaps 2 tsp. & some minced fresh parsley, to sprinkle over finished dish

METHOD

Place 3 Tbs. balsamic vinegar, 2 Tbs. honey, 4 Tbs. soy sauce, 4 Tbs. olive oil, 2 – 3 Tbs. minced garlic, 3 Tbs. finely chopped fresh parsley and a bit of freshly ground pepper into a gallon-sized ziplock bag.

Zip bag and shake bag to mix ingredients.  Add the chicken pieces.  Allow chicken to marinate for at least four hours – overnight is even better.

++ I recommend turning the bag a few times to ensure each piece of chicken gets to soak in the marinade.  ++  If possible, lie the bag down so all the chicken pieces are sitting in the marinade.

Line a baking sheet (cookie sheet with sides) with aluminum foil.  Place chicken pieces evenly on baking sheet and pour over ALL the marinade. Cook in preheated oven set at 400F for 30 minutes.

Once the chicken is thoroughly cooked, place it on a warmed platter.  Pour the marinade into a small saucepan and simmer until marinade is reduced and thoroughly heated through.  Pour marinade over chicken pieces.  Sprinkle with some toasted sesame seeds and minced fresh parsley.  Enjoy !!

++ Recipe inspired by ‘Beyond Kimchee’ – – – http://www.beyondkimchee.com/soy-balsamic-chicken-thighs-asparagus/ 

Balsamic, Honey, Soy Sauce and Garlic Chicken - myyellowfarmhouse.com

‘A Little Help from My Friends’ Ham, Chicken and Potato Bake

++ If you wish, this casserole can be prepared using just chicken or ham.  It could also be prepared with a few cans of drained tuna !!

Ham, Chicken and Potato Bake’ comes together quickly thanks to the use of frozen hash brown potatoes. (I like Potatoes O’Brien hash browns because they already include red pepper and onion.)  Thaw the potatoes in your microwave, allow to drain – and they’re ready to go.  No cooking and no peeling!

After scattering the potatoes on the bottom of a 9′ x 13′ casserole dish, chunks of cooked chicken and ham are added, along with sweet red pepper, mushrooms and a touch of garlic.  A quickly-prepared sauce is poured over all, followed by a sprinkling of three-cheese mix (Parmesan, Romano and Asiago) and some sliced almonds.  Bake the casserole at 350F for about for 50 – 60 minutes and get ready for some Good Eaten’ !!

INGREDIENTS         Bake in 350F oven for 50 – 60 minutes

  • 1 pkg (28 oz) frozen Potatoes O’Brien – thawed  — OR —  1 pkg. (32 oz.) frozen cubed hash browns – thawed
  • 2 cups cooked chicken cut into bite-sized pieces  ++ If you don’t happen to have cooked chicken, in a small covered skillet simmer 1 boneless chicken breast in 1/4 water or broth until fully cooked. Cut into bite-sized pieces.
  • 2 cups ham, cut into bite-sized pieces = (10 oz) ham steak      ++  Most hams are now water-injected…. If the ham seems ‘drippy’ place between paper towels and squeeze out some of the moisture.
  • 1 small pkg. (10 oz.) cremini  (or button) mushrooms, sliced       ++ If there are any specs of dirt on the mushrooms, wipe with a paper towel.  Do NOT wash under running water.  Mushrooms are like little sponges!
  • 1/4 cup chopped onion
  • 1/4 chopped sweet red pepper
  • 1 clove garlic, minced
  • 1 cup sour cream
  • 1 can condensed cream of chicken or mushroom soup, undiluted
  • 1 chicken bouillon cube, crumbled
  • 3/4 to 1 tsp. salt
  • 1/4 tsp. pepper
  • 1 tsp. chopped fresh parsley     ++  Fresh parsley can be chopped, then frozen in a small storage bag.  Simply break off what you need !!
  • 1 1/2 cups chicken broth
  • 1/2 cup sliced almonds
  • a bit of parsley – to sprinkle on top
  • paprika – to sprinkle on top for color

METHOD

Spread thawed Potatoes O’Brien evenly on the bottom of a 9′ x 13′ casserole.

Ham, Chicken and Potato Bake - www.myyellowfarmhouse.com (2)

Add cooked chicken and ham pieces.

Ham, Chicken and Potato Bake - myyellowfarmhouse.com

Place 1 Tbs. butter in a large skillet and cook sliced mushrooms, stirring, until mushrooms wilt.  Remove mushrooms and set aside while you cook the 1/4 chopped onion and 1/4 cup chopped sweet red pepper.  Cook onion and pepper until softened.  Add 1 clove minced garlic.  Continue to cook a minute more, until garlic softens.

Spread cooked mushrooms, onion, red pepper and garlic over ham and chicken.

Sauce – –  In a medium-sized bowl mix 1 cup sour cream, 1 can condensed cream of chicken (or mushroom soup), 1 chicken bouillon cube, crumbled, 3/4 to 1 tsp. salt, 1/4 tsp. pepper, 1 tsp. chopped fresh parsley and  1 1/2 cups chicken broth until well blended.  Pour over ingredients already in casserole.

Sprinkle with 2/3 cup three-cheese-blend   ++ Or any mixture of Parmesan and other cheeses.  Add 1/2 cup sliced almonds and a bit more chopped fresh parsley.  Sprinkle with some paprika.

Ham, Chicken and Potato Bake - - myyellowfarmhouse.com

Bake at 350F for 50 – 60 minutes – until sauce bubbles around edges of casserole.  Allow casserole to sit for 5 – 10 minutes and serve.  Enjoy!!

 Ham, Chicken and Potato Bake - www.myyellowfarmhouse.com

‘A Little Help from My Friends’ Chocolate Raspberry Cupcakes with Whipped Chocolate Frosting

Sweet Little ‘G’… who happens to be a big fan of Chocolate Raspberry Cupcakes.  (Notice she ate the ENTIRE cupcake…. but left the blueberries!)
Little G. - The Happy Chocolate Cupcake Eater
– – – – – –

I like to use the title ‘A Little Help from My Friends’ when a recipe utilizes prepared mixes etc.  With ‘A Little Help from My Friends’ you can whip up something delicious in very little time – yet the result tastes as if you’d ‘slaved away’ !!

My recipe for Chocolate Raspberry Cupcakes with Whipped Chocolate Frosting includes a chocolate cake mix prepared with raspberry jam.  Your friends and family will be surprised to learn the delicious chocolate frosting is simply whipped topping mixed with cocoa powder and vanilla.

For a more ‘adult taste, you can add some Chambord liqueur – OR – add a few tablespoons of dark rum.  As they say in New York City, “What’s not to like!?”

Today is Valentine’s Day and I plan to share some of my Chocolate Raspberry Cupcakes with Whipped Chocolate Frosting with friends as a special Valentine’s treat.   Happy Valentine’s Day to all of you.

INGREDIENTS  FOR CUPCAKES         Yield = 18 large cupcakes     For 24 cupcakes, fill  sections with less cake mix 
  • one Dark Chocolate cake mix… prepared according to directions
  • 1/4 cup seedless raspberry jam
  • +++  If adding Chambord or dark rum  – substitute 1/4 cup Chambord or dark rum for 1/4 cup of the water.  ++  Up to 1/2 cup Chambord or dark rum can be substituted for water.

Prepare Dark Chocolate cake mix according to directions – but remove 2 Tbs. water from the amount of water called for in the recipe.  Add 1/4 cup seedless raspberry jam. Mix cupcake batter on low to blend ingredients – then beat 2 minutes until batter is smooth. Line cupcake tins with cupcake liners OR lightly grease each section.  Fill each section 3/4s full.   Bake cupcakes according to package directions.  

++ I find it really helps to use a small measuring cup to scoop out the batter and fill the sections.

++  The cupcakes liners I used are called ‘Parchment Lotus Cups’.  They’re sold by ‘PaperChef’.

Remove cupcakes from baking pan and allow to cool on a rack for 20 – 25 minutes – or until cupcakes no longer feel warm.    ++  To test if cupcakes are done, insert a sharp knife or toothpick into the center. If knife or toothpick comes out clean – the cupcakes are ready.

INGREDIENTS FOR WHIPPED CHOCOLATE FROSTING
  • 2 (8 oz.) containers of ‘Cool Whip’ whipped topping
  • 6 Tbs. cocoa powder
  • 1 tsp. vanilla extract

Place 2 (8 oz.) containers of ‘Cool Whip’ whipped topping into a medium-sized bowl, along with 5 – 6 Tbs. cocoa powder and 1 tsp. vanilla extract in a medium-sized bowl. Mix with a large spoon until well-combined.     ++  A bit of confectionery/powdered/ icing sugar can be added if you wish.  Spread whipped frosting on cupcakes and that’s it.    Talk about ‘Quick, Easy and Good’    Enjoy!

Chocolate Raspberry Cupcakes with Whipped Chocolate Frosting - www.myyellowfarmhouse.com

“Khobz’ – Moroccan Bread ++ Quick & Easy ++ Dough only needs to rise once!

Khobz - Moroccan Bread - myyellowfarmhouse.com (2)

I purchased this beautifully hand-painted blue and white platter in Casablanca.  It’s one of my favorites!

I truly enjoy making different kinds of bread!  It amazes me how something so comforting and delicious comes out of playing around with some flour, salt and sugar etc.  It also amazes me how many different types of bread there are in the world. One of my favorite memories took place in India on New Year’s Eve years ago, where we saw men (fearless men!) slapping Naan onto the sides of a tandoor oven with their bare hands.

And, on a visit to Cairo, we saw women sitting on the ground cooking bread on large, flat stones.  That bread was, like Naan, a flat-bread but with a whole different – and wonderful – taste.

Egyptian Flat Bread - courtesy of Egyptian Food Recipes.com

++  Curious about ‘Breads of the World’ – here’s a great site!    http://en.wikipedia.org/wiki/List_of_breads

Interestingly enough, bread in Malta is called ‘Hobz’ (Ħobż Malti).  Ħobż Malti is dense, heavy bread which makes wonderful sandwiches.  Malta was ruled by Arabs for quite a long time, and the Maltese language contains many words derived from (or exactly the same as) Arabic.  So, it’s not too surprising that the Arabic word for bread is ‘Khobz’ and the Maltese word is Hobz.

When we lived in Malta I wrote a small book about the country’s long and varied history.  And let me tell you, Malta’s history, including rule by the Knights of St. John (better known today as The Knights of Malta) is fascinating!

Maltese Hobz -  courtesy of 'honeyandmustard.wordpress.com

One of the best sandwiches I’ve ever eaten is called Hobz Biz-zejt.  There are times when The Whole Equals More Than the Sum of It’s Parts and this is sure one of those times!!   Hobz Biz-zejt can be recreated with another type of crusty bread, but it just won’t be quite the same…   Here’s a link if you’d like to make these sandwiches at home.  (I just started following this blog!)

https://honeyandmustard.wordpress.com/2011/05/13/maltese-traditional-hobz-biz-zejt/

I know you’re going to enjoy Khobz.  It’s easy to make.  The recipe makes two loaves.  And – best of all – Khobz only needs one rising.

– – – –

INGREDIENTS      Oven at 435F      Bake for 20 minutes     ++ Switch position of baking sheets after first 10 minutes

  • 4 cups flour
  • 2  tsp. salt
  • 2 tsp. sugar
  • 1 Tbs. yeast
  • 2 Tbs. olive oil
  • 1 1/4 cups warm water   ++  Water should feel warmer than your skin.  Try pouring a bit on your wrist to check.  If the water’s too cold – or too hot – the yeast won’t work properly and the bread won’t rise. 
  • olive oil  – – to spread on baking sheets – and – to drizzle on bread both before and after baking

METHOD

Prepare 2 baking sheets by pouring 1/2 tsp. olive oil in the center of each baking sheet.  Spread oil, using fingers, to make a 5″ – 6″ circle .     ++ You can skip the olive oil and use cornmeal…. but, to me, cornmeal doesn’t seem very authentic. Place 4 cups flour, 2  tsp. salt and 2 tsp. sugar in a large bowl.  Stir to combine.

Make a well in the center.   Place 1 Tbs. yeast in the center.  Gently pour 2 Tbs. olive oil and 1 1/4 cups warm water into the well and mix together to dissolve yeast.  Then mix entire contents of bowl until flour mixture has been incorporated.     

++  It may seem, at first, like you’ll never be able to get all the flour incorporated – just work at it a bit and it’ll all come together!   

Turn dough out onto a floured surface. Knead dough for 10 minutes, adding a bit more flour if necessary.  After kneading for 10 minutes dough should be soft and pliable. ++  Here’s an excellent link to learn how to knead bread –   http://bread.wonderhowto.com/how-to/knead-bread-dough-by-hand-355638/ After dough is kneaded, form into a ball.

              Divide dough into halves.         .

Khobz - Moroccan Bread - - www.myyellowfarmhouse.com

Shape each portion into a smooth, circular mound.

khobz - Moroccan Bread - myyellowfarmhouse.com (4)

Place dough onto prepared baking sheets.  Cover with towels.  Allow to rest for 10 minutes.

Khobz - Moroccan Bread - myyellowfarmhouse.com

After 10 minutes, flatten dough using the palm your hand to form two – 7″ circles.

Khobz - Moroccan Bread - www.myyellowfarmhouse.com (3)

Once again, cover dough with towels. Allow dough to rise for an hour – or until dough springs back when pressed lightly with a finger.

Khobz - Moroccan Bread - myyellowfarmhouse.com

After dough has risen, poke here and there with a fork.  Drizzle on a bit of olive oil and spread with your fingers (which is what I do) or use a spoon.

Khobz - Moroccan Bread - www.myyellowfarmhouse.com (4)

++ Raise bottom oven rack up one level     Bake bread at 435F for 20 minutes – – rotating baking sheets halfway through cooking time (at the 10 minute mark). Loaves should be browned and sound hollow when tapped.    ++  Don’t be afraid to take bread out a minute or two early  – oven temperatures can vary widely.

Remove loaves from baking sheets and allow to cool on wire racks.  At this point I like to drizzle on more olive oil and spread it over the crust – because I think it makes most-any bread look better.   Enjoy !!

Khobz - Moroccan White Bread -- www.myyellowfarmhouse.com (3)

—-

  ‘Moroccan Chicken Tagine with Sweet Potatoes’ 

Moroccan Chicken Tagine with Sweet Potatoes and Dates - - myyellowfarmhous.com

https://myyellowfarmhouse.com/2015/02/03/moroccan-chicken-tangine-with-sweet-potatoes/

And, to complete your meal, how about ‘Couscous with Raisins and Pine Nuts’

Moroccan Chicken and Couscous - myyellowfarmhouse.com

  https://myyellowfarmhouse.com/2014/03/10/moroccan-chicken-couscous-with-raisins-and-slivered-almonds/ 

Moroccan Chicken Tagine with Sweet Potatoes (Does NOT have to be cooked in a tagine!)

Moroccan Chicken and Rice Pilaf - - myyellowfarmhouse.com

Moroccan Chicken and Sweet Potatoes -- myyellowfarmhouse.com

Today it snowed almost all day long, so it was a perfect day to prepare a dish which simmers away in the oven, filling your kitchen with the scent of cardamom, cinnamon, turmeric and ginger!

I’m not proud to say I actually received my beautiful tagine as a gift LAST Christmas.  (I’ve told you I’m a procrastinator..)  There’s no excuse for waiting so long to ‘try it out’. It’s not as if I don’t see the tangine every day, sitting and waiting patiently on the lower shelf of the buffet in my kitchen…

tangine - kitchen buffet - myyellowfarmhouse.com

Moroccan Chicken Tagine can be be cooked several different ways; 1. In a tangine – cooked in the oven.  2.  In a tangine, cooked on very low heat on top of the stove.  3.  In a covered casserole – cooked in the oven.  4.  In a large saucepan or Dutch Oven – either in the oven (if pan has heatproof handles) or on top of the stove.

Whichever way you chose to cook Moroccan Chicken Tagine, you’re in for a treat.  And, except for frying up the onions and garlic in a skillet, you have a one pot meal with no mess in the kitchen. If you’re lucky enough to have a tagine, you can proudly present your Moroccan meal served right from your tagine.                

++  Tagines, according to my research, range in size from 8″ to 16″.  Actually, mine is only 7″ across at the base but it’s deep, so I was able to able to put in 8 boneless & skinless chicken thighs, plus 2 large cut-up sweet potatoes.

++ Be sure to learn how to use your tagine if you’ve never cooked with one before!  (The terracotta ones need special care.)   ++ Here’s a link to a great website which we could call “All You Ever Wanted to Know About Tangines” !  http://moroccanfood.about.com/od/moroccanfood101/f/How-to-Use-Tagine.htm

Love Moroccan? Here’s another recipe – plus Couscous with Raisins and Sliced Almonds

Moroccan Chicken and Couscous - My Yellow Farmhouse.com

‘Never Fail’ Armenian Rice Pilaf

Moroccan Chicken and Rice Pilaf - - myyellowfarmhouse.com

++ Start tagine in a cold oven

++ Place oven rack at 2nd lowest level. 

INGREDIENTS       Oven at 325 (F)      Cook for 2 hours.   If cooking on top of stove in a saucepan or Dutch Oven, be sure to just ‘simmer’ the tangine.

  • 6 – 8 boneless/skinless chicken THIGHS
  • 2 – 3 medium sweet potatoes – peeled and cut into eighths.   ++  My tangine is small, so I only used 2 medium sweet potatoes.  They turned out soo yummy cooked this way that I plan to try to cram more in next time!! 
  •  2 Tbs. olive oil
  • 1 medium onion, sliced      ++  About 2 cups
  • 4 large cloves of garlic, minced or finely chopped   ++  Warm garlic cloves in microwave for 10 – 15 seconds, which helps remove papery covering on garlic cloves.
  • 1 tsp. ground ginger
  • 1 tsp. ground cinnamon
  • 1/2 tsp. ground turmeric
  • 1 tsp. ground coriander      ++  I used 1 tsp. minced fresh cilantro, which are the leaves of the same plant.  In fact, coriander comes from the seeds.
  • 1/4 to 1/2 tsp. chili powder
  • 1/4 tsp. cardamom
  • 1 tsp. salt
  • 1/4 tsp. freshly ground pepper
  • 1/4 cup chopped dates    (You can purchase chopped dates – BIG time saver!)
  • 1 cup HOT chicken broth    ++  Can also use 1 CUP HOT water and one bouillon cube.

METHOD

Arrange boneless/skinless chicken thighs in one layer on bottom of tagine.   ++  I folded the loose bits under, which looks a bit nicer and helps the chicken cook evenly.

Moroccan Chicken Tagine - www.myyellowfarmhouse.com

Put the following spices in a small dish or glass and set aside; 1/2 tsp. ground ginger, 1 tsp. ground cinnamon, 1/2 ground turmeric, 1 tsp. ground coriander (or 1 tsp. minced fresh cilantro), 1/4 to 1/2 tsp. chili powder, 1/4 tsp. cardamom, 1 tsp. salt and 1/4 tsp. freshly ground pepper.

Pour 2 Tbs. olive oil into a large skillet.  Add sliced onions and cook over medium heat until onions begin to brown a bit – between 5 to 6 minutes.

Add minced garlic.  Cook two to three minutes more, stirring occasionally.

Add the spices you’d set aside.  Stir to combine with the onions and garlic.  Cook one more minute, stirring.

Spread contents of skillet over chicken.

Moroccan Chicken Tangine - -  myyellowfarmhouse.com

Make one layer of the peeled and cut-up sweet potatoes.  Sprinkle 1/4 chopped dates over potatoes.  Pour 1 cup HOT broth over all.

Moroccan Chicken  Tangine - -www.myyellowfarmhouse.com

Cover on tagine.  Lower oven rack to second lowest level.  Place covered tagine in COLD oven.  Set temperature to 325F.

Cook for two hours.  ++  Chicken and sweet potatoes will be cooked after 1 1/2 hours but the extra 1/2 hour of cooking time REALLY makes the chicken thighs tender.  Enjoy !!

Moroccan Chicken and Rice Pilaf 2- - myyellowfarmhouse.com

Oven Baked Salmon with Crispy Topping ++ Can Be Prepared Gluten Free !

As you may know, I’m seriously ‘on a mission’ lately to eat more healthy and I’ve discovered eating healthy does NOT mean dining on meals that taste like cardboard!!

Just because I’m trying to eat better doesn’t mean I can’t indulge in the occasional treat, as I did yesterday when I lost my car key (it just dropped off the key chain….).  After searching the parking lot etc. I finally found it at my doctor’s office…. but that was AFTER I called AAA to open my car in the hopes the key had dropped off inside.  I ended up rewarding myself, after all that frustration, with a (not too big…) piece of carrot cake – and I enjoyed every single bite !!

– – – – 

++  If you prefer to prepare this “gluten-free” – just use gluten free corn flakes, such as Nature’s Path Organic. 

++  Corn itself is gluten free but many products containing corn, such as corn flakes, may have flour (wheat) in the ingredients.

++  Recipe makes enough for 4 people, depending upon the size of your piece of salmon.    ++  I prepared 1 piece of salmon and stored the extra topping in the fridge.

INGREDIENTS                Oven at 375 F           ++ Bake salmon for approximately 20 minutes

  • a bit of olive oil, to grease skillet….. about 2 tsp.
  • 4 pieces of salmon about 5″ long and 1/2″ in center    ++  Can be either with – or without – skin.
  • TOPPING
  • 1/2 tsp. garlic powder
  • 1/2 tsp. onion powder
  • 1/4 tsp. paprika
  • some freshly ground pepper
  • 2 cups corn flakes
  • 1/4 – 1/2 cup pine nuts      ++ I used 1/4 cup – – pine nuts are expensive!!
  • 1/4 cup freshly grated Parmesan cheese
  • a bit of fresh parsley         ++  optional

Preheat oven 375F

Put all the ingredients into a food processor.  Pulse into ground.

++  If you don’t have a food processor, put all topping ingredients in a ziplock bag and crush.

Oven Baked Crispy Salmon  with Crispy Topping  -  myyellowfarmhouse.com

Oven Baked Salmon with Crispy Topping  -  myyellowfarmhouse.com

+

Sprinkle between 1/4 to 1/3 cup of crumb mixture on each piece of salmon, pressing the crumbs into the fish a bit.     ++  Leftovers of crumb mixture can be stored in fridge !

Oven Baked Salmon with Srispy Topping - myyellowfarmhouse.com

Place salmon pieces on a broiler broiler  OR  on a rack, as shown above.

Bake in 375 F oven for 20 minutes, depending upon thickness of salmon.    ++  Salmon should be firm in the middle and look opaque. 

It does NOT get much easier than this. And – believe me, this Oven Baked Salmon with Crispy Topping is delicious.   Enjoy!!

Oven Baked Salmon with Crispy Topping - myyellowfarmhouse.com

Roasted Cauliflower and Red Pepper Gratin with Toasted Pine Nuts

++ This can be prepared GLUTEN FREE  !!

++  UPDATE – – EVEN BETTER WHEN MADE A DAY AHEAD !!      I just discovered that the next day the flavor of the roasted red peppers and cheddar cheese is infused throughout and the cauliflower is lovely & creamy !!  It tastes a lot like a very special version of Mac & Cheese.

It amazes me, now that I’m actually paying attention, how many fabulous recipes can be found which are healthy AND delicious.  Not only am I losing weight in my effort to eat healthy, I also have a lot more energy.  LOOK OUT WORLD !!

If you think you don’t like cauliflower, this may be the recipe to change your mind !  This is NOT your mother’s (or grandmother’s) ‘boiled all to hell’ cauliflower.  A light cheese sauce graces the roasted cauliflower with loads of flavor and there’s a tiny bit of heat from the cayenne pepper. And, except for garlic salt with herbs, there’s no salt in this recipe.  (This was my dinner last night, that’s how much I enjoyed this dish.)

INGREDIENTS

  • 7 cups cauliflower, cut into pieces 2″       ++ Uses 1 head of cauliflower, with perhaps a bit leftover
  • 1 red pepper, cut into 1/4′ strips
  • 1 – 2 Tbs. olive oil
  • 1 Tbs. flour      ++  For ‘Gluten-Free use 1 Tbs. cornstarch
  • 1/4 tsp. garlic salt with parsley      ++  Or garlic powder
  • 1/8 tsp. cayenne pepper
  • 1/4 tsp. salt-free seasoning      ++  I like ‘Mrs. Dash – Garlic & Herb’
  • 1/8 tsp. freshly ground pepper
  • 14 – 1/3 cup pine nuts       ++  a.k.a. pinola nuts        ++  You could also use walnuts or pecans
  • 2 Tbs. butter
  • 1 1/4 cups 2% milk      ++  I used 1% & that worked fine!
  • 1 1/4 grated Cheddar cheese

SET OVEN AT 425 (F)       TOTAL COOKING TIME – 25 MINUTES    (10 MINS, THEN 15 MINS.)                                           

Mix together cauliflower pieces, red pepper strips and 1 – 2 Tbs. olive oil.

Roasted Cauliflower Gratin with Toasted Pine Nuts

Spread vegetables evenly on baking sheet with sides.  

Roasted Cauliflower Gratin with Toasted Pine Nuts

Roast veggies in a 425 (F) oven for 10 minutes.  While cauliflower is roasting, toast pine nuts and prepare cheese sauce.

                                       Roasted Cauliflower and Red Pepper – After 10 Minutes

cooked -Roasted Cauliflower Gratin with Toasted Pine Nuts

TOASTED PINE NUTS  

In a small (ungreased) frying pan over medium heat toast pine nuts, shaking pan occasionally, until nuts become lightly browned.

CHEESE SAUCE

In a small bowl mix together 1 Tbs. flour  (For ‘Gluten-Free use 1 Tbs. cornstarch), 1/4 tsp. garlic salt with parsley, 1/8 tsp. cayenne pepper, 1/4 tsp. salt-free seasoning and 1/8 tsp. freshly ground pepper

Melt butter in a medium saucepan over medium heat.  Once butter is melted, add the flour and spices.  Whisk together and cook, stirring with whisk, for about a minute. 

Slowly add 1 1/4 cup milk and continue whisking until mixture is well blended.  Continue to simmer sauce for 4 – 5 minutes if using flour, whisking occasionally.  ++  If using cornstarch, the simmering time will be less.   ++  If sauce becomes too thick when using cornstarch, add a bit more milk.

REMOVE SAUCEPAN FROM HEAT.  Add 1 1/4 cup shredded cheese and whisk until cheese sauce is smooth.  Add toasted pine nuts.

Remove baking sheet from oven after 10 minutes.  Using a spatula, gently turn the partially cooked cauliflower and red pepper strips.  Drizzle cheese sauce slowly over veggies.

Return baking sheet to oven and roast for another 15 minutes, or until tops of cauliflower are nicely browned.  Serve & Enjoy !!

Roasted Cauliflower Gratin with Toasted Pine NutsRoasted Cauliflower Gratin with Toasted Pine Nuts

Nutty Oatmeal and Wholewheat Bread

Oatmeal and Wholewheat Bread - My Yellow Farmhouse.com

For Bread Machine directions, follow this link – https://myyellowfarmhouse.com/2015/01/22/nutty-oatmeal-wholewheat-bread-bread-machine-version/

– – – –

This is the latest recipe in my Eating Healthy series.  And I’m happy to say that after only a week of ‘eating healthy’ I’m back in my jeans – and I can actually sit here and work on this post without having to unzip them.  If I’m hungry, I eat.  I just watch what I eat.  Believe me – I have a long, long way to go weight-wise.  But I’m motivated and enjoying the process.

It took me two tries to get this recipe the way I wanted it… and it was definitely worth the effort.  Nutty Oatmeal & Wholewheat Bread has a delicious, nutty taste.  And it’s good for you! There’s a cup of oatmeal and a cup of wholewheat flour, plus a cup of regular bread flour (because I don’t like heavy bread).  I added 1 tablespoon of chia seeds, which are so very good for you – or – you could add some bran in place of the chia seeds.  I  also added 1/3 cup of chopped walnuts, which, like chocolate, make everything taste better.    ++ This bread makes wonderful toast!

small red heart

INGREDIENTS                    Makes One Loaf

  • 1 cup very warm water
  • 2 1/4 tsp. active dry yeast
  • 2 Tbs. honey            ++  Or brown sugar
  • 1 1/4 tsp. salt
  • 2 Tbs. butter             ++  Or Olive oil
  • 1 cup quick-cooking oats
  • 1 cup wholewheat flour
  • 1 cup flour      ++  In the United States, bread flour is different than regular flour.  In Canada, regular flour has the same qualities as bread flour.  I use bread flour but this recipe works with either.
  • 2 pinches nutmeg
  • OPTIONAL    –    1 Tbs. Chia seeds    ++  Or wheat germ
  • OPTIONAL    –    1/3 cup chopped walnuts  ++  Walnuts will be added once dough has been kneaded a while.

METHOD

3 - Nutty Oatmeal and Wholewheat Bread - My Yellow Farmhouse.com (3)

Measure 1 cup very warm water.    ++  The water should feel warm on your wrist – not hot.  Too hot and you kill the yeast.  Too cold, and the yeast just sits there. 

Add 2 Tbs. honey and stir briefly.  Add 2 1/4 tsp. active dry yeast.  Again stir briefly.  I’ve never seen directions to ‘stir’… it’s just what I do.)

Allow water, honey and yeast to sit for 15 minutes.

++  I usually give the mixture a little stir after about 7 minutes.

++  During cold weather you may want to place the measuring cup somewhere out of drafts.  I use my microwave!

After 15 minutes the water, honey and yeast should’ve bubbled up to resemble the photo above.  ++ If it does NOT – your water may have been too cold or too hot – or – your yeast may not be good anymore.  Just dump the contents out and try it again.  DO NOT GIVE UP!  The first bread I made was heavy as a brick!!

++  The quality of yeast goes down the longer you have it.  Use ‘6 months’ as your guide for when it’s time to discard it BUT your bread won’t fail if the yeast is older.  Your bread will just not rise quite as much and will have less flavor.  (I buy small jars of yeast but the same applies to packets.)

Pour the liquid into a medium-sized bowl.  Add 1 1/4 tsp. salt, 2 Tbs. butter, 1 cup quick-cooking oats, 1 cup wholewheat flour, 1 cup flour (see note above), 1 Tbs. Chia seeds and 2 pinches nutmeg.  ++  You’ll be adding the walnuts a bit later.

Using your hands (or a large spoon if you wish) mix the ingredients until combined, which should only take about a minute.

KNEADING THE DOUGH

Place dough on lightly floured work surface.  ++  I usually use a ‘tea towel’ (a.k.a. ‘dish towel) but this dough is a bit sticky, just I just used the counter.

Knead dough about 5 minutes.  ++  To knead dough, push away from you with the palm of your hand, turn dough, fold over and repeat. If dough is too sticky, add a bit more flour.

++ Now add 1/3 chopped walnuts and knead just until walnuts are incorporated.  Form dough into a ball.

++  Here’s an excellent link to learn how to knead bread –  http://bread.wonderhowto.com/how-to/knead-bread-dough-by-hand-355638/

Dough After Kneading

6 -  Nutty Oatmeal and Wholewheat Bread - My Yellow Farmhouse.com (5)

ALLOWING THE DOUGH TO ‘RISE’    

8 - Nutty Oatmeal and Wholewheat Bread - My Yellow Farmhouse.com (7)

After dough has been kneaded, place it in a greased bowl.  Turn dough over to grease top.  Cover bowl with a dish towel or plastic wrap.  Let rise in warm place for 30 to 40 minutes, or until double in size. 

++ During cold weather, place a 10′ x 13′ pan half-full of VERY HOT water on the bottom rack. of your oven.  Place the covered bowl containing the dough on the top rack.

7 - Nutty Oatmeal and Wholewheat Bread - My Yellow Farmhouse.com

ALLOWING THE DOUGH TO RISE A 2nd TIME

Once dough has risen, you’re going to ‘punch it down’, which seems pretty counter-intuitive…but allowing the dough rise a 2nd time will make the bread much lighter.  ++  If you like dense bread – then just skip this step!

Cover bowl with dishtowel and repeat step above for rising the dough.  Again – allow to rise for 30 – 40 minutes or until double in size.

 FORMING THE DOUGH  –  This is fun and easy!!

9 - Nutty Oatmeal and Wholewheat Bread - My Yellow Farmhouse.com (8)

10 - Nutty Oatmeal and Wholewheat Bread - My Yellow Farmhouse.com (9)

Remove dough from bowl.  Place on a lightly floured surface.  Using fingers, press dough into an 8′ x 12′ rectangle.  Beginning at short end, roll up tightly.  Place in a greased (I use olive oil) 9′ x 5′ loaf pan.

Bake in a 375 (F) oven for 35 – 40 minutes.  Allow the Nutty Oatmeal and Wholewheat Bread a few minutes to cool off due to the denseness of the bread…. that is….if you can wait.  (I didn’t!)     Enjoy!

2 - Nutty Oatmeal and Wholewheat Bread - My Yellow Farmhouse

Nutty Oatmeal & Wholewheat Bread – Bread Machine Version

2 - Nutty Oatmeal and Wholewheat Bread - My Yellow Farmhouse

Follow this link for Nutty Oatmeal and Wholewheat Bread made without a bread machine –   http://myyellowfrmhouse.com/2015/01/22/nutty-oatmeal-and-wholewheat-bread/

This is the latest recipe in my Eating Healthy series.  And I’m happy to say that after only a week of ‘eating healthy’ I’m back in my jeans – and I can actually sit here and work on this post without having to unzip them.  If I’m hungry, I eat.  I just watch what I eat.  Believe me – I have a long, long way to go weight-wise.  But I’m motivated and enjoying the process.

It took me two tries to get this recipe the way I wanted it… and it was definitely worth the effort.  Nutty Oatmeal & Wholewheat Bread has a delicious, nutty taste.  And it’s good for you! There’s a cup of oatmeal and a cup of wholewheat flour, plus a cup of regular bread flour (because I don’t like heavy bread).  I added 1 tablespoon of chia seeds, which are so very good for you – or – you could add some bran in place of the chia seeds.  I  also added 1/3 cup of chopped walnuts, which, like chocolate, make everything taste better.    ++ This bread makes wonderful toast!

small red heart

INGREDIENTS        ++  According to my bread machine directions, this is the order of the ingredients as they’re put into the bread machine.  Check the directions for your bread machine, just in case they differ.

  • 1 cup warm water
  • 2 Tbs. honey            ++  Or brown sugar
  • 1 1/4 tsp. salt
  • 2 Tbs. butter             ++  Or Olive oil
  • 1 cup quick-cooking oats
  • 1 cup wholewheat flour
  • 1 cup bread flour      ++  In the United States, bread flour is different than regular flour.  In Canada, regular flour has the same qualities as bread flour.  Follow your manufacturer’s directions.
  • 1 Tbs. Chia seeds    ++  Or wheat germ
  • 2 pinches nutmeg
  • 2 1/4 tsp.active dry yeast  ++  I use Bread Machine yeast but regular yeast may be used
  • 1/3 cup chopped walnuts   ++  The walnuts should be added during your machine’s ‘add’ cycle, which is part way through the kneading process.  Your machine should give you a signal.  If not, add the walnuts after machine has had time to knead the dough for awhile.


use - Nutty Oatmeal and Wholewheat Bread - My Yellow Farmhouse.com (2)

Set bread machine on ‘grain’ cycle.   ++  Your machine’s grain cycle will allow for the bread to rise twice, which gives the bread a lighter texture.  Enjoy !!

++  This step is NOT necessary but if you want a darker, crisper crust, up-end your baked bread into a 9’x 9′ square pan.  Remove bread machine pan from bread.  Turn bread over so crust side faces up.  Place in a 400′ oven for 5 – 6 minutes. 

Oatmeal and Wholewheat Bread - My Yellow Farmhouse.com

Herbed Blackened Salmon Fillets

You know you’re in trouble when you can’t zip your jeans !!  And you know you’re in trouble when your doctor tells you that you’ve gained 13 pounds in three months !!  POSSIBLE REASONS FOR THIS WEIGHT GAIN.  1. Trip to ‘all-inclusive’ resort in Cancun in October.   2.  Holiday Eating… beginning with Thanksgiving and ending with a two-week trip to Florida during Christmas and the New Year.   3.  Copious amounts of cooking during said trip, which meant copious amounts of eating – not to mention copious amounts of white wine and just lazing around like a nice, warm happy slug in the sunshine.  Oh, I forgot to mention Margaritas in both Mexico and Florida… yes… copious amounts!

I refuse give in and buy new jeans, so I’ve decided to begin taking care of myself and eating right. My guideline for this new endeavor is the Mayo Clinic’s ‘Dash Diet Program’ which is NOT a diet.  Rather, it’s an excellent guide to eating well.  And by eating well you lose weight, have more energy and also lower your blood pressure and possibly your cholesterol.

Herbed Blackened Salmon Fillets is the first of several posts which will feature delicious, healthy recipes.  I do hope you come along on this new journey with me.  If you’re already eating healthy, you might find a few new ideas.  Or, if you’re like me and need to lose some weight to improve your life, you may discover recipes to inspire you.  ++ I’ll keep you all informed as to my ‘progress’ with the too-small jeans!

1 - Herbed Blackened Salmon - My Yellow Farmhouse.com

2 - organic salmon steak - courtesy of Graig Farm -

Salmon Fillet = uneven thickness                           Salmon Steaks = even throughout.

INGREDIENTS            ++ Enough salmon for 2 servings

  • 1 lb. salmon fillet   OR   1 lb. salmon steak
  •           Blackening Seasoning
  • 1/4  to  1/8 tsp. cayenne pepper
  • 1/4 tsp. freshly ground pepper
  • 3/4 tsp. paprika
  • 1/2 tsp. Mrs. Dash ‘Garlic & Herbs’    ++  Contains no salt !
  • 1/2  tsp. Italian Seasoning

3 - Blackened Salmon - My Yellow Farmhouse.com

METHOD

Rinse salmon and pat dry with paper towels.  Place salmon on a plate.  In a small bowl, mix blackening seasoning  ingredients .

++ For salmon fillet with skin on one side, rub blackening seasoning on the flesh side of the fillet only.   (You won’t need all the seasoning.)       ++ Allow fish to rest for 10 minutes.

++  For skinless salmon fillet  OR  salmon steak, rub 1/2 the blackening seasoning on one side of fish.  Repeat on other side.                      ++ Allow fish to rest for 10 minutes.

Drizzle about 2 Tbs. olive oil in large, heavy skillet. Heat skillet over medium-high heat.  (Skillet is hot enough when a bit of water, sprinkled onto heated skillet, ‘dances’.)

Lower heat to medium.

4 - possible - Salmon (2)

++  For Salmon Fillet

  • Place salmon fillet, skin side down, in center of heated skillet.
  • Cook for about 3 minutes, depending upon thickness of fillet.   ++ Cooked skin should peel right off !!
  • Flip fish and continue cooking for another  3 minutes or so.

++  Cooking time will depend upon the thickness of the fillet.  My fillet was rather thin, so I cooked it for 3 minutes on the first side and only 2 minutes on the second side.

++ Cooked salmon will be lighter in color and should look opaque.  Use your best judgement.  It’s actually better to undercook fish slightly than to overcook it.

++  For Salmon Steak

  • Place salmon steak in center of heated skillet.
  • Due to the thicker nature of salmon steaks, they take just a bit longer to cook.
  • Turn the fish when the bottom half looks opaque.
  • Continue cooking another 5 – 8 minutes.

++  Cooking time will depend upon the thickness of the salmon steak.

++  Cooked salmon will be lighter in color and should look opaque.  Use your best judgement.  It’s actually better to undercook fish slightly than to overcook it !

Herbed Blackened Salmon - My Yellow Farmhouse.com.

Recipe adapted from ‘The DASH Diet for Beginners’.

Photo of organic salmon steak courtesy of ‘Graig Farm’.

Green Beans with Browned Butter and Sesame Seeds – Browned Butter Can Be Prepared Ahead !

++  The prep work for this recipe can be done one night before – or earlier in the day.  ++

Green Beans with Browned Butter and Sesame Seeds is the last recipe in a series of 6 ‘make ahead’ recipes, all of which can be prepared – or prepped – a day or two ahead, which will help to make your busy life a bit easier!  By preparing a few dishes each night for two nights, all you’ll need to do the day of The Big Feast is roast the turkey, make the gravy and cook the green beans.

I’ve been preparing green beans this way for a few years but today it was a bit different as I had to list amounts and cooking times – I usually just ‘wing it’.  Guests often ask, “How did you make these beans?”  Well, now they know!

Everything was very casual the night of the ‘taste testing’.

Make Ahead Thanksgiving Dinner - My Yellow Farmhouse.com

My Yellow Farmhouse.com - Make-Ahead Turkey Dinner

  MENU

  • Mashed Potatoes with Sour Cream and Chives

https://myyellowfarmhouse.com/2014/11/13/make-ahead-turkey-dinner-recipe-no-1-mashed-potatoes-with-sour-cream-and-chives/

  • Sweet Potatoes with Cinnamon, Nutmeg and a Dash of Bourbon

https://myyellowfarmhouse.com/2014/11/15/make-ahead-turkey-dinner-recipe-no-2-sweet-potatoes-with-cinnamon-nutmeg-and-a-splash-of-brandy/

  • Herb Stuffing with Baby Bella Mushrooms, Celery and Onions

https://myyellowfarmhouse.com/2014/11/15/make-ahead-turkey-dinner-recipe-no-3-herb-stuffing-with-baby-bella-mushrooms/

  • Green Beans with Browned Butter and Sesame Seeds
  • Turkey Breast (or Turkey) with White Wine, Oranges  & + Savory Turkey Gravy

https://myyellowfarmhouse.com/2014/11/17/make-ahead-turkey-dinner-recipes-no-4-5-roasted-turkey-breast-or-whole-turkey-with-white-wine-oranges-and-apples-savory-turkey-gravy/

  • Bonus Recipe – Homemade Whole-Berry Cranberry Sauce with Apple and a Hint of Cinnamon

https://myyellowfarmhouse.com/2014/11/20/homemade-whole-berry-cranberry-sauce-with-apple-and-a-hint-of-cinnamon/

– – –

++ The amount of beans shown here should serve between 5 – 6 people, depending upon how many other sides dishes you’re serving.  I figure approximately a handful of fresh beans for each guest… but I have small hands, so this ‘method’ might not work for you! 

++ If you’re having lots and lots of guests and need to cook more beans, just double or triple the browned butter.  But remember, the cooking time for the beans will be a bit longer.

Ingredients and Method 

  • fresh green beans, rinsed  –  ends snapped       ++ You don’t have to snap both ends… although I usually do.
  • 1/2 cup water
  • 2 Tbs. butter
  • 1/8 tsp. Mrs. Dash ‘Garlic & Herb’ seasoning
  • 1/4 tsp, salt
  • 1 Tbs. sesame seeds

Rinse beans and snap off ends.  Snap beans in half if they’re are overly large.  (This step can be done either the night before or earlier in the day, just place the beans in a plastic zip lock bag and refrigerate.)

Greeen Beans with Browned Butter and Sesame Seeds - My Yellow Farmhouse.comGreen Beans with Browned Butter and Sesame Seeds - My Yellow Farmhouse.com

Place beans and 1/2 cup water into a large skillet with a cover.  Bring water to a boil.  Cover and allow to cook at a light boil for between 10 -12 minutes.  ++  Beans will not be fully cooked at this point.

Green Beans with Browned Butter and Sesame Seeds - My Yellow Farmhouse.comWhile beans are cooking (or the night before/earlier in the day) prepare the Browned Butter, which only takes about 5 minutes!

Place 2 Tbs. butter, 1/8 tsp. Mrs. Dash ‘Garlic & Herb’ seasoning and 1/4 tsp, salt in a small pan over medium heat.  It’s not necessary to stir the butter but you do have to watch it carefully !  After several minutes the butter will have foamed up considerably. Remove pan from heat and add 1 Tbs. sesame seeds.  Set browned butter aside until beans are fully cooked.

++  If you prepared the browned butter the night before (or earlier in the day) remove it from the refrigerator and rewarm in the microwave before adding it to the cooked beans.

Remove cover from skillet.  Lower heat a bit.  Continue cooking for another 5 – 6 minutes, stirring every once in a while.   ++ Any remaining water will gradually evaporate, which helps the browned butter to stick to the beans.    ++  Be sure not to overcook the beans – you want them crisp-tender!!

Add your prepared browned butter to the beans, mix well and serve.    Easy and delicious!

Happy Holidays to All – Enjoy !

Prepare Ahead Green Beans with Browned Butter and Sesame SeedsMake Ahead Turkey Dinner - My Yellow Farmhouse.com

‘Not Your Grandmother’s’ Bread Pudding

Although I used Panettone to make my bread pudding, any type of dense bread can be used.

Panetonni -cortinasitalianfood.comLast night I remembered I had some chocolate chip Panettone (bread) leftover from Christmas. Before you become alarmed, Panettone remains fresh for quite a while, especially when refrigerated.  ++ Photo courtesy of Cortina’s Italian Food.com

Lately I’ve been in the mood for some good, old-fashioned bread pudding and I thought, “Hmm, how about making a totally new version using Panettone, with the addition of cream cheese for extra richness?”  Happily, my idea resulted in a creamy, rich dessert that’s easy to make.  (My ‘taste testers’ gave this recipe a big thumbs up!)

++ Recipe can be easily doubled – use a 1 1/2 quart baking dish or casserole and up baking time to 55 – 60+ minutes.      See tip below for testing if bread pudding is fully cooked.

           Ingredients          Oven at 350F         Makes 10 pieces 

  • 3 cups dense bread – such as Panettone – cut into 2′ squares      ++ cups should be a bit over-full
  • 2 eggs
  • 1/2 cup condensed milk
  • 1/2 cup water
  • 2 pinches nutmeg
  • 1/4 tsp. vanilla
  • 1/2 package cream cheese
  • ++  Optional —- IF NOT USING PANETONNE add about 1/8 cup chocolate chips & a few gratings of orange peel.

Not Your Grandmother's Bread Pudding - myellowfarmhouse.com

Cut bread into thick slices – cut slices into 2′ squares.   ++ You don’t have to be fussy about how you cut up the bread.   Place cubed bread into a greased loaf pan.

In a medium bowl, whisk together 2 eggs, 1/2 cup condensed milk, 1/2 cup water, 2 pinches nutmeg & 1/4 tsp. vanilla.  Pour over bread squares.

Cut – or pull off – small pieces of cream cheese and drop on top of the bread/milk mixture.  Mix everything together and allow to sit for a few minutes so bread can absorb liquid.   Place loaf pan in large pan or large casserole containing 1′ of hot water.

USE -Not Your Grandmother's Bread Pudding - myyellowfarmhouse.com

Bake at 350F  for 45 minutes – or until a knife inserted 1/2′ into pudding comes out clean.  Bread pudding should be puffed and dry-looking on the top.

Not Your Grandmother's Bread Pudding - myyellowfarmhouse.com

‘Not Your Grandmother’s’ Bread Pudding is delicious eaten warm or cold.  And it’s so rich there’s actually no need for special toppings but it sure is good with fudge sauce!!

Not Your Mother's Bread Pudding - myyellowfarmhouse.com

Homemade Chocolate Truffles

++ Recipe adapted from Family Circle magazine, Feb. 2013

I recently returned from spending a week at our home in the Pocono mountains. While there I was determined to prepare a few things for my blog as I hadn’t posted anything in several weeks.

                      We had a bit of snow – not too much.  But it sure was c.o.l.d. !!

pocono house - jan 2014

++ UPDATE – These Homemade Chocolate Truffles were a big hit.  A limit had to be set on the amount of truffles eaten at one time so the children wouldn’t eat them all !

Cooking, when you don’t have all your usual ‘stuff’, can be a real challenge.  The original recipe for these truffles calls for a food processor – which we don’t happen have at the Pocono house. So, I decided, seeing as I was ‘sans food processor’, to use a hammer and a zip lock bag to ‘bust up’ the chocolate – and I made the truffles in a large saucepan. Luckily, my efforts resulted in some creamy and delicious truffles!!

small red heart

To make these truffles WITHOUT a food processor, scroll farther down…


ORIGINAL DIRECTIONS – USES A FOOD PROCESSOR  

  Truffles - myyellowfarmhouse.com

Truffles - My Yellow Farmhouse
On left, 6 oz. semi-sweet chocolate.  On right, 8 oz. bittersweet chocolate.

INGREDIENTS

  • 8″ square pan, lined with foil
  • large cookie sheet, lined with waxed paper (Or a large tray.)
  • 6 ounces semi-sweet chocolate   (I use Baker’s, which comes in 4 oz. boxes. You can find it in the baking aisle.  Buy 2 boxes but you’ll only need half of the 2nd one.)
  • 8 ounces bittersweet chocolate (You’ll need 2 full boxes.)
  • 2/3 cup heavy (whipping) cream   (Full Cream)
  • 2 Tbs. coffee liqueur
  • 2/3 cup confectioner’s sugar  (Icing Sugar)
  • 1/4 tsp salt
  • FOR ROLLING THE FINISHED TRUFFLES IN:
  • 1/3 cup cocoa powder – mixed with 1 Tbs. confectioner’s sugar    ++ You do NOT have to add the confectioner’s sugar. I just don’t like truffles rolled in plain cocoa powder, although that’s how truffles are usually sold. 
  • 1/3 cup confectioner’s sugar   ++ Another option to roll the truffles in.

METHOD

++ Line a 8″ square pan with aluminum foil.

++ Line a cookie sheet or a tray with waxed paper.

Add 6 oz. semi-sweet chocolate, 8 ounces bittersweet chocolate, 2/3 cup confectioner’s sugar and 1/4 tsp. salt to food processor. Whirl 1 – 2 minutes until ground. Set aside.

In a medium saucepan using medium heat, warm 2/3 cup heavy cream and 2 Tbs. coffee liqueur just to a simmer.

Truffles - myyellowfarmhouse.com

With food processor running, add cream mixture in a steady stream. Process until smooth.

Scrape into pan. Chill for 1 1/2 hours.

truffles - myyellowfarmhouse.com

Lift chocolate from pan using aluminum foil. Cut into 36 pieces.

truffles - myyellowfarmhouse.com

Shape into balls. ++  Allow chocolate to warm up a bit – makes it easier to roll.  Place chocolate balls on a wax-paper lined sheet or tray.

Truffles - My Yellow Farmhouse.com

Roll truffles in 1/3 cup cocoa powder mixed with 1 Tbs. confectioner’s sugar OR plain cocoa powder OR just plain confectioner’s sugar.

Truffles - myyellowfarmhouse.com

Truffles can be stored in an airtight container for up to a month, not that these will last that long.  Enjoy !

Truffles - My Yellow Farmhouse

= = = = =

Directions for making these truffles WITHOUT a food processor.

Truffles - myyellowfarmhouse.com

Truffles - My Yellow Farmhouse
On left, 6 oz. semi-sweet chocolate.  On right, 8 oz. bittersweet chocolate.

On left, 6 oz. semi-sweet chocolate.  On right, 8 oz. bittersweet chocolate.

  • 8″ square pan, lined with foil
  • large cookie sheet, lined with waxed paper (Or a large tray.)
  • 6 ounces semi-sweet chocolate   (I use Baker’s, which comes in 4 oz. boxes. You can find it in the baking aisle.  Buy 2 boxes but you’ll only need half of the 2nd one.)
  • 8 ounces bittersweet chocolate (You’ll need 2 full boxes.)
  • 2/3 cup heavy (whipping) cream   (Full Cream)
  • 2 Tbs. coffee liqueur
  • 2/3 cup confectioner’s sugar  (Icing Sugar)
  • 1/4 tsp salt
  • FOR ROLLING THE FINISHED TRUFFLES IN:
  • 1/3 cup cocoa powder – mixed with 1 Tbs. confectioner’s sugar    ++ You do NOT have to add the confectioner’s sugar. I just don’t like truffles rolled in plain cocoa powder, although that’s how truffles are usually sold. 
  • 1/3 cup confectioner’s sugar   ++ Another option to roll the truffles in.

++ Line a 8″ square pan with aluminum foil.

++ Line a cookie sheet or a tray with waxed paper.

Method

Break the 6 ounces of semi-sweet chocolate and the 8 ounces of bittersweet chocolate into pieces. Place the broken up chocolate in a zip lock bag and break up the chocolate further by using a meat tenderizer, a can, a hammer or anything else you can think of, like a rolling pin. Set aside.  ++ I got the chocolate into smaller pieces by using the NutriBullet I use to make smoothies. However, it’s not necessary to have the chocolate pieces this small because they’ll melt when added to the warm cream/liqueur mixture.

Truffles - myyellowfarmhouse.com

In a large saucepan, over medium heat, warm 2/3 cup heavy cream and 2 Tbs. coffee liqueur – just until it comes to a simmer.

Truffles - myyellowfarmhouse.com

Raise heat slightly. Add chocolate pieces, 1/4 tsp. salt and 2/3 cup confectioner’s sugar. Stir slowly until chocolate is melted and mixture comes to a boil.

Truffles - myyellowfarmhouse.com

Remove pan from heat and allow mixture to cool for about 5 minutes. Then, using a large mixing spoon, beat the chocolate pretty hard for about 30 seconds.

Scrape into an 8′ pan which has been lined with foil. Refrigerate for 1 1/2 hours.

truffles - myyellowfarmhouse.com

Lift chocolate from pan using the aluminum foil. Cut into 36 pieces. (Another adaption – we only had a round cake pan, so my pieces were uneven. But I worked it out!)

truffles - myyellowfarmhouse.com

Shape chocolate into small balls about 1″ across.  ++  Allow chocolate to warm up a bit – makes it easier to roll.  Place chocolate balls on a wax-paper lined sheet or tray.

Truffles - My Yellow Farmhouse.com

Roll truffles in 1/3 cup cocoa powder mixed with 1 Tbs. confectioner’s sugar OR plain cocoa powder OR just plain confectioner’s sugar.

Truffles - myyellowfarmhouse.com

Truffles can be stored in an airtight container for up to a month, not that they’ll last that long. Enjoy!                     Truffles - My Yellow Farmhouse

‘The Popover Experiment’ – Recipe No. 2. Popovers are a bit higher & insides are slightly drier.

Julia Child’s Popover Recipe – with your choice of two different temperature settings, which result in two slightly different types of popovers!

These particular popovers came out super high and crusty ’cause I actually left them in a bit too long at 425F – maybe 3 – 4 minutes too long ’cause I took some popovers over to a neighbor – and got back a bit too late.. No biggy – I just cooked them 3 – 4 minutes less at 350F.   And, can you believe I did the same thing AGAIN while talking to a friend on the phone…. I re-set the timer but forgot to lower the oven temperature. The popovers were HUGE. Which just goes to show that popovers are actually ‘pretty forgiving’!

++ For the Dos & Don’ts of making popovers – plus information I discovered while researching popover recipes AND the first recipe in ‘The Popover Experiment” – go to  https://myyellowfarmhouse.wordpress.com/2013/11/01/the-popover-experiment-recipe-no-1-brown-n-crusty-on-the-outside-soft-creamy-on-the-inside/

While working on ‘The Popover Experiment’, I tried two recipes attributed to Julia Child. The first recipe (from the book Baking with Julia) I found at vintagekitchen.com.  It  has the same list of ingredients as the recipe called Julia Child Popovers, found on Blogspot. The difference between the two recipes is the temperature at the end, when you lower the heat from 425F. Vintage Kitchen instructs lowering the heat to 350F, which results in a slightly bigger and slightly drier popover than the recipe from Blogspot.

The Blogspot recipe recommends lowering the temperature to 325F. The resulting popovers are slightly smaller in size, with softer exteriors and creamy centers. These popovers tend to deflate more than the popovers cooked (at the end) at 350F, but that’s no biggy because they’ll probably be gone before they have time to cool and deflate.

Tip !!  If using older popover pans without nonstick coating, butter each section.

Tip !!  If using muffin tins or ramekins, butter each section. You’re going to have too much batter for a six-cup muffin pan, so use a 12-cup pan. Fill each section 1/3 full, and fill any empty sections with water. The popovers won’t be as big as those made in the new style popover pans but they’ll be wonderful.

 Yield6 popovers if using popover tin.    8 to 10 popovers if using ramekins/muffin tin.

For softer popovers – –  425F  for 25 minutes…  then lower to 325F for 15 – 20 minutes

For crustier popovers – – 425F for 25 minutes… then lower to 350F for 15 – 20 minutes

        INGREDIENTS & METHOD

  • 1 cup WHOLE milk (or 2%)
  • 3 eggs
  • 2 Tbs. melted butter
  • 1 cup flour
  • 1/2 tsp. salt

In a medium bowl, whisk or beat 1 cup WHOLE milk (or 2%), 3 eggs, 2 Tbs. melted butter, 1 cup flour and 1/2 salt until well blended. (If you have a few small lumps, that’s OK.)

USE - Try Number 3 -all ingredients bowl

Fill each section of your popover pan equally with the batter. (There’s no need to butter your popover pan if its nonstick. Otherwise, it’s probably wise to butter it, just to be sure.)

First try at Popovers - Fanny Farmer Recipe 001

++ For smaller, creaminer-in-the middle popovers, bake at 425F for 25 minutes, then lower heat to 325F for 15 – 20 minutes.

++  For larger, drier popovers, lower heat to 350F for 15 – 20 minutes.

Your popovers are done when they’re puffed & lightly browned. I don’t know about you – but I think it’s rather magical how popover puff!!  Recipes usually warn about opening the oven, but, if it’s at the very end, it won’t make any difference.

Immediately after removing popovers from oven, pierce each with a sharp knife to release steam. Popovers are best served immediately. However, if you wish to save some for later, I recommend laying each popover on its side on a cooling rack until cooled, then covering each with plastic wrap.  Enjoy !!

USE - end photo - Popovers -

“A Little Help from My Friends” Warm & Spicy Dip for Tortilla Chips

I always try to have the fixins for this warm & spicy Mexican-inspired dip in case people drop by. Talk about easy!  All you have to do is open two jars, pour the contents into a medium bowl, add a few spices, mix it all together – then warm it in the microwave until bubbly.

++  As with any recipe of this type, feel free to add more of the spices depending upon your personal preference.  A friend of mine threw this together for me recently a few minutes before a party.  She didn’t bother to measure the ingredients and it was delicious!

Ingredients  

  • One (15.5 oz) jar chunky salsa (I like “medium” heat…)    ++ For a thicker dip, add 1/2 jar of chunky salsa instead of the whole jar.  Actually, that’s what I’ve been doing lately!
  • One (15.5 oz) jar salsa con queso (Again, I like “medium” heat)
  • 1/2 tsp. cumin
  • + new addition +    1/4 tsp. dried cilantro  (I use McCormick’s)
  • 1/4 tsp. Mrs. Dash Southwest Chipotle
  • ++ If you don’t have any Mrs. Dash Southwest Chipotle, add a bit of cayenne pepper.)
  • ++ To ‘Kick This up a Notch” – – fry up about 1/4 cup chopped onion in butter and add !!
  • a bag of tortilla chips

I don’t know of many things that are this easy to make, yet taste so good.    Enjoy !

Warm and Spicy Dip for Tortilla Chips - My Yellow Farmhouse.com

“Eggs in a Frame” a.k.a. “Eggs in a Blanket”

Eggs in a Frame - cooked - FOR END OF POST

Whether you call these ‘Peek-a-Boo Eggs’, ‘Eggs in a Hole’, ‘Eggs in a Frame” or ‘Eggs on the Island’   – – – – they’re “good eats”!!

My sons used to love these!! The taste is truly (as the old expression goes) “more than the sum of its parts”, meaning eggs and toast prepared this way are so much tastier than eggs and toast cooked the usual way.

++ Someone recently asked, “When to flip over ‘Eggs in a Frame?’  I would say, ‘Use the above photo as your guide.” When the eggs are ‘almost set’ – as above – flip them over for just a few seconds. That is, unless you prefer your yolks very, very set – then let them cook a few seconds longer.

++ Be sure to fry one side of the bread first – THEN break the egg into the hole.  That way both sides of the bread are buttery and toasted, even if you don’t flip them over!

    Ingredients…. (I’m not even sure that a list this short can even be called “ingredients”!!)

  • eggs – allow 2 per person
  • bread – allow 2 slices per person
  • butter or margarine
  • salt & pepper
  • OPTIONAL – cayenne pepper, red pepper flakes etc.
  • OPTIONAL – sliced cheese

Eggs in a Frame - ingredients

If you’re making these for more than 2 people, then it’s really wonderful if you happen to have some sort of griddle. Otherwise just use 2 large nonstick skillets.

Butter one side of the bread. Using a biscuit cutter, if you have one (or a small glass which has an opening of about 2 1/2″), cut a hole in the center of each piece of bread. Don’t discard the centers – you’re going to fry those as well – actually, the centers might end up being your favorite part!!

On medium heat, warm up a large nonstick skillet. Add about 2 tsp. butter. Once the butter has melted, place the bread slices, butter side up, in the skillet.  Cook JUST THE BREAD until the bottoms of the bread are toasted.

Eggs in a Frame - bread in panFlip the toast over. Lower the heat a bit and gently break an egg into each ready-made hole. Sprinkle with a bit of salt & pepper – plus a bit of cayenne pepper etc if you choose.

Cook the eggs/toast until almost cooked through if you want “Sunnyside” eggs. Or, you can flip the “Eggs in a Frame” over to give you “Over Easy” eggs.

You can also place a slice of cheese on top once the eggs seem a few minutes away from being ready. I recommend covering the pan, if you’re adding cheese, so that the cheese melts without overcooking the eggs.   Enjoy !!

Eggs in a Frame - cooked

Stuffed Shells Florentine – Cook in Oven – OR – Outside on Your Grill !

++ These Stuffed Shells Florentine can be cooked outside on a covered grill set at “low” so your kitchen remains nice and cool !!t

The term Florentine, or à la Florentine, refers to any dish which is prepared in the style of the fabulous city of Florence, which resides in the Tuscan region of Italy. Florentine recipes often feature meat, poultry or fish served over a bed of spinach. In this recipe the spinach is, in fact, mixed with ricotta, mozzarella and Parmesan cheeses – plus eggs, fresh parsley and some spices. All this deliciousness becomes the filling for the stuffed shells, over which a quick and easy marina sauce is poured, followed by a grating of either Parmesan or Romano cheese. I’ve been making this recipe for years and it’s always been a family favorite, however I decided to change both the filling and the sauce – and I have to say I’m very happy with the results!

I was recently invited to spend a weekend with friends in the beautiful town of Wells, Maine. I had decided Stuffed Shells Florentine would be great to bring because everyone likes them – and this recipe makes a lot! Several of us planned to head north in just one car, so, in order to save space, I prepared the filling and the sauce – and cooked the shells –  in advance and then assembled the final dish the following night.

And, get this, my friend decided she’d cook the stuffed shells on the grill so we wouldn’t heat up her kitchen. I never would’ve thought of that . . .  We took the containers of sauce, the filling and the precooked shells outside and assembled everything on the picnic table. Since there were three of us stuffing the shells, it only took a few minutes.

We sealed the pan with a sheet of aluminum foil, and placed it in the grill – which was set to LOW.  Then we enjoyed a drink and just let the Stuffed Shells Florentine simmer away. We were very pleasantly surprised when we checked after a half hour to see the sauce bubbling away, signaling that the shells were thoroughly heated through.

So, now you have two choices –  heat these in either your oven or your  grill.  Enjoy!

++ Cook stuffed shells in the oven at 350 for about 40 minutes.

++ Cook stuffed shells in covered grill set on LOW for about 30 minutes.

Ingredients

  • 1 full box of jumbo pasta shells – cooked according to package directions and drained  (We had about five shells for which we didn’t have filling, but they were the ones which had fallen apart, so that worked out well !)
  • 2 jars (24 oz.) prepared tomato sauce  (I like Bertolli – Tomato & Basil)
  • 1/4 to 1/2 cup red wine
  • 1 Tbs. chopped fresh basil
  • 4 cups ricotta cheese (32 ounces)
  • 2 cups shredded mozzarella cheese  – plus extra to sprinkle on top !
  • 1/2 cup grated Parmesan cheese  –  plus extra to sprinkle on top !
  • 1 (10 oz) package frozen (DEFROSTED AND DRAINED!!) spinach (I actually squeeze the defrosted spinach to get out all the excess water.)
  • 2 eggs
  • 1 Tbs. chopped fresh flat leaf parsley (a.k.a. Italian parsley)
  • 1 tsp. salt – (or to taste)
  • 1/2 tsp. black pepper

– – – – –  “A Little Help from My Friends” Marinara Sauce  – – – – –

Place two jars (24 oz.) of marinara sauce into a large saucepan – add 1/4 to 1/2 cup red wine and 1 Tbs. chopped fresh basil. Simmer, uncovered, over medium to medium-low heat while you cook the pasta shells and prepare the stuffing.

+ +  I had planned to prepare a meat sauce featured on the blog “From the Bartolini Kitchens”.  I had even purchased the ingredients but ended up “doctoring” a purchased sauce when I realized I was running out of time. (And I was actually very satisfied with the results of my “doctoring”.)  But, if you’d like to make this dish with a traditional Italian meat sauce, take a minute to head over to John’s blog!

http://fromthebartolinikitchens.com/2013/01/16/basic-meat-sauce-sugo-di-carne/

John's Basic Meat Sauce Recipe

– – – – –  To Prepare the Filling  – – – – –

Stuffed Shells - cheese and spinach 1

In a medium bowl, mix 4 cups ricotta cheese, 2 cups shredded mozzarella, 1/2 cup Parmesan (or Romano) cheese , the defrosted and DRAINED spinach, 2 eggs, 1 Tbs.chopped flat leaf parsley, 1 tsp. salt and 1/2 tsp. black pepper.

– – – – –  Putting It All Together  – – – – –

Pour about two cups of sauce in the bottom of a 10 x 13 pan – or a large disposable aluminum pan. With a large spoon, spread the sauce out a bit so most of the bottom is covered with sauce – you don’t have to be fussy about it ….

Fill each shell with a heaping soup spoonful of the cheese/spinach mixture.  Pour the remaining sauce over the shells.

Sprinkle some shredded Mozzarella and grated Parmesan. (We ended up using some grated Monterey Jack in place of the grated Parmesan, which added a nice little “kick” of flavor!)

Ready for the Oven or Grill !!  (Cover with aluminum foil.)

Stuffed Shells - uncooked

Cover with aluminum foil. If using oven, set temperature to 350 and cook until heated through – about 35 – 40 minutes.  If using you grill, set dial to LOW and cook until heated through – about 30 minutes. (I put a – freshly washed – finger in the middle to check for doneness. It’s a bit unorthodox – but it works!)

Once the stuffed shells are heated through,  remove the aluminum foil and let the shells sit about five minutes. Of course, if you just can’t wait, then you can skip the “let it sit” part.  Enjoy!

Stuffed Shells Floretine - myellowfarmhouse.com

Turkey Strata (Casserole) – Uses Left-Over Turkey and Stuffing

This is so delicious – and so easy  !!  (My photos do NOT do it justice.)

While working on this post, I’m enjoying a good-sized portion of this delicious Turkey Strata! I gotta say – it’s yummy!! Since the Turkey Strata can already be in the oven when your guests arrive, you’ll have time to clean up your kitchen and meet them with a smile and a glass of wine! The “clean kitchen” part would be exceptional for me… my kitchen is usually a disaster when my company arrives. But they’re used to it… and the meal is always good !

Oven at 350 F      Bake for 30 minutes      Serves 4 – 5 people     

Ingredients & Method

  • 1 Tbs. olive oil
  • 3/4 cups sliced onions
  • 3 – 4 heaping cups baby spinach leaves  (Feel free to add more spinach !)
  • 1/2 can mushroom soup
  • 1 packet turkey gravy – (I like McCormick)
  • 1/2 cup milk
  • 3/4 cup water
  • 2 tsp. chopped fresh parsley
  • 1/2 tsp. salt
  • 1/4 tsp. pepper
  • 1/2 tsp. poultry seasoning – (I like Bell’s)
  • 3 cups left-over stuffing – or prepare a packaged stuffing – (I like Stovetop Turkey)
  • 3 cups cooked chicken/turkey, cut into bite-sized pieces
  • 1/8 cup Italian-flavored breadcrumbs
  • 2 Tbs. grated Parmesan cheese
  • paprika

In a medium-sized skillet over medium heat, cook the sliced onions in the olive oil for 2 minutes. Add baby spinach and cook for another minute. Remove from heat and set aside. In a medium-sized saucepan, over medium-high heat, mix the 1/2 can of mushroom soup, the packet of turkey gravy, milk, water, parsley, poultry seasoning, salt & pepper. Whisk – or stir – until mixture comes to a boil. Lower heat and, still whisking, cook for a minute. Add the bite-sized chicken/turkey to the sauce mixture.

To assemble the Turkey Strata, use a 9′ x 9″ pan or a medium-sized casserole and begin by making a layer of HALF of the stuffing. Spoon HALF the turkey/sauce mixture on top of the stuffing. Now, make a layer of the onion/spinach mixture. (There is only one layer of the onion/spinach mixture.)

turkey-strata-casserole-fixed-3

Make your final layer of stuffing, and spoon the second – and final layer – of the sauce/turkey mixture on top of the stuffing.

Sprinkle with 1/8 cup bread crumbs and 2 Tbs. grated Parmesan. For color, sprinkle on some paprika. Bake at 350F for 30 minutes. The crumb topping should be slightly browned around the edges and the filling should be bubbling!       Enjoy !!

Turkey Strata (Casserole) - Uses Leftover Turkey and Stuffing! - My Yellow Farmhouse.com