Chocolate and Pistachio Swirl Cake

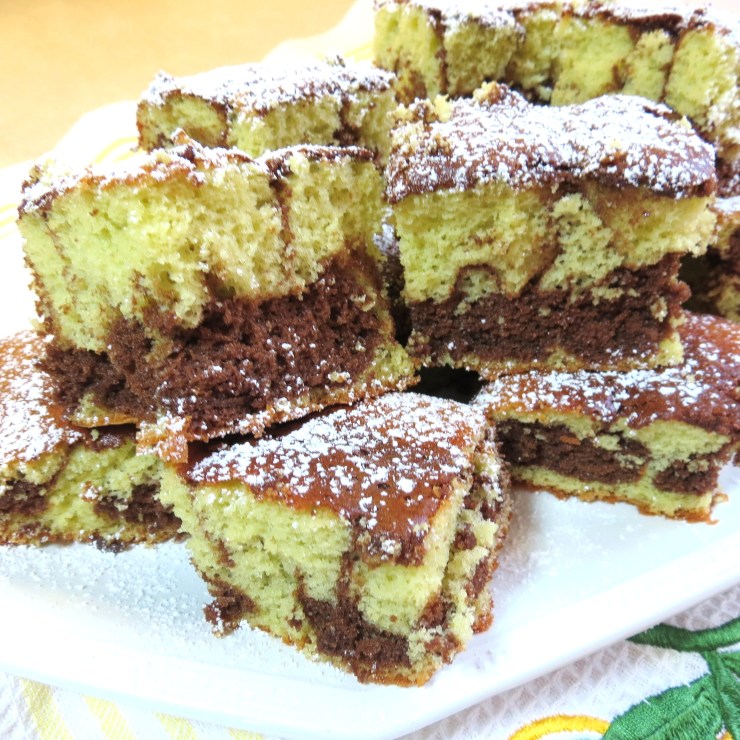
How the chocolate layer goes from the top to the bottom is a mystery to me!!

A dear friend of mine shared this recipe with me back in the 80s, when bundt cakes were the ‘in thing’.  Chocolate and Pistachio Swirl Cake  baked in a bundt pan does make a beautiful presentation, but I wanted something to bring to a Fourth of July picnic that could be eaten ‘out of hand’, so I went for the good old 13′ x 9′ pan and cut the cake into squares.

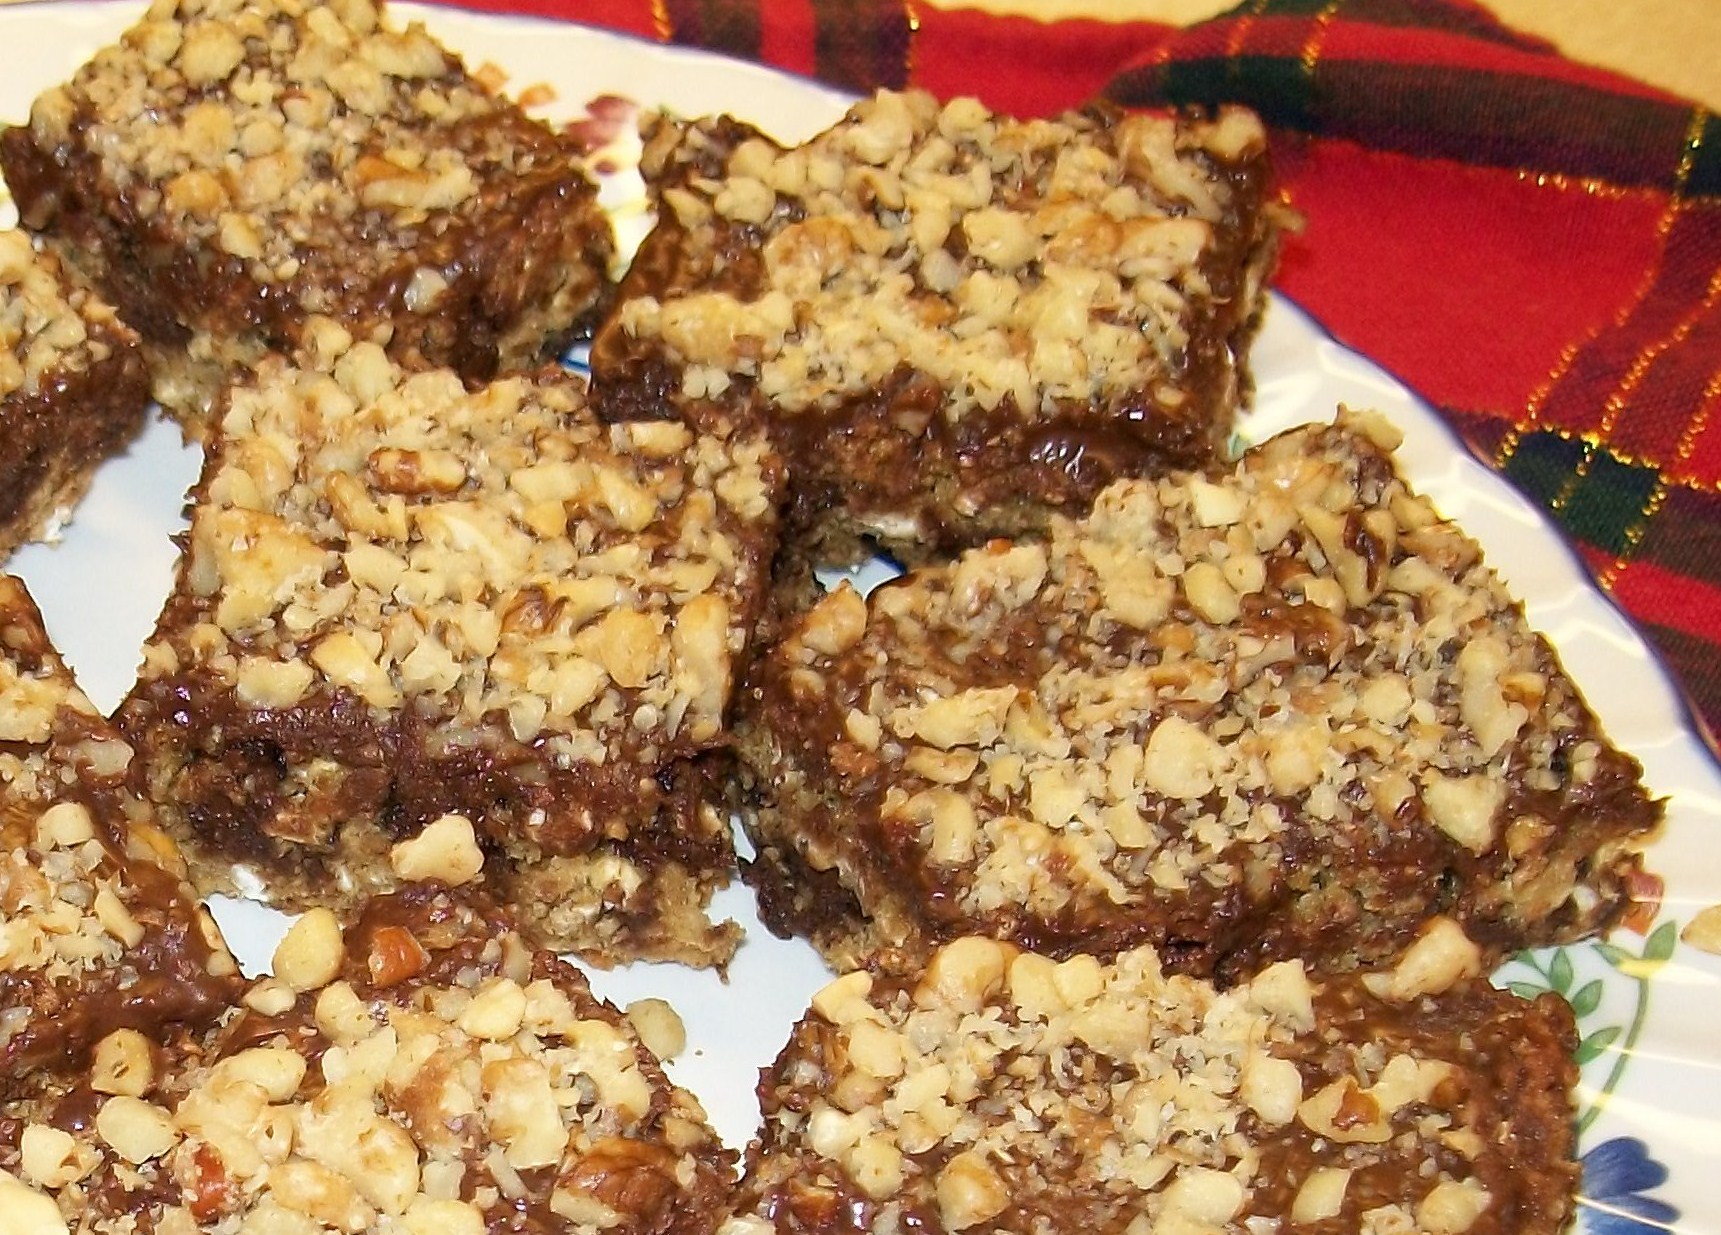
Because Chocolate and Pistachio Swirl Cake is prepared with a boxed cake mix, it’s really quick to put together. Once the cake was cooled and cut into squares, a little dusting of confectionery (icing) sugar was all that was needed and off I went to the barbecue.

3 - Chocolate and - Pistachio and  Swirl Cake - myfarmhouse.com

new type bundt cake pan
In case you’ve never heard of a bundt pan – here’s an example.

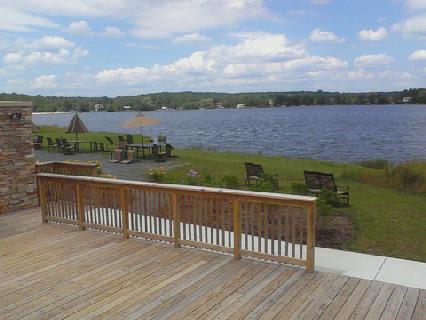
We had a wonderful time the Fourth of July at my cousin’s home on Lake George (Massachusetts), which a small lake and not the big, big Lake George in New York State.  And everyone very much liked what I brought for dessert!

Fourth of July - David's - 2016
Lake George, Massachusetts (USA)  Don’t you just LOVE having friends/family who live on the water AND who own a boat??!!

small red heart

Oven at 350F      

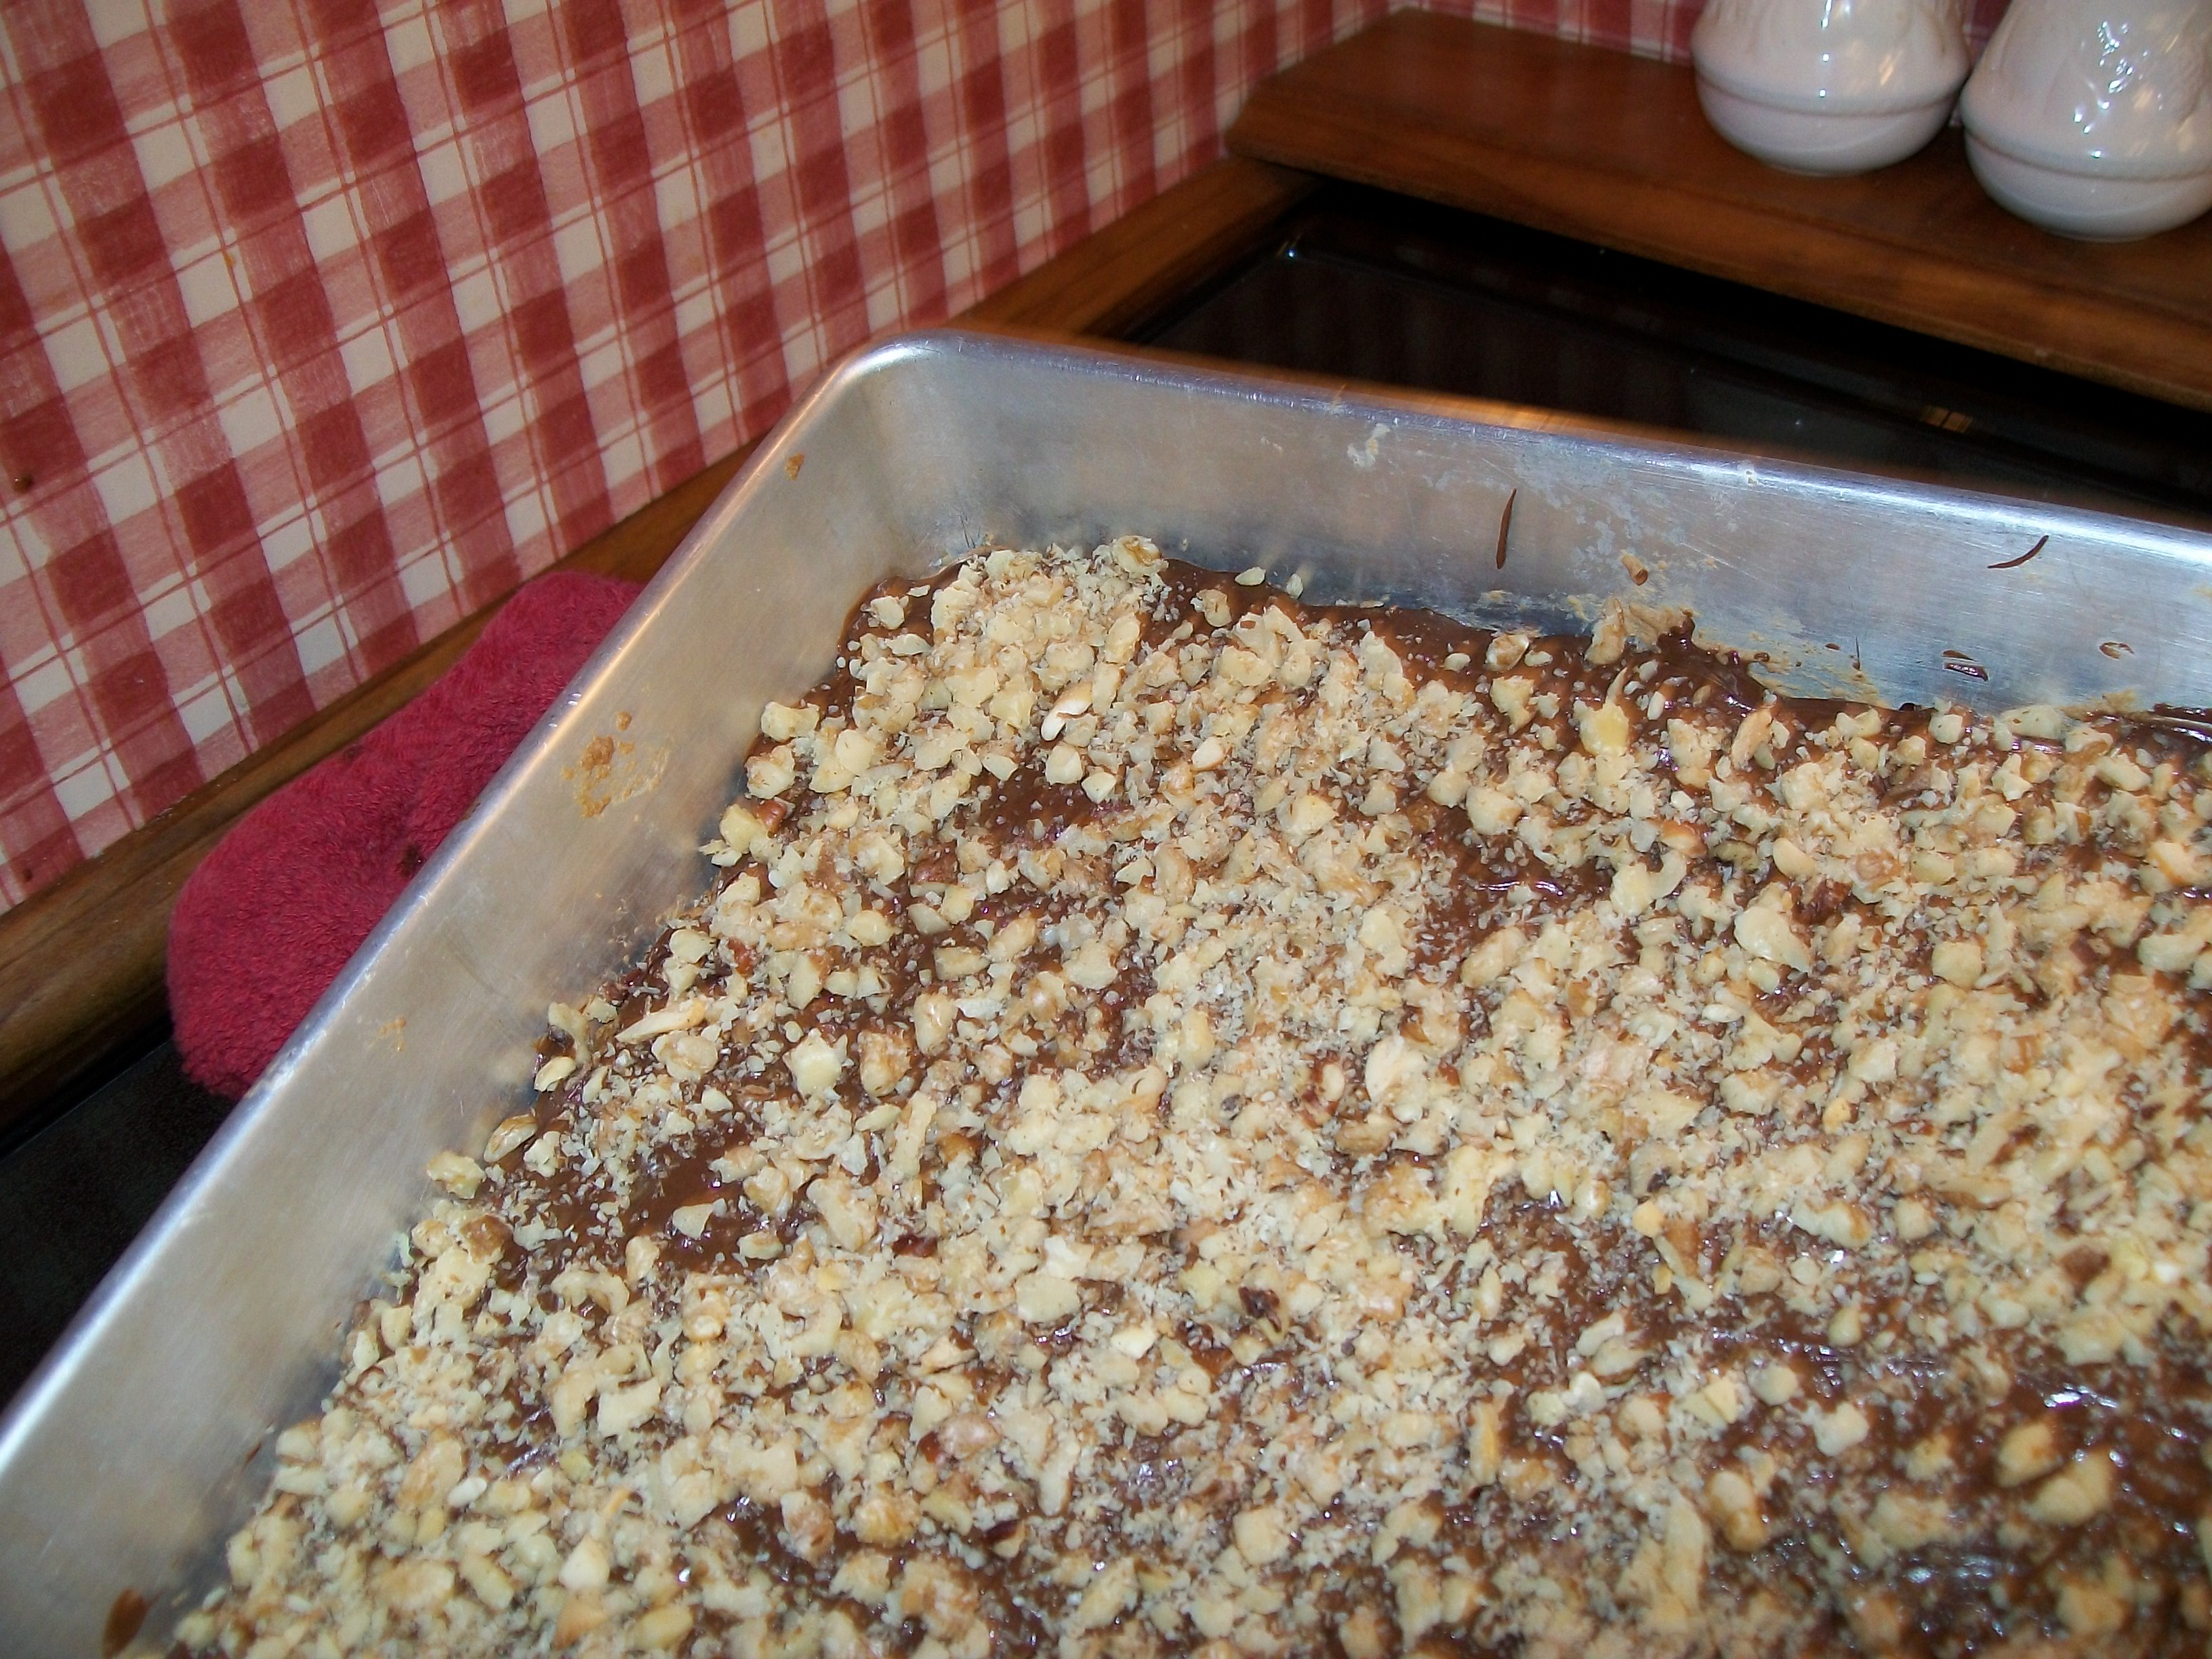
++  13″ x 9″ pan  (buttered & floured) – bake for 35 – 40 mins. 

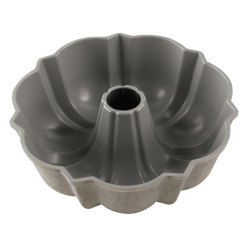
++ bundt pan (buttered & floured) – bake for 55 – 60 mins.

++  Cake is cooked when it pulls away from the sides of the pan – and when a sharp knife (or toothpick) inserted in the middle comes out clean

INGREDIENTS

  • 1 yellow cake mix
  • 1 package instant pistachio pudding
  • 1/2 cup orange juice
  • 1/2 cup water
  • 1/3 cup oil
  • 4 eggs
  • 3/4 cup chocolate syrup  ++  I use Hershey’s.  Be sure not to buy thick fudge topping.  You want the chocolate syrup used to make chocolate milk.

METHOD

In a large bowl beat yellow cake mix, 1 package instant pistachio pudding, 1/2 cup orange juice, 1/2 cup water, 1/3 cup oil and 4 eggs for two minutes on medium speed.  Pour half the batter into buttered and floured pan.

++  To ‘flour a pan’, put some flour into the buttered pan.  Shake the pan around so that the butter is totally covered with a light coating of flour.  Turn the pan upside and hit the bottom of the pan so the extra flour falls out. 

Mix remaining batter with 3/4 cup chocolate syrup.  Pour batter on top of the pistachio layer.

Bake for 37 – 40 minutes (or so) if using a 13″ x 9″ pan.  (Oven temperatures vary.)

Bake 55 – 60 minutes (or so) if using a bundt pan.  (Oven temperatures vary.)

Allow cake to cool – in the pan – on a cake rack for 20 – 30 minutes.  ++  Allowing  the cake to cool thoroughly makes it easier to cut because this cake is very moist.

++  Here’s a trick to get that ‘dusting’ of confectionery sugar (icing) sugar on prettily – use a small strainer.  

small strainer
Photo courtesy of WebstaurantStore

3 - Chocolate and - Pistachio and  Swirl Cake - myfarmhouse.com

‘Five-Star’ White Sandwich Bread – Prepared in a Bread Maker

COPY -Five Star Bread - King Arthur Flour - Made in a Bread Machine

UPDATE!! 

One of my ‘Reddit’ followers made Italian bread with this recipe!!

“I made this recipe, but substituted the milk with more water, and instead of letting the machine bake the bread, I used the dough program, then made a ball and let it rise in a greased bowl for an hour.  After that I formed an Italian loaf and placed it in a cold oven.  I turned the oven up to 450 F and baked the bread until it was done. It came out great! (The important thing of the recipe is the ratios, they’re spot on.)”  

++  If you’re an experienced bread baker, give this a try.  I know I will!   

small red heart

King Arthur Flour Company calls this  recipe ‘Bread Machine Bread – Easy as Can Be’, but I prefer the name ‘Five-Star Bread’ because this recipe is so highly rated! The loaf bakes up super high with a lovely, springy texture – great for sandwiches, toast and French Toast.

Because ‘Five-Star Bread’ is made with a bread maker, you just add the ingredients, press a button and, in a few hours, you’ll be making sandwiches with freshly baked bread.

Judging from the reviews on the King Arthur Flour web site, it seems people have fallen in love with this sandwich bread. In fact a few people said they make this bread two to three times a week.  You can’t have a better recommendation than that!

King Arthur Flour, based in Vermont (USA), has been in existence as a flour mill since 1790 – that’s a long, long time.  I truly love their products.  When we had our farm in Quebec we traveled back and forth between our ‘Yellow Farmhouse’ here in Massachusetts and our farmhouse ‘up north’ – and I loved to drop by King Arthur’s Flagship Store, aptly named The Baker’s Store, in Norwich, Vermont.  If you’re ever in the New England area, I highly recommend dropping by!!

King Arthur Flour - Store- Norwich, Vermont
King Arthur Flour’s Flagship Store – Norwich, Vermont

The King Arthur Flour’s Baker’s Hotline can answer and & all of your baking questions!     1-855-371-2253.

Directions for Large Loaf  (1  1/2 – 2 lb.)

++  For a Smaller (1 lb.) Loaf — continue scrolling down.)

INGREDIENTS

  • 1 cup lukewarm water
  • 1/3 cup lukewarm milk     ++ warm, briefly, in microwave
  • 3 Tbs. butter – slightly softened
  • 3 3/4 cups all-purpose or bread flour
  • 3 Tbs. sugar
  • 1 1/2 tsp. salt
  • 1 1/2 tsp. active dry yeast OR instant (bread machine) yeast  ++ I used bread machine yeast

Follow your bread maker’s instructions for basic white bread.  With my bread maker I set the machine to ‘Regular/Basic’, which takes 3 hours and 50 minutes.  Enjoy !!

Instructions for Smaller  (1 lb.) Loaf  

  • 2/3 cup lukewarm water
  • 1/4 lukewarm milk     ++ warm, briefly, in microwave
  • 2 Tbs. butter
  • 2 1/2 cups all-purpose or bread flour
  • 5 tsp. sugar
  • 1 1/4 tsp. salt
  • 1 tsp. active dry yeast OR instant (bread machine) yeast

Follow your bread maker’s instructions for basic white bread. I know with my bread maker I set the machine to ‘Regular/Basic’.  Enjoy !!

Follow this link for baking recipes of all kinds. King Arthur Flour even has a Help Line!

Cookies ‘n Cream Ice Cream Cupcakes

I made these Cookies ‘n Cream Ice Cream Cupcakes with Oreo cookies but they can be made with whatever cookies you choose.

Cookies 'n Cream ice Cream Cupcakes - myyellowfarmhouse.com

Cookies ‘n Cream Ice Cream Cupcakes are so very easy to put together – and you’re going to make every Ice Cream Lover in your life very happy!  (I can’t wait to make these with my grandchildren – speaking of Ice Cream Lovers.)

The east coast of the United States is bracing for a BIG snow storm, arriving here in Massachusetts in a few hours.  I plan to take advantage of being socked in by working on a few new recipes!  I’ve been attempting to perfect a recipe I’m calling Shake, Pour and Bake Pizza Crust.  I’ve prepared it twice so far and the crust is almost right.  Another one or two tweaks and I think I’ll have the results I’m looking for.  In the meantime, both myself and my neighbors are enjoying the results of my ‘pizza crust experiments’.  ; o )

Here’s photos of the two Shake, Pour and Bake Pizzas I’ve prepared so far.  On the left – black and green olives topped with 5-cheese Italian mix.  The 2nd – a Margherita pizza with slices of fresh mozzarella and Parmesan.  (Didn’t have any basil leaves – sprinkled on a bit of fresh Italian parsley.)

small red heart

Here’s how to put-together today’s recipe – Cookies ‘n Cream Ice Cream Cupcakes

INGREDIENTS

  • 1  (1.5 quart container ice cream  (Don’t they sell ‘gallons’ anymore?? )    ++  I used French Vanilla
  • 3 Tbs. chocolate syrup     ++  Optional 
  • 2  (7.5 oz)  containers chocolate shell topping  ++ There’ll be some left over.
  • 3/4 cup Oreo cookies, broken into small pieces   ++  You can use any cookie you chose

METHOD         Line a 12-cup cupcake pan with paper liners

First Layer – Half the ice cream 

Cut the ice cream in half.  Place HALF in a medium bowl.  (Return the rest of the ice cream to the freezer.)  Optional – add 3 Tbs. chocolate syrup and mix to combine.  Drop  1 1/2 Tbs. into each section of the cupcake pan.  ++ Don’t forget to line with paper liners.   ++  Allow ice cream to soften just a bit – it makes it easier to fill the sections.  Freeze ice cream cupcakes for at least 30 minutes.

Second Layer – Warmed chocolate shell topping

Place VERY HOT water in a small bowl.  Stand the 7.5 oz container of chocolate shell topping in the hot water for about 4 minutes.  Squeeze chocolate shell topping over each ice cream cupcake until you have a layer of chocolate topping.  Freeze for at least 30 minutes.  ++  I didn’t warm the chocolate shell topping for this layer – it didn’t spread out very well, as you can see in the photo below.

Third Layer – 1/4 of the rest of the ice cream and 3/4 cup broken up cookies

Briefly chop 6 Oreo cookies in a food processo.  Or – put 6 Oreo cookies in a small baggy and ‘smack up’ up the cookies to break them into small pieces.  You should have about 3/4 cup small cookie bits.   ++  You don’t want ‘cookie dust’, so don’t over do it.

Take out the remaining ice cream.  Remove half the ice cream… in other words,  you only need 1/4 of the 1.5 quart container for this layer. Place ice cream in a bowl, mix in 3/4 cup cookie bits.  Again, the softer the ice cream, the easier it will be to fill each section.  You should have enough for 1 Tbs. in each section.  Smooth ice cream a bit using a spoon. Freeze for at least another 30 minutes.

Fourth and Final Layer – Warmed chocolate shell topping and 1/2 a cookie

—  About 5 minutes before you you’re ready to remove ice cream cupcakes for their final layer, place the 2nd container of chocolate shell topping in a bowl with HOT water.  And – cut 6 Oreo cookies in half to use as a garnish.  ++  The best way to avoid breaking the cookies is to cut straight down with a sharp knife.  I went through LOTS of cookies until I figured that out!

Squeeze warmed chocolate shell topping onto each ice cream cupcake – use enough to cover the layer below .  Gently push a cookie half into the middle of each ice cream cupcake.  Freeze for about an hour.

++  Squeeze the warmed chocolate topping onto only one ice cream cupcake at a time, then gently push in a cookie half.  Otherwise, the chocolate shell on the ice cream cupcakes will be hardened by the time you do the rest.  Guess how I learned that??

Enjoy!!

++  Adapted from Good Housekeeping – June 2015 

An Oldie but a Goody !! Old-Fashioned Apple Squares – Just in Time for Apple Picking Season

Old-Fashioned Apple Squares - - myyellowfarmhouse.com

The recipe for these ‘Old-Fashioned Apple Squares’ was one of the first recipes I ever posted – back in November of 2012.  There’s a ‘bumper crop’ of apples this year, so I thought I’d repost this once again. These apple squares are yummy!

– – – – – –

You know you’re getting o.l.d when the recipe you’re searching for is over 30 years old !! Imagine how pleasantly surprised I was when I actually found it – not filed under “bars” but filed under “apples” – but found, nevertheless!!

These apple squares (or bars) are even tastier than I remember!! They’re loaded with apples, nuts and raisins, and have a buttery, cinnamony goodness – so you can even eat them for breakfast!!

                                              MAKES ABOUT 24 SQUARES – or BARS

  • Oven at 350 F
  • Lightly grease a 9″ x !0″ pan
  • Bake 45 – 50 minutes, or until a knife inserted in the center comes out clean.

                                                                          INGREDIENTS

  • 2 tsp. vanilla
  • 1 cup sugar
  • 1/2 packed brown sugar
  • 2 eggs
  • 2 cups flour
  • 2 tsp baking soda
  • 2 tsp. cinnamon
  • 1 tsp. nutmeg
  • 1/2 tsp. salt
  • 4 cups roughly chopped peeled and cored apples
  • 1/2 cup walnuts, chopped
  • 1/2 raisins (Try the raisins even if you don’t always like raisins. They kind of “melt away” into the batter, and give the resulting bars a lovely sweetness and golden dark color.)

In a medium-sized bowl – using a mixer – cream together the vanilla, both sugars and 2 eggs until creamy and throughly mixed.

In a large bowl, mix together the flour, baking soda, cinnamon, salt & nutmeg. Add the creamed mixture to the dry mixture, and mix by hand until throughly blended.

Add the apples, walnuts and raisins – mix by hand until throughly blended

Pour into the greased pan, spreading with the spoon to get the mixture even.

Bake at 350 F for between 45 – 50 minutes.  When cooled, cut with a sharp knife. Enjoy!

Old-Fashioned Apple Squares - - myyellowfarmhouse.com

Pea Salad – A delicious and easy ‘make-ahead’ salad ! UPDATE – An even tastier and easier version!!

Pocono House - View from Lodge at Arrowhead Lake - myyellowfarmhouse.com
View from the Lodge at Arrow Head Lake – PA

I just returned from spending two weeks at our home in the Pocono Mountains where we don’t have an internet or TV connection, which actually makes it very relaxing.  I also spent a few days outside of Philadelphia with one of my sons and his family & they ‘gifted me’ by bringing me to see The Lion King – what a colorful, lively and just plain fabulous play it is!!

While at the Pocono house I did some spring projects, such as giving the deck a BIG SCRUB with some pretty powerful cleaning products.  When the directions tell you not to get any of it on your skin etc., you know it’s strong. But it works!!   (DO NOT invite me to your home to scrub your deck, thank you!  LOL!)

I didn’t have time to scrub the deck last spring… and look how bad it got in just 1 year! 

spring 2015 - deck
I used ‘Clorox – Pro-Results’ – it worked great!

small red heart

Pea Salad – Ingredients and Method

I LOVE Pea Salad!!  This version is guaranteed to turn Pea Haters in Pea Lovers – even people who aren’t overly fond of peas end up going back for seconds and even thirds. 

Ingredients

  • 1 (14.4 oz.) package of frozen peas  ++ Allow to thaw and drain in a colander.  No need to cook!   ++  2015 – New version.   Microwave peas with 1/4 cup water for a minute – stir. Microwave another minute – stir, then microwave for about 30 more seconds and drain in a colander. (Shaking the colander helps to remove all the water. You don’t want a watery salad!)
  • 1/3 cup celery, diced
  • 1/2 cup red onion, sliced thin 
  • 6 oz. Cheddar (or American) cheese, cut into small cubes   ++  ALTERNATIVE – substitute 1 cup purchased shredded Cheddar cheese … or … shred the cheese yourself for the BEST flavor!  
  • 2 – 3 hard-cooked eggs, sliced thin   
  • 1/4 cup mayonnaise
  • 1/4 tsp. dried basil
  • 1/4 cup chopped sweet pimentos  
  • 1/2 tsp. salt
  • 1/4 tsp. pepper

Mix all ingredients in a medium-sized bowl – it’s as easy as that!  Cover with plastic wrap and refrigerate for a few hours – or overnight. How’s that for quick and easy?   Enjoy!

Here’s my friend Joanne’s presentation of ‘Pea Salad’ – great job my friend!!

pea salad - Joanne's version

Pea Salad - www.myyellowfarmhouse.com

Chocolate ‘n Walnut Streusel Coffee Cake

 The ingredients for ‘Chocolate ‘n Walnut Streusel Coffee Cake’ are probably already in your cupboard. Plus, it’s quick and easy to prepare!

This recipe makes enough for breakfast or ‘tea time’, with a bit left-over for snacking …. any time of the day.  Coffee cake is not ‘just for breakfast anymore’! ++ YIELD –  approximately 12 pieces   Greased 9 x 9 pan    Oven at 350 F      Bake for 25 – 30 minutes

Ingredients

  • 1/3  to 1/2 cup chopped walnuts  ++ I like a LOT of nuts, so I added 1/2 cup.
  • 1 Tbs. cocoa powder
  • 1/4 cup packed brown sugar   ++ Packed means the brown sugar is pressed down in the measuring cup – not lightly spooned in.
  • 1/2 cup sugar
  • 2 Tbs. softened butter
  • 1 tsp. vanilla
  • 1 egg
  • 2 cups Bisquick baking mix  ++ I’ve included a recipe for making your own ‘baking mix’ at the end of this post.
  • 3/4 cup milk

small strainer - for coffee cake recipe++ I highly recommend putting a small amount of confectionery (icing) sugar in a strainer and then gently shaking it over the baked & cooled coffee cake. Not only will your coffee cake look nicer but the sugar adds a bit more sweetness. (‘Chocolate ‘n Walnut Streusel Coffee Cake’ isn’t overly sweet.)

Method

Combine 1/3  to 1/2 cup chopped walnuts, 1 Tbs. cocoa powder and 1/4 cup packed brown sugar in a small bowl.  Set aside. In a medium bowl beat 1/2 cup sugar, 2 Tbs. softened butter and 1 tsp. vanilla. Add egg and beat until fully combined. Add 1 (of the 2 cups) of Bisquick to sugar/butter/egg mixture and beat to combine. Add 1/2 the milk and beat to combine, scraping bowl occasionally. Repeat with remaining 1 cup of Bisquick and and rest of the milk.

Spoon half the batter into a greased 9′ x 9′ baking pan.  Sprinkle on the walnut/cocoa powder/brown sugar mixture.  Spoon remaining batter on top. Using a knife, swirl the batter to make a marble pattern.

1 - Chocolate-Walnut Streusel Coffee Cake - myyellowfarmhouse.com2 - Chocolate-Walnut Streusel Coffee Cake  myyellowfarmhouse.com

Spoon remaining batter on top. Using a knife, swirl the batter to make a marble pattern.

3 - Chocolate-Walnut Streusel Coffee Cake myyellowfarmhouse.com4 - Chocolate-Walnut Streusel Coffee Cake myyellowfarmhouse.com

Bake at 350F for 25 – 30 minutes. Check for doneness at 25 minutes by inserting a sharp knife into the center of the coffee cake.  If the knife comes out clean, your coffee cake is fully cooked.

5 - Chocolate-Walnut Streusel Coffee Cake  myyellowfarmhouse.com

Place baking pan on a wire rack to cool coffee cake a bit. ++ The coffee cake doesn’t have to be totally cool before you cut into it…. which is a BIG PLUS!!  (I am sooo bad – I ate three pieces in one go!  The coffee cake was warm, delicious and perfect with a glass of cold milk.)     ENJOY!!

6 - Chocolate-Walnut Streusel Coffee Cake  myyellowfarmhouse.com

– – – – – – – – –

SUBSTITUTE FOR ‘BISQUICK’ BAKING MIX

Yield 6 cups  /   Units US

Ingredients

• 6 cups all-purpose flour • 3 Tbs.baking powder • 2 Tbs. powdered sugar • 1 1/2 tsp. salt • 3⁄4 tsp. baking soda • • 9 Tbs. canola oil

Method

Whisk together 6 cups all-purpose flour, 3 Tbs. baking powder,  2 Tbs. powdered (icing) sugar, 1 1/2 tsp. salt and 3⁄4 tsp. baking soda. Using an electric mixer set on low, slowly mix in canola oil until no lumps remain and mixture is a uniform texture – about a minute.  Store in an airtight container. ++ Recipe for preparing substitute for Bisquick Baking Mix courtesy of – – http://www.food.com/recipe/original-bisquick-baking-mix-copycat-357101

‘Quick ‘n Easy’ White Chocolate Peppermint Bark with Pecans

      This is a great recipe for those times when you want to share a homemade treat but have very little time to prepare something!

Candy Canes - clipartbest.com

You may know I call myself “Organized/Disorganized”…  Example – I have a folder in a closet full of Christmas ideas/recipes and another folder for Thanksgiving, which is the ‘organized’ part of my personality.  But because my kitchen is my office, my workstation and basically where I spend much of my time, it’s usually a mess.  Which is the shows the ‘disorganized’ part of my personality.

I couldn’t sleep last night, so I reorganized my Christmas folder and found my recipe for White Chocolate Peppermint Bark with Pecans – which I had totally forgotten about.  Making candy doesn’t get much easier than this – just a few ingredients, a bit of time cooking in the microwave, a bit of stirring et voila –  CANDY!

++  For a delicious change-of-pace, use two (12 oz.) bags of semi-sweet choc.! Candy Canes - clipartbest.com

INGREDIENTS

  • 4 cups white chocolate morsels – divided      ++  Two (12 0z.) bags of morsels
  • 2 Tbs. shortening – divided
  • 1/3 cup finely chopped salted pecans
  • 1/3 cup “smashed up” candy canes or peppermint candies

++  To break up candy canes, place several in a plastic zip lock bag and smack with a hammer, a can or a rolling pin.  (Of course, if you have a high-powered food processor you can chop them up in that… I think!)

++  Leftover candy canes can – like any type of hard peppermint candy – be saved for later use.  

'Quick 'n Easy' White Chocolate Peppermint Bark with Pecans1 - My Yellow Farmhouse.com

METHODCandy Canes - clipartbest.com

1.  Place 2 cups (1 bag) white chocolate morsels in a medium-size microwavable bowl.  Add 1 Tbs. shortening.

2.  Microwave – on high – for 2 minutes.     ++ This is only half of the white chocolate morsels – 2 cups (one bag) at a time are melted in 2 batches.  This ensures the chocolate doesn’t seize, meaning it won’t thicken or harden during melting

3.  Remove chocolate from microwave and mix well with a large spoon.

4.  Return to microwave for 30 – 40 seconds. Remove and stir well – ‘smooshing’ any chocolate morsels which may remain a bit unmelted. 

5. Spoon melted chocolate into another bowl & repeat the process of melting 2 cups of white chocolate morsels with 1 Tbs. Crisco.

6.  Stir in 1/3 cup “smashed up” candy canes or peppermint pieces and 1/3 cup finely chopped pecans.

'Quick 'n Easy' White Chocolate Peppermint Bark with Pecans 2 - My Yellow Farmhouse.com

7.  Drop by large tablespoons onto a cookie sheet which has been lined with waxed paper, parchment paper or plastic wrap.

'Quick 'n Easy' White Chocolate Peppermint Bark with Pecans 3 - My Yellow Farmhouse.com

8.  When candies are cooled and hardened, which won’t take long, they’re ready.  Enjoy !

‘Quick ‘n Easy’ White Chocolate Peppermint Bark with Pecans - My Yellow Farmhouse.com

Homemade Whole-Berry Cranberry Sauce with Apple and a Hint of Cinnamon

I consider my Homemade Whole-Berry Cranberry Sauce with Apple and a Hint of Cinnamon a ‘bonus recipein my series of 6 ‘make ahead’ recipes, all of which can be prepared – or prepped – a day or two ahead, which will help to make your busy life a bit easier!  By preparing a few dishes each night for two nights, all you’ll need to do the day of The Big Feast is roast the turkey, make the gravy and cook the green beans.

Everything was very casual the night of the ‘taste testing’.

Make Ahead Thanksgiving Dinner - My Yellow Farmhouse.com

My Yellow Farmhouse.com - Make-Ahead Turkey Dinner

MENU

  • Mashed Potatoes with Sour Cream and Chives

https://myyellowfarmhouse.com/2014/11/13/make-ahead-turkey-dinner-recipe-no-1-mashed-potatoes-with-sour-cream-and-chives/

  •  Sweet Potatoes with Cinnamon, Nutmeg and a Dash of Bourbon

https://myyellowfarmhouse.com/2014/11/15/make-ahead-turkey-dinner-recipe-no-2-sweet-potatoes-with-cinnamon-nutmeg-and-a-splash-of-brandy/

  • Herb Stuffing with Baby Bella Mushrooms, Celery and Onion

https://myyellowfarmhouse.com/2014/11/15/make-ahead-turkey-dinner-recipe-no-3-herb-stuffing-with-baby-bella-mushrooms/

++  Green Beans with Browned Butter and Sesame Seeds

https://myyellowfarmhouse.com/2014/11/22/green-beans-with-browned-butter-and-sesame-seeds-browned-butter-can-be-prepared-ahead/

  • Turkey Breast (or Turkey) with White Wine, Oranges  & + Savory Turkey Gravy

https://myyellowfarmhouse.com/2014/11/17/make-ahead-turkey-dinner-recipes-no-4-5-roasted-turkey-breast-or-whole-turkey-with-white-wine-oranges-and-apples-savory-turkey-gravy/

  • Bonus Recipe – Homemade Whole-Berry Cranberry Sauce with Apple and a Hint of Cinnamon

– – – –

I’m so pleased with how this cranberry sauce turned out.  Adding a bit of apple mellows out the naturally tart taste of the cranberries. And, the addition of just two small pinches of cinnamon and some brown sugar adds a subtle something extra.  (I’m heading down to Philadelphia for Thanksgiving & I’m taking this cranberry sauce to share.  I’ll be helping out where I can while I’m there. Still – it’s so nice to be a guest!!)

There are times… luckily not often… when I get a recipe idea that turns out really bad.  Such was the case recently.  I had the idea of substituting some orange juice for the water when making homemade cranberry sauce.  DON’T EVER TRY THAT !!   It was so sour – and I learned long ago that you just can’t fix sour… no matter how much sugar you add.  (Perhaps freshly squeezed orange juice would’ve worked…. what do you think?)

Ingredients and Method

Homemade Whole-Berry Cranberry Sauce with Apple and a Hint of Cinnamon - My Yellow Farmhouse.com

  • 3/4 cup sugar
  • 1/4 cup brown sugar    ++ NOT packed down !!
  • 1 cup water
  • 1 bag (12 oz.) fresh cranberries
  • 1/3 cup chopped (peeled) apple   ++ See photo below to give you an idea of what size chunks.
  • 2 pinches cinnamon
  • ++ You can add a few tablespoons of chopped walnuts, filberts or pecans etc. AFTER the cranberry sauce had been made.

Open a 12 oz. bag of cranberries – discard any bad ones.  Set aside.

Peel and chop apple.  You’ll need 1/3 cup.  ++ No turkeys were abused during the making of this cranberry sauce.  I did all the work myself, even though Mr. Turkey looks so very proud !

Homemade Whole-Berry Cranberry Sauce with Apple and a Hint of Cinnamon - My Yellow Farmhouse.com

Bring 3/4 cup sugar, 1/4 cup brown sugar (not packed), and 1 cup water to a boil.  Add cranberries, 1/3 cup chopped apple and 2 pinches cinnamon.

Homemade Whole-Berry Cranberry Sauce with Apple and a Hint of Cinnamon - My Yellow Farmhouse.com

Lower heat a bit – continue to boil – stirring occasionally – for 10 minutes.

Homemade Whole-Cranberry Sauce with Apple and a Hint of Cinnamon - My Yellow Farmhouse.com

Pour the cranberry sauce into a bowl, cover – allow to cool completely at room temperature.  Refrigerate until serving time.  Talk about e.a.s.y. !!

Happy Holidays to All  – Enjoy !

Make Ahead Turkey Dinner - My Yellow Farmhouse.com

Quick ‘n Easy Corn Salad

UPDATE – My friend Betsy at Bits and Breadcrumbs.com suggested heating up the Corn Salad in a 350 oven until bubbly, then serving it with tortilla chips. I love that idea !!  I think I might add a bit of cumin to the corn, peppers & onions etc., then sprinkle some extra cheese on the top. I can’t wait to try it.  Thanks Betsy !

—–It’s been so long since I’ve posted a new recipe here on My Yellow Farmhouse….for several reasons –  but I’m planning to make up for lost time, starting right now!!

The other day I spotted a recipe on Pinterest for Corn Salad and it looked so delicious I decided to make it, with a few small changes, for a barbeque last night. Everyone really enjoyed it – including my brother-in-law, who, I was told, “Hates Corn”!

Corn Salad is quick and easy to make. The only thing that takes any time at all is chopping the red, green and yellow peppers – and onion. I was lucky – my sister-in-law did all the chopping while I swam in the pool with the children!!

It seems Corn Salad is often served with crushed “Fritos Corn Chips” mixed in. I decided not to do that, but I did put some tortilla chips in a small basket for anyone who wished to add a them. As for me, I enjoyed the Corn Salad with, and without, the tortilla chips.

++  JUST IN CASE YOU WERE WONDERING  ++

Most of the differences in bell pepper color stem from time of harvest and degree of ripening. Green peppers are bell peppers that have been harvested before being allowed to fully ripen. While green bell peppers usually turn yellow-orange and then red this is not always the case. Red, orange, and yellow bell peppers are always more ripe than green ones and therefore require more time before they can be harvested; that’s why they are more expensive. Bottom line: all of the bell peppers originate from the same species of plant, and they achieve their different colors naturally, not by any artificial means.

It’s interesting to note that in addition to their unique colors, each differently hued bell pepper has a unique array of nutritional benefits. Green peppers feature an abundance of chlorophyll. Yellow peppers have more of the lutein and zeaxanthin carotenoids. Orange peppers have more alpha-, beta-, and gamma-carotene. Red peppers have more lycopene and astaxanthin, two other important carotenoids.   (From http://www.whfoods.org)

Ingredients & Method      Serves approximately 5 – 6  – – – –  recipe is easily doubled

  • 2 cans yellow corn – DRAINED WELL
  • 1/2 red bell pepper, chopped
  • 1/2 yellow bell pepper, chopped  ++ I recommend using the three different colors of bell pepper because each color has a different flavor. 
  • 1/2 green bell pepper, chopped
  • 1/2 medium purple onion, chopped
  • 1 cup shredded cheddar cheese  ++ I used “Sargento Cheddar Jack”.. Mild Cheddar & Monterey Jack Cheeses 
  • 3/4 to 1 cup of mayonnaise
  • “Fritos Corn Chips” or tortilla chips, optional              

My Yellow Farmhouse - Corn Salad - before mayo

+

In a medium bowl, place the 2 cans of DRAINED yellow corn, the chopped red, yellow and green bell pepper and chopped onion.  Add 1 cup shredded cheddar cheese – or a mix of mild shredded cheese.

+

Add 3/4 to 1 cup mayonnaise and mix all ingredients together well. Your Corn Salad is now ready to eat – or you can prepare it early and allow the flavors to blend.   Enjoy !!

My Yellow Farmhouse - Corn Salad with Green, Yellow & Red Peppers


M and C’s Chocolate Oatmeal Bars

FINAL CUT - M and C Choc and Oatmeal bars

A few weeks before Christmas I attended a really fun and well-organized event at my grandchildren’s grade school in Pennsylvania. It was a craft fair – but the kids all got to MAKE the crafts, all of which they could give away as gifts, if they so desired. Among the choices were a Christmas ornament, a really cute little pin with beads and a snowflake (which I was given for Christmas!) and “Snowman Soup”, which was made of instant cocoa mix, some marshmallows and a Hershey’s kiss, with a little candy cane tossed in for a stirrer – yummy!!. The table where you could make the always-popular Cookie Mix in a Jar was one of the busiest – and I was lucky enough to receive two of those!!

USE - M & C's CookiesAs my sons can attest, I’m not a very good cookie-baker. I tend to over-bake them, for some reason. Once, while chatting with a friend on the phone, I banged a cookie on the counter and asked her to guess what it was. She said, “A hammer?” “No”, I replied, just a tad embarrassed, “It’s a cookie!”

With my many cookie failures in mind, I decided to make “bars” with the two containers of cookie mix – and I’m glad I did. The bars turned out dense and moist, and, dare I say “hearty” due to the addition of the oatmeal. As a finishing touch, and, because there’s no walnuts in the mix.. AND … because you can never have too much chocolate, I melted a cup of morsels, spread them over the cooked bars and then sprinkled on chopped walnuts.   Enjoy!

Oven at 350     30 minutes     10′ x 13′ pan      Makes 32 bars… 1 1/2″ x 1 1/2″

Use - M & C Choc Oatmeal Bars    

Ingredients  – don’t worry about “leveling” the dry ingredients. At the craft fair, they don’t bother (or have the time).

  • 2 cups flour
  • 1 tsp. baking soda
  • 1 tsp. salt
  • 2 cups NOT PACKED brown sugar
  • 1 cup oatmeal – not instant
  • 2 cups chocolate chips
  • 1 stick butter (1/2 cup) – remove packaging, microwave on high for 30 secs.
  • 3 eggs
  •  1 Tbs. hot water
  • 2 tsp. vanilla
  • 1 cup chocolate chips
  • 1 Tbs. Crisco
  • 1/2 cup chopped walnuts

In a medium-sized bowl, place all the dry ingredients. Then add the softened butter, 3 eggs, 1 Tbs. hot water and 2 tsp. vanilla.

Spread the batter evenly in the 10″ x 13″ pan. I give you my permission to use your fingers, which will get really, really sticky but you can always lick the dough from them once you’re done mixing.  (I’m a big proponent of using (clean) hands when dealing with thick cookie doughs.)

Bake at 350 F for 30 minutes. The bars will be golden brown and a bit “bumpy” looking.

In a microwavable bowl or glass measuring cup, place 1 cup chocolate chips and 1 Tbs. Crisco –  microwave on high for 1 minutes. Take out and stir. Then microwave again – but this time for only 30 seconds. Spread the chocolate glaze evenly over the bars. Sprinkle with the 1/2 cups chopped walnuts. Allow bars to cool, then cut with a sharp knife into 1 1/2″ x 1 1/2 ” squares.  Enjoy!

 M & C's Chocolate and Oatmeal Bars