Ricotta and Spinach Ravioli with Red Pepper, Ham & Parmesan – – Ready in 20 Minutes!!

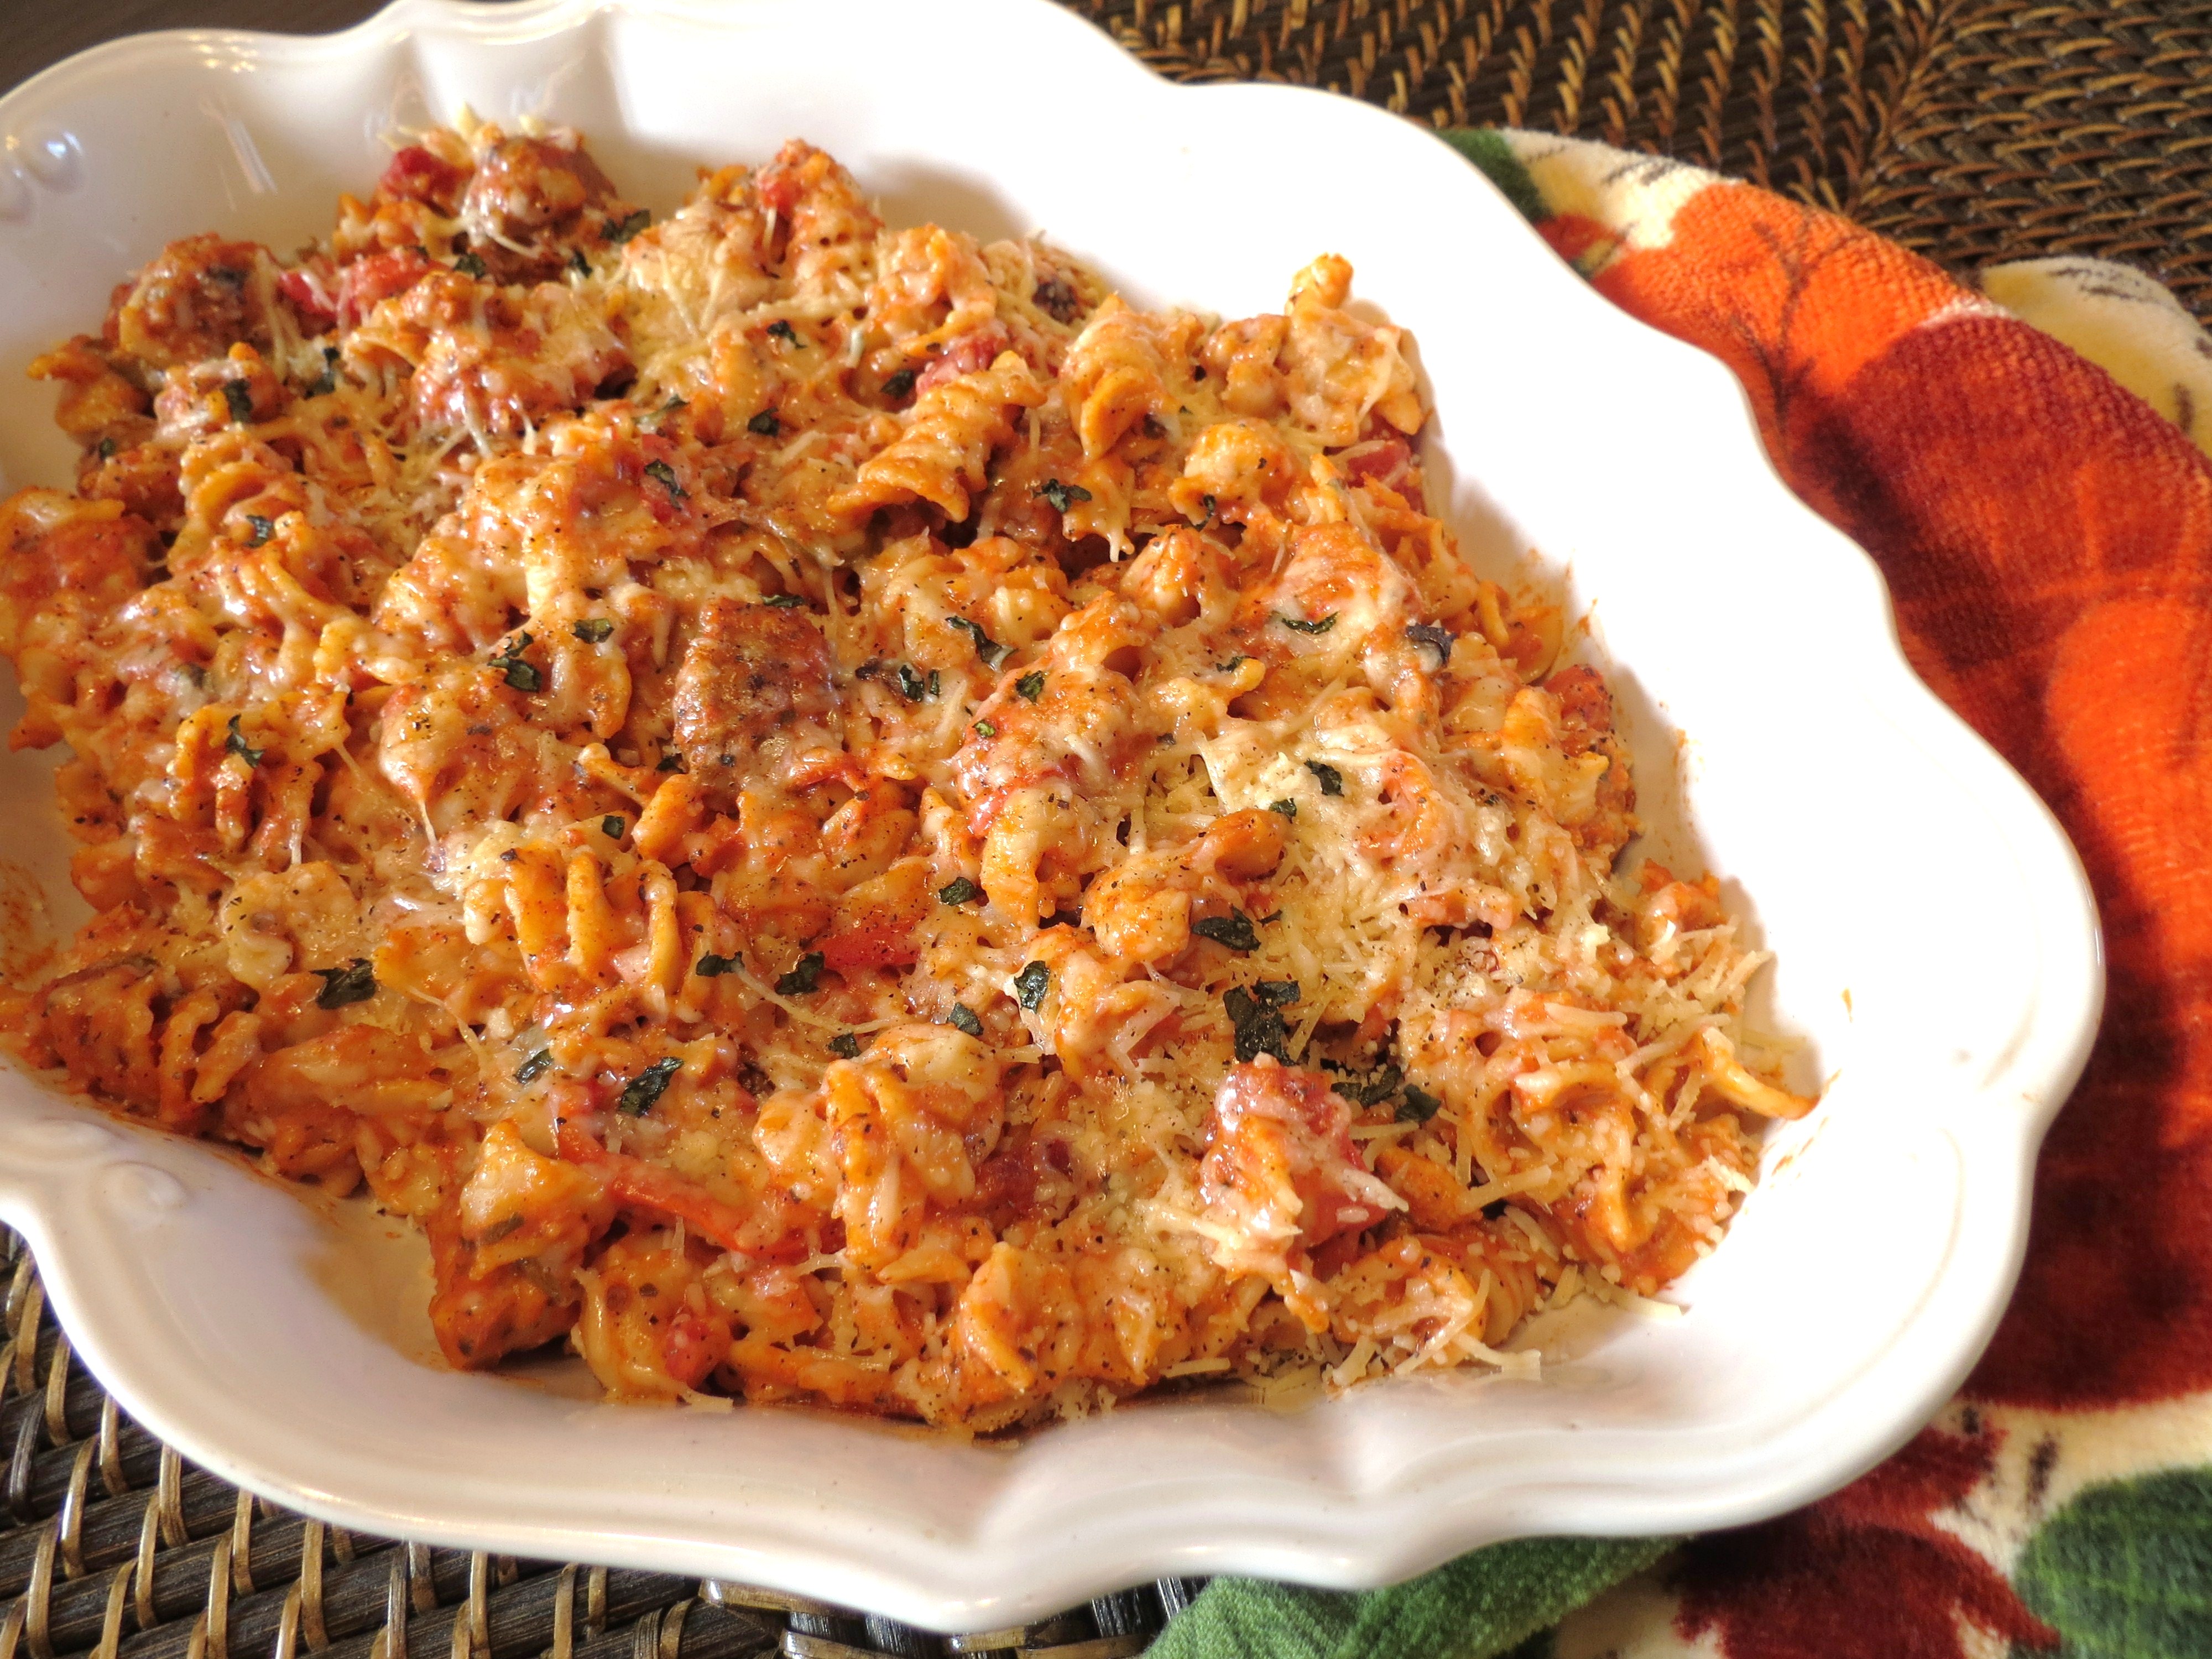
Quick, Easy and Good!!

If you’ve been following My Yellow Farmhouse for a while, you know I call these types of recipes Quick, Easy and Good. And you may also know – at times when the ‘cupboard is bare’ – I make up with a recipe using whatever I happen to have in the house.

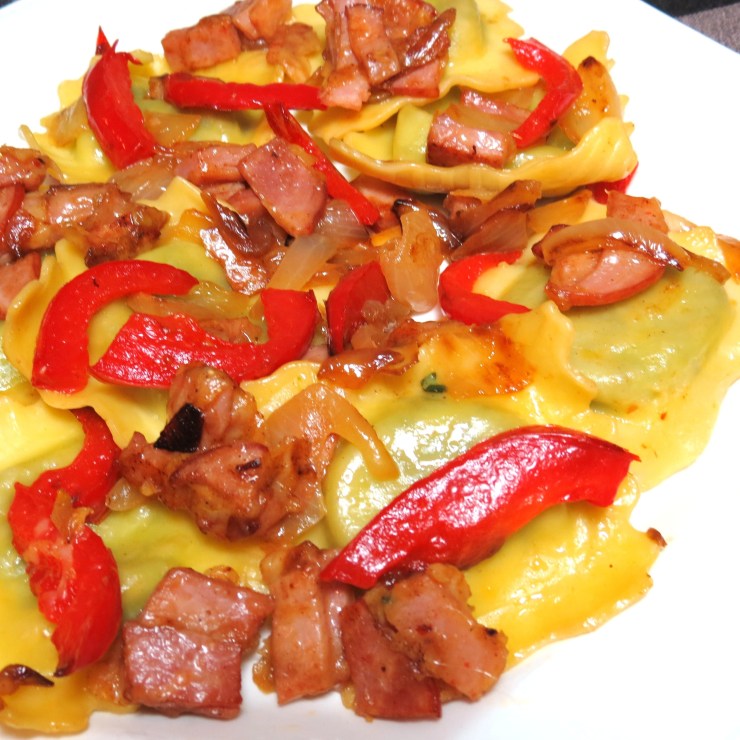
And – this is one of those recipes!!  Looking through my ‘almost empty fridge’ I scored some ham, a red pepper and a hunk of Parmesan cheese – plus a bag of refrigerated KANA brand Spinach & Ricotta-Filled Ravioli.  With the addition of butter and onion, I had the makings of a quick, delicious meal.

(I like KANA refrigerated pastas.  Buitoni is good as well.)

So, see what you have on hand.  Only have a green pepper… or a bit of leftover green or orange peppers, sliced those up  and throw them in.  Like a lot of onion?  Slice up a bunch.  Want a bit more butter… add it in.  Make this recipe your own.  I’m  just giving you a place to start.     PS  I highly recommend preparing this with ham because it adds  quite a bit of flavor to the dish.       ; o )


INGREDIENTS

Recipe feeds two, but is easily doubled!

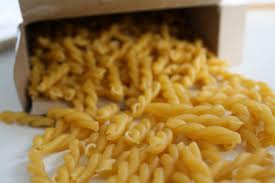
  • One (10 oz.) package Spinach & Ricotta Ravioli, cooked according to package directions   ++ RANA cooks in 4 – 5 minutes!!
  • 2 Tb. – 3 Tb. butter
  • sliced red pepper.. about half a pepper
  • sliced onion..about half a large onion
  • 1 cup ham, cut into short, rather thin slices    ++ If you are going to use deli ham, have it sliced thicker than for sandwiches.
  • about a 1/2 cup freshly grated Parmesan cheese   ++ Invest in a cheese grater.  Freshly grated Parmesan tastes so much better!

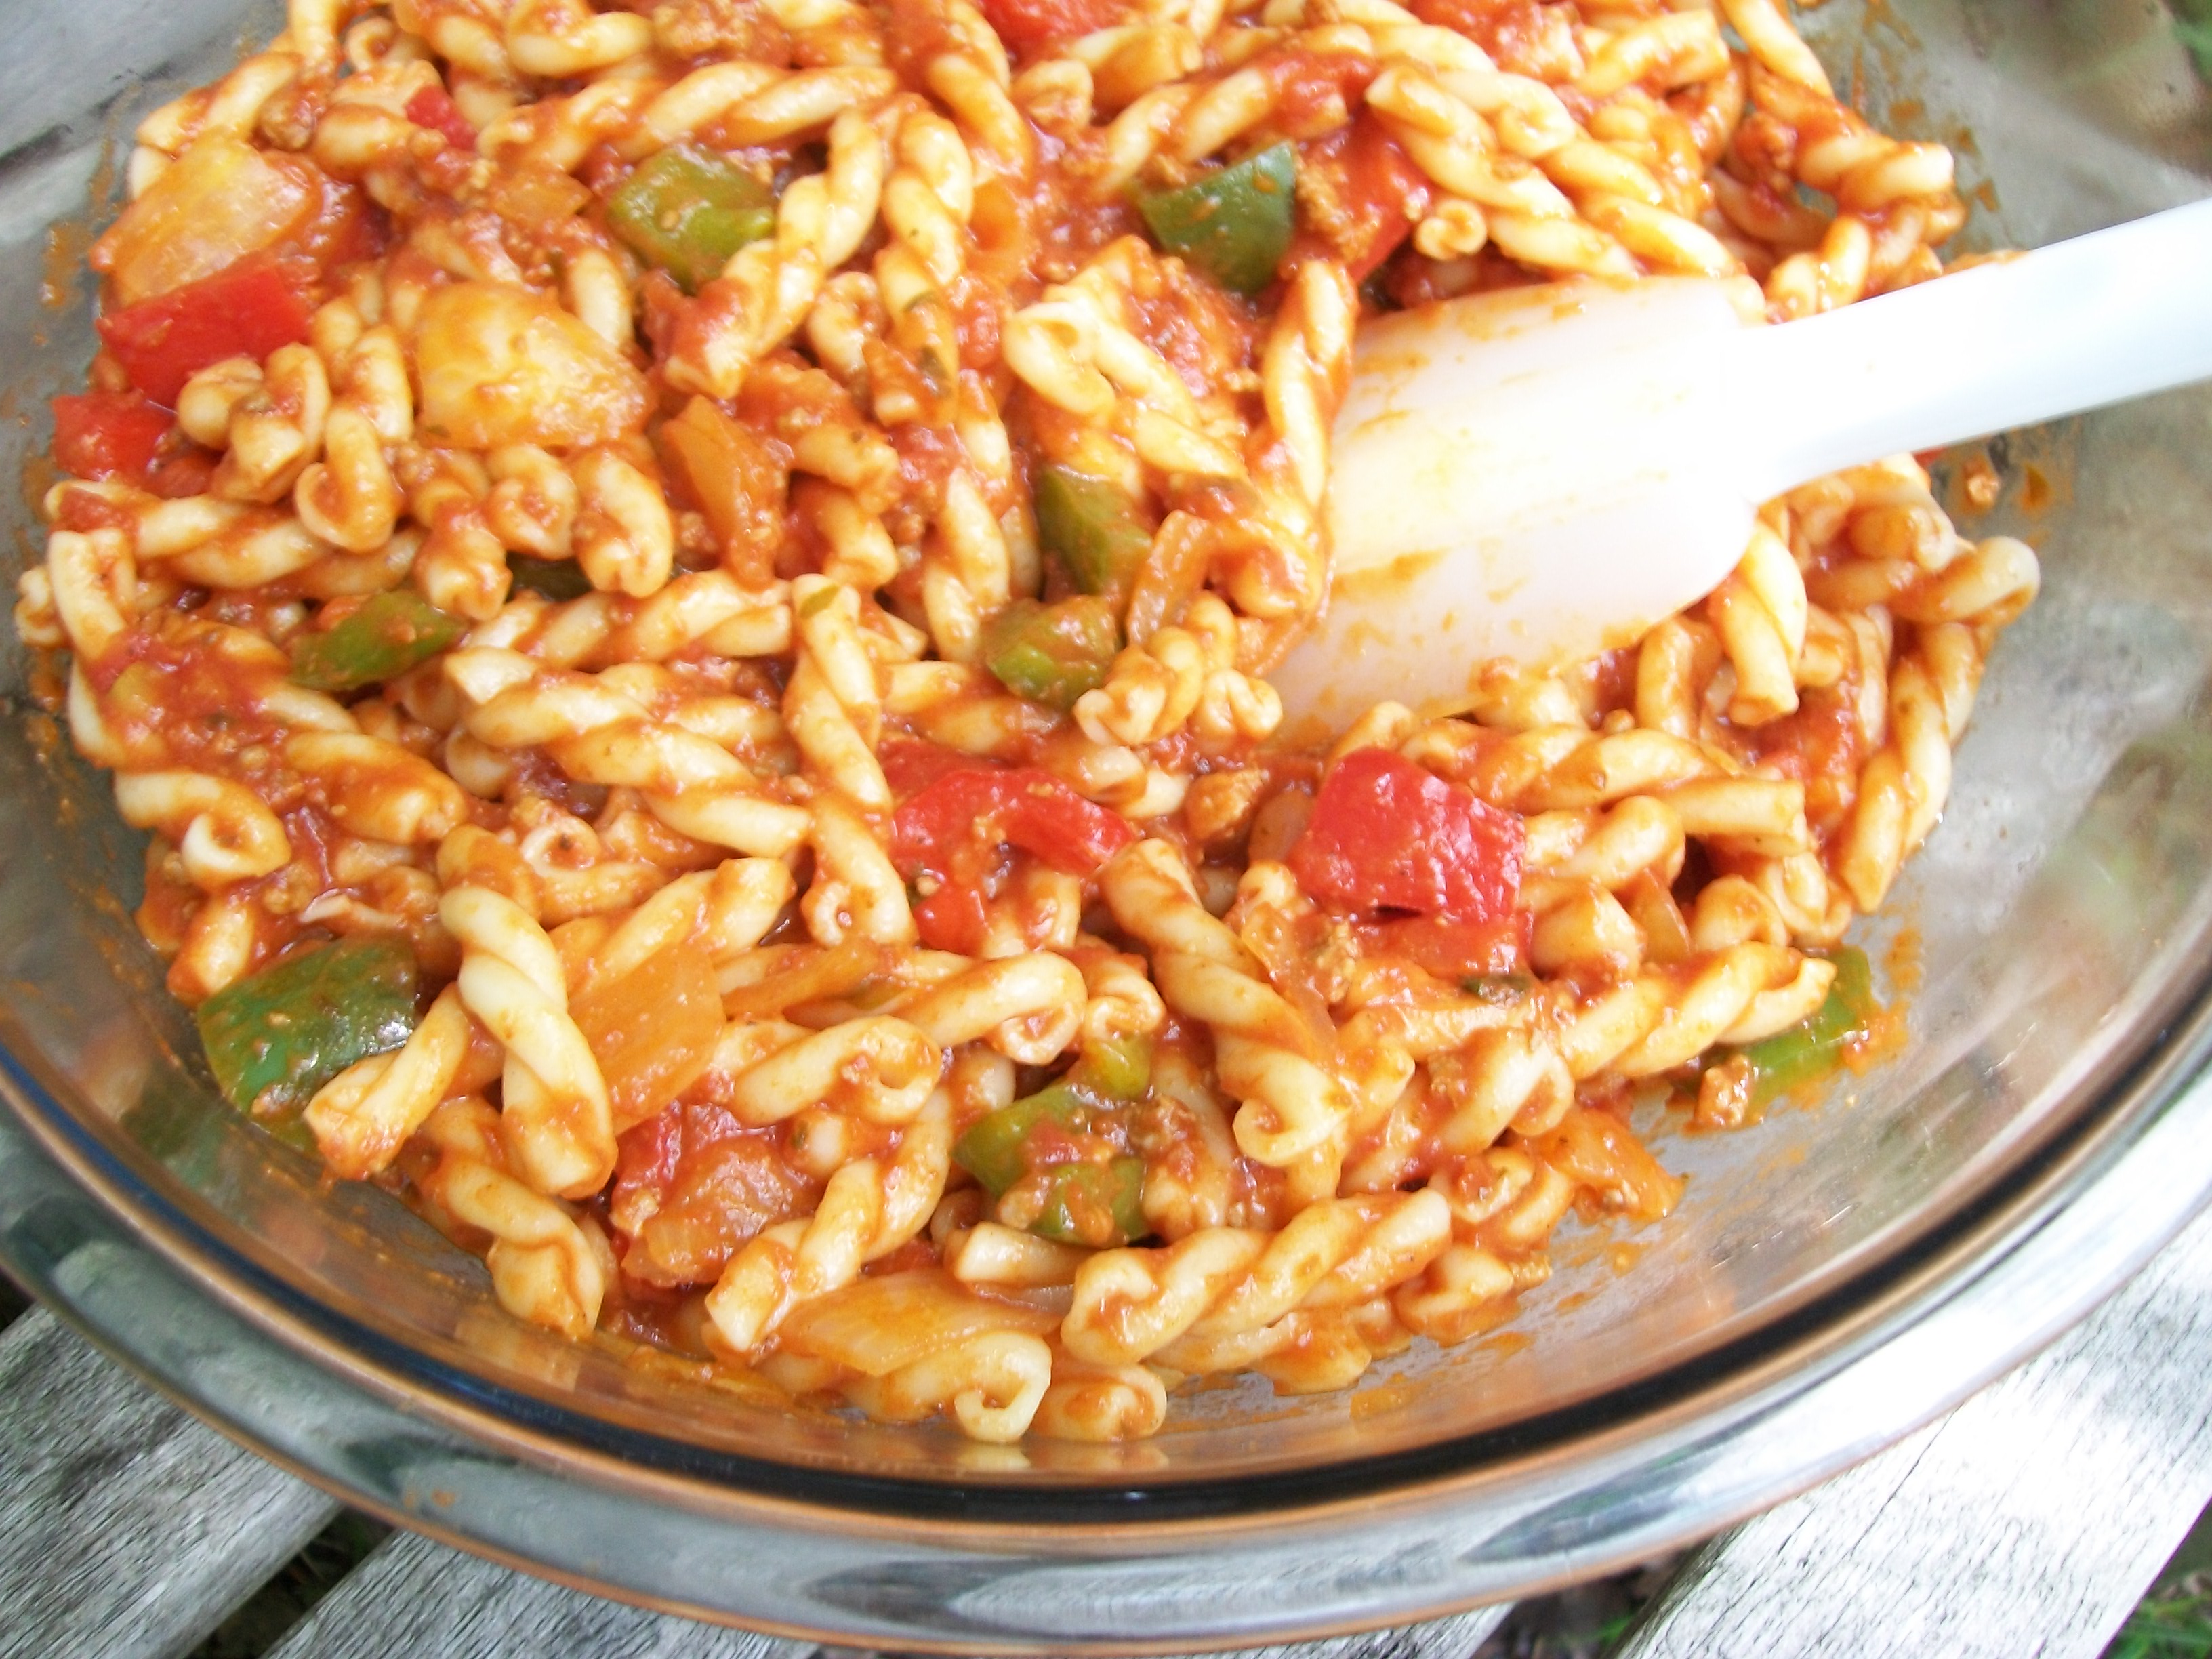
While you’re waiting for the ravioli water to boil, slice the red pepper, onion and ham.

Place 2 Tb. – 3 Tb. butter in a large non-stick skillet.  ++ TIP  Add veggies once pan starts to get hot. Cook over medium-high heat, stirring often, until veggies are softened.  Add ham, and cook just until heated through. Remove skillet from heat.

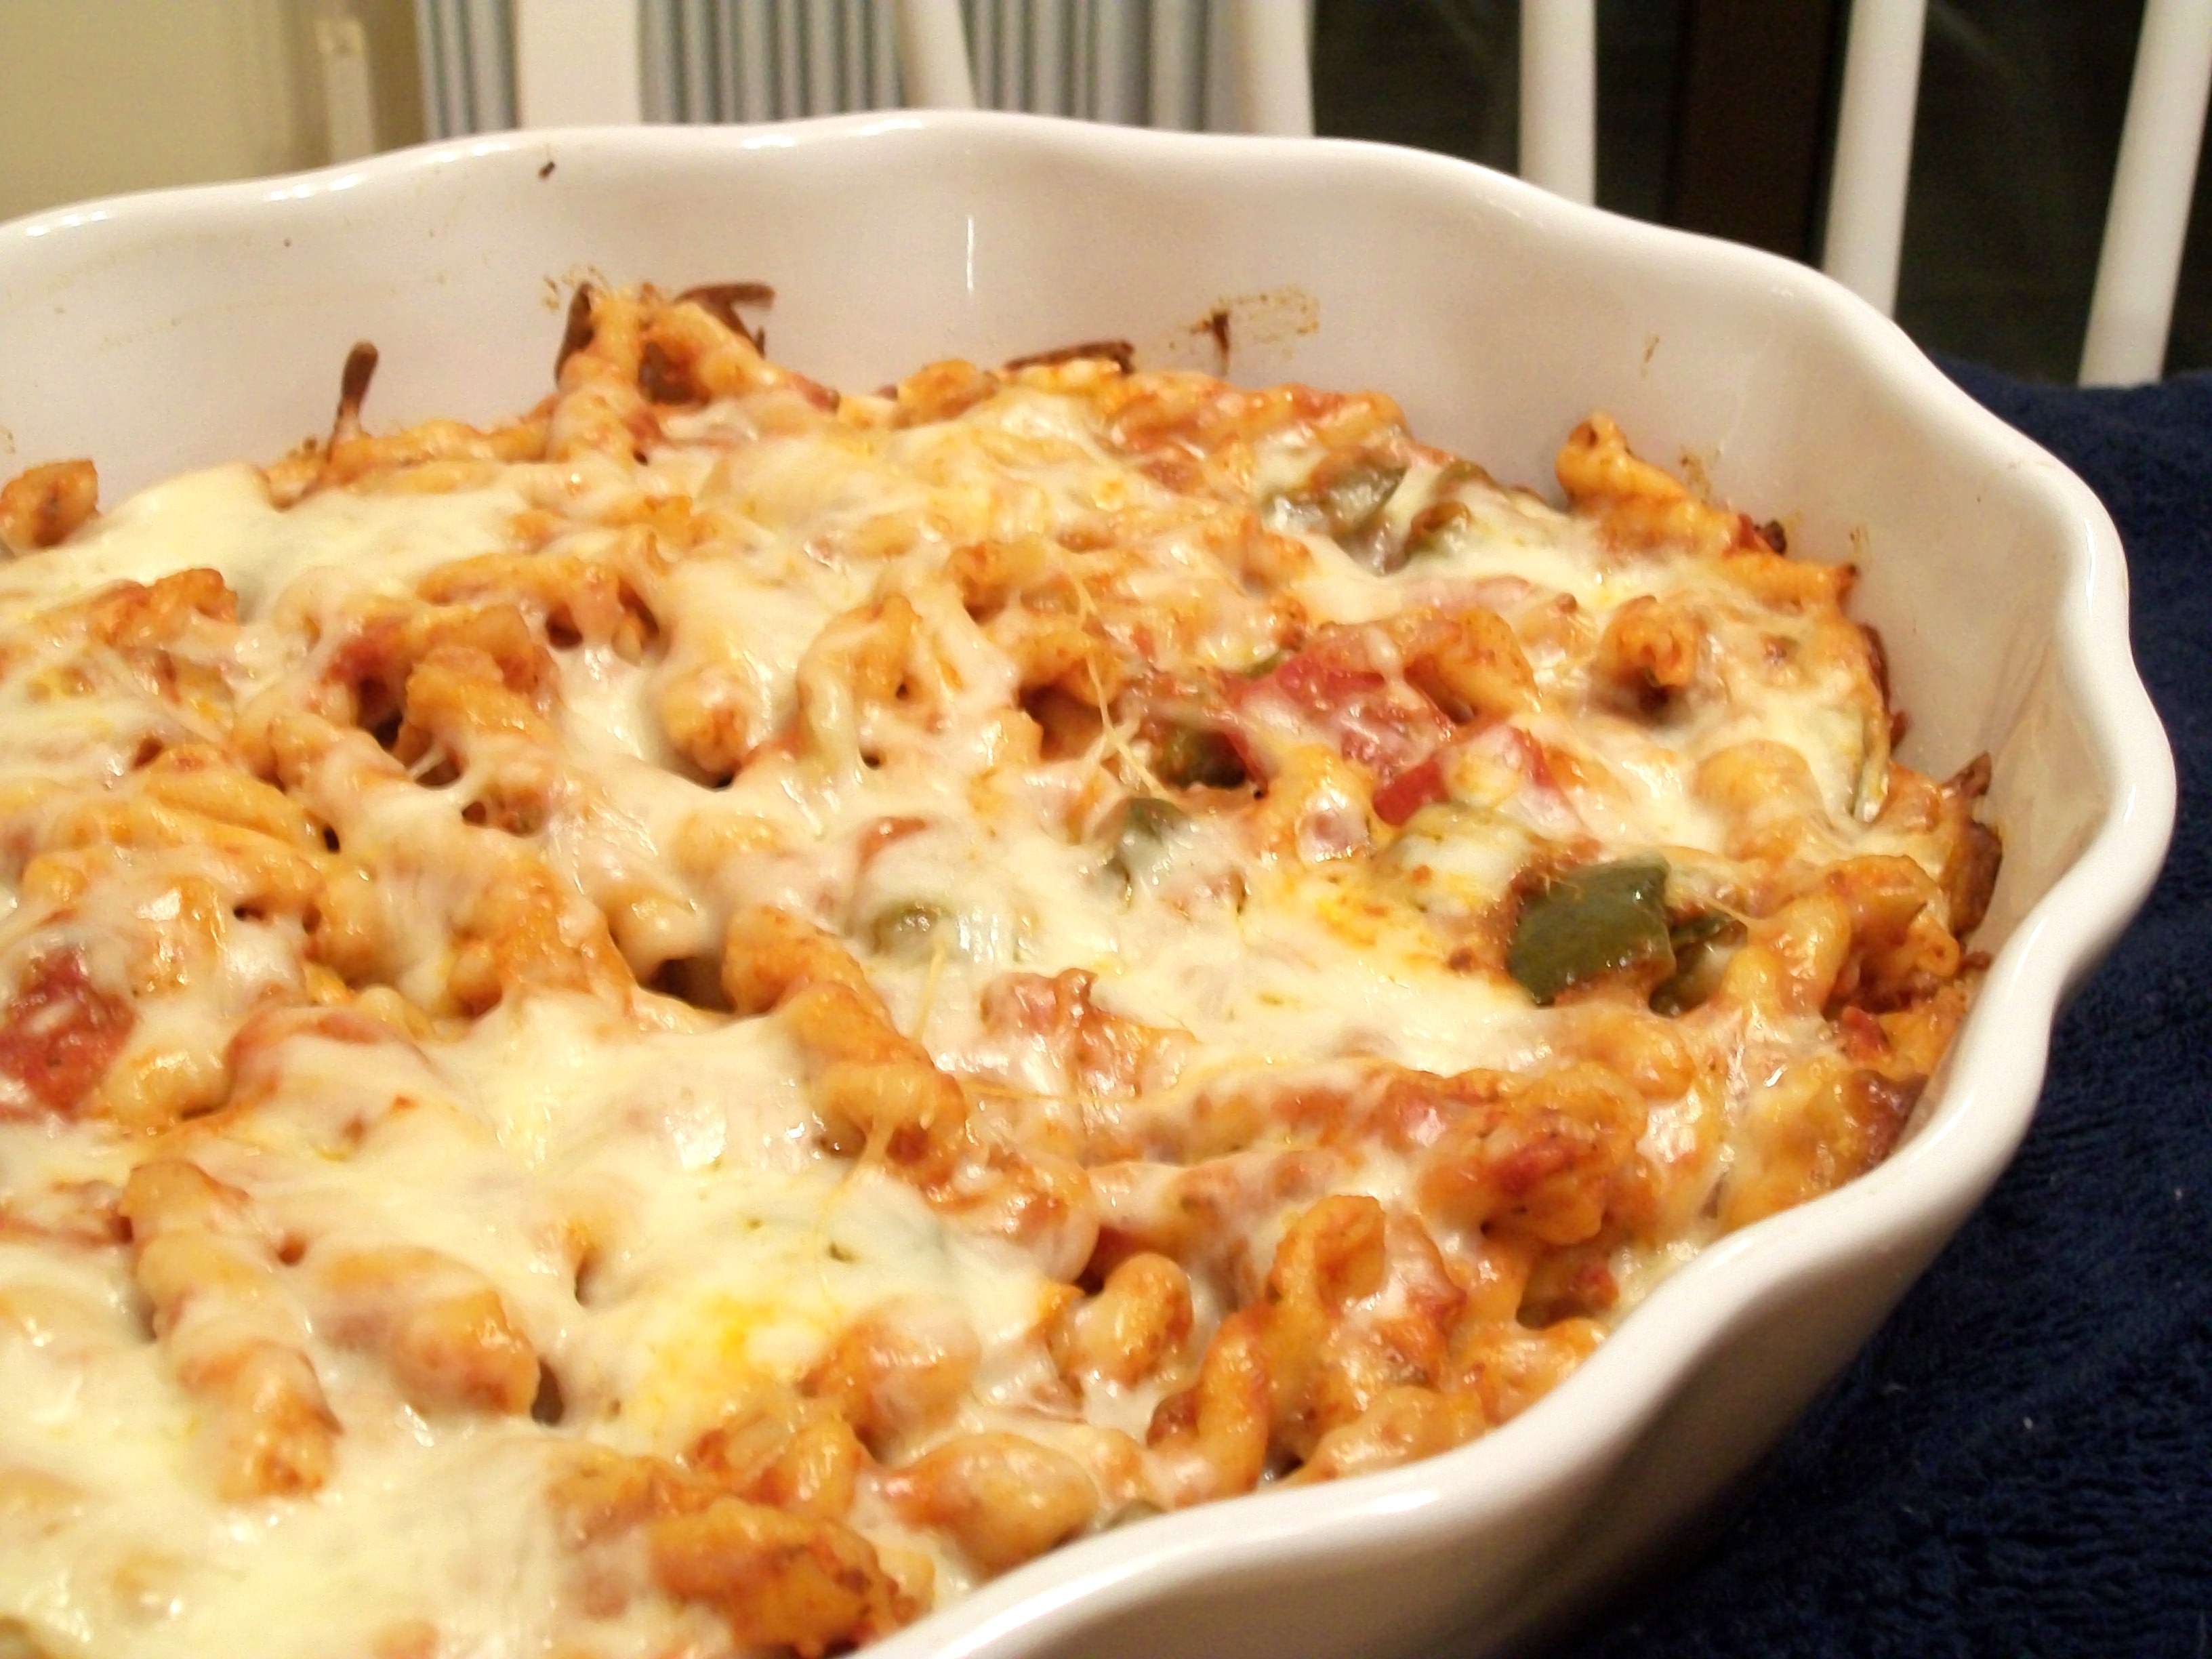
Drain cooked ravioli and add to skillet.  Sprinkle on 1/2 cup freshly grated Parmesan cheese.  Stir to mix ingredients – and you’ve got dinner.  Enjoy!

COPY - Ricotta and Spanach Ravioli with Red Peppers, Ham and Freshly Grated Parmesan - My Yellow Farmhous
Ricotta and Spinach Ravioli with Ham, Red Pepper and Parmesan


Forget Take-Out … Thirty-Minute Pizza with Homemade Crust

Two versions of Thirty-Minute Pizza –  Thin OR Thick Crust !!

Yup – takes about 30 minutes!  You make the pizza crust, let the dough rise for 10 minutes, add your favorite pizza toppings and you’ll be eating hot, fresh, delicious homemade pizza in less time than it takes to wait for delivery!  

Having a party which includes children?  Prepare dough ahead and let each child make their own individual pizzas.  They’ll have a great time!

Here’s my Latest Thing – invite The Girls over for a night of wine & fresh pizza. Soo much fun!

small red heart

From our last party…fresh mozzarella, sauteed red peppers & onions, pepperoni and arugula   

thirty-minute-pizza-myyellowfarmhouse-com

Meatball Version – Got leftover meatballs & sauce….?     

My Grandchildren’s Version – Each put on exactly what they wanted on their half of the pizza.  And just look at those flying hands!  

Fresh Mozzarella and Fresh Basil – The first Thirty Minute Pizza I ever made.

Follow this link to ‘Popover Pizza’ a.k.a. ‘Upside Down Pizza’, which was one of my twins sons favorites when they were young!

6 - Popover Pizza a.k.a. Upside-Down Pizza - myyellowfarmhouse.com

For the meatball pizza I used whatever I had in the fridge; some meatballs, spaghetti sauce and various cheeses.  Once my pizza was fully ‘fitted out’, it was popped onto the lowest shelf in the oven. After 14 minutes I was happily stuffing my face with hot, delicious pizza. And, get this, I’m not usually a big pizza fan.  But I’ve been known to have three pieces of Thirty Minute Pizza.

Recently I doubled the pizza crust dough recipe, put the dough in two large resealable plastic bags and refrigerated them. Actually, I made the dough two days ahead, so on the night of the party, the dough had risen so much that the bags were near to bursting.

My plan was for each of the four ‘kiddos’ who attended the party to make their own individual pizzas.  And it worked like a charm.  I gave each child a small piece of parchment paper, a hunk of dough and some ‘pizza fixings’. The mini individual pizzas, still on the parchment paper, were placed on a cookie sheet and baked on the lowest rack of the oven for about 13 minutes. The kids had a great time making their pizzas AND they actually ate almost all of them – which was pretty unusual since they usually eat like birds..    ; o )

small red heart

Thin Crust Version – note cooking time is slightly less than Thick Crust Version !

To double the Thin Crust Version – do NOT double salt. Use 1 tsp. ..  double all other ingredients

Oven at 425F     Bake on lowest rack for 12 – 14 minutes.

Ingredients and Method          

  • 2 cups all-purpose flour   – plus a bit extra when kneading the dough
  • 3/4 tsp. salt
  • 1 1/2 tsp. sugar
  • 2 1/4 tsp. quick rise (or bread machine) yeast – OR 1 packet
  • 3 Tbs olive oil    ++  I used olive oil infused with basil
  • 1/2 cup very warm water   –  120 to 130 degrees    ++  Water should feel very warm..but not quite hot.

Sauce & Toppings of Your Choice!

  • pizza sauce or spaghetti sauce or  etc.
  • meatballs, cut in half or thirds
  • pepperoni
  • cooked ground beef
  • peppers, onions etc.
  • fresh mozzarella, grated mozzarella, grated Parmesan, grated Romano etc .  OR – pepper jack cheese, grated 5-cheese Italian mix…. whatever you have
  • Don’t be afraid to try things like ham and slices of canned pineapple etc. YUMMY!
  • Or make a White Pizza with Alfredo sauce & cheese.   Or mix it up and add sliced tomatoes and fresh basil.

Method

In a good-sized bowl place 2 cups all-purpose flour, 3/4 tsp. salt, 1 tsp. sugar and 1 packet quick rise (or bread machine) yeast, which equals 2 1/4 tsp.  Mix dry ingredients with a fork.

Add 3 Tbs olive oil and 1/2 cup very warm water   –  120 to 130 degrees  ++  Water should feel very warm..but not quite hot.  Mix ingredients together with a large spoon.  Towards the end it might seem as if there’s not enough water but just keep mixing in the rest of the flour and it’ll turn in a really nice dough.  ++  Dough will be a stiff.

Sprinkle a little flour on the counter or a clean dish towel.  Knead dough for about four minutes. Dough should be nice and elastic by this time.  Place the bowl you were using over the ball of dough and let rest for 10 minutes.

++   You’re going to find this dough easy to work with.  Because the dough is warm and fresh, it won’t keep shrinking back every time you try to form the it.  

After letting dough rest, I suggest using your fingers to press dough into shape.  Add whatever toppings you wish.  Bake pizza at 425F – ON THE LOWEST SHELF OF YOUR OVEN – for 12 to 14 minutes, or until bottom is slightly browned and the crust is just a bit brown.  ++ I cook the Thin Crust pizza for about 12 minutes but ovens differ.

++  I like to use a 11 1/2 inch nonstick pizza pan with holes on the bottom because it makes a crisper crust.  You can also use a cookie sheet.  If your cookie sheet isn’t nonstick, I recommend using parchment paper – it makes it much easier to remove the cooked pizza.

Thicker Crust Version – note cooking time is slightly different !

To double the Thicker Crust Version – do NOT double salt.   Use 1 tsp. ..  double all other ingredients

Ingredients and Method          

  • 2 1/4 cups all-purpose flour   – plus a bit extra when kneading the dough
  • 3/4 tsp. salt
  • 1 1/2 tsp. sugar
  • 2 1/4 tsp. quick rise (or bread machine) yeast – OR 1 packet
  • 3 Tbs olive oil    ++  I used olive oil infused with basil
  • 2/3 cup very warm water   –  120 to 130 degrees    ++  Water should feel very warm..but not quite hot.

See TOPPINGS & METHOD above

++  Bake on lowest rack of oven set at 425F – for 12 – 15 minutes.  

++ I cook the Thicker Crust pizza for 15 minutes but ovens differ.  The pizza dough should be slightly browned on the bottom and the crust will just be a bit brown.  

++  I like to use a 11 1/2 inch nonstick pizza pan with holes on the bottom because it makes a crisper crust.  You can also use a cookie sheet.  If your cookie sheet isn’t nonstick, I recommend using parchment paper – it makes it much easier to remove the cooked pizza.

 thirty-minute-pizza-meatball-version-myyellowfarmhouse-com

Quick and Delicious Popover Pizza – a.k.a. Upsidedown Pizza

Back in 1999, when I was such a neophyte with computers that I didn’t even know how to use spell check, I made a cookbook containing many of my twin sons’ favorite recipes. The cookbook, aptly named The Roy Family’s Favorite Recipes, was a big hit with my guys and they  still use it, and a subsequent Christmas cookbook, fairly often.

Popover Pizza was always a big favorite of my sons’ – and their friends.  If you happen to have leftover meatballs and sauce, prepare the Popover Pizza with that. Don’t happen to have leftovers?  All you’ll need is a pound of ground beef, a jar of prepared spaghetti sauce and an onion. Plus a few spices like oregano – whatever you’d like.

The meat and sauce are spread on the bottom of 9′ x  13′ pan, lots of shredded mozzarella cheese is sprinkled on top, then the popover batter is poured over the mozzarella, followed by a sprinkling of shredded Parmesan.  Pop the Popover Pizza into the oven for 30 – 45 minutes, or until the the popover ‘crust’ is puffed and  lightly browned. Et voila, dinner is served.

PS  – As I type this I’m staying with two of my grandchildren while my son M. and his wife are vacationing in Spain. Yesterday I broke out my son’s copy of The Roy Family’s Favorite Recipes and made Popover Pizza.  Judging from the stains and drips on the page, it seems Popover Pizza is  big hit with the new generation of Roys as well.  Enjoy!!

Follow this link to ‘Forget Takeout Pizza – Thirty Minute Pizza with Homemade Crust

thirty-minute-pizza-meatball-version-myyellowfarmhouse-com

small red heart

Oven at 400F         Buttered 9′ x 13′ pan            Bake for 35 – 45 minutes

INGREDIENTS

  • 2 – 3 cups leftover meatballs and sauce     ++  chop meatballs into chunks
  •      Don’t have leftover meatballs and sauce?
  •                1 lb. ground beef
  •                1 small onion, chopped
  •                1 jar purchased spaghetti sauce
  •                1 /2 tsp. dried oregano, basil or Italian herbs
  • 2 cups shredded Mozzarella cheese
  • 1 cup milk     ++ Full fat or 2% is best
  • 2 large eggs
  • 1 Tbs. olive oil
  • 1 cup all-purpose flour
  • 1/2 tsp. salt
  • 1/2 grated Parmesan cheese

METHOD

Butter a 9′ x 13′ pan

– If you have leftover sauce and meatballs, spread 2 – 3 cups of sauce and chopped up meatballs on bottom pan.

– No Leftovers?  —  Fry 1 lb. ground beef and one onion, chopped, in a large skillet. Remove any fat from pan and discard.  Add one jar spaghetti sauce, some herbs, such as 1 /2 tsp. dried oregano, basil or Italian herbs –  any herbs and spices you wish.   Simmer sauce, uncovered, for 10 minutes to 15 minutes – stirring occasionally.  Spread beef and sauce mixture on bottom of pan.

Sprinkle two cups shredded Mozzarella cheese over meat and sauce.

  Popover Topping

In a medium bowl beat -on high – 1 cup milk, 2 large eggs and 1 Tbs. olive oil until foamy, about a minute.  Add 1 cup all-purpose flour and 1/2 tsp salt   Beat on high until mixture is thoroughly blended. Slowly pour batter over mozzarella cheese.  Sprinkle with 1/4 cup shredded Parmesan.

Bake at 400F for between 35- 45 minutes.  The meat and sauce with be bubbling and the popover topping should be lightly browned and puffy.  If you check and the popover topping isn’t puffy and lightly browned, just bake it a bit longer.  ++  The amount of time needed will depend upon your oven – and your pan. If using a glass pan, you will probably need the full 45 minutes simply because glass doesn’t conduct heat in the same way as metal.  (I’m making a note to myself to tell my son that!)   

6 - Popover Pizza a.k.a. Upside-Down Pizza - myyellowfarmhouse.com

A New Spin on an Old Favorite – Mushroom Ravioli Lasagna with a Light Basil & Bell Pepper Tomato Sauce

Mushroom Ravioli Lasagna  - My Yellow Farmhouse

My son Dan recently dropped by and I told him I’d made a new dish called Mushroom Ravioli Lasagna.  He wanted to try it for himself… and the first words out of his mouth were, “Why did you make so much”?  Hey, I prefer to make A LOT.  It’s just as easy to make a lot as it is too make a little.  And everyone loves leftovers, especially if you have children who seem to eat 18 hours a day.  I guess I’m still thinking like the woman who used to feed twin sons…. plus all their friends.  And now I just feed the neighbors!   ; 0 )

Mushroom Ravioli Lasagna with a Light Basil & Bell Pepper Tomato Sauce is easier, at least to me, than preparing a regular lasagna with lasagna noodles.  And the mushroom ravioli gives this Italian staple a whole new spin.  The tomato sauce has a fresh, light taste and is a cinch to prepare. I used several types of bell pepper, a bit of red onion, two cans of VERY good quality crushed tomatoes, one can of tomato sauce, some roughly chopped basil – plus salt and pepper.  Then I let the sauce simmer for about an hour, which thickened it up perfectly and allowed the flavors to meld.

While the sauce was simmering I mixed the ricotta, parmesan, eggs and fresh Italian parsley, and cooked the mushroom ravioli al dente.  All that was left to do was make the layers, which I thought was a lot of fun.  (Maybe I need to get out more, huh?)


A few of my sister-in-laws (I have six) visited Saturday night, when I prepared this lasagna. The wine was flowing and we had a lot of fun.  Due to my broken ankle, one of them had to drain the ravioli and place the lasagna in the oven… And take it out, of course.

I hope you like this Mushroom Ravioli Lasagna with a Light Basil & Bell Pepper Tomato Sauce as much as we did.  Enjoy!

Follow this link to -‘Not Your Grandmother’s’ Turkey (or Chicken) Tetrazzini – Prepared with Tortellini Instead of Spaghetti !

larger-photo-chicken-tetrazzini-with-a-twist-tortellini-instead-of-spaghetti

small red heart

Oven at 425 degrees F  for 45 minutes           13″ x 10″ deep casserole dish

Do NOT Cover Lasagna with Foil !    

Allow lasagna to stand for 10 minutes after removing it from the oven.

     INGREDIENTS

Sauce

  • 1 Tbs. olive oil
  • ½ cup each; chopped red pepper, chopped green pepper, chopped orange pepper ++ Or any combination – to equal  1 1/2 cups.
  • ¾ cup chopped red onion
  • 2 cans (28 oz.) crushed tomatoes ++  I used Sclafani brand for the first time & was very impressed with the quality.
  • 1 (8 oz.) can tomato sauce  ++  I used Hunts – Basil, Garlic & Oregano
  • 2 Tbs. roughly chopped fresh basil
  • 1 tsp. salt
  • ground fresh pepper – to taste

Filling

  • 4 cups (32 ounces) ricotta cheese
  • 1 (16 oz.) package shredded Mozzarella  ++ DIVIDED  Mix 2 1/2 cups into the ricotta mixture – the rest will be sprinkled top. 
  • 1/2 cup grated Parmesan (or Romano) cheese
  • 2 eggs
  • 1 Tbs. chopped fresh flat leaf parsley (a.k.a. Italian parsley)
  • 1 tsp. salt
  • 1/2 – 3/4 tsp. black pepper

Ravioli

  • 3 packages (9 0z.) fresh mushroom-stuffed ravioli, cooked according to package directions    ++ I used Buitoni Riserva Pasta Agnolotti Wild Mushroom, located in the refrigerator aisle of your grocery store.
  • 1 tsp. salt and 1 Tbs. olive oil in water
  • 2 Tbs. olive oil… to mix with cooked ravioli.  Helps it not to stick. (I forgot to do this…)

     METHOD

Add 1 Tbs. olive oil to a large stock pot or Dutch Oven.  Add ½ cup each; chopped red pepper, chopped green pepper, chopped orange pepper ++ Any combination – to equal  11/2 cups and ¾ cup chopped red onion.  Cook, stirring occasionally, over medium heat until peppers and onion begin to soften. (They’ll cook more in the oven.)

Add 2 cans (28 oz.) crushed tomatoes, 1 (8 oz.) can tomato sauce, 2 Tbs. roughly chopped fresh basil, 1 tsp tsp. salt and ground fresh pepper, to taste.  Simmer sauce, stirring occasionally, for one hour. Do NOT cover pan.  Sauce will reduce by about 1/3.

I highly  recommend using a splatter guard!

splatter guard

While sauce is simmering, prepare ricotta/mozzarella mixture.  In a medium bowl mix 4 cups (32 ounces) ricotta cheese, 2 1/2 cups shredded Mozzarella, 1/2 cup grated Parmesan cheese, 2 eggs, 1 Tbs. chopped fresh flat leaf parsley (a.k.a. Italian parsley), 1 tsp. salt and 1/2 – 3/4 tsp. black pepper.  Set aside.

Ravioli

Cook al dente, according to package directions.  Drain well and mix with 2 Tbs. olive oil so the ravioli won’t stick together.  Set aside.

Putting It All Together    ++  See photos below !

In a large casserole – or 13″ x 10″ pan – spread about 1  cups tomato sauce.  Layer about 14 mushroom ravioli on top, depending upon the size of the ravioli.  Spread HALF the ricotta/mozzarella mixture on top of ravioli.  Cover with more tomato sauce. Add your second layer of ravioli, other half of ricotta/mozzarella mixture and your final layer of ravioli.  Spread remaining tomato sauce on top.

At this time you can sprinkle on the remaining shredded mozzarella BUT I suggest you wait until the lasagna has been cooking for about 25 minutes, then sprinkle on the shredded mozzarella because this helps the mozzarella to not overcook and turn brown.  Enjoy!

Mushroom Ravioli Lasagna - My Yellow Farmhouse

Spaghetti Carbonara à la St. Julians Bay (Malta)

St Julians Bay - Malta   myyellowfarmhouse.com
The view from one of our favorite restaurants in St Julians Bay (Malta), where I, almost always, ordered Spaghetti Carbonara.

According to food lore, Spaghetti Carbonara is a relatively new addition to Italian cooking.. In fact, one of the theories is that Spaghetti Carbonara came about due to food shortages during World War II.  Another theory is that coal miners may have invented the dish.  (I’m not buying that theory.) Or… that the black specs of freshly ground black pepper – and you should add a good amount of pepper – resemble coal dust lying atop a bed of spaghetti mixed with eggs and cheese.  Actually, who cares where or why the recipe originated?  We love it because it’s easy to make and delicious!

Like spaghetti and meatballs, there’s an unlimited number of ways to prepare Spaghetti Carbonara.  While living in Malta I found a recipe very much like the ‘Popeye’s Spaghetti Carbonara’ served at our favorite restaurant, to which I added peas simply because that’s how it was served.  WHAT??… you’re probably thinking.  Yup – peas. And now I have to tell you how the making of the movie Popeye in the small island country of Malta led to a chef naming his version of Spaghetti Carbonara “Popeye’s.

If you’re not familiar with the character called Popeye, you may not know he always eats a can of spinach (yuck..) to give him strength.  It seems the chef preferred adding peas, as opposed to Popeye’s spinach, to the Spaghetti Carbonara dish named Popeye’s, and I think he made the right call.  Enjoy!!

Spaghetti Carbonara a la St. Julian's Bay, Malta
Popeye Village (Anchor Bay, Malta) for which ‘Popeye’s Spaghetti Carbonara’ was named.

small red heart

INGREDIENTS             Serves 4 – 5, depending upon your appetite         ; o )

  • ¾ cup cut-up bacon or pancetta  (about 4 ounces)     ++ Use kitchen shears!
  • ¾ package spaghetti  (12 ounces)   ++  I used ‘rigati’ – it has ridges to hold the sauce.
  •  2 tsp. salt
  • 1 Tbs. olive oil
  • 1/3 cup finely chopped onion    ++  Optional
  • 2 whole eggs – and – 2 egg YOLKS       ++  Take eggs out early – OR – place eggs in a bowl with very warm water.
  • 2/3 cup grated good-quality Parmesan cheese      ++  Or Romano …….. Or a combination of both.
  • ½ tsp. salt
  • lots of freshly ground black pepper
  • 1/2 cup WARMED heavy (whipping) cream    ++  Optional – but I recommend using it!!
  • 1/3 cup frozen peas   ++  Optional

++  Reserve some of the pasta water.

METHOD

Eggs should be room temperature, so either take them out earlier – or place them in small bowl with very hot water.

Following the directions on the box, cook 12 ounces (3/4 of a 16 oz. package) al dente, which means the pasta shouldn’t be too soft.  Add 2 tsp. salt to the cooking water.

While waiting for the water to boil and the pasta to cook,  cut up the bacon (or pancetta). If using bacon, cook in a skillet over medium-high heat until crisp. If using pancetta , it should be lightly brown but not crisp. Place cooked bacon or pancetta on a paper towel lined plate.  Drain skillet of bacon grease and wipe skillet with paper towel.

Add 1 Tbs. olive oil to skillet. Cook 1/3 cup chopped onion over medium heat until cooked through and just beginning to brown.  Put onions on the plate with the bacon.

Now it’s time to make the sauce.  In a medium bowl whisk together 2 whole eggs – and 2 egg YOLKS, 2/3 cup grated good-quality Parmesan cheese, ½ tsp. salt and lots of freshly ground black pepper.   ++ If you chose to include the 1/2 cup WARMED heavy (whipping) cream, whisk that in now.   Set bowl aside.

Microwave 1/3 cup peas with a small amount of water (about 3 Tbs.) and cook for 3 minutes.

When spaghetti is ready, drain it – reserving some of the pasta water.  Place drained spaghetti back in the pot. Replace pot on turned off burner.  Add onions, bacon and peas. Pour on the egg & cheese mixture and stir to combine.

Think the sauce is too thick?  Add a bit of the reserved pasta water.

After you’ve plated your spaghetti, remember to add a generous amount of freshly ground black pepper!  And there you go – dinner is served!

As you can see below, the sauce should be creamy and stick to the pasta.  Unlike Spaghetti Alfredo, the pasta will not be swimming in sauce.

Spaghetti Carbonara a la St Julians Bay (Malta) myyellowfarmhouse.com
Spaghetti Carbonara a la St Julians Bay (Malta)


Too Cold to Grill Outside? Try Italian Sausages Baked in the Oven – Perhaps with a Side of Baby Bella Mushrooms with Balsamic and Sage . . . Two Ideas Too Easy to Even Be Called ‘Recipes’!

Sausages cooked this way make excellent grinders, subs or po’boys!!

baby bella mushrooms with balsamic and sage (2)

I was pleased with how delicious these oven-baked Italian sausages turned out!  As you can see in the photo, the sausages were brown and juicy.  I am never again going to bother browning sausages in a skillet again!  No matter how hard I tried, even with a splatter guard, I’d always end up with grease splattered all over my kitchen.

To cook sausages in the oven, simply place sausages on a broiler pan and pierce each one a few times with a sharp knife.  Bake at 400 (F) for 30 minutes.  (It sure beats making a big mess!)

++ Line the bottom of the broiler pan with foil for an easy clean up.         

Baked Italian Sausages 001

 ++  If you don’t own a broiler pan, line a cookie sheet with foil and place a cooling rack on top. cooling rack


Place broiler pan containing sausages in a preheated 400(F) degree oven for 30 minutes.  ++  Don’t forget to ‘prick’ the sausages at least on one side so the fat can drain out.

You can turn the sausages once, but it’s not necessary. I turned them the first time I tried this, the day before Christmas, but yesterday I forgot simply because I was on my computer .. checking on ‘My Yellow Farmhouse’.

++  If you do turn the sausages, you might want to cook them a bit longer – until both sides are nicely browned and crisped, but its not necessary.

I prepared a spaghetti sauce last night with some of the oven baked Italian sausages (I used both sweet and hot), plus the ‘Baby Bella Mushrooms with Balsamic and Sage’. I’m keeping some of the sauce for myself and sharing some with one of my neighbors. She’s Italian-American – I hope she likes it!!   

How to Prepare ‘Baby Bella Mushrooms with Balsamic and Sage’

baby bella mushrooms with balsamic and sage (2)
Baby Bella Mushrooms with Balsamic and Sage

I think you’ll like the earthy flavor the dried sage adds to this dish.  And a bit of balsamic adds a whole other level of flavor.

INGREDIENTS

  • 1 Tbs. butter
  • 1 Tbs. olive oil
  • 1 (16 oz.) package sliced Baby Bella Mushrooms  
  • 2 Tbs. good-quality balsamic vinegar
  • 1/2 – 3/4 tsp. dried sage 
  • 1 Tbs. roughly chopped Italian parsley
  • freshly ground pepper 

++ See if you can find a package of good-sized Baby Bella Mushrooms.  The ones I found were large and meaty, a bit like Portabella mushrooms. In fact, Portabella mushrooms would be wonderful prepared this way!

Put 1 Tbs. butter and 1 Tbs. olive oil in a large skillet.  Allow butter and olive oil to heat a bit before adding 16 oz. sliced Baby Bella (or Portabella) mushrooms.  Cook, stirring often, until mushrooms begin to soften.

Baby Bella Mushrooms with Balsamic and Sage

Add 2 Tbs. good-quality balsamic vinegar and 1/2 – 3/4 tsp. dried sage, 1 Tbs. roughly chopped Italian parsley and some freshly ground pepper. 

Continue to cook just a few minutes more, stirring often, until mushrooms are fully cooked.  That’s it!!  

++ Don’t make the mistake of over-cooking mushrooms.  If juice starts pouring out of the mushrooms, you’ve cooked them too long.

A terrific hogie, sub or po’boy can be made with a combination of sweet and hot Italian sausage and these mushrooms. Or, the sausages and mushrooms could be added to a big pot of spaghetti sauce, as I did last night. (I’m planning to serve ‘Baby Bella Mushrooms with Balsamic and Sage’ as a side for a nice, fat steak or a juicy chicken breast.)  Enjoy!

Baked Italian Sausages 003
Quick ‘n Easy Oven Baked Italian Sausage
baby bella mushrooms with balsamic and sage (2)
Baby Bella Mushrooms with Balsamic and Sage


Cheesy Roasted Red Pepper and Pepperoni Calzone – Quick, Easy & Good ! (Uses pre-rolled and pre-formed pizza dough!!)

10 - Cheesy Roasted Red Pepper and Pepperon Calzone

Cheesy Roasted Red Pepper and Pepperoni Calzone is loaded with several types of Italian cheeses, roasted red peppers and pepperoni.  And better yet, its prepared with pizza dough found in the refrigerator section of your market and jarred roasted red peppers, which makes this calzone ‘Quick, Easy and Good’!

There is a bit of chopping, and about two seconds spent mixing the two eggs with a few spices and the Italian five-cheese mix, then it’s simply a matter of layering the ingredients on one half of the pizza dough, folding up the calzone and baking it.

INGREDIENTS              

  • 2 large eggs
  • 2 Tbs. roughly chopped Italian parsley
  • 1 cup Italian five-cheese mix –  OR – 1 cup mozzarella
  • 1/8 tsp. Italian seasonings
  • 1/8 tsp. salt
  • 1 tube refrigerated pizza dough

++  I used ‘Wewalka Classic Crust’. The dough is rolled in a layer of parchment, so you don’t have to worry about cutting a piece of parchment paper.  

 ++  If you can’t find ‘Wewalka’, use a tubed refrigerated pizza dough. Of course, you could make your own pizza dough but the cooking times may be slightly different.  (You will need a 9″ x 12″ rectangle.)    

  • 4 ounces thinly sliced pepperoni, sliced into strips
  • 1 1/2 cups jarred fire-roasted red peppers- sliced and drained
  • 9 slices provolone cheese

TIPS

I placed the pizza dough on the baking sheet when I first began preparing the topping ingredients, but found the dough had dried out a bit on the edges.  I suggest placing the pizza dough on the parchment-lined baking sheet a few minutes before you’re ready to put on the toppings.  ++ If the dough does become dry on the edges, it won’t hold together.  Just moisten one of the edges with a bit of water using your fingers and it’ll hold just fine!

As I mentioned above, I used the new pizza dough which comes rolled in parchment paper.  If you buy another type of prepared dough, be sure to line your baking sheet with a piece of parchment paper.  You’ll be glad you did because the parchment paper will contain any drips and keep the calzone from sticking.

METHOD      Oven at 400F        Bake for a total of 30 minutes

In a small bowl, briefly beat two eggs.  Mix in 1/8 tsp. Italian seasonings and 1/8 tsp. salt.  Set aside half the egg mixture.  To the other half, add 1 cup shredded Italian five-cheese mix (or 1 cup shredded mozzarella).  ++  You’ll be using half the egg mixture as the first layer of the calzone.  The second half is brushed on top of the uncooked calzone.

Chop 4 oz. thinly sliced pepperoni into strips.  Chop the roasted red pepper into strips.  You should have 1 1/2 cups. Drain in a colander and place strips on a few sheets of paper towels.

On one side of the pizza dough spread  the egg and shredded cheese mixture, being sure to to leave a 1″ border around the edges free of filling. Next place pepperoni strips, followed by the drained, roasted red pepper strips.  And finally add the 9 pieces of provolone.  ++  SEE PHOTOS BELOW   

Fold over the other half of the pizza dough, making sure the edges meet.  Using your fingers, press dough down so both sides stick together – fold edges under.  Using a sharp knife, cut a few vent slits on the top of the calzone.

Bake calzone for only 15 minutes.  Remove from oven and brush with reserved egg mixture.  ++ You don’t have to use every single drop of the remaining egg mixture.

Return calzone to oven and bake until crust is golden – about another 15 minutes.  By this time the filling should be bubbling.  ++  A bit of oil from the pepperoni may bubble out but the parchment paper will catch it.

Allow calzone to rest  5 – 8 minutes, which helps the melted cheeses to set up a bit.  Cut into 12 pieces and – enjoy!!

++  If you chose, you can serve your creation with some marinara dipping sauce.  

Step-by-Step Photos – ‘Cheesy Roasted Red Pepper and Pepperoni Calzone’


Rotini with Creamy Red Sauce, Italian Sausage and Chicken

++ The casserole in the photo was prepared using approximately 1/2 of my Rotini with Creamy Red Sauce, Italian Sausage and Chicken.

Rotini with Creamy Red Sauce, Italian Sausage and Chicken was inspired by  ” jjbegonia’s Weeknight Chicken Riggies”.     http://jjbegonia.com/2013/11/04/weeknight-chicken-riggies/ 

++ Update – December 2013

My sons and their families spent the weekend of December 15th  here at my farmhouse, and we celebrated our ‘Roy Christmas’.  We had so much fun being together – and this year there’s a new baby in the family!!   (Our ‘Roy Christmas’ is usually two weeks before Christmas Day because one of my sons lives several states away.)  I served Rotini with Creamy Red Sauce, Italian Sausage and Chicken, as well as Grammy Brouillette’s French Canadian Meat Pies – of course! 

I’ve made three changes to the Rotini recipe simply because, like most people who love to cook, I really enjoy fiddling with recipes.   So – now you have two ways to prepare this dish !

1.  I took the casings off the Italian sausage and cooked the loose sausage-meat.

2.  Instead of three boneless chicken breasts – I used one (1 1/2 lb.) package of chicken breast tenders, cut into 1″ pieces.

3.  I added 1 (small) box of cherry tomatoes, cut in half.   

This is a great pasta dish to make for guests because it’s yummy & it makes a lot !  And – the best part – you can prepare ahead and easily keep it warm in the oven, which gives you time to enjoy yourself.

I add red wine to my sauce. BUT, if you skip the red wine and add a bit of vodka, you have a delicious “Vodka Sauce”. Believe me, you won’t taste the vodka –  it just gives the sauce another layer of flavor.  Whether you add red wine or vodka, the alcohol content completely disappears during cooking, so there’s no concern about serving this dish to nondrinkers or children.

+ Recipe feeds approximately 6 – 7 people

+ To make less – prepare half the recipe, which is shown in the photo at the top of the page.

+ I kept the Rotini with Creamy Red Sauce, Italian Sausage and Chicken warm and also served it from one of those ‘portable ovens’. I highly recommend acquiring one if you entertain often. (They’re pretty inexpensive !!)

This isn’t a great photo – there was a lot going on, so I didn’t have to time to ‘light the shot’.  Rotini with Italian Sausage and Chicken - My Yellow Farmhouse.com

Ingredients and Method

  • 1 to 1 /14 boxes — (16 oz.) Rotini, cooked al dente      ++ I.E. – the center of the pasta should be chewy… not soft.)   ++ There’s plenty of sauce if you chose to cook 1 1/4 boxes.)
  • 2 packages (14 oz) Italian sausage — 1 HOT  &  SWEET – cut into chunks.   (Or – take the meat out of the casings and cook it loose.)
  •  olive oil – you’ll need several tablespoons
  • 1/2 cup water
  • 3 large skinless, boneless chicken breasts – cut into bite-sized chunks.    OR 1 package ( 1 1/2 lbs.) chicken breasts tenders.
  • 1 large green pepper, roughly chopped or sliced
  • 1 large red pepper, roughly chopped or sliced
  • 1 large onion, roughly chopped or sliced
  • 3 cloves garlic – minced
  • 2 jars (24 oz.) spaghetti sauce   (I like ‘Bertolli Tomato & Basil’.)
  • 1 1/4 tsp. salt
  • 1/2 tsp. pepper
  • 1 tsp. sugar
  • 1/2 cup red wine …..  OR  ….. 1/4 vodka   Feel free to add more wine or vodka ‘to taste’
  • OPTIONAL – 1 (small) box of cherry tomatoes, cut in half
  • 1/3 – 1/2 cup freshly grated Parmesan cheese
  • 3/4 to 1 cup HEAVY cream    (Light cream works just as well….)
  • 2 Tbs. fresh basil, chopped   ++ Add as much, or as little, basil as you like!
  • 1/3 to 1/2 cup freshly grated Parmesan cheese – to sprinkle on top

Method

Cut sausage into chunks (or, take meat out of the sausage casings).    Set aside.   Cut 3 boneless, skinless chicken breasts into 1″ pieces – set aside.

 Rotini with Creamy Red Sauce and Italian Sausage and Chicken

Chop (or slice) 1 large red pepper, 1 large green pepper & 1 large onion.   Set aside.   Mince 3 cloves garlic – set aside.

Rotini with Italian Sausage and Chicken.jpg

Pour a few tablespoons of olive oil into a large skillet. Brown sausage pieces (or loose sausage meat). ++  The sausage does NOT need to be fully cooked. It’s going to cook more in the sauce. Place the browned sausage into a large saucepan or stockpot.

Rotini with Italian Sausage and Chicken.jpg

Remove most of the fat left in the frying pan – but not all.

Deglaze the skillet with 1/2 cup water.  Add the chicken chunks and simmer (uncovered) for 4 – 5 minutes – stirring often – until chicken is no longer pink. ++ Don’t overcook chicken – you don’t want tough chicken!   Place cooked chicken (and any juices) in the stockpot already containing the cooked sausage.

Now add a few tablespoons olive oil to your frying pan. Cook the chopped (or sliced) pepper and onions until they are crisp tender.  Add 3 cloves minced garlic and cook another minute or so.

Place the cooked onions, peppers and garlic in the stockpot containing the cooked sausage and chicken.

Rotini with Italian Sausage and Chicken - for a crowd 019

Add to the stockpot;   2 jars (24 oz.) spaghetti sauce, 1 1/4 tsp. salt, 1/2 tsp. pepper, 1 tsp. sugar, 1/2 cup red wine ( OR  ….. 1/4 cup vodka ) and 1/3 – 1/2 cup freshly grated Parmesan cheese.  (Optional – 1 (small) box cherry tomatoes, cut in half.)  

Simmer – uncovered – for 1/2 hour, stirring often so the sauce doesn’t stick.     ++ While sauce is simmering – cook Rotini according to package directions.

 Red Sauce - Rotini with Italian Sausage and Chicken.jpg

After simmering sauce gently for a half hour, add 3/4 – 1 cup cream. (Any type of cream will do !) Simmer on low for 1 – 2 minutes. ++ Be sure to ‘simmer’ – you don’t want to curdle the cream!   Add 2 Tbs. chopped fresh basil. ++ I like to add the basil at the last minute so you really get all the fabulous fresh basil flavor, which seems to ‘get lost’ if it’s cooked too long.

Rotini with Italian Sausage and Chicken.jpg

 Rotini with Creamy Red Sauce and Italian Sausage and Chicken

+ These two photos show only HALF the recipe

Place the cooked and drained Rotini into a large serving bowl or casserole.

Add the creamy red sauce – mix until well-blended. Sprinkle on 1/3 – 1/2  freshly grated Parmesan cheese – and serve.

Rotini with Creamy Red Sauce with Italian Sausage and ChickenOr………you can bake your Rotini with Creamy Red Sauce, uncovered, at 350F for 15 – 20 minutes, which actually intensifies the flavor.

If you want to keep your Rotini with Creamy Red Sauce warm for a while – just lower the heat to 225F & cover the casserole with aluminum foil.        Andiamo a mangiare !

Gemelli Pasta Bake with Parmesan & Mozzarella and Rustic Italian Bread

++ For my recipe for Rustic Italian Bread – please follow this link – https://myyellowfarmhouse.wordpress.com/2013/08/04/rustic-italian-bread

Rustic Italian Bread - myyellowfarmhouse.com

A meal featuring saucy/cheesy baked pasta with a warm slice of homemade rustic Italian bread is always a sure winner. This recipe is a snap to make and it can be put together ahead of time – which is always nice, especially when you’re having guests.

In my case, I was at our house in the Pocono Mountains, with plans to leave the next day, when I decided that I’d rather cook up something with whatever was in the refrigerator rather drag it all home. If you follow this blog, you’ll know that I love “digging in the fridge” and making “what’s for dinner” using whatever I find. I found a bit of left-over spaghetti sauce that I’d made following ChgoJohn’s recipe for basic meat sauce. (It makes quite a bit, so I’d frozen some). http://fromthebartolinikitchens.com/2013/01/16/basic-meat-sauce-sugo-di-carne/ I also found some left-over red and green pepper, an onion, some left-over bottled spaghetti sauce – and – digging further, I found a box of  pasta in the cupboard. We had run out of Parmesan, so I ran to the store – while there, I also purchased a bag of shredded Mozzarella.

I often bring my bread machine to the Pocono house, and my grandchildren love both making – and eating – homemade bread. So I decided I’d make – for the very first time – an Italian bread using the bread machine for the dough and then baking the bread in the oven. I’d never made Italian bread before and I was so happy with the results.  In fact, the bread looked so beautiful it almost looked fake!

And – I gotta say – the pasta turned out yummy, though I only ate a small bit ’cause I wanted to freeze both the bread and the pasta for my son and his family when they returned to the Pocono house. And were they ever glad because on their next trip they brought along a bunch of nieces and nephew. From what I was told, the pasta – and especially the bread – were big hits!

Pocono House - view from LodgeView from the fabulous new lodge built by the ‘association’ where we have our home in the Pocono Mountains. I LOVE sitting here – you can bring something to eat, and, better yet… something to drink!   So very peaceful….

gemelli pasta - from frites and fries.comGemelli (pasta), which comes from the Italian word for twin, resembles two strands of pasta twisted together. These small pasta twists keep their shape and hold the flavor of sauce beautifully while retaining a firm “al dente” texture – which makes Gemelli perfect for a baked pasta dish.     (Photo courtesy of Frites and Fries.com)

Ingredients for Gemelli Pasta Bake with Parmesan & Mozzarella

Oven at 350 F

Cook  . . .  covered – for 30 minutes.   Uncover….cook for another 15 minutes

++ If the pasta has been refrigerated, it’ll take a bit longer to cook. (Here’s what I do to tell if it’s hot enough – I put a CLEAN finger in the middle – if it’s hot in the middle, then it’s ready!)

  • olive oil – about 2 Tbs.
  • 1/2 to 3/4 green pepper, roughly chopped
  • 1/2 – 3/4 red pepper, roughly chopped
  • 1 medium onion, roughly chopped
  • 2 (24 oz) jars of spaghetti sauce    (I like Bertolli “Tomato & Garlic”.)
  • ++ If you have some left-over sauce with meatballs or sausage, chop up the meatballs/sausage and add to the pasta. Or – you could add some left-over chicken or ground beef.
  •  3 – 4 cups UNCOOKED Gemelli pasta, cooked according to package directions for al dente.
  • 1/2 cup freshly grated Parmesan cheese PLUS 1/4 cup to sprinkle on top       (I highly recommend you buy freshly grated Parmesan – it just tastes so much better!)
  • 1 bag shredded Mozzarella – DIVIDED
  • salt & pepper to taste

Follow the package instructions for cooking Gemelli pasta al dente. Once cooked, drain  in a colander & rinse to prevent further cooking.  While your pasta is cooking, heat some oil olive in a large skillet, and cook the green pepper, red pepper and onion just until they’re just “crisp tender”. If adding left-over sauce with meatballs etc. – add it now. If adding raw ground beef or chicken, remove the veggies and continue cooking until no longer pink. Reintroduce the veggies and add sauce. Mix well.

Gemelli Pasta Bake - Sauce

Pour your sauce into a big bowl. Add the pasta, 1/2 cup grated Parmesan and 1/2 the bag of shredded Mozzarella & combine.

Gemelli Pasta and Sauce

Pour into a large casserole dish or a 13′ x 9″ pan. Sprinkle with 1/2 cup shredded Parmesan and the rest of the bag of shredded Mozzarella.

Gemelli Pasta Bake - My Yellow Farmhouse.com

Bake at 350 F – covered – for 30 minutes. Uncover and cook for another 15 minutes – or until heated through.

If the pasta has been refrigerated, remove it from fridge about 20 minutes before cooking. – it might still take a bit longer go heat up – say 40 minutes covered   &   15 more uncovered.    Enjoy !

Gemelli Pasta Bake - myyellowfarmhouse.com

Rustic Italian Bread

The beauty of this recipe for Rustic Italian Bread is that the dough can be made in a bread machine and then baked in the oven – OR it can be made in the traditional way. So, you choose!

Unlike typical Italian bread, this bread is very light. It’s called “rustic” but I don’t think the name really fits. It’s more like “light as a feather Italian bread”!

Both recipes take 3 hours, 45 minutes  – including 1 hour for cooling the bread. But that’s not all “hands on” time.

Ingredients       (The same for both methods.)

  • 1 cup water – temperature 100 F to  115 F  Here’s a trick, if the water feels slightly warm on your wrist, then it should be fine. You only want it “warm”, not “hot”! Too hot – or too cold and the yeast doesn’t  work. Of course, if you’re using a bread machine, it heats the water for you!
  • 2 Tbs. olive oil
  • 3 cups BREAD flour  –  Interestingly enough – in Canada, they can use ordinary flour. Somehow the flour in Canada is “different”.
  • 2 tsp. sugar – Yeast needs sugar to “work”.
  • 1/2 tsp. salt
  • 1 (1/4 oz.) package active dry yeast – I called Pillsbury and they said to use regular yeast – even with a bread machine.  1/4 oz. yeast = 2 1/4 tsp.  OR 1 cake fresh yeast
  •  about 3 Tbs. cornmeal
  • 1 egg white, beaten – spread on the bread BEFORE baking

Using a Bread Machine to Make the Dough

Oven at 375 F   Bake 25 – 35 minutes   Yield = 1 (12-slice) loaf

Place all ingredients – EXCEPT the cornmeal & egg white – in bread machine according the manufacturer’s directions. Set on “dough” setting.

When dough cycle is finished, remove dough and place on lightly floured surface. (I use a dish towel.) Punch dough down – meaning press it down with your hands, which flattens it out. If dough is too sticky, mix in a bit of additional flour before shaping.

Cover dough with a clean cloth. (I use the same dish towel.) Let dough “rest” 15 minutes. It will have already begun to rise a bit again. Nothing seems to keep a good dough down.   ; o )

Shape dough into a baguette shape about 12″ long.

Rustic Italian Bread - formed

Prepare a cookie sheet by spreading 3 Tbs. of cornmeal on it. Place formed dough onto cookie sheet. If the baguette shape becomes a bit “messed up”, just pat it back into submission! I find the best way to cook or bake is not to take it too seriously. There’s alot you can do to “fix things” before they’re baked/cooked. And believe me, even wedding cakes can be fixed up – I know ! So don’t freak out – just find a way to fix the problem. I also find that talking to yourself helps immensely !

Now cover your lovely creation and let it rise in a warm place (80 F to 85 F) for 20 to 25 minutes. If your kitchen is cold, you can fill a 13″ x 10″ pan with hot water, place it in the bottom of your oven and let your bread rise in there. I’ve also been known to heat the oven a bit and then shut it off, but you may not want to try that in case you heat the oven too much.

After 20 – 25 minutes your dough should be about double in size. If the bread has been rising in the oven, obviously, take it out and set the oven to 375 F. Take a sharp knife and make a 1/2″ deep cut along the length of the bread. (Oops – I just realized the directions say “1 cut”, and I had read it as “one 1” cut”… oh well, my bread turned out OK..)

Brush sides and top of loaf with some of the beaten egg white.  I use my fingers…

Bake for 25 to 34 minutes – or until bread sounds hollow when tapped lightly.  I’ve found that bread often cooks faster than the directions say.  My bread was ready in 25 minutes, but each oven are different.

+ Tip – if you like a soft crust, cover the bread with a dish towel as it’s cooling.         Enjoy!

Directions for Traditional Method 

Rustic Italian Bread - myyellowfarmhouse.comIngredients – exactly the same as above

Lightly spoon flour into measuring cup. Level off with a knife. In a large bowl combine flour, sugar, salt and yeast. Mix well. Add warm water and oil. Mix well. Turn out dough onto lightly floured surface. (I use a dish towel.) Knead dough 10 minutes or until smooth. (To knead dough, push away from you with the palm of your hand, turn dough, fold over and repeat.) If dough is too sticky, add a bit more flour.

Place dough into a lightly greased bowl and cover with plastic wrap and a towel. Let rise in warm place for 30 to 40 minutes, or until doubled in size. Punch down the dough, place it back onto the lightly floured surface and cover with inverted bowl. Allow to “rest” for 15 minutes.

To form the dough into a baguette and to bake the bread – refer to the directions above, as they’re the same.    Enjoy!

++Recipe courtesy of Pillsbury


Italian Pasta Sauce with Meat and Fresh Herbs

Recipe makes approximately  2 quarts.  The sauce freezes well, so you can make a lot and freeze it for later! Or, you can easily halve the recipe.

Ingredients 

  • 3 Tbs. olive oil     
  • 3/4 lb. ground beef 
  • 3/4 lb. ground pork
  • 1 large onion, chopped   (About 1 1/2 cups)
  • 8 cloves garlic, minced    (I highly recommend using a garlic press.)
  • 4 Tbs. roughly chopped fresh parsley –  divided
  • 4 Tbs. roughly chopped fresh basil –  divided
  • 1/2 tsp.salt
  • 1/4 tsp. pepper
  • 1/2 to 1 cup red wine
  • 1 (6 oz) can tomato paste
  • 2 (28 oz) cans diced tomatoes with basil, garlic & oregano
  • OPTIONAL – 10 Crimini (or any type of brown mushroom) mushrooms, sliced       

In a large skillet with high sides – or a large pan, such as the size you boil pasta in, heat  3 Tbs. olive oil – add 3/4 lb. ground beef and 3/4 lb. ground pork. Break up the meat as it cooks, and continue cooking until juices run clear. Continue cooking until all liquid is absorbed and meat is browned a bit. Add chopped onion, HALF the chopped parsley, HALF the chopped basil, 1/2 tsp. salt and 1/4 tsp. pepper. Continue cooking until onion is translucent.

Basic Italian Pasta Sauce with Meat - My Yellow Farmhouse.com -

Add tomato paste and mix until paste is thoroughly combined with the meat/onion mixture. Cook for another minute, then add the red wine. Allow to simmer a few minutes to intensify the flavors, then pour in the two cans of diced tomatoes.

 Basic Italian Meat Sauce - before simmering

I like to use a mesh cover to cut down on splashing. (I wonder why I bother… my kitchen is always a total disaster when I cook!)

splash screen - John's sauce

Simmer the sauce – uncovered – for 1 1/2 to 2 hours, stirring every once in a while.  ++  If you prefer your sauce thicker, just continue simmering a bit longer.

Basic Italian Pasta Sauce with Meat - after 1 hour - My Yellow Farmhouse.comPhoto shows Italian Pasta Sauce with Meat and Fresh Herbs – 1 hour into cooking time.

Add the rest of the chopped fresh basil and chopped fresh parsley, which will gives you a wonderful burst of flavor.

++ The diced tomatoes may still be a bit “chunky at the end of the cooking time.  If you prefer a smoother sauce, you can “mash” the the diced tomatoes down a bit with a potato masher, which is what I do.

Remove the sauce from the heat.   Pour yourself a glass of some of that red wine and enjoy !

Basic Pasta Sauce with Meat - My Yellow Farmhouse.com

Here’s the link to my friend John’s Italian Pasta Sauce recipe, which was the basis of this recipe. http://fromthebartolinikitchens.com/2013/01/16/basic-meat-sauce-sugo-di-carne/

Stuffed Shells Florentine – Cook in Oven – OR – Outside on Your Grill !

++ These Stuffed Shells Florentine can be cooked outside on a covered grill set at “low” so your kitchen remains nice and cool !!t

The term Florentine, or à la Florentine, refers to any dish which is prepared in the style of the fabulous city of Florence, which resides in the Tuscan region of Italy. Florentine recipes often feature meat, poultry or fish served over a bed of spinach. In this recipe the spinach is, in fact, mixed with ricotta, mozzarella and Parmesan cheeses – plus eggs, fresh parsley and some spices. All this deliciousness becomes the filling for the stuffed shells, over which a quick and easy marina sauce is poured, followed by a grating of either Parmesan or Romano cheese. I’ve been making this recipe for years and it’s always been a family favorite, however I decided to change both the filling and the sauce – and I have to say I’m very happy with the results!

I was recently invited to spend a weekend with friends in the beautiful town of Wells, Maine. I had decided Stuffed Shells Florentine would be great to bring because everyone likes them – and this recipe makes a lot! Several of us planned to head north in just one car, so, in order to save space, I prepared the filling and the sauce – and cooked the shells –  in advance and then assembled the final dish the following night.

And, get this, my friend decided she’d cook the stuffed shells on the grill so we wouldn’t heat up her kitchen. I never would’ve thought of that . . .  We took the containers of sauce, the filling and the precooked shells outside and assembled everything on the picnic table. Since there were three of us stuffing the shells, it only took a few minutes.

We sealed the pan with a sheet of aluminum foil, and placed it in the grill – which was set to LOW.  Then we enjoyed a drink and just let the Stuffed Shells Florentine simmer away. We were very pleasantly surprised when we checked after a half hour to see the sauce bubbling away, signaling that the shells were thoroughly heated through.

So, now you have two choices –  heat these in either your oven or your  grill.  Enjoy!

++ Cook stuffed shells in the oven at 350 for about 40 minutes.

++ Cook stuffed shells in covered grill set on LOW for about 30 minutes.

Ingredients

  • 1 full box of jumbo pasta shells – cooked according to package directions and drained  (We had about five shells for which we didn’t have filling, but they were the ones which had fallen apart, so that worked out well !)
  • 2 jars (24 oz.) prepared tomato sauce  (I like Bertolli – Tomato & Basil)
  • 1/4 to 1/2 cup red wine
  • 1 Tbs. chopped fresh basil
  • 4 cups ricotta cheese (32 ounces)
  • 2 cups shredded mozzarella cheese  – plus extra to sprinkle on top !
  • 1/2 cup grated Parmesan cheese  –  plus extra to sprinkle on top !
  • 1 (10 oz) package frozen (DEFROSTED AND DRAINED!!) spinach (I actually squeeze the defrosted spinach to get out all the excess water.)
  • 2 eggs
  • 1 Tbs. chopped fresh flat leaf parsley (a.k.a. Italian parsley)
  • 1 tsp. salt – (or to taste)
  • 1/2 tsp. black pepper

– – – – –  “A Little Help from My Friends” Marinara Sauce  – – – – –

Place two jars (24 oz.) of marinara sauce into a large saucepan – add 1/4 to 1/2 cup red wine and 1 Tbs. chopped fresh basil. Simmer, uncovered, over medium to medium-low heat while you cook the pasta shells and prepare the stuffing.

+ +  I had planned to prepare a meat sauce featured on the blog “From the Bartolini Kitchens”.  I had even purchased the ingredients but ended up “doctoring” a purchased sauce when I realized I was running out of time. (And I was actually very satisfied with the results of my “doctoring”.)  But, if you’d like to make this dish with a traditional Italian meat sauce, take a minute to head over to John’s blog!

http://fromthebartolinikitchens.com/2013/01/16/basic-meat-sauce-sugo-di-carne/

John's Basic Meat Sauce Recipe

– – – – –  To Prepare the Filling  – – – – –

Stuffed Shells - cheese and spinach 1

In a medium bowl, mix 4 cups ricotta cheese, 2 cups shredded mozzarella, 1/2 cup Parmesan (or Romano) cheese , the defrosted and DRAINED spinach, 2 eggs, 1 Tbs.chopped flat leaf parsley, 1 tsp. salt and 1/2 tsp. black pepper.

– – – – –  Putting It All Together  – – – – –

Pour about two cups of sauce in the bottom of a 10 x 13 pan – or a large disposable aluminum pan. With a large spoon, spread the sauce out a bit so most of the bottom is covered with sauce – you don’t have to be fussy about it ….

Fill each shell with a heaping soup spoonful of the cheese/spinach mixture.  Pour the remaining sauce over the shells.

Sprinkle some shredded Mozzarella and grated Parmesan. (We ended up using some grated Monterey Jack in place of the grated Parmesan, which added a nice little “kick” of flavor!)

Ready for the Oven or Grill !!  (Cover with aluminum foil.)

Stuffed Shells - uncooked

Cover with aluminum foil. If using oven, set temperature to 350 and cook until heated through – about 35 – 40 minutes.  If using you grill, set dial to LOW and cook until heated through – about 30 minutes. (I put a – freshly washed – finger in the middle to check for doneness. It’s a bit unorthodox – but it works!)

Once the stuffed shells are heated through,  remove the aluminum foil and let the shells sit about five minutes. Of course, if you just can’t wait, then you can skip the “let it sit” part.  Enjoy!

Stuffed Shells Floretine - myellowfarmhouse.com

Penne Mozzarella Bake

Hi There – well, here’s another recipe from the woman who’s in the running for The World’s Worst Procrastinator! I’ve recently been thinking, “Maybe I’ll put these recipes out there – and no one’s gonna ever see them”. Then, I noticed that almost 100 people have “checked out” my little recipe blog so far….even though I have, at this point, so few recipes. If that’s not a motivating factor, then I don’t know what is!!  I’m sending out a great, big THANKS to my first 100 visitors! And I promise, there’ll be lots and lots of delicious recipes “comin’ at ya” from My Yellow Farmhouse!

I made up this recipe recently – and – I gotta say – it’s damn good!! Perhaps it’s the additional depth of flavor due to adding some red wine, and simmering everything together for a bit before assembling and baking this Penne Mozzarella Bake.

Oven at 350 F     Serves 6

  • smaller-sized Penne (macaroni) – measure 3 cups, then cook  “al dente”
  • 1 lb. ground beef – 80% lean
  • 1/4 cup chopped onion
  • 1/4 cup chopped green pepper – or mixture of red & green
  • 1/2 tsp. dried basil
  • 1/2 tsp. garlic salt with parsley
  • black pepper to taste – about 1/4 tsp.
  • 1 tsp. salt
  • 4 cups prepared spaghetti sauce
  • 1/4 cup red wine
  • 1/2 cup grated Parmesan – divided in two1/4 cup portions
  • 7 oz. container of sliced fresh mozzarella, drained

In a large skillet, over medium heat, cook ground beef until no longer pink. Remove beef from skillet, taking out most of the fat, but not all. Add the chopped onion and pepper to the skillet; cook, stirring, for about 4 minutes. Return beef to skillet. Simmer with the chopped onions and peppers for about 2 minutes, stirring occasionally. Now add spaghetti sauce, spices and red wine.  Lower heat, cover skillet, and simmer 15 minutes, stirring occasionally. (If you don’t have a big lid, cover with foil.)

Add the cooked Penne to the simmered spaghetti sauce mixture. (If there’s not enough room in the skillet, mix Penne and sauce mixture in a large bowl.)

Place half the Penne/sauce mixture in a 2-quart casserole. Then, in a single layer, place the drained mozzarella slices. Sprinkle with the 1/4 cup grated Parmesan cheese.

Cover this layer with the rest of the Penne/sauce mixture. Sprinkle with 1/4 cup Parmesan cheese.  Bake at 350 F – uncovered – for 30 minutes. Pour yourself a nice glass of the red wine left-over from making the sauce – and ENJOY!!