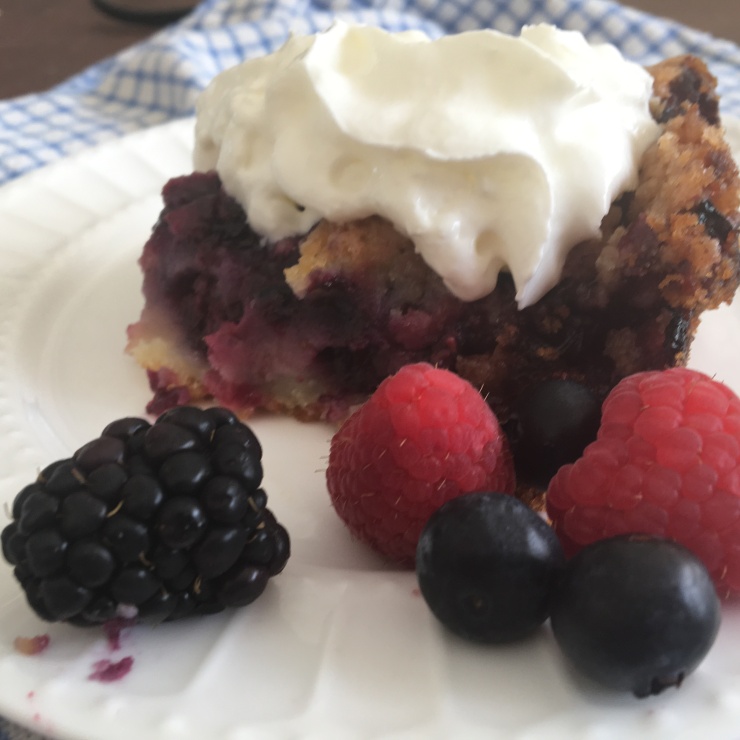
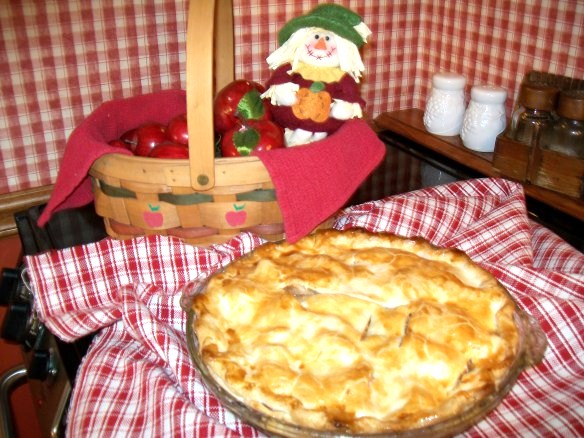
Mixed Berry Bubble-Up Cobbler

Mixed. Berry 'Bubble Up' Cobbler - My Yellow Farmhouse

I named this recipe ‘Mixed Berry Bubble Up Cobbler’ because the batter ‘bubbles up’ from the bottom to surround the berries in yumminess.

Another great thing about this cobbler is the buttery flour, sugar & cinnamon topping!

I decided upon a mixture of blueberries, raspberries and blackberries, but you can use any mixture you chose,  If you’re really lucky, you just might have some berry bushes in your own backyard. Or have a neighbor who has so many berries ripening at once they tell you to pick all you want, like my neighbor used to do when we lived in Quebec!

Need a take-along dessert for picnics or barbecues?  This cobbler is just the thing,  (Be prepared for people asking you for the recipe.)  Enjoy!

Here I was thinking my name for this recipe was SO original… until I went online and found tons and tons of recipes with the same name!!   ; o )   

INGREDIENTS

  • 1 cup flour
  • 1 1/2 tsp baking powder
  • 1/4 tsp salt
  • 1/2 cup softened butter
  • 1/2 cup sugar
  • 1 egg
  • 1 cup milk
  • 1 tsp vanilla
  • Mixed berries – 18 oz  (by weight)  blueberries, blackberries & raspberries
  • 1/2 cup sugar
  • 1/4 cup flour
  • 1/2 tsp cinnamon
  • 3 Tb softened butter

DIRECTIONS

Oven at 375 F        Butter a 2 1/2 quart casserole dish        Bake for 1 hour

In a small bowl combine 1 cup flour, 1 1/2 tsp baking powder and 1/4 tsp salt.  Set aside.

In a medium bowl beat together 1/2 cup butter and 1/2 cup sugar until fluffy.  Add 1 egg, 1 cup milk and 1 tsp vanilla – beat until combined.  Add dry ingredients – beat until just combined. Pour batter into a 2 1/2 buttered quart casserole dish.  Spread berries evenly over batter.

Mix together 1/2 cup sugar, 1/4 cup flour, 1/2 tsp cinnamon and 3 Tb softened butter using two knives until mixture is crumbly. Sprinkle over berries.

Bake 1 hour at 375F.  Let cool on a rack for about 15 minutes.  Serve with a scoop of ice cream or some whipped cream  Enjoy!


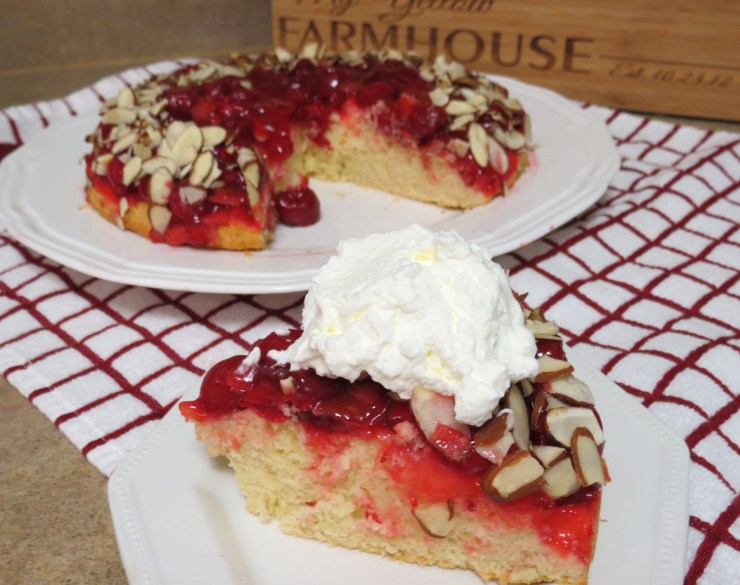
Upside Down Cherry Almond Cake

Upside Down Cherry Almond Cake - My Yellow Farmhouse.com

Recipe features a dense German-Style cake which can also be used for Strawberry Shortcake!

As always, I couldn’t wait to finish my photos so I could cut myself a rather huge piece of this cake, loaded with an equally huge amount of whipped cream!!  I highly suggest you do the same… or place a very large scope of vanilla ice cream on top, especially while the cake is still warm!

INGREDIENTS

  • 1 (21 oz). can  cherry pie filling    ++  I like Comstock
  • ¼ cup sliced almonds
  • ¼ cup softened butter
  • 1/3 cup sugar
  • 2 large eggs
  • 1/2 tsp. almond flavoring
  • 1½ cups flour
  • 2 tsp. baking powder
  • 1/8 tsp. salt
  • 5 Tbs. milk

DIRECTIONS

As I mention at the top of this post, this is a very dense cake which would also be excellent for Strawberry Shortcake etc.

 9” round cake pan, buttered    Oven at 375F       Bake for 20 – 25  minutes

Mix cherry pie filling with ¼ cup sliced almonds in a small bowl. Pour into buttered cake pan.  Set aside.

With mixer on medium, cream 1/4 cup softened butter and 1/3 cup sugar a few minutes until fluffy.  Add 2 large eggs and 1/3 tsp. almond flavoring. Beat for about a minute until well mixed.  Add 4 Tbs. milk, 1½ cups flour, 2 tsp. baking powder and 1/8 tsp.salt.  Start beating with mixer on low, then finish mixing on medium until just blended. ++ Remember to occasionally scrape sides of bowl.

Spoon cake batter over cherries and almonds. (Batter will be thick.) Using a large spoon, drop batter over cherries and almonds.  Spread batter gently with a knife.

Bake at 375F for 20 – 25 minutes, or until toothpick inserted in the center of the cake comes out clean.  ++ No toothpicks? Use a small sharp knife.

Once cake comes out of the oven, place a serving plate on top and – remembering to use pot holders – quickly tip cake over.

A good amount of the cherries & sliced almonds might remain in the pan. Not to worry…. just scope it out with a large spoon and spread on top of the cake.         Enjoy!!

Here’s the recipe which inspired my Upside Down Cherry Almond Cake

https://www.sunnycovechef.com/home/german-cherry-or-apple-cake

German Apple cake


Crunchy, Nutty Apple Crisp with a Sprinkling of Bacon

Sprinkling on bits of crispy bacon during the last few minutes of baking is, of course, optional. But it sure is a fun option!  

5-crunchy-nutty-apple-crisp-with-a-sprinkling-of-bacon-my-yellow-farmhouse

I always have such good intentions.  I always buy lots of fruit and I always throw away some of that fruit.  This time I put those soft apples to good use and baked one of my favorite old-fashioned desserts – Apple Crisp.  Sprinkling on bits of crispy bacon towards the end of the baking time gives this dessert an new twist.

You know, I actually prefer eating apple crisp at room temperature, but that didn’t keep me from giving myself a big serving while it was still hot.

Except for coring, peeling and cutting the apples, this dessert takes very little time to prepare.

small red heart

8 – 9 inch square cake pan        Bake at 350F for 30 – 35 minutes

Add chopped, cooked bacon 5 minutes before apple crisp is ready to come out of the oven.

Ingredients

    Apple Filling

  • 7 cups peeled, sliced apples
  • 1/3 cup sugar
  • 1/4 tsp. cinnamon
  • 3 pinches nutmeg
  • 1 Tbs. flour     ++ Flour helps thicken the apple juices
  • 1/4 tsp. salt

    Topping

  • 1/2 cup brown sugar   ++  Just leveled, not ‘packed’    
  • 3/4 cup all-purpose flour
  • 4 Tbs COLD butter, cut into small pieces
  • 2 pinches salt
  • 1/2 cup chopped walnuts or pecans
  • 2 – 3 Tbs. roughly chopped cooked bacon  To be added during last few minutes of baking.

++  As the old expression goes, “Live and Learn’.  I learned that finely chopping the cooked bacon was NOT the way to go, so I recommend doing a rough chop.  Also, it’s better if the bacon is slightly crispy… not super crispy.  

Method

In a large bowl mix 7 cups peeled, sliced apples, 1/3 cup sugar, 1/4 tsp. cinnamon, 3 pinches nutmeg, 1 Tbs. flour and 1/4 tsp. salt.  Pour into a square baking pan.

Place 1/2 cup brown sugar, 3/4 cup all-purpose flour, 4 Tbs cold butter (cut into small pieces) and 2 pinches salt in a medium bowl.  Using a pastry cutter, or two knives, mix ingredients until it resembles coarse crumbs.  Add 1/2 cup chopped walnuts or pecans.  (Do NOT add the bacon!)

Sprinkle crumb mixture evenly over the sliced apples.  Bake at 350F for 30 – 35 minutes.  The apple filling should be bubbling and the topping should be browned.

++ If adding 2 – 3 Tbs. chopped cooked bacon – sprinkle it on 5 minutes before apples crisp is fully cooked.    Enjoy!

6-crunchy-nutty-apple-crisp-with-a-sprinkling-of-bacon-my-yellow-farmhouse


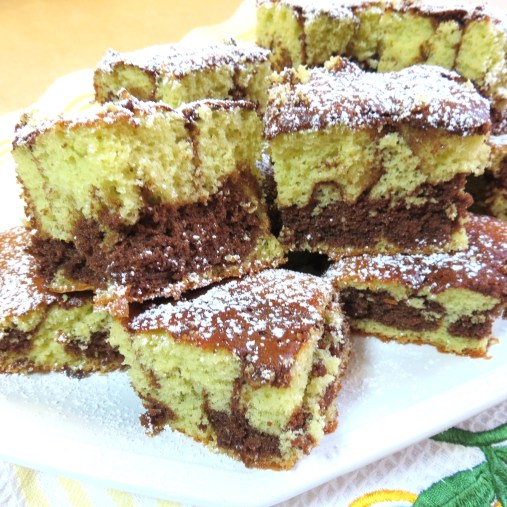
Chocolate and Pistachio Swirl Cake

How the chocolate layer goes from the top to the bottom is a mystery to me!!

A dear friend of mine shared this recipe with me back in the 80s, when bundt cakes were the ‘in thing’.  Chocolate and Pistachio Swirl Cake  baked in a bundt pan does make a beautiful presentation, but I wanted something to bring to a Fourth of July picnic that could be eaten ‘out of hand’, so I went for the good old 13′ x 9′ pan and cut the cake into squares.

Because Chocolate and Pistachio Swirl Cake is prepared with a boxed cake mix, it’s really quick to put together. Once the cake was cooled and cut into squares, a little dusting of confectionery (icing) sugar was all that was needed and off I went to the barbecue.

3 - Chocolate and - Pistachio and  Swirl Cake - myfarmhouse.com

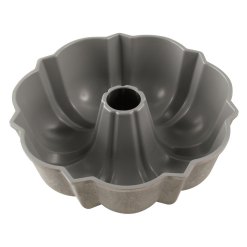
new type bundt cake pan
In case you’ve never heard of a bundt pan – here’s an example.

We had a wonderful time the Fourth of July at my cousin’s home on Lake George (Massachusetts), which a small lake and not the big, big Lake George in New York State.  And everyone very much liked what I brought for dessert!

Fourth of July - David's - 2016
Lake George, Massachusetts (USA)  Don’t you just LOVE having friends/family who live on the water AND who own a boat??!!

small red heart

Oven at 350F      

++  13″ x 9″ pan  (buttered & floured) – bake for 35 – 40 mins. 

++ bundt pan (buttered & floured) – bake for 55 – 60 mins.

++  Cake is cooked when it pulls away from the sides of the pan – and when a sharp knife (or toothpick) inserted in the middle comes out clean

INGREDIENTS

  • 1 yellow cake mix
  • 1 package instant pistachio pudding
  • 1/2 cup orange juice
  • 1/2 cup water
  • 1/3 cup oil
  • 4 eggs
  • 3/4 cup chocolate syrup  ++  I use Hershey’s.  Be sure not to buy thick fudge topping.  You want the chocolate syrup used to make chocolate milk.

METHOD

In a large bowl beat yellow cake mix, 1 package instant pistachio pudding, 1/2 cup orange juice, 1/2 cup water, 1/3 cup oil and 4 eggs for two minutes on medium speed.  Pour half the batter into buttered and floured pan.

++  To ‘flour a pan’, put some flour into the buttered pan.  Shake the pan around so that the butter is totally covered with a light coating of flour.  Turn the pan upside and hit the bottom of the pan so the extra flour falls out. 

Mix remaining batter with 3/4 cup chocolate syrup.  Pour batter on top of the pistachio layer.

Bake for 37 – 40 minutes (or so) if using a 13″ x 9″ pan.  (Oven temperatures vary.)

Bake 55 – 60 minutes (or so) if using a bundt pan.  (Oven temperatures vary.)

Allow cake to cool – in the pan – on a cake rack for 20 – 30 minutes.  ++  Allowing  the cake to cool thoroughly makes it easier to cut because this cake is very moist.

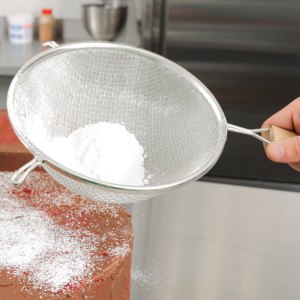
++  Here’s a trick to get that ‘dusting’ of confectionery sugar (icing) sugar on prettily – use a small strainer.  

small strainer
Photo courtesy of WebstaurantStore

3 - Chocolate and - Pistachio and  Swirl Cake - myfarmhouse.com

Double Chocolate Black-Bottom Strawberry Pie – If You Love Chocolate Covered Strawberries, You’ll Love This Pie!

Love Chocolate-Dipped Strawberries - Then You'll Love This Pie!
Finished Pie – with a bit of drizzled semisweet chocolate which, I decided, isn’t worth the bother!!   ; o )

strawberries

Double Chocolate Black-Bottom Strawberry Pie is best eaten the day it’s made!

You get a double dose of chocolate in this scrumptious strawberry pie! Your first dose of chocolate begins with a purchased chocolate cookie crust, over which is poured a rich layer of melted chocolate and cream.    

While the chocolate and cream layer is cooling in the fridge you prepare the strawberry glaze.  Once the glaze has cooled a bit you gently mix in the sliced strawberries, pour the pie filling over the chocolate and cream layer and refrigerate for several hours.  It’s doesn’t get much easier – or delicious – than that my friends!

small red heart

1 quart of strawberries = 1 1/2 lbs.    1 pint of strawberries = 3/4 lb. 

Ingredients 

  • 1 purchased chocolate cookie pie crust
  • 2 lbs. strawberries     ++  You’ll need 1/4 cup mashed strawberries for the glaze – – and 4 cups sliced strawberries for the filling.
  • 1/2 cup heavy (whipping) cream
  • 1 cup semisweet chocolate chips

UPDATE:  The ingredients for the glaze – listed below – are half of what I’d posted yesterday because a purchased cookie crust only holds 4 cups of sliced strawberries and a full cup of sugar made the filling overly sweet for my taste.    ; o )

  • 1/4 cup mashed strawberries
  • 1/2 cup sugar
  • 1 1/2 tsp. cornstarch
  • 1/4 cup water   ++ Mixture will be REALLY thick but it will get a bit watered down by the berry juice.  
  • 2 tsps. lemon juice – optional
  • 1 – 2 drops red food coloring – optional

Method

Chocolate & Cream Layer

In a microwave – or small saucepan on top of the stove – heat cream until steaming.  Add chocolate chips.  Let stand for 2 minutes, then whisk until chocolate is melted and mixture is thick.  Spread evenly over bottom of the pie crust.  Refrigerate while you prepare the strawberry glaze.

Strawberry Glaze   

Place in a small saucepan 1/4 cup mashed strawberries, 1/2 cup sugar, 1 1/2 tsp. cornstarch and 1/4 cup water. (Optional 2 tsp. lemon juice and 1 – 2 drops red food coloring.) Boil, stirring occasionally, for about 3 minutes until glaze is very thick and deep red.  Place glaze in a bowl and allow to cool while you slice the strawberries.

Once the strawberry glaze has cooled, gently mix in the sliced strawberries (about 4 cups) and pour into the pie crust.  Chill for several hours. Dollop on lots of whipped cream and enjoy!

Love Chocolate-Dipped Strawberries - Then You'll Love this Strawberry Pie
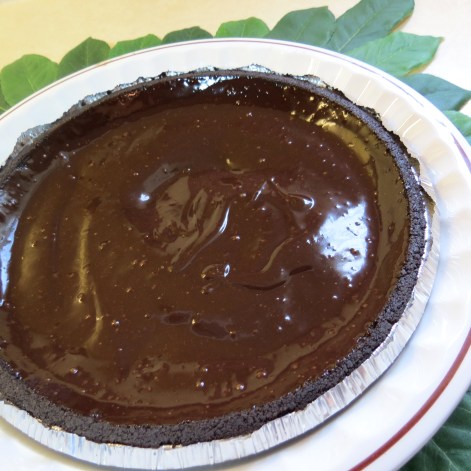
Start with a chocolate cookie crust.
Love Chocolate-Dipped Strawberries - Then You'll Love This Strawberry Pie (2)
Chocolate & Cream Mixture is spread over the chocolate cookie crust.
Love Chocolate-Dipped Strawberries - Then You'll Love This Strawberry Pie (3)
You’ll need 1/2 cup mashed strawberries for the glaze.
Love Chocolate-Dipped Strawberries - Then You'll Love This Strawberry Pie (4)
Strawberry Glaze – waiting for it to boil.
Love Chocolate-Dipped Strawberries - Then You'll Love This Strawberry Pie!
Strawberry Glaze – cooled and ready to mix with the sliced strawberries.
Love Chocolate-Dipped Strawberries - Then You'll Love This Pie!
Finished Pie – with a bit of drizzled semisweet chocolate, which I wouldn’t bother doing again! ; o )

Love Chocolate Covered Strawberries - Then You're Goona Love This Pie!

Coconut Joy Cheesecake Bars with Chocolate Wafer Crust

Believe it or not, I’ve never made a cheesecake… ever!  My sister-in-law Doris makes a killer cheesecake, so I get my ‘cheesecake thrills’ whenever we’re all together.  But when I saw this recipe, I knew just had to make it.  I’m so glad I did because these cheesecake bars taste like a candy bar in cheesecake form.

My Very First Cheesecake Ever is in the oven right now.  It’s gonna be interesting to see if it comes out a bit lopsided.  The kitchen floors here in My Yellow Farmhouse are old and slant down a bit, especially right in the corner where the stove resides.  My Man of All Work (my brother-in-law Mike) did his best to level out the floor, but since I moved here I’ve never baked a cake that was absolutely level.  ++  The cheesecake actually came out level – hurrah!

I recommend baking these cheesecake bars the night before, or early in the morning of the day you plan to serve it because once the cheesecake is cooled completely, it’s refrigerated for 4 hours.  Then a simple creamy chocolatey topping is prepared using chocolate chips and Cool Whip, then toasted almonds and coconut are sprinkled on top.  Yummy!

INGREDIENTS

Chocolate Wafer Crust

  • 1 ¼ cups finely crushed chocolate wafer cookies   ++   About 25 – I used Nabisco ‘Famous Chocolate Wafers. 
  • 2 Tbs. granulated sugar
  • ¼ cup melted butter

Cheesecake Filling

  • 4 packages (8 oz.) cream cheese – SOFTENED
  • 1 cup sugar
  • ½ tsp. vanilla  AND  ½ tsp. almond flavoring
  • ½ cup coconut milk   ++ Due to my broken ankle I accidentally ordered an Almond Milk/Coconut Milk blend to be delivered via Pea Pod …. luckily, it worked great!!
  • 4 eggs

Creamy Chocolatey Topping with Toasted Almonds and Coconut

  • 1/2 cup chocolate chips  ++  I used mini-chocolate chips.  
  • 1 (8 0z.) container of FROZEN whipped topping, such as Cool Whip
  • 2 drops almond extract
  • 1 cup flaked sweetened coconut
  • 1/2 cup sliced almonds  – OR – 1/2 cup almond pieces  ++ I had whole almonds, so I put some in a food bag & ‘smacked them down’ a bit.  ; o )

small red heart

       Line a 10″ x 9″ pan with aluminum foil          Bake at 325F  for 45 minutes

Once cheesecake is fully cooked, turn off oven – leaving door open –  and let cheesecake sit in oven for 20 minutes.

METHOD

In a small bowl, thoroughly mix 1 ¼ cups finely crushed chocolate waferS, 2 Tbs. granulated sugar and ¼ cup melted butter.  Using your fingers, press chocolate wafer mixture into bottom of a 13 x 9” pan, which you’ve covered with aluminum foil – edges hanging over.  ++ This will help will when removing the cheesecake bars.

In a medium bowl, using mixer, thoroughly blend 4 packages (8 oz.) SOFTENED cream cheese, 1 cup sugar, ½ tsp. vanilla  AND  ½ tsp. almond flavoring.  Slowly add in 1/2 cup coconut milk.  ++ Or.. Almond Milk/Coconut Milk Blend.  Add 4 eggs – one at a time, mixing on low until well blended.  Pour over chocolate wafer crust.

Bake at 325F for 45 minutes – or until center is almost set.  Turn off oven.  Open door and leave cheesecake in oven for 20 minutes.  ++ If you’re like me and you’ve never made a cheesecake before, you’ll be pleased to see that, after 20 minutes sitting in the still-warm oven, the center will be fully set!!  Remove cheesecake from oven, place on a cooling rack and cooled completely.   Refrigerate 4 hours – or overnight.

The Finishing Touches — microwave 2 oz. chocolate chips and 1 cup FROZEN whipped topping (such as Cool Whip) in a medium bowl – on high – for 1 minute.  Stir and heat on high for another minute.  ++ The whipped topping will melt down… don’t worry. That’s the way it should be!  Add in 2 drops almond extract. Whisk hot mixture until chocolate chips are completely melted, then mix a bit more until you get a nice dark chocolate color.  Pour over cheesecake and spread evenly. Sprinkle on  1 cup flaked coconut and 1/2 cup almond bits – or sliced almonds. Cut into squares and refrigerate until its time to serve.   Enjoy!


Coconut Joy Cheesecake Bars with Chocolate Cookie Crust - myyellowfarmhouse.com
Coconut Joy Cheesecake Bars with Chocolate Cookie Crust

Tired of Thin Layer Cakes – Here’s a Trick to Fix That! Yellow Layer Cake with Mini Chocolate Chips and English Toffee Bits

I don’t know about other parts of the world, but the cake mixes in the States have been getting smaller and smaller – which is so wrong.  I’d rather pay a bit more and have a nice, fat layer cake..  We have no control over what the stupid cake mix companies do, but luckily there’s a few things you can add to be sure your layer cakes come out bigger.  (You may decide it’s just easier to make a cake from scratch – and that works too!)

BREAKING DEVELOPMENT  – –  I broke my ankle last night… Not a bad break, luckily, but still inconvenient.  And – get this – I’m having a party today because one of my twin sons and his family will be visiting from the Philadelphia area.

I’ve been cooking, and cleaning, for the last few days. Yesterday my other son and I put out all the outdoor furniture… and dragged out all the cushions and lanterns etc.  I was so pleased when I finished washing the final table and chairs… But cruel fate intervened… As I stepped down from our deck (to dump out the bucket of water) my foot caught on a huge, thick stepping stone… Over I went, like Jill of Jack & Jill fame, bucket, gloves and sponges flying all over.

And I heard my ankle break.  I crawled to where I thought I’d left my phone…. then remembered I’d brought it to the porch… so I crawled some more.  In any event, my brother-in-law and a neighbor got in me the car… but not until I directed them to find my comb, get my make-up kit and bring me clean clothes.  Being men… they started getting impatient – but I was married for almost 40 years… so I’m used to it!

Luckily, the cake (which is for my granddaughter’s birthday) was baked before I fell – so I got up early this morning so I could frost it and post the recipe.   ; o )

UPDATE — My Granddaughter was very happy with her birthday cake.  And the party was a great success as well !!

small red heart

Directions for a ‘Bigger and Better’ Layer Cake with Mini Chocolate Chips and English Toffee Bits  

Oven at 350F        Bake for 30 – 35 minutes      Two greased 9” round cake pans

Dry Ingredients for ‘Add-In’ Batter

  • 3/4 cup flour
  • 1/4 cup brown sugar or granulated sugar   ++  I used brown
  • 1 teaspoon baking powder
  • 2 pinches salt

In a medium bowl mix together flour, sugar baking powder and salt with a fork

Liquid Ingredients for ‘Add-In’ Batter

  • 1/2 cup water
  • 1/4 cup oil
  • 1 egg

Add liquid ingredients to dry ingredients. Beat with mixer for about 30 seconds until well blended.  Set bowl aside.

  • 1/2 cup mini chocolate chips
  • 1/2 cup English Toffee Bits  ++  I used ‘Heath’ Brand 
  • 1 Tbs. all purpose flour

Mix 1/2 cup mini chocolate chips, 1/2 cup English Toffee Bits and 1 Tbs. flour in a small bowl.  Set aside.

  • 1 yellow cake mix, prepared according to package directions    ++  I used Duncan Hines Butter Yellow – ‘Classic’

Once cake mix is prepared, pour in ‘Add-On’ batter.  Beat with mixer for about 30 seconds until well blended.  Gently mix in mini chocolate chips, English Toffee Pieces and flour mixture.

Divide batter equally between two greased 9” round cake pans.  Bake at 350F for 30 – 35 minutes – or until toothpick or sharp knife inserted in center comes out clean.   ++  Because of the ‘Add-In’ batter, your layers may take 3 – 5 minutes more time than usual.  

Cool cakes on wire rack for 15 minutes. Remove cake from pans and cool completely before frosting.

Due to my broken ankle – and the fact that I have no crutches because the ER ran out of ‘short people crutches’, I frosted my cake with purchased frosting BUT soon I’ll post my recipe for a really delicious homemade chocolate frosting ‘to die for’.   Enjoy!!

P.S.  My son who lives locally is arriving in a few minutes with some crutches – HURRAH!! And I am not cancelling the party …however, I won’t be the one bringing out trays of food.. not for several weeks.

1 - Morgan's Birthday Cake - My Yellow Farmhouse

Add-In Batter – Ready to Go

2 - Morgan's Birthday Cake - My Yellow Farmhouse
Add-In Batter & Cake Mix Batter Mixed – Chocolate Chips and English Toffee Added
3 = Morgan's Birthday Cake - My Yellow Farmhouse
Divide Batter Equally Between 2 Greased 9″ Pans
Morgan's birthday cake - My Yellow Farmhouse
I Like to Level the Layers Using a Sharp Knife

Tired of Thin Layer Cakes - Here's a Trick to Fix That!  Yellow Layer Cake with Mini Chocolate Chips and English Toffee - My Yellow 


Cookies ‘n Cream Ice Cream Cupcakes

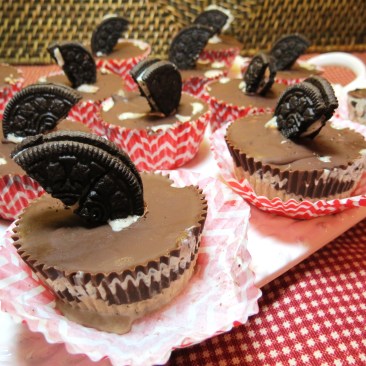
I made these Cookies ‘n Cream Ice Cream Cupcakes with Oreo cookies but they can be made with whatever cookies you choose.

Cookies 'n Cream ice Cream Cupcakes - myyellowfarmhouse.com

Cookies ‘n Cream Ice Cream Cupcakes are so very easy to put together – and you’re going to make every Ice Cream Lover in your life very happy!  (I can’t wait to make these with my grandchildren – speaking of Ice Cream Lovers.)

The east coast of the United States is bracing for a BIG snow storm, arriving here in Massachusetts in a few hours.  I plan to take advantage of being socked in by working on a few new recipes!  I’ve been attempting to perfect a recipe I’m calling Shake, Pour and Bake Pizza Crust.  I’ve prepared it twice so far and the crust is almost right.  Another one or two tweaks and I think I’ll have the results I’m looking for.  In the meantime, both myself and my neighbors are enjoying the results of my ‘pizza crust experiments’.  ; o )

Here’s photos of the two Shake, Pour and Bake Pizzas I’ve prepared so far.  On the left – black and green olives topped with 5-cheese Italian mix.  The 2nd – a Margherita pizza with slices of fresh mozzarella and Parmesan.  (Didn’t have any basil leaves – sprinkled on a bit of fresh Italian parsley.)

small red heart

Here’s how to put-together today’s recipe – Cookies ‘n Cream Ice Cream Cupcakes

INGREDIENTS

  • 1  (1.5 quart container ice cream  (Don’t they sell ‘gallons’ anymore?? )    ++  I used French Vanilla
  • 3 Tbs. chocolate syrup     ++  Optional 
  • 2  (7.5 oz)  containers chocolate shell topping  ++ There’ll be some left over.
  • 3/4 cup Oreo cookies, broken into small pieces   ++  You can use any cookie you chose

METHOD         Line a 12-cup cupcake pan with paper liners

First Layer – Half the ice cream 

Cut the ice cream in half.  Place HALF in a medium bowl.  (Return the rest of the ice cream to the freezer.)  Optional – add 3 Tbs. chocolate syrup and mix to combine.  Drop  1 1/2 Tbs. into each section of the cupcake pan.  ++ Don’t forget to line with paper liners.   ++  Allow ice cream to soften just a bit – it makes it easier to fill the sections.  Freeze ice cream cupcakes for at least 30 minutes.

Second Layer – Warmed chocolate shell topping

Place VERY HOT water in a small bowl.  Stand the 7.5 oz container of chocolate shell topping in the hot water for about 4 minutes.  Squeeze chocolate shell topping over each ice cream cupcake until you have a layer of chocolate topping.  Freeze for at least 30 minutes.  ++  I didn’t warm the chocolate shell topping for this layer – it didn’t spread out very well, as you can see in the photo below.

Third Layer – 1/4 of the rest of the ice cream and 3/4 cup broken up cookies

Briefly chop 6 Oreo cookies in a food processo.  Or – put 6 Oreo cookies in a small baggy and ‘smack up’ up the cookies to break them into small pieces.  You should have about 3/4 cup small cookie bits.   ++  You don’t want ‘cookie dust’, so don’t over do it.

Take out the remaining ice cream.  Remove half the ice cream… in other words,  you only need 1/4 of the 1.5 quart container for this layer. Place ice cream in a bowl, mix in 3/4 cup cookie bits.  Again, the softer the ice cream, the easier it will be to fill each section.  You should have enough for 1 Tbs. in each section.  Smooth ice cream a bit using a spoon. Freeze for at least another 30 minutes.

Fourth and Final Layer – Warmed chocolate shell topping and 1/2 a cookie

—  About 5 minutes before you you’re ready to remove ice cream cupcakes for their final layer, place the 2nd container of chocolate shell topping in a bowl with HOT water.  And – cut 6 Oreo cookies in half to use as a garnish.  ++  The best way to avoid breaking the cookies is to cut straight down with a sharp knife.  I went through LOTS of cookies until I figured that out!

Squeeze warmed chocolate shell topping onto each ice cream cupcake – use enough to cover the layer below .  Gently push a cookie half into the middle of each ice cream cupcake.  Freeze for about an hour.

++  Squeeze the warmed chocolate topping onto only one ice cream cupcake at a time, then gently push in a cookie half.  Otherwise, the chocolate shell on the ice cream cupcakes will be hardened by the time you do the rest.  Guess how I learned that??

Enjoy!!

++  Adapted from Good Housekeeping – June 2015 

Cream Cheese and Chocolate Filled Monkey Bread (Uses a 9 x 13 pan)

Monkey Bread Bread Filled with Cream Cheese & Chocolate - myyellowfarmhouse.com (2)

These are so good you might want to ‘slap your own self ‘ in the head !!  

Cream Cheese and Chocolate Filled Monkey Bread is baked in a 9″ x 13″ pan.  Unlike typical monkey bread, there’s only one layer rather than several and the pieces are bigger.  Think of these as ‘cinnamon roll meets monkey bread’!

A friend of mine is in the hospital and I brought two plates of my monkey bread to share with the nurses. They gave it rave reviews and several blamed me for their lack of will-power.  (Actually, I didn’t do so well in the will power department myself.)

Oven at 350F  (175C)       Greased 9″ x 13″ pan

Bake for 35 minutes – or until top is golden and center biscuits are fully cooked.

    INGREDIENTS 

  • 2 (16 oz.) packages of LARGE biscuits, such as Pillsbury ‘Grands’ Biscuits, found in the dairy case

    Cream Cheese Filling

  • 2 ( 8 oz.) packages of cream cheese – softened
  • ½ tsp. almond extract
  • 1 ½ tsp. sugar
  • chocolate chips, such as Nestles    ++  You’ll need about 1/2 cup or more    ++  I recommend using dark chocolate 

    Chopped Nuts, White Sugar & Cinnamon  … to be sprinkled over filled biscuits

  • ½ cup chopped walnuts or pecans
  • ½ cup white sugar
  • 2 tsp. ground cinnamon

    Caramel Sauce

  • ½ cup (1 stick) butter – cut into cubes
  • ¾ cup PACKED brown sugar

METHOD      ++  See photos at bottom of post !

Open 2 packages of large refrigerated biscuits – allow to warm up a bit.  Soften 2 packages of cream cheese by bringing them to room temperature OR by microwaving each UNWRAPPED block of cream cheese on high for about 10 seconds.

In a medium bowl, beat softened cream cheese with ½ tsp. almond extract and 1 ½ tsp. white sugar until combined.

Place about a 1/2 cup dark chocolate chips in a small bowl.

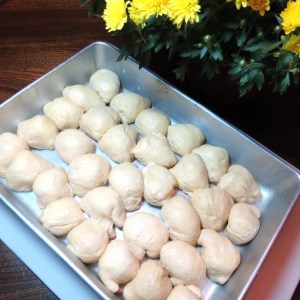
Here’s how I formed the biscuits; take out four at a time.  Cut each biscuit in half.  Fold the cut halves together to form a circle.  (See photo below).  Using your palms, flatten each biscuit half until you have a 3″ circle.  Drop 2 heaping measuring teaspoons in the middle of each flattened biscuit and place several chocolate chips on top.   ++  I used about 4 for each, but next time I’m going to add more!! 

Bring the edges together to form something resembling a ball.  The shape does NOT matter, so don’t be fussy.  Place biscuit balls into a greased 9” x 13″.  Repeat….

++ I allowed the biscuits to rest a few minutes so the dough could rise a bit.  While dough is resting, sprinkle with 1/2 cup chopped walnuts or pecans.  In a small bowl mix ½ cup white sugar with 2 tsp. ground cinnamon.  Sprinkle sugar/cinnamon mixture over biscuits.

Place ½ cup (1 stick) butter, cut into cubes, and ¾ cup PACKED brown sugar in a small microwavable bowl.  Heat on high for 30 seconds.  Stir.  Heat for another 30 seconds.  Mix butter and brown sugar well with a fork or a whisk.  Pour over biscuits.

Bake in a 350F (175C) oven for 35 minutes.  Biscuits should be golden brown and center biscuits should be fully cooked.

Invert onto a serving platter…. it IS a bit tricky.  Immediately remove pan.  There will be bits of yummy melted brown sugar and butter left – scrape it out before it cools and put it in the nooks and crannies between the biscuits. (If no one is looking, you have my permission to just eat it!)  ; o )

++  If you don’t have a large enough serving platter, use a cookie sheet.   

Cream Cheese and Chocolate Filled Monkey Bread  is soooo good when eaten fresh from the oven – and I was pleasantly surprised to see how good these were a day later. Enjoy!

Monkey Bread Filled with Cream Cheese & Chocolate - myyellowfarmhouse.com

Monkey Bread Filled with Cream Cheese & Chocolate - myyellowfarmhouse.com (2)

– – –

Monkey Bread Filled with Cream Cheese and Chocolate - myyellowfarmhouse.com (3)

Monkey Bread Filled with Cream Cheese and Chocolate - myyellowfarmhouse.com

– – –

Monkey Bread Bread Filled with Cream Cheese & Chocolate - myyellowfarmhouse.com 2

Monkey Bread Bread Filled with Cream Cheese & Chocolate - myyellowfarmhouse.com (2)

– – –

Monkey Bread Filled with Cream Cheese and Chocolate - myyellowfarmhouse.

‘S’Mores Cupcakes’ …. Buttery, Chocolatey, Marshmallow Goodness – No Frosting Needed !!

S'Mores Cupcakes - myyellowfarmhouse.com

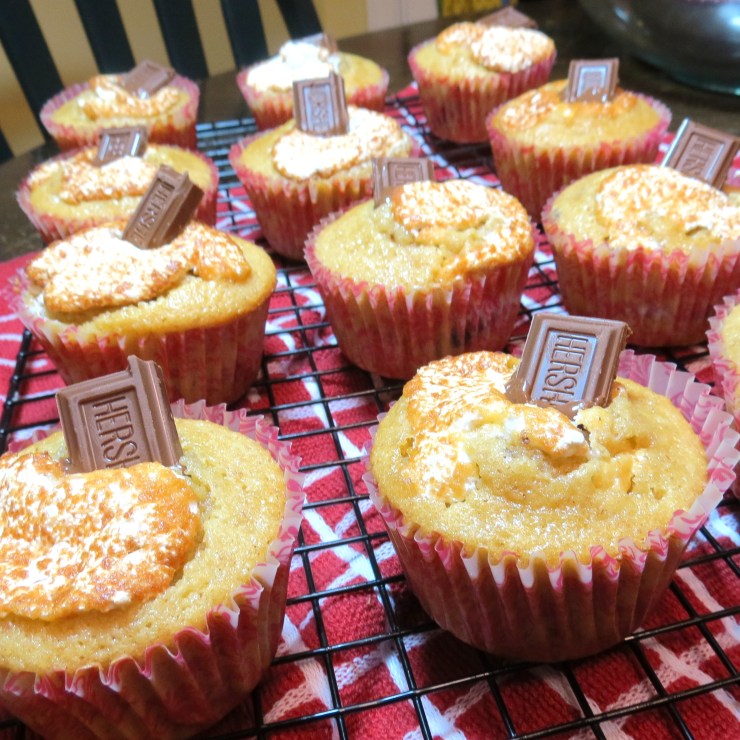
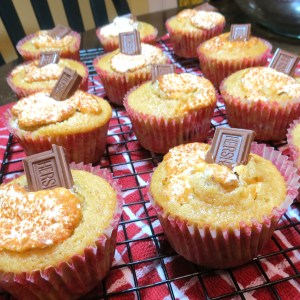
These S’Mores Cupcakes are so rich and yummy that I found it very hard to wait ’til I’d finished taking photos so I could have one. (Actually…. I ate  two!!)  As you can see, the milk chocolate pieces on top of the cupcakes are melting. I just couldn’t wait!

I was pleasantly surprised how dense, moist and buttery the cupcakes turned out, and there’s the added yumminess of Marshmallow Fluff and Hershey Bars.  If you like S’Mores – you’re gonna LOVE these!!  In fact, I’d take one (or two) of these S’Mores Cupcakes over actual S’Mores anytime.

I actually baked a totally different recipe for S’Mores Cupcakes last week – but I did NOT like them at all.  So this time I tried something totally different – and something totally unexpected happened.  The Marshmallow Fluff slowly worked its way to the top of the cupcakes – while the milk chocolate chunks sunk to the bottom, which was actually perfect… albeit unplanned!

++ Recipe makes 12 cupcakes!   To make 24, double ingredients BUT do NOT double the salt.  Add 3/4 tsp. salt.
Ingredients
  • 12 paper cupcake tin liners
  • 1 cup graham crackers
  • 1 cup flour
  • 1 1/2 tsp. baking powder
  • 1/2 tsp. salt
  • 1/2 cup room-temperature butter
  • 1/2 cup sugar
  • 1/4 cup brown sugar   ++ NOT packed, just spooned into measuring cup
  • 2 large eggs
  • 1 tsp. vanilla extract
  • 3/4 cup milk  ++ I used 2 %
  • 12 heaping tsp. Marshmallow Fluff (marshmallow cream)
  • 4 Hershey bars total  – – 3 broken into pieces and 1 broken into rectangles to be placed on top.
  • ++ Any milk chocolate bar may be substituted for Hershey bars.
Method          Heat oven to 350F   Line 12-cup cupcake tin with paper liners

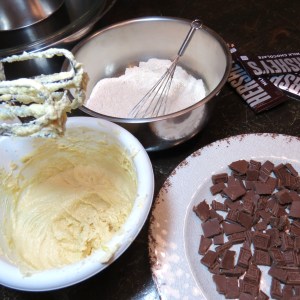
In medium bowl, whisk together 1 cup graham crackers, 1 cup flour, 1 1/2 tsp. baking powder and 1/2 tsp. salt.  Set aside.

In a large bowl, with mixer set at medium-high, beat butter, 1/2 cup sugar and 1/4 cup (NOT packed) brown sugar until light and fluffy – about 2 minutes.

Beat in two eggs – one at a time – then add 1 tsp. vanilla.   ++  Scrape sides of bowl if necessary.

++  I goofed and used a small bowl to beat the eggs & sugar etc.

S'Mores Cupcakes - myyellowfarmhouse.com

Reduce mixer speed to low.  Beginning with dry ingredients, alternate adding dry ingredients and milk to butter/sugar mixture.  Mix until just combined.  Mix in the broken up pieces of Hershey milk chocolate bars.

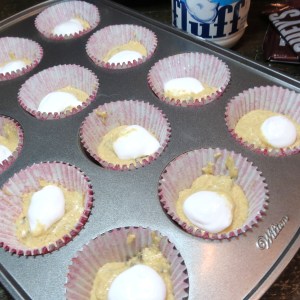
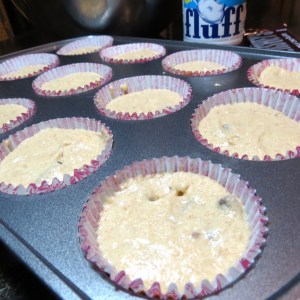
Put a heaping tablespoon of batter into each paper-lined section.  Place 1 heaping teaspoon Marshmallow Fluff (marshmallow cream) on top of batter – followed by 1 heaping tablespoon of batter.  ++  Divide cupcake batter evenly for best results.

3 - S'Mores Cupcakes - myyellowfarmhouse.com (2)3 - S'Mores Cupcakes - myyellowfarmhouse.com

+

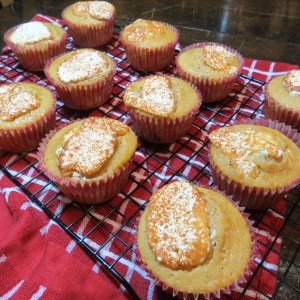
Bake at 350F for 20 – 24 minutes.  ++  My cupcakes were ready in 20 minutes.  The marshmallow cream will have risen to the top and browned slightly.  These S’Mores Cupcakes are so moist they may not look done when they actually are. To test for doneness insert a toothpick, or sharp knife, into the center. If the toothpick comes out clean, the cupcakes are fully cooked.

5 - S'Mores Cupcakes - myyellowfarmhouse.com

Leave cupcakes in tin and allow to cool – on a wire rack – for 10 minutes.  Remove S’Mores Cupcakes  from tin and cool fully…. unless you’re like me and just can’t wait!  When cupcakes are fully cooled, place a rectangle of milk chocolate into the marshmallow topping.  ENJOY!!

Final - S'Mores Cupcakes - myyellowfarmhouse.com

++ Recipe inspired by ‘s’mores cupcakes’ – REALSIMPLE.com – –  July 2014

‘A Little Help from My Friends’ Chocolate Raspberry Cupcakes with Whipped Chocolate Frosting

Sweet Little ‘G’… who happens to be a big fan of Chocolate Raspberry Cupcakes.  (Notice she ate the ENTIRE cupcake…. but left the blueberries!)
Little G. - The Happy Chocolate Cupcake Eater
– – – – – –

I like to use the title ‘A Little Help from My Friends’ when a recipe utilizes prepared mixes etc.  With ‘A Little Help from My Friends’ you can whip up something delicious in very little time – yet the result tastes as if you’d ‘slaved away’ !!

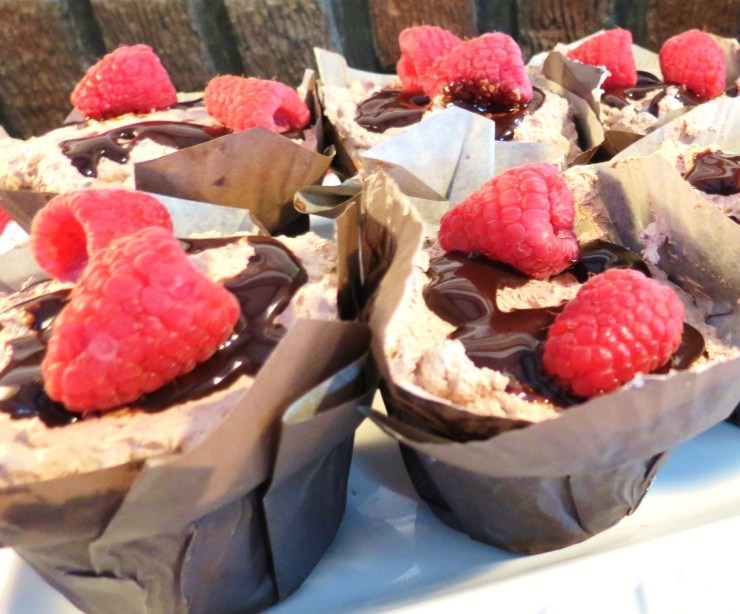
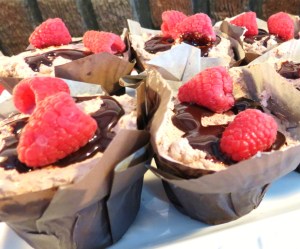
My recipe for Chocolate Raspberry Cupcakes with Whipped Chocolate Frosting includes a chocolate cake mix prepared with raspberry jam.  Your friends and family will be surprised to learn the delicious chocolate frosting is simply whipped topping mixed with cocoa powder and vanilla.

For a more ‘adult taste, you can add some Chambord liqueur – OR – add a few tablespoons of dark rum.  As they say in New York City, “What’s not to like!?”

Today is Valentine’s Day and I plan to share some of my Chocolate Raspberry Cupcakes with Whipped Chocolate Frosting with friends as a special Valentine’s treat.   Happy Valentine’s Day to all of you.

INGREDIENTS  FOR CUPCAKES         Yield = 18 large cupcakes     For 24 cupcakes, fill  sections with less cake mix 
  • one Dark Chocolate cake mix… prepared according to directions
  • 1/4 cup seedless raspberry jam
  • +++  If adding Chambord or dark rum  – substitute 1/4 cup Chambord or dark rum for 1/4 cup of the water.  ++  Up to 1/2 cup Chambord or dark rum can be substituted for water.

Prepare Dark Chocolate cake mix according to directions – but remove 2 Tbs. water from the amount of water called for in the recipe.  Add 1/4 cup seedless raspberry jam. Mix cupcake batter on low to blend ingredients – then beat 2 minutes until batter is smooth. Line cupcake tins with cupcake liners OR lightly grease each section.  Fill each section 3/4s full.   Bake cupcakes according to package directions.  

++ I find it really helps to use a small measuring cup to scoop out the batter and fill the sections.

++  The cupcakes liners I used are called ‘Parchment Lotus Cups’.  They’re sold by ‘PaperChef’.

Remove cupcakes from baking pan and allow to cool on a rack for 20 – 25 minutes – or until cupcakes no longer feel warm.    ++  To test if cupcakes are done, insert a sharp knife or toothpick into the center. If knife or toothpick comes out clean – the cupcakes are ready.

INGREDIENTS FOR WHIPPED CHOCOLATE FROSTING
  • 2 (8 oz.) containers of ‘Cool Whip’ whipped topping
  • 6 Tbs. cocoa powder
  • 1 tsp. vanilla extract

Place 2 (8 oz.) containers of ‘Cool Whip’ whipped topping into a medium-sized bowl, along with 5 – 6 Tbs. cocoa powder and 1 tsp. vanilla extract in a medium-sized bowl. Mix with a large spoon until well-combined.     ++  A bit of confectionery/powdered/ icing sugar can be added if you wish.  Spread whipped frosting on cupcakes and that’s it.    Talk about ‘Quick, Easy and Good’    Enjoy!
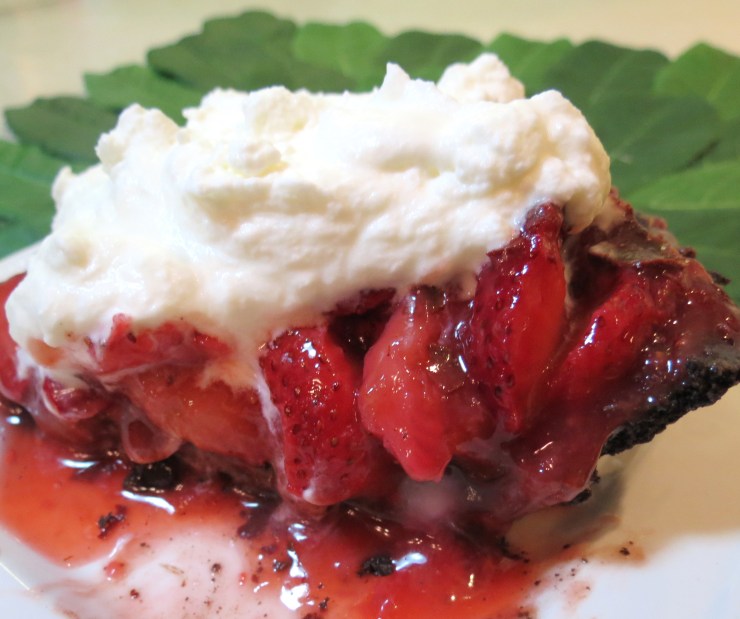
Chocolate Raspberry Cupcakes with Whipped Chocolate Frosting - www.myyellowfarmhouse.com

Scrumptious No-Bake Pies … Double Chocolate Pie with Pecans … & … Pistachio Pie with White Chocolate Chips and Walnuts

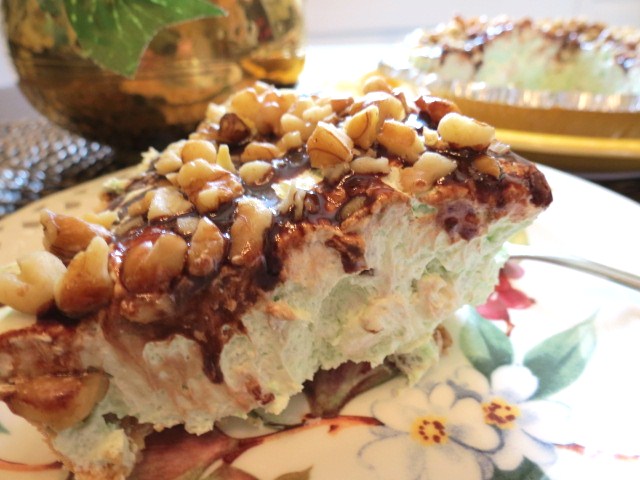
No-Bake Pistachio Pie - My Yellow Farmhouse

Who wants to heat up an oven in the summer – not me!  These pies are so simple & so delicious I know you’re going to make them often.  And, believe me, these pies won’t be hanging around your fridge for very long!  (I honestly think I ate more pie than my grandchildren !!)

My grandchildren and I experimented with different fillings and crusts –  Double Chocolate Pie with Pecans  and Pistachio Pie with White Chocolate Chips & Walnuts became our favorites, so I’m posting those two recipes today.

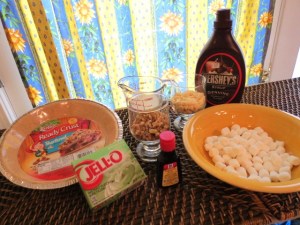
There are so few ingredients used to prepare these pies that you might be a bit surprised  – – a box of instant pudding, 1/2 cup milk, 8 oz. of whipped topping (such as Cool Whip), 1 cup of mini-marshmallows, the chips and either vanilla or almond extract. You just mix everything together, pour into a purchased no-bake pie crust, sprinkle with nuts and drizzle with chocolate…. and there you go… an almost instant pie!

My grandchildren and I sampled our pies almost immediately – and they were delicious, but we discovered the pies were even better refrigerated for a few hours. But who wants to wait – these pies are ready to serve after about 20 minutes.

Using these simple recipes as a base, I hope you experiment and find your own favorite no-bake pies.  And don’t forget to share your ideas!

++ Pistachio Pie with White Chocolate Chips & Walnuts

Pistacho Pie - My Yellow Farmhouse

  • 1 ready-made shortbread crust   (I use Keebler)
  • one package INSTANT pistachio pudding
  • 1 (8 oz.) container whipped topping – – such as Cool Whip
  • 1/2 cup milk
  • 1/2 tsp. almond extract
  • 1/2 cup white chocolate chips
  • 1 cup mini-marshmallows
  • chocolate syrup – – such as Hershey’s
  • 1/4 cup chopped walnuts – – to sprinkle on top

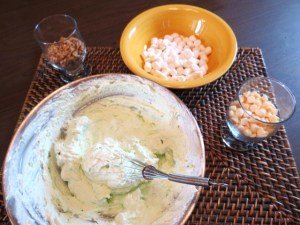
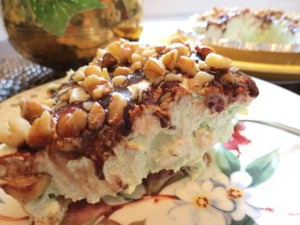
In a medium bowl beat 1 box pistachio INSTANT pudding, 8 oz. Cool Whip, 1/2 cup milk and 1/2 tsp. almond extract for about 45 seconds. Stir in 1/2 cup white chocolate chips and 1 cup mini-marshmallow.

Pistachio Pie - My Yellow Farmhouse

Spoon pie filling into pre-made shortbread crust. Pour on some chocolate syrup. (I think I got carried away when pouring the chocolate syrup on both pies today!) Sprinkle on 1/2 to 3/4 cup chopped walnuts.  ++ To make it really easy, purchase chopped walnuts!!

Refrigerate pie for a short time – 20 minutes will do it, although overnight is even better. But who can wait that long – NOT ME….

Pistachio Pie - finished - USE

++ Use the cover provided with the crust if you’re transporting the pie!

Pistachio Pie - USE

++++++++   Double Chocolate Pie with Pecans +++++++++

Double Chocolate Pie

    • 1 ready-made chocolate crust   (I use Keebler)
    • one package INSTANT chocolate pudding
    • 1 (8 oz.) container whipped topping – – such as Cool Whip
    • 1/2 cup milk
    • 1/2 tsp. vanilla extract
    • 1/2 cup mini chocolate chips
    • 1 cup mini-marshmallows
    • chocolate syrup – – such as Hershey’s
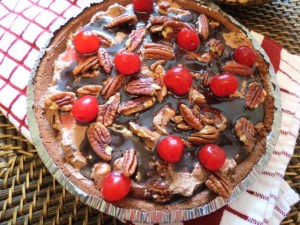
    • 1/2 cups pecan halves – to sprinkle on top
    • 11 – 12 Maraschino cherries, drained on a paper towel

Package of M&Ms - for Double Chocolate No-Bake Pie++++ For Double Chocolate Mint Pie – add 1/2 cup CRUSHED Mint M&Ms instead of the 1/2 cup mini chocolate chips!

In a medium bowl beat 1 box chocolate INSTANT pudding, 8 oz. Cool Whip, 1/2 cup milk and 1/2 tsp. vanilla extract for about 45 seconds. Stir in 1/2 cup mini chocolate chips and 1 cup mini-marshmallows.

Chocolate Pie USE

Spoon pie filling into pre-made chocolate crust. Pour on some chocolate syrup. (I usually use a crisscross pattern but today I went a little wild the the chocolate syrup!) Place 1/2 cup or so  pecans on top, then 11 – 12 Maraschino cherries.

Double Chocolate Pie - My Yellow Farmhouse

++ Use the cover provided with the crust if you’re transporting the pie!

Double Chocolate Pie - My Yellow Farmhouse

Enjoy !!

Chocolate Pie - use at endNo-Bake Pistachio Pie - My Yellow Farmhouse

‘Not Your Grandmother’s’ Bread Pudding

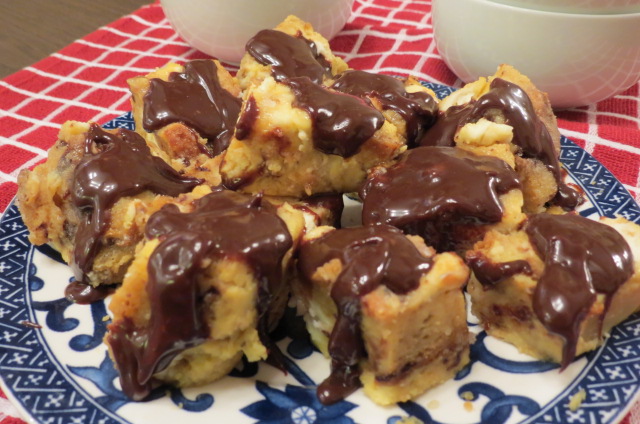
Although I used Panettone to make my bread pudding, any type of dense bread can be used.

Panetonni -cortinasitalianfood.comLast night I remembered I had some chocolate chip Panettone (bread) leftover from Christmas. Before you become alarmed, Panettone remains fresh for quite a while, especially when refrigerated.  ++ Photo courtesy of Cortina’s Italian Food.com

Lately I’ve been in the mood for some good, old-fashioned bread pudding and I thought, “Hmm, how about making a totally new version using Panettone, with the addition of cream cheese for extra richness?”  Happily, my idea resulted in a creamy, rich dessert that’s easy to make.  (My ‘taste testers’ gave this recipe a big thumbs up!)

++ Recipe can be easily doubled – use a 1 1/2 quart baking dish or casserole and up baking time to 55 – 60+ minutes.      See tip below for testing if bread pudding is fully cooked.

           Ingredients          Oven at 350F         Makes 10 pieces 

  • 3 cups dense bread – such as Panettone – cut into 2′ squares      ++ cups should be a bit over-full
  • 2 eggs
  • 1/2 cup condensed milk
  • 1/2 cup water
  • 2 pinches nutmeg
  • 1/4 tsp. vanilla
  • 1/2 package cream cheese
  • ++  Optional —- IF NOT USING PANETONNE add about 1/8 cup chocolate chips & a few gratings of orange peel.

Not Your Grandmother's Bread Pudding - myellowfarmhouse.com

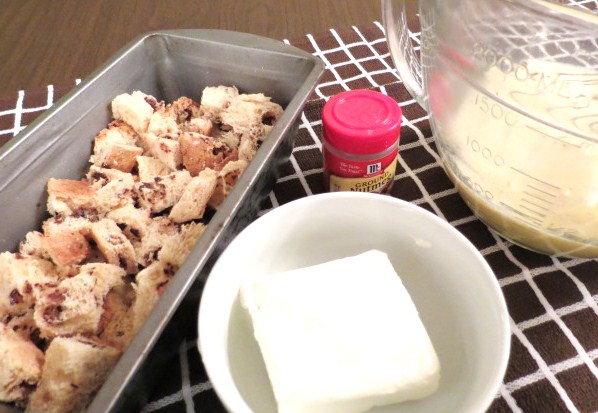
Cut bread into thick slices – cut slices into 2′ squares.   ++ You don’t have to be fussy about how you cut up the bread.   Place cubed bread into a greased loaf pan.

In a medium bowl, whisk together 2 eggs, 1/2 cup condensed milk, 1/2 cup water, 2 pinches nutmeg & 1/4 tsp. vanilla.  Pour over bread squares.

Cut – or pull off – small pieces of cream cheese and drop on top of the bread/milk mixture.  Mix everything together and allow to sit for a few minutes so bread can absorb liquid.   Place loaf pan in large pan or large casserole containing 1′ of hot water.

USE -Not Your Grandmother's Bread Pudding - myyellowfarmhouse.com

Bake at 350F  for 45 minutes – or until a knife inserted 1/2′ into pudding comes out clean.  Bread pudding should be puffed and dry-looking on the top.

Not Your Grandmother's Bread Pudding - myyellowfarmhouse.com

‘Not Your Grandmother’s’ Bread Pudding is delicious eaten warm or cold.  And it’s so rich there’s actually no need for special toppings but it sure is good with fudge sauce!!

Not Your Mother's Bread Pudding - myyellowfarmhouse.com

Chocolate Chip Peanut Butter Cookies with Peanut Butter-Filled M & M’s

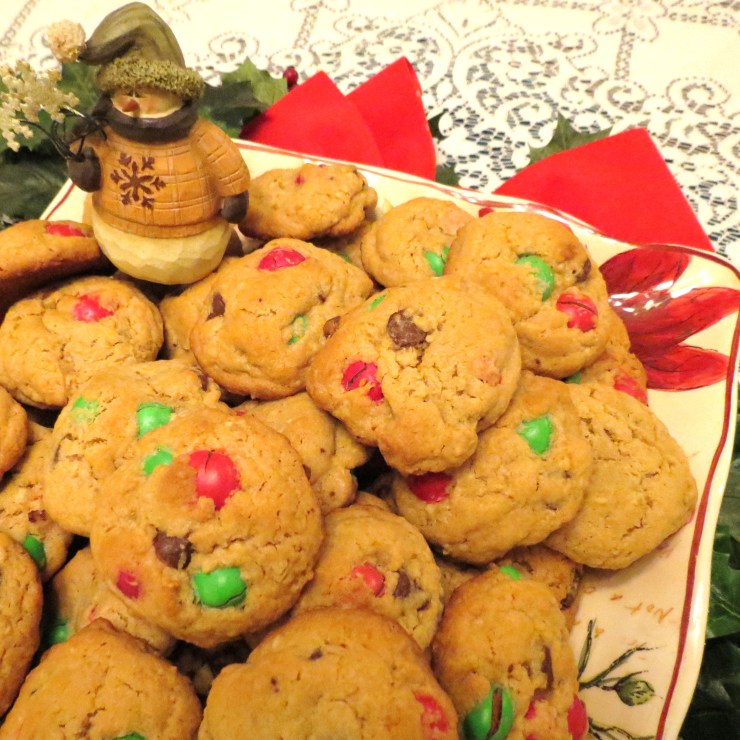
Looking for a quick and easy recipe for Christmas cookies, perhaps for a cookie swap or as a gift – how about making these Chocolate Chip Peanut Butter Cookies with Peanut Butter-Filled M&M’s?  (Of course – these quick, easy and delicious cookies aren’t just for the Holidays !!)

All you’ll need is a package of Peanut Butter Cookie Mix, a package of Chocolate Chip Cookie Mix, a cup of butter, a package of (red & green) peanut butter filled M&M’s, 3 eggs and some quick cooking oatmeal.  It doesn’t get much easier than that!

Oven at 375 F       Bake cookies for 11 – 12 minutes, until they’re lightly browned

++ Tip  I recommend using at least 2 cookies sheets and two cooling racks, so you always have one cookie sheet in the oven and another being prepared for baking.

++ Tip  It’s a good idea NOT to use a hot cookie sheet when baking cookies. Doing so can make cookies flatten out too much.

Ingredients & Method               Yield – about 4 dozen good-sized cookies

  • 1 cup butter or margarine, softened    Tub margarine is NOT recommended.
  • 3 eggs
  • 1 1/2 cups quick-cooking oats       Not instant oatmeal !
  • 1 (1 lb. 1.5 oz.) package Betty Crocker Chocolate Chip Cookie Mix
  • 1 (1 lb. 1.5 oz.) package Betty Crocker Peanut Butter Cookie Mix
  • 1 bag  (11.40 oz.)  peanut butter-filled M & M’s    (I used red & green colored M & Ms.)

Place 1 cup softened butter or margarine, 3 eggs and 1 1/2 cups quick-cooking oatmeal in a large bowl and blend together on medium speed. (Takes less than a minute…)

Add a package of Chocolate Chip Cookie Mix & a package of Peanut Butter Cookie Mix. You can try to mix it all together with a wooden spoon but I used my freshly-washed hands because it’s easier. (The dough may seem to dry at first – just keep smoshing it with your hands and it’ll come together.)

Now add the  bag (11.40 oz.) of peanut butter-filled M & M’s.  Again, I recommend using your hands because the dough is very stiff.

 Christmas Cookies.jpg

On an ungreased cookie sheet, using a 1/8 measuring cup, drop dough about 2 inches apart.  (I found that ‘knocking’ the measuring cup against the side of the bowl helped the dough fall out….)  You’ll probably be able to bake 12 cookies at a time, depending upon the size of your cookie sheet.

Bake cookies at 375 (F) for 11 – 12 minutes, until your cookies are lightly browned. Cool cookies about 2 minutes before removing them from the cookie sheet to a cooling rack.   Enjoy !

My Yellow Farmhouse Peanut Butter Cookies with Peanut M & Ms Cookies - My Yellow Farmhouse.com

“A Little Help from My Friends” Chocolate Cherry Nut Cake

Chocolate Cherry Nut Cake - My Yellow Farmhouse.comYour Friends !!

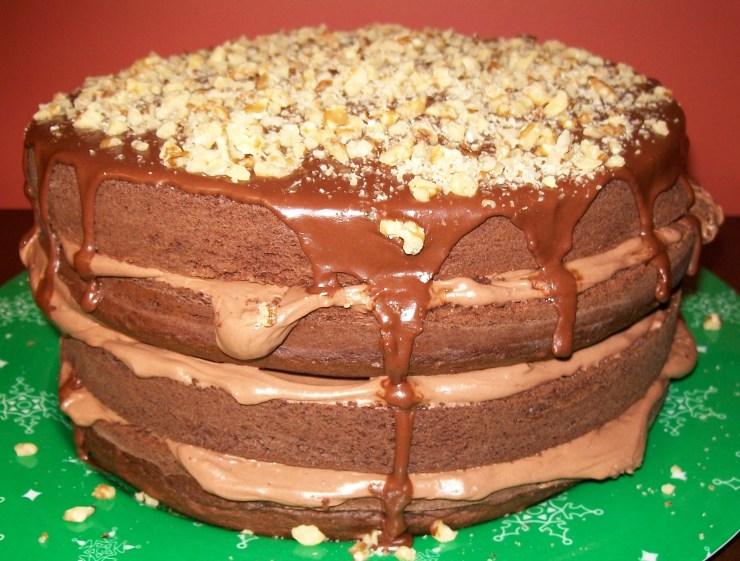
I “invented” this a few years ago when I needed a dessert for some friends who were planning to drop by. I usually have a least one box of chocolate cake mix, walnuts and a can of cherry pie filling in my “larder” – so I made a simple and delicious cake which turned out so well I’ve been making it ever since.   I know most people don’t have lots of extra time, so it’s always good to have a little help from your friends – even if those “friends” come in a box, bag or jar!!

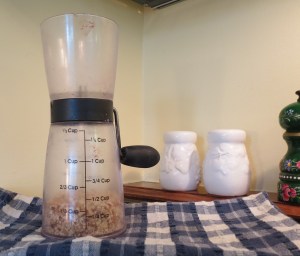
++ As an aside, if you ever see something on this idea – buy it!  It comes in so handy ’cause it’s not electric, it’s small – so it’s easily stored – and all the parts can go in the dish washer. I use mine all the time, even though I have electric “gadgets”.

Nut chopper

Oven at 350 F             9″ x 13″ pan           Bake for 40 – 45 minutes

Ingredients a.k.a “Your Friends”!

  • 1 box of chocolate cake mix    (I like “Duncan Hines” Devil’s Food)
  • 1 (21 oz.) can of cherry pie filling   
  • 1/2 cup chocolate chips
  • 1/2 cup chopped nuts, such as walnuts or pecans

Prepare cake mix according to package directions. Pour batter into a greased and floured 13″ x 9″ pan.

Spoon cherry pie filling on top of the cake batter.  (Many of today’s cherry pie fillings contain ‘more sauce than cherries’, which results in a bit more sauce in the ‘Chocolate Cherry Nut Cake’.  If you prefer a slightly less runny cake, use about half to two-thirds the ‘saucy’ part of the cherry pie filling.    ++ I used ALL the sauce.)

With a knife, swirl the cherry pie filling a bit, trying not to go all the way down with the knife. (Looks like peanut butter & jelly, doesn’t it?)

Choc. Cherry

Sprinkle on 1/2 cup chocolate chips and 1/2 cup nuts.

Chocolate Cherry Nut Cake - My Yellow Farmhouse.com

Bake at 350 F for 40 – 45 minutes.

++ The cake is done when 1. it pulls away from the sides of the pan and 2. a knife put into the center of the cake comes out clean.

++ Don’t confuse the melted chocolate chips with the cake batter. If some chocolate does stick to the knife – taste it. You’ll know if it’s uncooked batter. (That’s what I do!)

Chocolate Cherry Nut Cake - My Yellow Farmhouse.comThere’s a cake called “Earthquake Cake” ’cause the top of the cake comes out with cracks.  My ‘Chocolate Cherry Nut Cake’ has a similar, cracked appearance.

Chocolate Cherry Nut Cake - My Yellow Farmhouse.com

Dessert Crepes with Ice Cream and Homemade Fudge Sauce

My Dessert Crepes with Ice Cream and Homemade Fudge Sauce were a big hit recently when I brought them to a family dinner party. In fact, one of my brother-in-laws was just like a little kid – we almost had to tell him, “First you have to eat your dinner, then you can have the crepes”.

Just before we served dessert, I “tried” to photograph the crepes but the whipped cream kept melting. So I decided to wait until the next day to do the photography. It certainly wasn’t a sacrifice – I saved one, photographed it at home… and ate it all by myself!!

Not only is this dessert delicious but you can make both the crepes and the fudge sauce the day before. These particular crepes are light and slightly more sweet than the crepes used for savory fillings –  or the crepes I sometimes make on a Sunday mornings.  (I’ll post that recipe sometime soon!)

When it’s time to serve the crepes, you simply warm them… and the fudge sauce… in the microwave. Then you place a scoop of ice cream (I used vanilla) in the middle of each crepe, roll it up, drizzle on the yummy fudge sauce and top with whipped cream and a cherry. (I like to use Reddi Whip Original ’cause it’s easy.)

Although this dessert looks rich, it’s actually rather light, which is appreciated after a big meal.  Your guests will think you’re amazing!!!

Makes between 8 – 12 crepes

Ingredients – Crepes          

  • 3 eggs
  • 3/4 cup water
  • 2/3 cup milk
  • 2/3 cup flour
  • 2 Tbs. sugar
  • 1/2 tsp. salt
  • 2 Tbs. melted butter

Ingredients – Fudge Sauce

  • 1 1/4 cups sugar
  • 1 cup whipping cream
  • 4 squares unsweetened baking chocolate (In the “Baking” aisle.)
  • 2 Tbs. butter
  •  +++  1 tsp. vanilla – add after sauce is cooked in microwave

In a medium bowl, mix 3 eggs, 3/4 water, 2/3 cup milk, 2/3 cup flour, 2 Tbs. sugar, 1/2 tsp. salt and 2 Tbs. melted butter. Beat for about a minute or so – just until all ingredients are combined.

Heat a small skillet on medium-high heat. (I use a 8″ teflon skillet, but, if you don’t have a small skillet, then just use whatever size you have. The crepes will probably be a bit thinner and a bit bigger – but they’ll taste exactly the same!)

Add about a teaspoon of butter to the heated skillet each time – before you pour in about 1/2 cup of the crepe batter. Immediately after you’ve poured in the 1/2 cup of batter, lift up the skillet and turn the pan a bit so that batter covers the pan evenly. When one side is a bit browned, turn the crepe over and slightly brown the other side. Place crepe on a plate and repeat until there is no more batter.

++ Tip – I “play around” with the heat while I’m cooking the crepes. As the pan becomes hotter and hotter, I lower the heat a bit – then, a while later, I might raise it a bit again. The heat should be hot enough so the crepes cook pretty quickly. You only want to brown the crepes a bit. And, the top of the crepe should look almost dry when it’s time to flip it.

++ Tip – The crepes will be light & “tender”, so you’ll have to be gentle with them. If one tears, don’t worry. It’ll still taste as good.

If you’re preparing the crepes for the next day, cover with plastic wrap and refrigerate. To warm before serving, remove plastic wrap – cover with a paper towel and microwave for a short time. (They don’t take long to warm up. You don’t want them rubbery, so keep an eye on them.) 

For the fudge sauce – place 1 1/4 cup sugar, 1 cup whipping cream, 4 squares unsweetened baking chocolate and 2 Tbs. butter in a glass 2-quart measuring cup – or a microwave safe bowl. Cook on high for between 8 – 9 minutes, stirring often. ++ Add 1 tsp. vanilla after fudge sauce is fully cooked.

If you’re preparing the fudge sauce ahead, allow it to cool a bit – then cover and refrigerate. To warm, microwave until well heated, stirring often.  Enjoy !!

Dessert Crepese with Ice Cream and Homemade Chocolate Sauce - SMALL

M and C’s Chocolate Oatmeal Bars

FINAL CUT - M and C Choc and Oatmeal bars

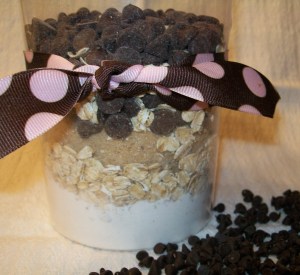
A few weeks before Christmas I attended a really fun and well-organized event at my grandchildren’s grade school in Pennsylvania. It was a craft fair – but the kids all got to MAKE the crafts, all of which they could give away as gifts, if they so desired. Among the choices were a Christmas ornament, a really cute little pin with beads and a snowflake (which I was given for Christmas!) and “Snowman Soup”, which was made of instant cocoa mix, some marshmallows and a Hershey’s kiss, with a little candy cane tossed in for a stirrer – yummy!!. The table where you could make the always-popular Cookie Mix in a Jar was one of the busiest – and I was lucky enough to receive two of those!!

USE - M & C's CookiesAs my sons can attest, I’m not a very good cookie-baker. I tend to over-bake them, for some reason. Once, while chatting with a friend on the phone, I banged a cookie on the counter and asked her to guess what it was. She said, “A hammer?” “No”, I replied, just a tad embarrassed, “It’s a cookie!”

With my many cookie failures in mind, I decided to make “bars” with the two containers of cookie mix – and I’m glad I did. The bars turned out dense and moist, and, dare I say “hearty” due to the addition of the oatmeal. As a finishing touch, and, because there’s no walnuts in the mix.. AND … because you can never have too much chocolate, I melted a cup of morsels, spread them over the cooked bars and then sprinkled on chopped walnuts.   Enjoy!

Oven at 350     30 minutes     10′ x 13′ pan      Makes 32 bars… 1 1/2″ x 1 1/2″

Use - M & C Choc Oatmeal Bars    

Ingredients  – don’t worry about “leveling” the dry ingredients. At the craft fair, they don’t bother (or have the time).

  • 2 cups flour
  • 1 tsp. baking soda
  • 1 tsp. salt
  • 2 cups NOT PACKED brown sugar
  • 1 cup oatmeal – not instant
  • 2 cups chocolate chips
  • 1 stick butter (1/2 cup) – remove packaging, microwave on high for 30 secs.
  • 3 eggs
  •  1 Tbs. hot water
  • 2 tsp. vanilla
  • 1 cup chocolate chips
  • 1 Tbs. Crisco
  • 1/2 cup chopped walnuts

In a medium-sized bowl, place all the dry ingredients. Then add the softened butter, 3 eggs, 1 Tbs. hot water and 2 tsp. vanilla.

Spread the batter evenly in the 10″ x 13″ pan. I give you my permission to use your fingers, which will get really, really sticky but you can always lick the dough from them once you’re done mixing.  (I’m a big proponent of using (clean) hands when dealing with thick cookie doughs.)

Bake at 350 F for 30 minutes. The bars will be golden brown and a bit “bumpy” looking.

In a microwavable bowl or glass measuring cup, place 1 cup chocolate chips and 1 Tbs. Crisco –  microwave on high for 1 minutes. Take out and stir. Then microwave again – but this time for only 30 seconds. Spread the chocolate glaze evenly over the bars. Sprinkle with the 1/2 cups chopped walnuts. Allow bars to cool, then cut with a sharp knife into 1 1/2″ x 1 1/2 ” squares.  Enjoy!

 M & C's Chocolate and Oatmeal Bars

Barcardi Chocolate Cake with Creamy Chocolate Filling

Barcardi Choc. Cake2 - FIXED MARCH 2013

Some of my friends and family are “reaping the benefits” of me starting this recipe blog;  namely – being invited over to help me eat some of the food I’ve been cooking! They really loved this dense and incredibly moist chocolate cake. It can be prepared either with/or without the rum – it’ll still be wonderful !

You know, I’ve noticed boxed cake mixes have been making smaller and smaller cakes over the years, just as candy bar manufacturers have been making smaller and smaller candy bars.. So, to rectify this, and to have a lovely, huge and impressive chocolate cake, I made this recipe using TWO cake mixes. I’m very happy with the result of my experiment, and I think you will be as well !

Oven at 350 F    Grease two  /  8 1/2″  round pans

++ I’ve been thinking about this recipe and now realize that not everyone wants to make such a BIG cake. In that case, just use ONE CAKE MIX, 3 eggs, (still use 1 pkg. choc. instant pudding when you prepare the cake mix), 1/3 cup vegetable oil, 3/4 cup of water and 1/4 cup rum (OR replace the 1/4 cup rum with water) and 1/2 tsp. rum flavoring.   +++ Still use two  8 1/2″ greased cake pans

   Ingredients      ++ See above if you prefer to make a smaller version of this cake.

  • 2 packages Devil’s Food (chocolate) cake mix – I like Duncan Hines
  • 6 eggs
  • 1 pkg. chocolate instant pudding – will need 2 pkgs. pudding total
  • 2/3 cup vegetable oil
  • 1 1/2 cups water
  • 1/2 cup dark rum – if not using rum, replace with 1/2 cup water
  • 1 tsp. rum flavoring

   For Frosting

  • 1 package chocolate instant pudding
  • 1 3/4 cup milk
  • 1 envelope Dream Whip whipped topping
  • 1 tsp. rum flavoring

For Glaze

  • 1 cup confectionery sugar
  • 1 Tbs. cocoa powder
  • ++  Pour in a little bit of milk at a time, until the glaze reaches a good consistency for pouring – it’s better to be a bit thick. And – if you find it’s too thick, just add a few more drops of milk!
  • about 1/3 cup chopped walnuts – to sprinkle on top

In a bowl large enough to hold two cakes mixes – add the cake mixes, eggs, chocolate pudding, vegetable oil, water, rum and rum flavoring. At medium speed, beat for 3 minutes.  (If you want a stronger rum flavor, substitute a bit more rum for some of the water.)

Pour batter into two greased 8 1/2″ round pans until the batter is about 3/4″ below the top of the pan. (You WILL have some batter left over.)  Bake at 350 – or until a sharp knife placed into the center comes out clean.

After baking, allow cakes to cool in pans for about 10 minutes, then turn out onto cake racks. (A good trick is to put a cake rack ON TOP of one of the cakes, then turn everything over & lift off the pan. If it seems as if the cake is sticking, with your hand, bang on the bottom of the pan a few times.) After cakes are cool – about 25 minutes – cut each layer in half horizontally using a serrated knife. You’ll end up with a total of 4 layers.

Make filling by placing the pudding, Dream Whip, milk and rum flavoring into a medium-sized bowl. Beat on high for 4 minutes. (It takes a while but it does thicken up in the end.) Place one cake layer onto a plate – spread 1/3 of the filling on top. Place the next layer on top, spread on another 1/3 of the filling – add the 3rd layer and spread the last 1/3 of the filling. Place 4th layer on top.

Make the chocolate glaze, and pour it onto the middle of the top of the cake. With a big spoon, gently spread the glaze until it covers the entire cake and a bit drips down the sides. Sprinkle on the chopped nuts – and – you’re done.  Refrigerate – enjoy!
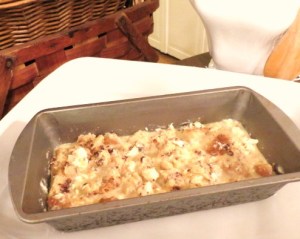
FOR BLOG - Bacardi Chocolate Cake with Creamy Chocolate Frosting-slice-fixed march

Cecile’s Apple Pie

My Yellow Farmhouse - Apple Pie

I’ve never once eaten a slice of bad apple pie.  I think, like an ugly baby, bad apples pies are “few and far between”. I’ve been told that my apple pies are very delicious – I hope you think so!

Following an old recipe, I add dabs of butter on top of the apple/flour/sugar mixture before putting on the top crust. Maybe that’s why people like this pie so much. Or – maybe it’s that I’ve finally found the right balance of nutmeg versus cinnamon??  In any event, I look forward to your suggestions and comments, as always!

Follow link to see this ‘Quick and Easy One Crust Apple Pie with Maple Whipped Cream. (This cute little scarecrow makes another appearance – three years later!)

Rustic One-Crust Apple Pie - myyellowfarmhouse

                                                                  INGREDIENTS

Oven at 425(F)     Bake for 45 – 50 minutes, until crust is golden and filling is bubbling. You might want to place a cookie sheet – or a piece of foil – on the rack below the pie, in case it bubbles over

  • 6 cups sliced apples – peeled and cored, or course!
  • 3/4 cup sugar
  • 3/4 tsp. cinnamon
  • 4 “pinches” nutmeg
  • 1/4 tsp. salt
  • 4 TBS. flour (yes – tablespoons!!)
  • 2 TBS. butter – to be cut up and dropped on top of apple/sugar mixture
  • 2 crusts – either purchased or homemade
  • 1 egg, beaten

In a large bowl, mix the sliced apples, sugar, cinnamon, nutmeg, salt and flour.

Put the 1st crust into the pie plate. Fill with the apple/sugar mixture. (Some people like to mound the apple/sugar mixture higher in the middle but I don’t. I prefer it evenly spread out.) With a sharp knife, cut a few slashes into the crust to help steam escape.

Cut your butter into small pieces and dot on top of the apple/sugar mixture. (I just hold it in my hand and cut off a piece at a time – otherwise the cut-up butter sticks together.)

Place the 2nd crust over the butter/apple mixture, crimping edges to seal.

++  Here’s a video which shows you how to ‘crimp’ a pie crust.  http://www.youtube.com/watch?v=sJRY1vdCMkQ

++  If you’re feeling really creative – here’s a video showing how to make ‘fancy’ crimps!  http://www.youtube.com/watch?v=ZcQGja6jpbE

Now for the “egg wash”. Take the beaten egg and with your fingers (my favorite) or a pastry brush, spread some of the beaten egg on the top crust. (You don’t have to do this, but it does give the crust a nice sheen and golden color.)

Bake at 425F for about 45 – 50 minutes, until the crust is golden, and the apples are fully cooked. Serve with whipped cream or vanilla ice cream.  Enjoy!!

Old-Fashioned Apple Squares

Apple Squares - 2 -

You know you’re getting o.l.d when the recipe you’re searching for is over 30 years old !! Imagine how pleasantly surprised I was when I actually found it – not filed under “bars” but filed under “apples” – but found, nevertheless!!

These apple squares (or bars) are even tastier than I remember!! They’re loaded with apples, nuts and raisins, and have a buttery, cinnamony goodness – so you can even eat them for breakfast!!

                                              MAKES ABOUT 24 SQUARES – or BARS

  • Oven at 350 F
  • Lightly grease a 9″ x !0″ pan
  • Bake 45 – 50 minutes, or until a knife inserted in the center comes out clean.

                                                                          INGREDIENTS

  • 2 tsp. vanilla
  • 1 cup sugar
  • 1/2 packed brown sugar
  • 2 eggs
  • 2 cups flour
  • 2 tsp baking soda
  • 2 tsp. cinnamon
  • 1 tsp. nutmeg
  • 1/2 tsp. salt
  • 4 cups roughly chopped peeled and cored apples
  • 1/2 cup walnuts, chopped
  • 1/2 raisins (Try the raisins even if you don’t always like raisins. They kind of “melt away” into the batter, and give the resulting bars a lovely sweetness and golden dark color.)

In a medium-sized bowl – using a mixer – cream together the vanilla, both sugars and 2 eggs until creamy and throughly mixed.

In a large bowl, mix together the flour, baking soda, cinnamon, salt & nutmeg. Add the creamed mixture to the dry mixture, and mix by hand until throughly blended.

Add the apples, walnuts and raisins – mix by hand until throughly blended

Pour into the greased pan, spreading with the spoon to get the mixture even.

Bake at 350 F for between 45 – 50 minutes.  When cooled, cut with a sharp knife. Enjoy!