
For Bread Machine directions, follow this link – https://myyellowfarmhouse.com/2015/01/22/nutty-oatmeal-wholewheat-bread-bread-machine-version/
– – – –
This is the latest recipe in my Eating Healthy series. And I’m happy to say that after only a week of ‘eating healthy’ I’m back in my jeans – and I can actually sit here and work on this post without having to unzip them. If I’m hungry, I eat. I just watch what I eat. Believe me – I have a long, long way to go weight-wise. But I’m motivated and enjoying the process.
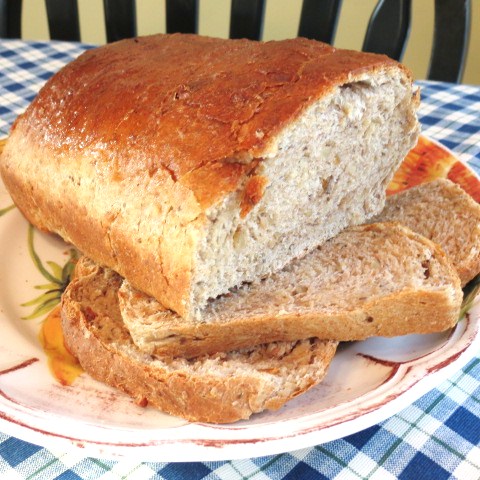
It took me two tries to get this recipe the way I wanted it… and it was definitely worth the effort. Nutty Oatmeal & Wholewheat Bread has a delicious, nutty taste. And it’s good for you! There’s a cup of oatmeal and a cup of wholewheat flour, plus a cup of regular bread flour (because I don’t like heavy bread). I added 1 tablespoon of chia seeds, which are so very good for you – or – you could add some bran in place of the chia seeds. I also added 1/3 cup of chopped walnuts, which, like chocolate, make everything taste better. ++ This bread makes wonderful toast!

INGREDIENTS Makes One Loaf
- 1 cup very warm water
- 2 1/4 tsp. active dry yeast
- 2 Tbs. honey ++ Or brown sugar
- 1 1/4 tsp. salt
- 2 Tbs. butter ++ Or Olive oil
- 1 cup quick-cooking oats
- 1 cup wholewheat flour
- 1 cup flour ++ In the United States, bread flour is different than regular flour. In Canada, regular flour has the same qualities as bread flour. I use bread flour but this recipe works with either.
- 2 pinches nutmeg
- OPTIONAL – 1 Tbs. Chia seeds ++ Or wheat germ
- OPTIONAL – 1/3 cup chopped walnuts ++ Walnuts will be added once dough has been kneaded a while.
METHOD

Measure 1 cup very warm water. ++ The water should feel warm on your wrist – not hot. Too hot and you kill the yeast. Too cold, and the yeast just sits there.
Add 2 Tbs. honey and stir briefly. Add 2 1/4 tsp. active dry yeast. Again stir briefly. I’ve never seen directions to ‘stir’… it’s just what I do.)
Allow water, honey and yeast to sit for 15 minutes.
++ I usually give the mixture a little stir after about 7 minutes.
++ During cold weather you may want to place the measuring cup somewhere out of drafts. I use my microwave!
After 15 minutes the water, honey and yeast should’ve bubbled up to resemble the photo above. ++ If it does NOT – your water may have been too cold or too hot – or – your yeast may not be good anymore. Just dump the contents out and try it again. DO NOT GIVE UP! The first bread I made was heavy as a brick!!
++ The quality of yeast goes down the longer you have it. Use ‘6 months’ as your guide for when it’s time to discard it BUT your bread won’t fail if the yeast is older. Your bread will just not rise quite as much and will have less flavor. (I buy small jars of yeast but the same applies to packets.)
Pour the liquid into a medium-sized bowl. Add 1 1/4 tsp. salt, 2 Tbs. butter, 1 cup quick-cooking oats, 1 cup wholewheat flour, 1 cup flour (see note above), 1 Tbs. Chia seeds and 2 pinches nutmeg. ++ You’ll be adding the walnuts a bit later.
Using your hands (or a large spoon if you wish) mix the ingredients until combined, which should only take about a minute.
KNEADING THE DOUGH
Place dough on lightly floured work surface. ++ I usually use a ‘tea towel’ (a.k.a. ‘dish towel) but this dough is a bit sticky, just I just used the counter.
Knead dough about 5 minutes. ++ To knead dough, push away from you with the palm of your hand, turn dough, fold over and repeat. If dough is too sticky, add a bit more flour.
++ Now add 1/3 chopped walnuts and knead just until walnuts are incorporated. Form dough into a ball.
++ Here’s an excellent link to learn how to knead bread – http://bread.wonderhowto.com/how-to/knead-bread-dough-by-hand-355638/
Dough After Kneading

ALLOWING THE DOUGH TO ‘RISE’

After dough has been kneaded, place it in a greased bowl. Turn dough over to grease top. Cover bowl with a dish towel or plastic wrap. Let rise in warm place for 30 to 40 minutes, or until double in size.
++ During cold weather, place a 10′ x 13′ pan half-full of VERY HOT water on the bottom rack. of your oven. Place the covered bowl containing the dough on the top rack.

ALLOWING THE DOUGH TO RISE A 2nd TIME
Once dough has risen, you’re going to ‘punch it down’, which seems pretty counter-intuitive…but allowing the dough rise a 2nd time will make the bread much lighter. ++ If you like dense bread – then just skip this step!
Cover bowl with dishtowel and repeat step above for rising the dough. Again – allow to rise for 30 – 40 minutes or until double in size.
FORMING THE DOUGH – This is fun and easy!!


Remove dough from bowl. Place on a lightly floured surface. Using fingers, press dough into an 8′ x 12′ rectangle. Beginning at short end, roll up tightly. Place in a greased (I use olive oil) 9′ x 5′ loaf pan.
Bake in a 375 (F) oven for 35 – 40 minutes. Allow the Nutty Oatmeal and Wholewheat Bread a few minutes to cool off due to the denseness of the bread…. that is….if you can wait. (I didn’t!) Enjoy!