Quick Lunch or Dinner – Hot Open-Faced Sandwiches

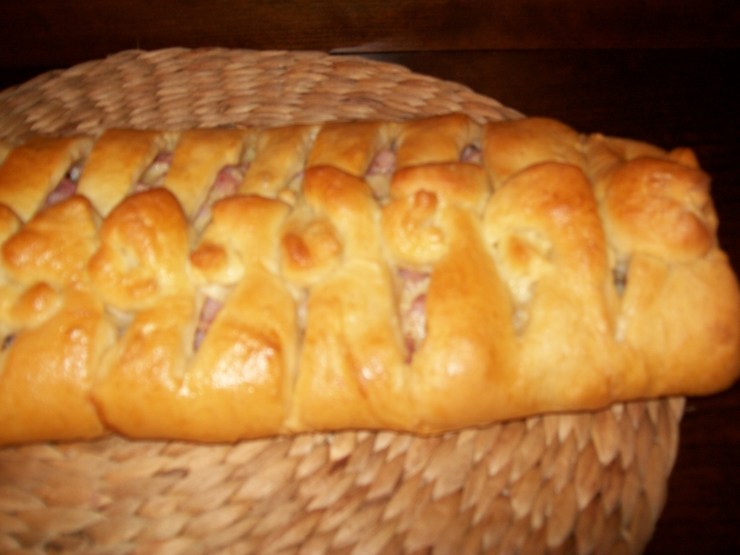
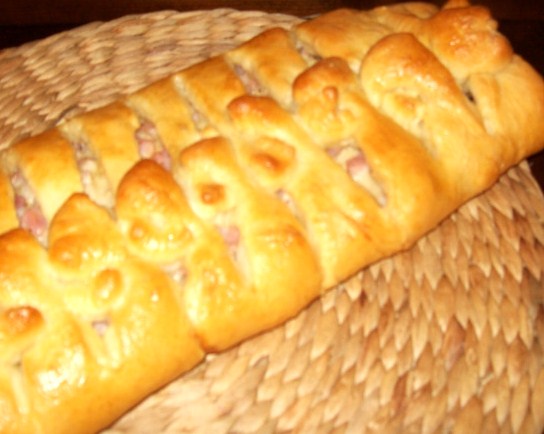
Hot Open-Faced Sandwiches – version 1 –  Tomato, Bacon & Cheese

Use for 2nd photo

Hot Open-Faced Sandwiches – Version 2 – Warm & Puffy Open-Faced Cheese Sandwiches

+++ Update – I bet “Version 2” would really be good with bits of cooked bacon or ham mixed in!  Actually, so would a bit tuna,, salami or turkey etc. 

Any time of day is a good time for an open-faced sandwich. And a sandwich is particularly good when it’s adorned with melted cheese! These Melted Cheese,Tomato and Bacon Open-Faced Sandwiches – and the Warm & Puffy Open-Faced Cheese Sandwiches – are super easy and yummy.

With the addition of a green salad, cold slaw, potato salad or sliced avocado drizzled with balsamic vinaigrette, both the Melted Cheese,Tomato and Bacon Open-Faced Sandwiches and the Warm & Puffy Open-Faced Cheese Sandwiches are perfect for an easy dinner.

(1) Melted Cheese, Tomato and Bacon Open-Faced Sandwiches – Uses toaster oven  – or toaster and broiler

Recently I went through I time where I was kind of “addicted” to these sandwiches.  I like to spread a bit of mayonnaise on these babies once they’re heated up. And that’s part of why my cholesterol is so high – my total fascination with all things mayonnaise.

HOW TO —  Lightly toast two English Muffins – cut in half. Place a ripe & juicy tomato slice on top of each of the halves of English muffin. On top of the tomato, place a few slices of cooked bacon. Place a slice of Swiss cheese – or any cheese of your choice – on top of the bacon.  (I like to sprinkle on a bit of oregano on top of the cheese but you can sprinkle on anything you like.)

Turn toaster oven to BROIL and broil until cheese is melted.   ++ Make sure you keep your eye on your sandwiches, broilers seem to wait until your back is turned, then they immediately burn your lunch! Recipe makes 4 sandwiches.

2 – Warm & Puffy Open-Faced Cheese Sandwiches – OR – Appetizers  Uses toaster oven – or toaster and broiler

use as first photo

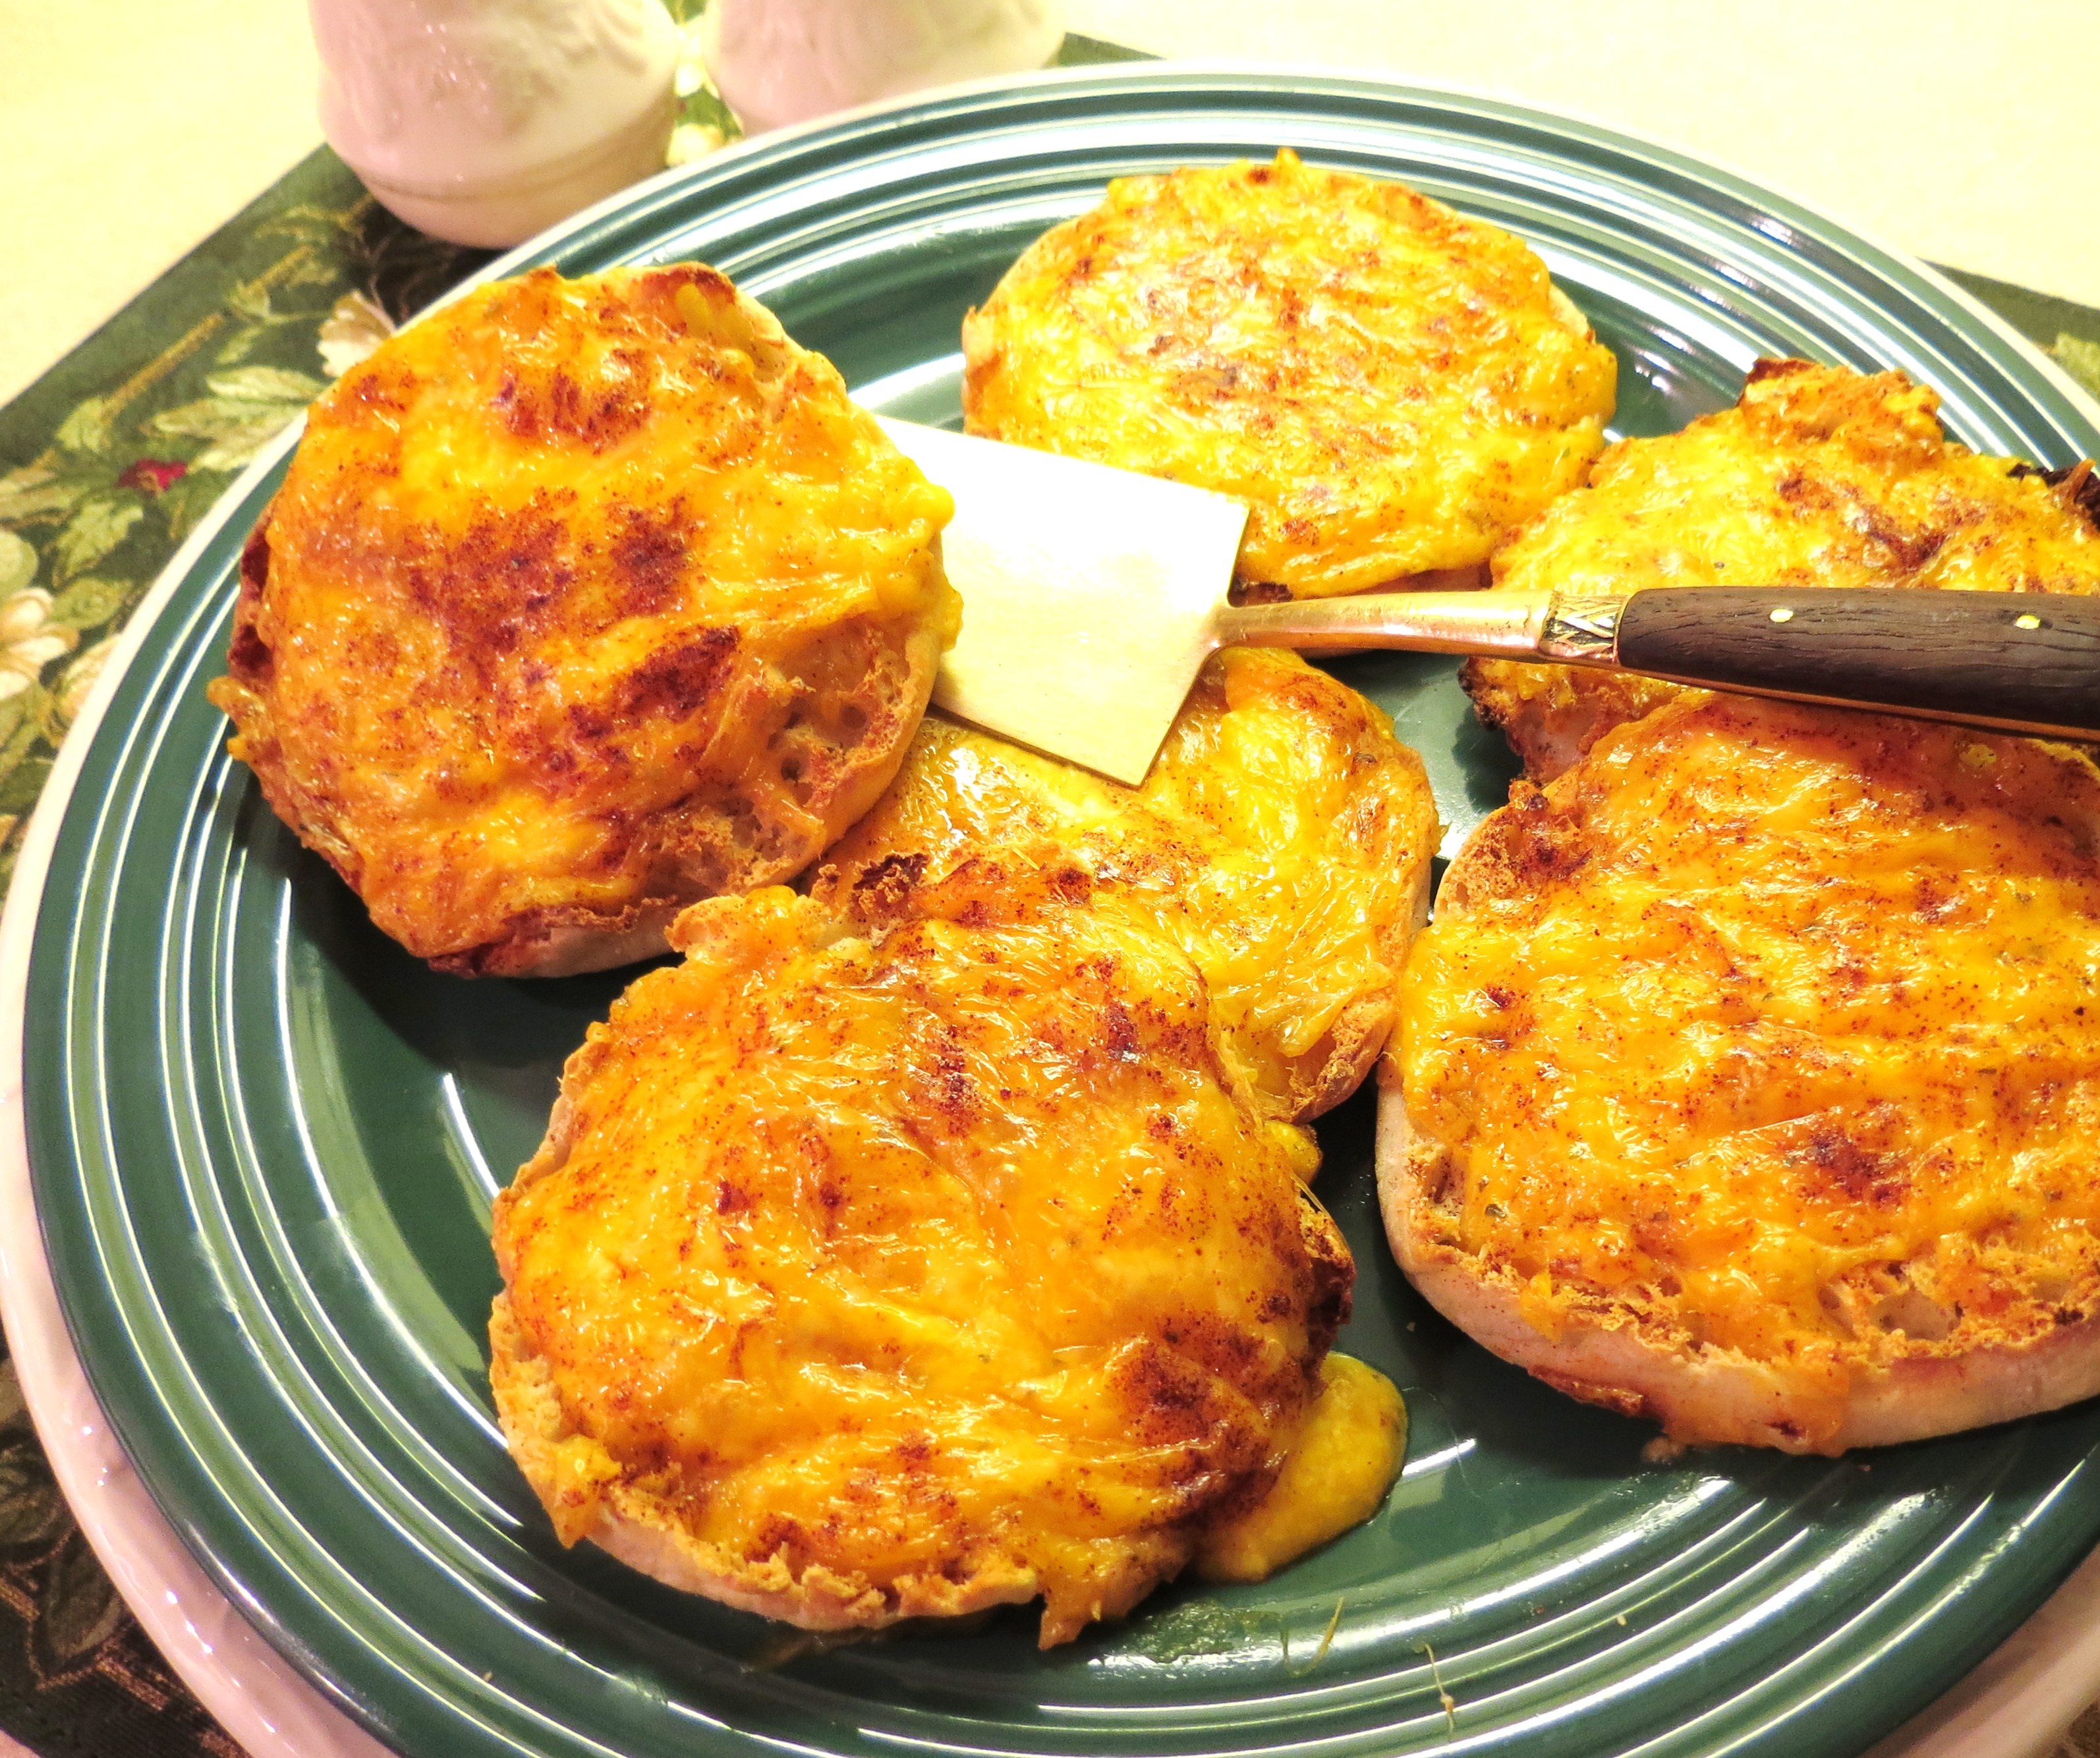
++ UPDATE – – – I highly recommend grating the cheese using a block of cheese. The pre-shredded cheese sold in the diary section doesn’t have the same taste as freshly grated cheese & the sandwiches don’t ‘puff up’ in the same way.

++ For Sandwiches – These sandwiches are rich and filling – and would be great for a brunch as well as lunch. If you add a salad, you’ve got a quick dinner idea! It’s pretty cool how the filling puffs up a bit as it heats up.  Recipe makes 6 open-faced sandwiches.

++ For Appetizers  Prepare as usual. Once they come out of the broiler, cut each English muffin into 1/4’s and there you go – a delicious hot appetizer!!

  Ingredients

  • 1 egg
  • 2 cups hard cheese, grated – such as Cheddar   (You can use pretty much any time of hard cheese, except for cheeses with a very strong flavor. Mozzarella – or any other type of soft cheese – is not recommended.)
  • 1/8 cup mayonnaise
  • a few sprinkles of Mrs. Dash
  • sprinkle on a little Paprika – for color
  • 3 English Muffins, cut in half to give you 6  halves – toasted

In a bowl, mix until well-blended; 1 egg, 2 cups grated hard cheese, 1/8 cup mayonnaise and a few sprinkles of Mrs. Dash & Italian Seasonings – or any seasonings you like.

Lightly toast 6 English Muffin halves. Spread egg/cheese mixture evenly on top of the toasted English muffins or toast. Broil until cheese mixture is hot and bubbling. It doesn’t get much easier than that!   Enjoy!


Ham ‘n Swiss Bread

When we lived in Villanova, outside of Philadelphia, my sons and their friends used to love grabbing something to eat which didn’t need to be heated.  Just Grab and Go!   Therefore, they  loved Ham ‘n Swiss Bread.   Ham ‘n Swiss Bread is good reheated, at room temperature or right out of the oven = which makes it nice for a party or a picnic.

Oven at 375 F       Bake for 30 minutes       Makes  one  Ham ‘n Swiss Bread

            Ingredients

  • white bread dough – enough for one bread, either made from scratch or purchased.  ++ Of course, if it’s frozen…. you’ll have to thaw it first.  Follow directions on the package.)
  • 3 cups chopped ham   (I used a 12 oz. packaged ham slice)
  • 1 cup chopped Swiss cheese
  • 1 Tbs. mayonnaise
  • 1 Tbs. grainy mustard    (I use Grey Poupon “Country Djion”)
  • a bit of oil to grease baking sheet
  • 1 egg, beaten – to be used right before baking

Place dough (after thawing, if necessary) in a medium-sized greased bowl. Cover with plastic wrap (or a dish towel).  Allow dough to almost double in size in a warm place. (I like to warm up the oven – just a tiny bit – and leave the dough to rise there  – out of any drafts.)

Ham and Swiss Bread - My Yellow Farmhouse

Once dough has risen, remove it from bowl and ‘punch it down’, which means punching or pressing the dough down until it’s, basically, hardly any bigger than when you first placed it into the covered bowl.   This rising is called (no surprise here..) – The First Rising.

Form the punched down dough into a log shape about 8″ long.

Ham and Swiss - myyellowfarmhouse.com

Place “dough log” onto a greased cookie sheet and flatten down with your hands – or a rolling-pin – into a rectangle about 11″ x 13′.    ++ The rectangle doesn’t have to be perfect. 

Once you begin working the dough, it’ll get softer and your job will be easier.  Here I am stretching the dough. Whatever works, right?      ++ I discovered purchased bread dough is harder to work with than homemade bread dough.

Ham and Swiss Bread - myyellowfarmhouse.com

Mix chopped ham and chopped Swiss cheese with 1 Tbs. mustard and 1 Tbs. mayonnaise. Spread the mixture in the center of the rectangle. Then, using kitchen shears (you can use a knife, but I think shears make the job easier), make cuts at 1″ intervals on both sides of the dough – cutting towards the center.

Ham and Cheese Bread - myyellowfarmhouse.com

One by one, take a strip from each side and bring them together in the middle of the loaf.  Twist the two ends together, using the photo of the finished bread as your model.  Don’t worry – it’s super easy.  And, actually, kind of fun!   ++ You might have to stretch some strips a little bit to make them ‘meet’.

Ham and Swiss Bread - myyellowfarmhouse.com (2)

After you’ve finished twisting – admire you handiwork for a minute – then cover bread with a dish towel. (Tea towel for my British, Maltese & Australian friends!!).   Allow bread to rise for the second time, which should take about 40 minutes.

When bread has risen sufficiently, meaning almost doubled in size,  heat oven to 375F.    ++ Don’t forget to remove bread from oven – if it’s been rising there.

Using a brush or your fingers (I always use my fingers…) spread beaten egg on the risen bread.

Bake for 25 – 30 minutes.  Bread should be golden brown, and should sound hollow when lightly tapped.      Enjoy!!