‘No Name Bread’ – – A dense, round loaf made with flour & cornmeal. Perfect with chili, soup or stew!

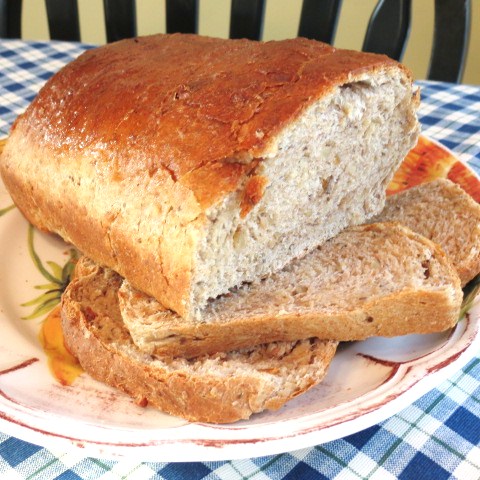
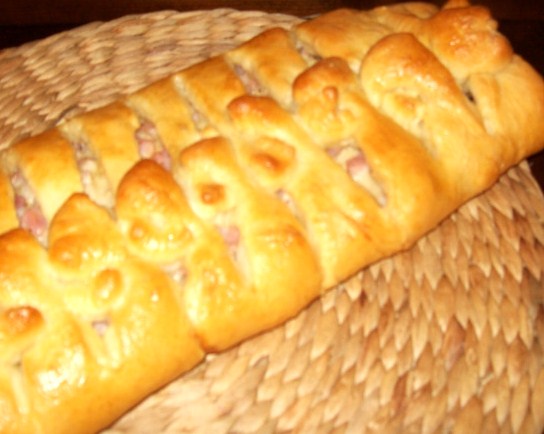
No Name Bread is delicious, but what makes it really special is how little ‘hands on’ time is needed. You mix flour, salt, water and instant yeast, then let the dough sit overnight. (Or a total of 12 – 18 hours.) About an hour before you plan to eat, add some cornmeal & some seasonings and knead dough for about 5 minutes.  Cover dough and allow to rest for a half hour.  Bake for a half hour and ‘et voila’ – a dense moist bread which holds up to being dunked in soup, chili or stew.  ; o )

I’ll let you in a secret.  This loaf of bread is NOT the bread I intended to make.  I won’t go into a lot of detail about The Problem.  I’ll just mention that ‘all flours are not made equal’, meaning Canadian flour is slightly different than flour used in the States. Due to that difference, the dough ended up being sticky and soft. But the yeast worked it’s magic and that’s the most important thing!!

I thought of adding a bit more flour to the dough but was out of flour. (Thank you flour moths…)  But I did have cornmeal – and the rest of the story will go down in history as How ‘No Name Bread’ Came to Be!

INGREDIENTS       ++  Remember to start the dough the afternoon or night before!!

  • 3 cups unbleached all purpose flour
  • 1 3/4 tsp. salt
  • 1/2 tsp. instant OR rapid rise yeast    ++  Bread machine yeast IS rapid rise yeast
  • 1 1/2 cups lukewarm water    ++ Run your hands under the water to check.  If the water feels  slightly warmer than your hand – it’s perfect!
  • 1 cup cornmeal.
  • 1/2 tsp. Italian seasoning
  • 1/3 tsp. garlic salt with herbs
  •  2 Tbs. pine (pignolia) nuts    ++  optional
  • parchment paper
  • RIGHT BEFORE BAKING….
  • olive oil
  • 1/4 tsp. Italian seasonings

METHOD

Oven at 450 (F)       Bake on a parchment paper-lined cookies sheet for 25 mins.

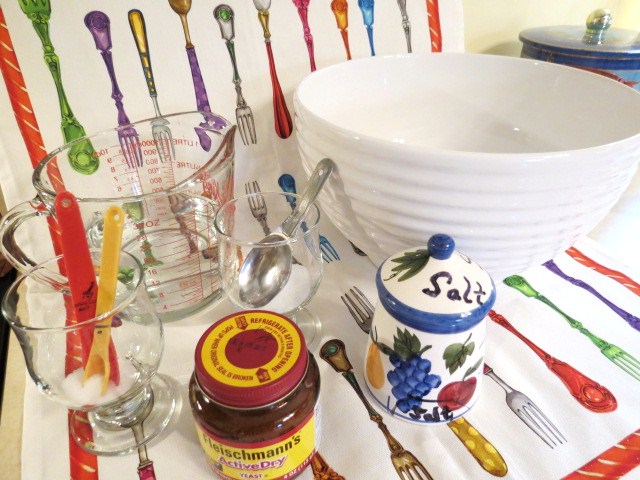
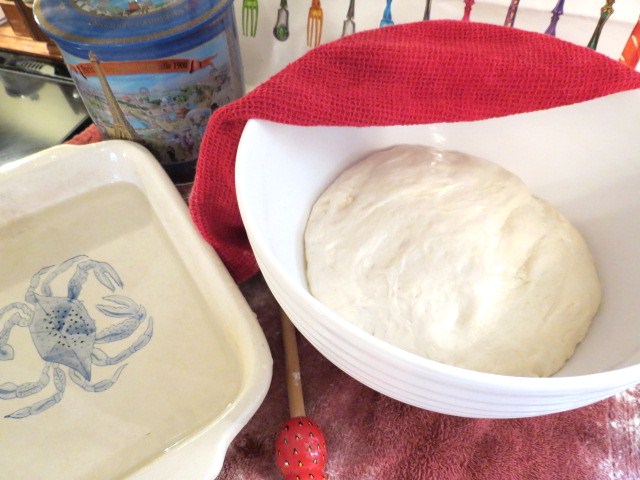
In a large bowl, whisk together 3 cups flour, 1 3/4 tsp. salt and 1/2 tsp. instant (rapid rise) yeast.  Mix in 1 1/2 cups lukewarm water.  Cover bowl with plastic wrap and allow to sit for 12 – 18 hours.  (You can peek it at… I know I did!)

About an hour before you plan to serve the bread, turn out dough… which will be VERY sticky… onto a heavily floured work surface.  Roll dough around a bit so it picks up some of the flour.  Add 1 cup cornmeal.  Work the dough with your hands until cornmeal is thoroughly mixed in.  Add 1/2 tsp. Italian seasonings, 1/3 tsp. garlic salt with herbs and 2 Tbs. pine nuts and work into dough.

Knead dough for about 5 minutes. Scrape dough onto the middle of a parchment paper-lined cookie sheet.  Form into a 7 1/2″ circle.  Cover dough with the same large bowl, turned upside down, and allow to rest for 30 minutes.

No Name Bread - myyellowfarmhouse.com (2)

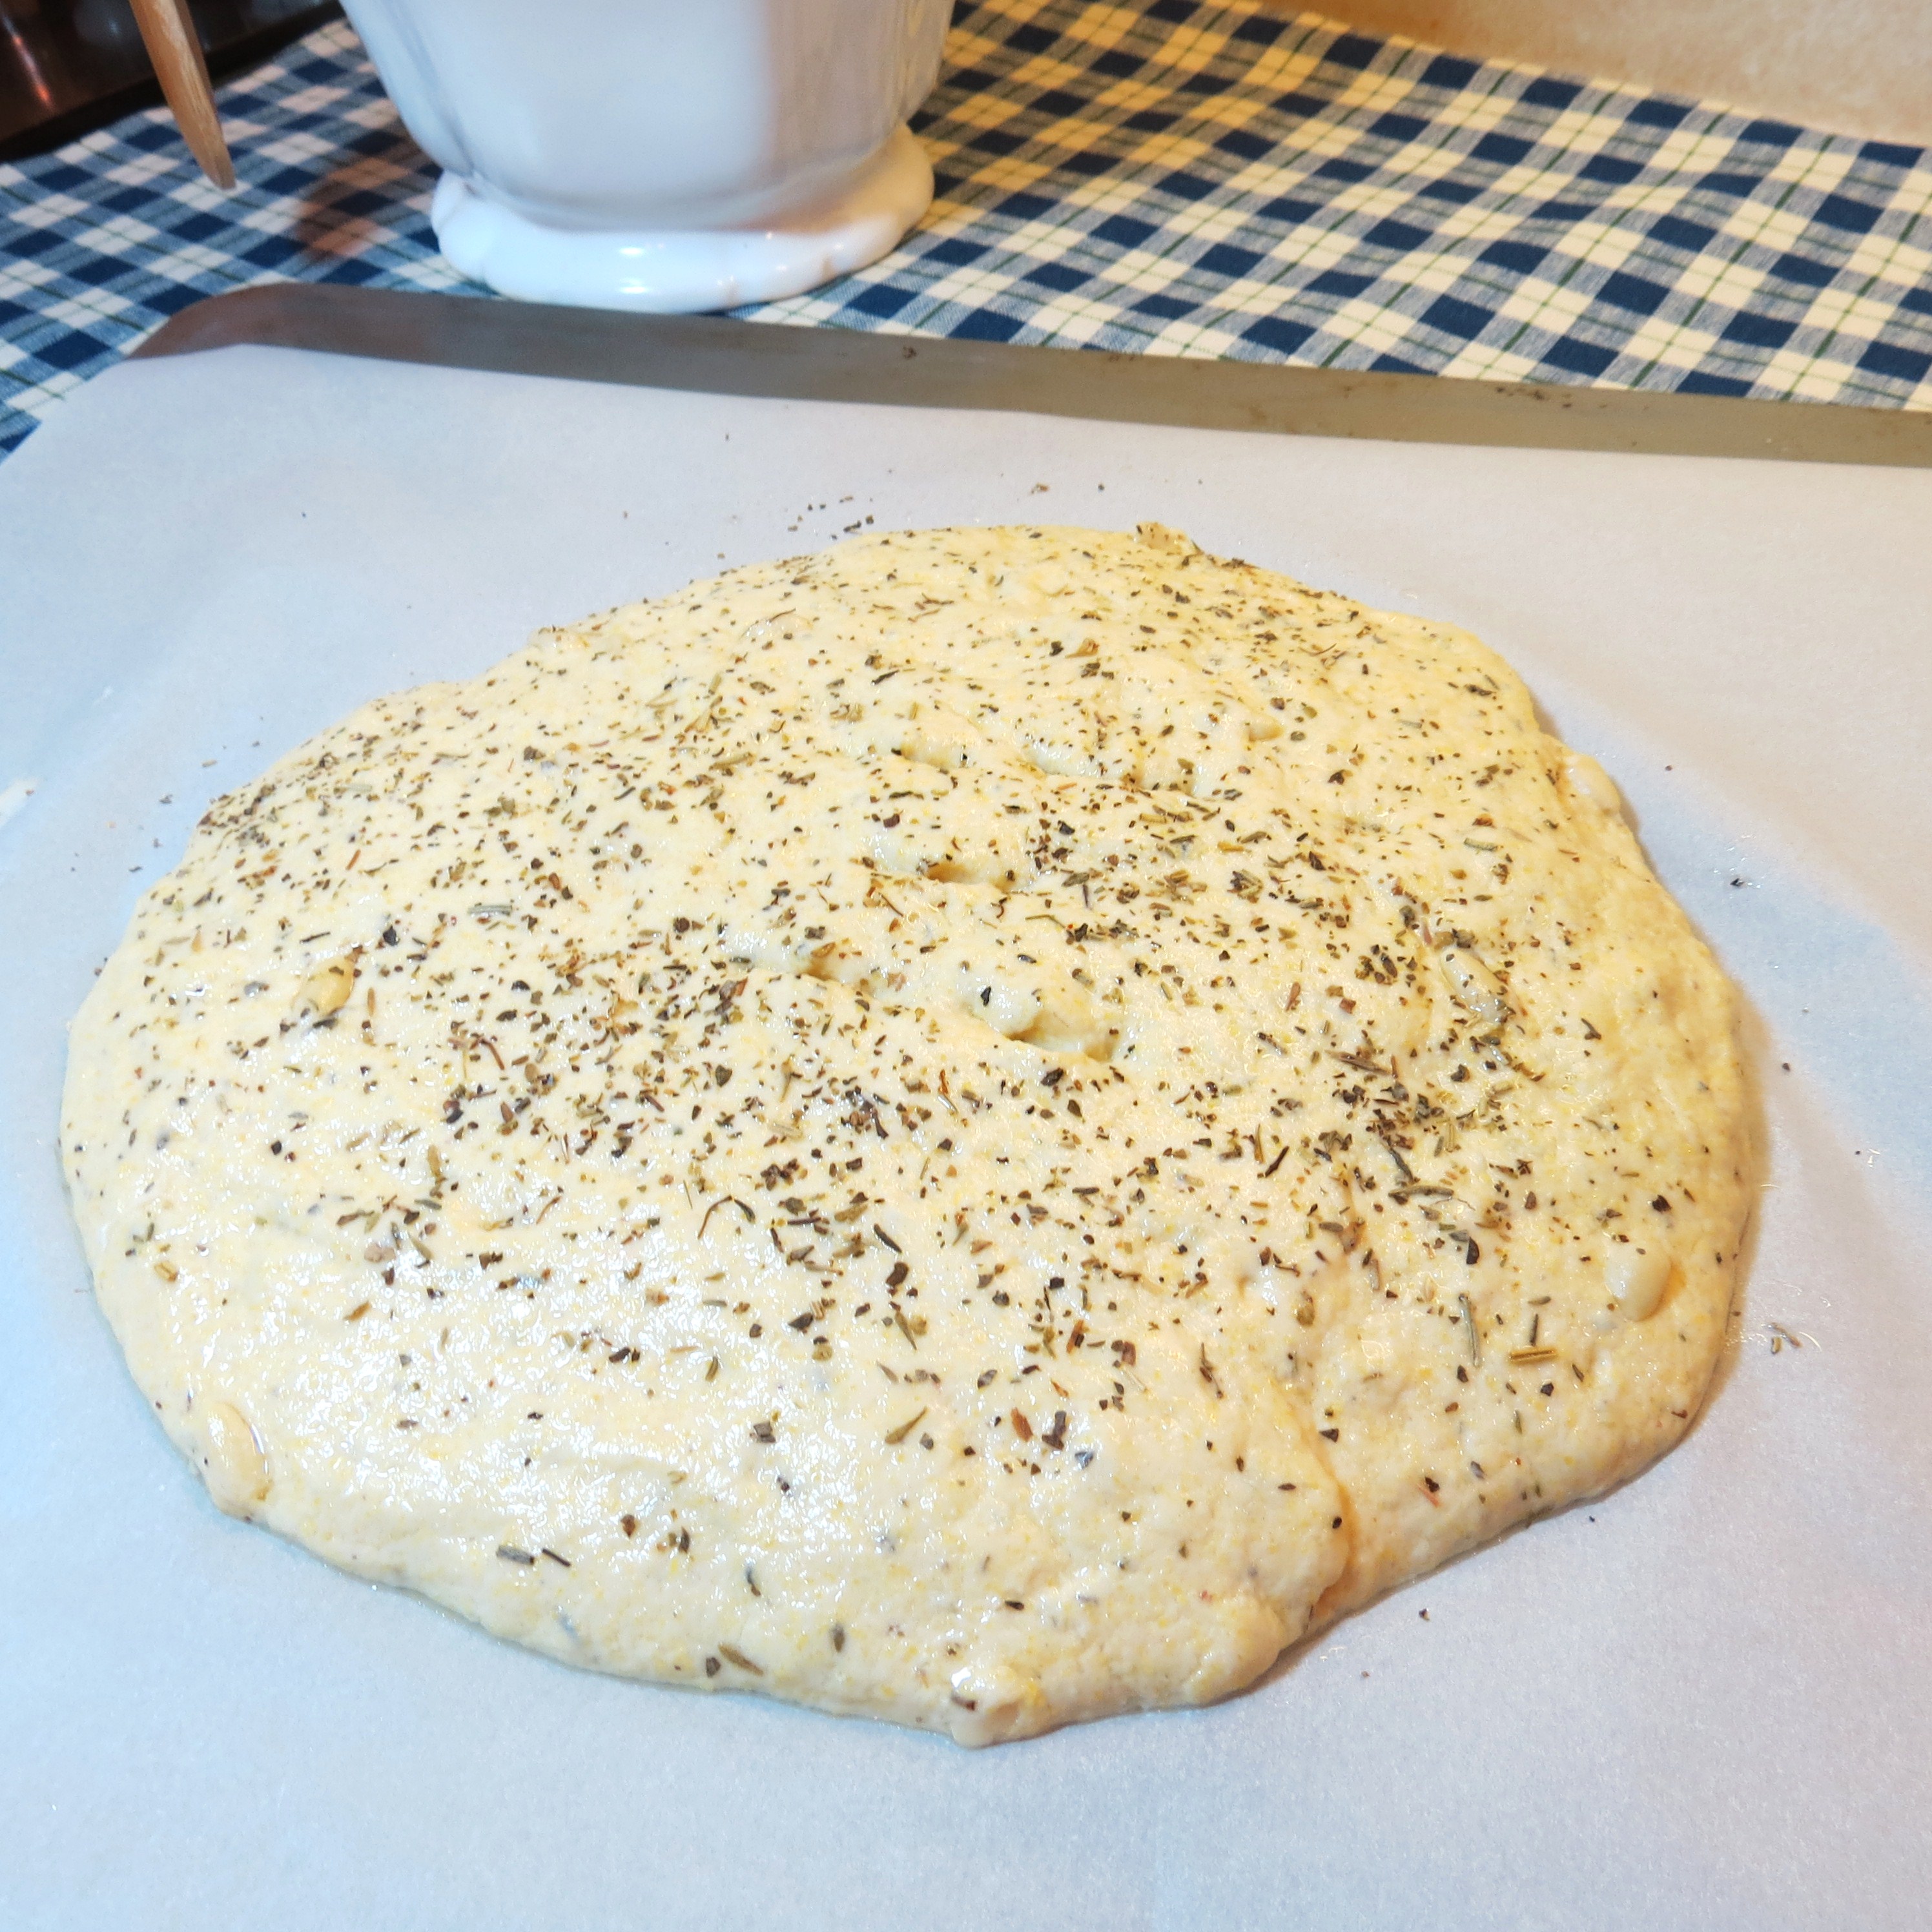
See, it’s bubbling again!

Drizzle dough with olive oil (you can be generous with the olive oil) and sprinkle with 1/4 tsp. Italian seasonings.

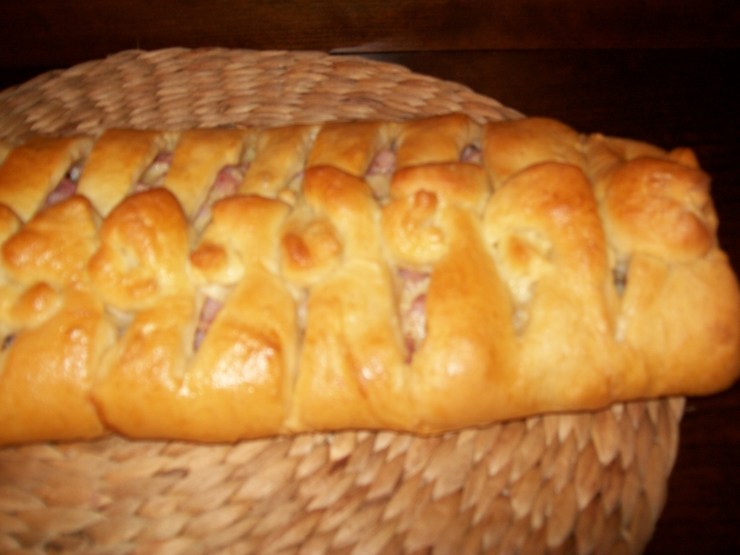
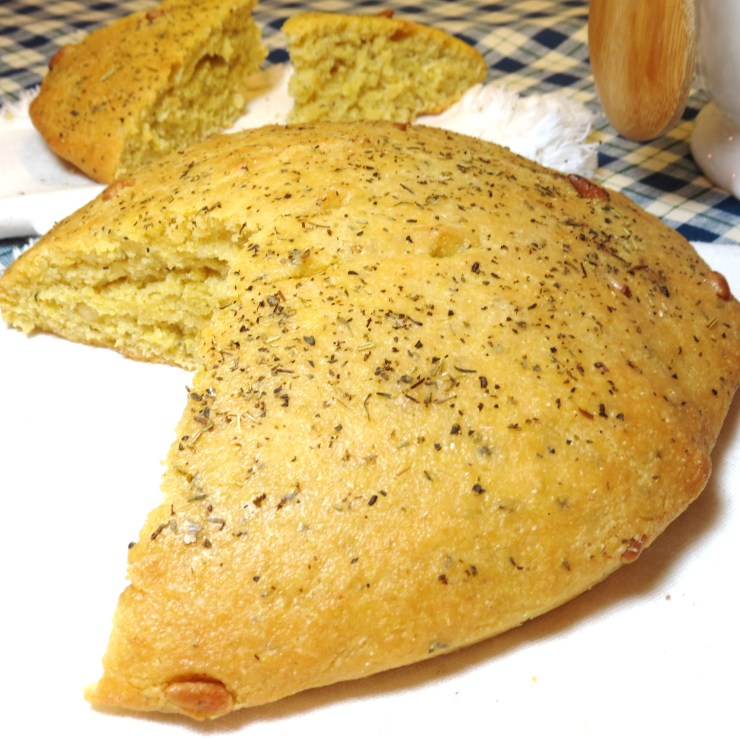
Bake in a preheated 450 (F) oven for 25 minutes.  ++  Loaf will look more ‘golden’ than brown.  I recommend letting the loaf of ‘No Name Bread’ sit for 5 – 10 minutes…. if you can wait that long!!

Follow this link for my recipe ‘Thick ‘n Creamy Charred Red Bell Pepper and Potato Chowder’

Creamy Charred Red Bell Pepper and Potato Chowder - myyellowfarmhouse.com

—-

'No Name Bread' - myyellowfarmhouse.com

Nutty Oatmeal and Wholewheat Bread

Oatmeal and Wholewheat Bread - My Yellow Farmhouse.com

For Bread Machine directions, follow this link – https://myyellowfarmhouse.com/2015/01/22/nutty-oatmeal-wholewheat-bread-bread-machine-version/

– – – –

This is the latest recipe in my Eating Healthy series.  And I’m happy to say that after only a week of ‘eating healthy’ I’m back in my jeans – and I can actually sit here and work on this post without having to unzip them.  If I’m hungry, I eat.  I just watch what I eat.  Believe me – I have a long, long way to go weight-wise.  But I’m motivated and enjoying the process.

It took me two tries to get this recipe the way I wanted it… and it was definitely worth the effort.  Nutty Oatmeal & Wholewheat Bread has a delicious, nutty taste.  And it’s good for you! There’s a cup of oatmeal and a cup of wholewheat flour, plus a cup of regular bread flour (because I don’t like heavy bread).  I added 1 tablespoon of chia seeds, which are so very good for you – or – you could add some bran in place of the chia seeds.  I  also added 1/3 cup of chopped walnuts, which, like chocolate, make everything taste better.    ++ This bread makes wonderful toast!

small red heart

INGREDIENTS                    Makes One Loaf

  • 1 cup very warm water
  • 2 1/4 tsp. active dry yeast
  • 2 Tbs. honey            ++  Or brown sugar
  • 1 1/4 tsp. salt
  • 2 Tbs. butter             ++  Or Olive oil
  • 1 cup quick-cooking oats
  • 1 cup wholewheat flour
  • 1 cup flour      ++  In the United States, bread flour is different than regular flour.  In Canada, regular flour has the same qualities as bread flour.  I use bread flour but this recipe works with either.
  • 2 pinches nutmeg
  • OPTIONAL    –    1 Tbs. Chia seeds    ++  Or wheat germ
  • OPTIONAL    –    1/3 cup chopped walnuts  ++  Walnuts will be added once dough has been kneaded a while.

METHOD

3 - Nutty Oatmeal and Wholewheat Bread - My Yellow Farmhouse.com (3)

Measure 1 cup very warm water.    ++  The water should feel warm on your wrist – not hot.  Too hot and you kill the yeast.  Too cold, and the yeast just sits there. 

Add 2 Tbs. honey and stir briefly.  Add 2 1/4 tsp. active dry yeast.  Again stir briefly.  I’ve never seen directions to ‘stir’… it’s just what I do.)

Allow water, honey and yeast to sit for 15 minutes.

++  I usually give the mixture a little stir after about 7 minutes.

++  During cold weather you may want to place the measuring cup somewhere out of drafts.  I use my microwave!

After 15 minutes the water, honey and yeast should’ve bubbled up to resemble the photo above.  ++ If it does NOT – your water may have been too cold or too hot – or – your yeast may not be good anymore.  Just dump the contents out and try it again.  DO NOT GIVE UP!  The first bread I made was heavy as a brick!!

++  The quality of yeast goes down the longer you have it.  Use ‘6 months’ as your guide for when it’s time to discard it BUT your bread won’t fail if the yeast is older.  Your bread will just not rise quite as much and will have less flavor.  (I buy small jars of yeast but the same applies to packets.)

Pour the liquid into a medium-sized bowl.  Add 1 1/4 tsp. salt, 2 Tbs. butter, 1 cup quick-cooking oats, 1 cup wholewheat flour, 1 cup flour (see note above), 1 Tbs. Chia seeds and 2 pinches nutmeg.  ++  You’ll be adding the walnuts a bit later.

Using your hands (or a large spoon if you wish) mix the ingredients until combined, which should only take about a minute.

KNEADING THE DOUGH

Place dough on lightly floured work surface.  ++  I usually use a ‘tea towel’ (a.k.a. ‘dish towel) but this dough is a bit sticky, just I just used the counter.

Knead dough about 5 minutes.  ++  To knead dough, push away from you with the palm of your hand, turn dough, fold over and repeat. If dough is too sticky, add a bit more flour.

++ Now add 1/3 chopped walnuts and knead just until walnuts are incorporated.  Form dough into a ball.

++  Here’s an excellent link to learn how to knead bread –  http://bread.wonderhowto.com/how-to/knead-bread-dough-by-hand-355638/

Dough After Kneading

6 -  Nutty Oatmeal and Wholewheat Bread - My Yellow Farmhouse.com (5)

ALLOWING THE DOUGH TO ‘RISE’    

8 - Nutty Oatmeal and Wholewheat Bread - My Yellow Farmhouse.com (7)

After dough has been kneaded, place it in a greased bowl.  Turn dough over to grease top.  Cover bowl with a dish towel or plastic wrap.  Let rise in warm place for 30 to 40 minutes, or until double in size. 

++ During cold weather, place a 10′ x 13′ pan half-full of VERY HOT water on the bottom rack. of your oven.  Place the covered bowl containing the dough on the top rack.

7 - Nutty Oatmeal and Wholewheat Bread - My Yellow Farmhouse.com

ALLOWING THE DOUGH TO RISE A 2nd TIME

Once dough has risen, you’re going to ‘punch it down’, which seems pretty counter-intuitive…but allowing the dough rise a 2nd time will make the bread much lighter.  ++  If you like dense bread – then just skip this step!

Cover bowl with dishtowel and repeat step above for rising the dough.  Again – allow to rise for 30 – 40 minutes or until double in size.

 FORMING THE DOUGH  –  This is fun and easy!!

9 - Nutty Oatmeal and Wholewheat Bread - My Yellow Farmhouse.com (8)

10 - Nutty Oatmeal and Wholewheat Bread - My Yellow Farmhouse.com (9)

Remove dough from bowl.  Place on a lightly floured surface.  Using fingers, press dough into an 8′ x 12′ rectangle.  Beginning at short end, roll up tightly.  Place in a greased (I use olive oil) 9′ x 5′ loaf pan.

Bake in a 375 (F) oven for 35 – 40 minutes.  Allow the Nutty Oatmeal and Wholewheat Bread a few minutes to cool off due to the denseness of the bread…. that is….if you can wait.  (I didn’t!)     Enjoy!

2 - Nutty Oatmeal and Wholewheat Bread - My Yellow Farmhouse

Nutty Oatmeal & Wholewheat Bread – Bread Machine Version

2 - Nutty Oatmeal and Wholewheat Bread - My Yellow Farmhouse

Follow this link for Nutty Oatmeal and Wholewheat Bread made without a bread machine –   http://myyellowfrmhouse.com/2015/01/22/nutty-oatmeal-and-wholewheat-bread/

This is the latest recipe in my Eating Healthy series.  And I’m happy to say that after only a week of ‘eating healthy’ I’m back in my jeans – and I can actually sit here and work on this post without having to unzip them.  If I’m hungry, I eat.  I just watch what I eat.  Believe me – I have a long, long way to go weight-wise.  But I’m motivated and enjoying the process.

It took me two tries to get this recipe the way I wanted it… and it was definitely worth the effort.  Nutty Oatmeal & Wholewheat Bread has a delicious, nutty taste.  And it’s good for you! There’s a cup of oatmeal and a cup of wholewheat flour, plus a cup of regular bread flour (because I don’t like heavy bread).  I added 1 tablespoon of chia seeds, which are so very good for you – or – you could add some bran in place of the chia seeds.  I  also added 1/3 cup of chopped walnuts, which, like chocolate, make everything taste better.    ++ This bread makes wonderful toast!

small red heart

INGREDIENTS        ++  According to my bread machine directions, this is the order of the ingredients as they’re put into the bread machine.  Check the directions for your bread machine, just in case they differ.

  • 1 cup warm water
  • 2 Tbs. honey            ++  Or brown sugar
  • 1 1/4 tsp. salt
  • 2 Tbs. butter             ++  Or Olive oil
  • 1 cup quick-cooking oats
  • 1 cup wholewheat flour
  • 1 cup bread flour      ++  In the United States, bread flour is different than regular flour.  In Canada, regular flour has the same qualities as bread flour.  Follow your manufacturer’s directions.
  • 1 Tbs. Chia seeds    ++  Or wheat germ
  • 2 pinches nutmeg
  • 2 1/4 tsp.active dry yeast  ++  I use Bread Machine yeast but regular yeast may be used
  • 1/3 cup chopped walnuts   ++  The walnuts should be added during your machine’s ‘add’ cycle, which is part way through the kneading process.  Your machine should give you a signal.  If not, add the walnuts after machine has had time to knead the dough for awhile.


use - Nutty Oatmeal and Wholewheat Bread - My Yellow Farmhouse.com (2)

Set bread machine on ‘grain’ cycle.   ++  Your machine’s grain cycle will allow for the bread to rise twice, which gives the bread a lighter texture.  Enjoy !!

++  This step is NOT necessary but if you want a darker, crisper crust, up-end your baked bread into a 9’x 9′ square pan.  Remove bread machine pan from bread.  Turn bread over so crust side faces up.  Place in a 400′ oven for 5 – 6 minutes. 

Oatmeal and Wholewheat Bread - My Yellow Farmhouse.com

Farmhouse Bread – Possibly the EASIEST Bread You’ll Ever Make !

++ UPDATE  My fellow blogger friend John, who I mention below, recently made one loaf of ‘Farmhouse Bread’. He was very pleased with the results – in spite of the fact he forgot the dough rising in the oven… for 4 hours! I recently read bloggers should not begin a post by apologizing for having been out-of-touch.. that is.. unless you’ve been doing something noteworthy, such as vacationing. So, I’ll use that as my excuse because I did just return from a trip to Mexico.  I spent a week at Sandos Playacar Beach Resort in Playacar Del Carmen, Mexico, and it was all-inclusive and totally wonderful. I baked these loaves and took the photos before I left, planning to post the recipe while in Mexico….but I left the recipe at home…  Liz, who writes the excellent food blog ‘My Favorite Pastime‘, wrote to me (after I whined to her how I’d forgotten the recipe), “Have a great time. You can always post the recipe once you get home”. And John, ‘From the Bartolini Kitchens‘, told me, “You’ll find the recipe when you least expect it”.  It turns out they were both right & I thank them for their words of wisdom. So – without further ado – here’s the recipe for ‘Farmhouse Bread‘, which makes two beautiful loaves quicker than any bread recipe I’ve ever seen simply because you don’t have to wait for the bread to rise twice!

** If you have any questions or comments, keep scrolling down. I love to hear from you !!

INGREDIENTS

  • 1 TABLESPOON (1 packet) active dry yeast    ++ NOT ‘quick rise’ yeast
  • 1 TABLESPOON sugar
  • 1 TABLESPOON salt
  • 2 cups warm water     ++ The water should not be over 110F.  ++ Heat up your measuring cup first by running hot water over it, then fill it with warm water  ++ Check the water temperature by pouring a bit on your wrist – it should feel slightly warm.
  • 5 1/2 to 6 cups All-Purpose Flour    ++ Some bread recipes in the States ask for ‘Bread Flour’.. but not this particular recipe.
  • Cornmeal, to spread on bottom of a cookie sheet – OR – use parchment paper, which I prefer.

Possibly the Easiest Bread You'll Ever Make! - My Yellow Farmhouse.com

In a large bowl mix together 1 Tbs. active dry yeast, 1 Tbs. sugar, 1 Tbs. salt and 2 cups warm water. Allow mixture to stand 4 – 5 minutes while the yeast ‘eats up the sugar’, the combination of which will make the bread rise!

++ Everything will foam up a bit, which means the yeast is working.  If you don’t see any ‘bubbling’, your yeast is too old.  (Been there…. done that…)

Gradually add the flour to the liquid and mix thoroughly until the dough pulls away from the sides of the bowl.

Adding Flour to the Yeast, Sugar, Salt & Water Mixture

Possibly the Easiest Bread You'll Ever Make! - My Yellow Farmhouse.com

++ Making bread is not an exact science. One time you may need a bit more flour and another time you may need a bit less.  I ended up adding a bit more warm water because my dough was too dry and some of the flour wouldn’t incorporate into the dough. Don’t be afraid to ‘play around’ until the dough just feels right. You can always add a bit more flour when you’re kneading the dough.

Remove the dough and place on a lightly floured surface.

++ I like to use a floured dish towel.  (Tea towel for our British friends!) Knead dough 5 minutes. 

++ To knead dough, push away from you with the palm of your hand, turn dough, fold over and repeat. If dough is too sticky, add a bit more flour. If it’s still sticking to the floured surface.. yup.. add a bit more flour.

++ If you’re interested, here’s why kneading is necessary. (Adapted from ‘The Wise Geek’.) “One of the most important things taking place during the kneading process is the development of gluten, a type of protein. As the flour is moistened and stirred, gluten begins to form. This protein (gluten) acts as a binding agent within the dough, allowing the loaf to take on a cohesive texture so it doesn’t fall apart during baking.”

Let the dough rest while you wash & dry the bowl.  Using your hands, spread some oil (I use olive oil) around the inside of the bowl. Knead dough again for 2 to 3 minutes.  Place dough in the oiled bowl and turn dough over once to oil the top.

Kneaded Dough & Baking Pan with Hot Water

Possibly the Easiest Bread You'll Ever Make! - My Yellow Farmhouse.com

Cover bowl with a damp towel and keep warm until dough doubles in size – between 1 – 2 hours. SEE TIP BELOW !!

++ Here’s what I do to speed up the process.  Place a large baking pan containing HOT water on the bottom rack of your oven. Place the covered bowl containing the dough into the oven and close the door. Check between 45 minutes to an hour – your dough may have risen enough.  If the dough has doubled in bulk, then it’s ready for the next step. If not, just wait a bit longer.  (The original directions, from King Arthur Flour, say to let dough rise between 1 – 2 hours.)

Risen Dough – Ready to be ‘Punched Down’

Possibly the Easiest Bread You'll Ever Make! - My Yellow Farmhouse.com

Dough After Being ‘Punched Down’ (I think it looks a bit sad…)

Possibly the Easiest Bread You'll Ever Make! - My Yellow Farmhouse.com

Once you’ve punched down the dough with your fists, knead the dough briefly right in the bowl to get out any large air bubbles.  Return dough to lightly floured surface.  ( I thought this bread was so much fun to make.  The dough begins to rise again almost immediately after being punched down.)

Ready to be Formed into Loaves

Possibly the Easiest Bread You'll Ever Make! - My Yellow Farmhouse.com

Cut dough in half using either a knife or kitchen shears.  You don’t have to be overly fussy with it. Just try to end up with two pieces of dough pretty much the same size. Form each half into Italian or French styles loaves.  I went for a more rustic Italian look – if you’d like the same look, form dough into two 8″ – 9″ loaves. Place the loaves on a cookie sheet generously sprinkled with cornmeal OR use parchment paper, which I prefer.  Allow loaves to rest 5 minutes.

++ If the cookie sheet is lined with parchment paper, you can form the loaves right on the cookie sheet – which is what I do. Slash the tops 3 or 4 times diagonally. Brush loaves with cold water.  ++ I sprinkled my loaves with sesame seeds but it’s not necessary.

Shaped, Slashed and Ready to Rise ‘n Bake.

As you can see, the dough has already risen quite a bit since I formed it into loaves!

Possibly the Easiest Bread You'll Ever Make! - My Yellow Farmhouse.com

This is the coolest thing I’ve ever seen in bread making. You don’t have to wait for a 2nd rising. Your loaves are going to rise in the oven!  Place the cookie sheet containing the loaves into a COLD OVEN!!  Refill the baking pan you’d use before with BOILING WATER and return it to the bottom rack of the oven.

++ Caution – – don’t fill the baking pan too full with boiling water. The water’s going to slosh around a lot and you could get burned !

Place shaped loaves on the center rack of your oven – then set temperature to 400F.

++ As your loaves are rising, don’t be alarmed if they get so big the sides touch. That happened to me, so I just broke them apart after they cooled a bit.

Bake bread for 35 to 45 minutes, until the crust is golden brown and the bread sounds hollow to the touch.

++ For a softer crust, which I like, spread butter on the still-warm loaves.  (The butter gives the loaves that lovely sheen.)

Remove loaves from baking sheet and allow to cool.. not for long… just until it’s cooled enough so you can hold on to the bread while you cut a nice, big piece and slather it with butter. Enjoy!

P.S. My neighbor said this is the best bread she’s ever eaten! Of course, she might’ve just said that so I keep coming over with ‘goodies’!!

Possibly the Easiest Bread You'll Ever Make! - My Yellow Farmhouse.com

** Adapted from King Arthur Flour’s – “Hearth Bread”.  King Arthur Flour’s ‘Flagship Campus’, as they call it, is located in Norwich, Vermont.  It’s a wonderful place to visit, so drop by if you’re ever in the area!

Ham ‘n Swiss Bread

When we lived in Villanova, outside of Philadelphia, my sons and their friends used to love grabbing something to eat which didn’t need to be heated.  Just Grab and Go!   Therefore, they  loved Ham ‘n Swiss Bread.   Ham ‘n Swiss Bread is good reheated, at room temperature or right out of the oven = which makes it nice for a party or a picnic.

Oven at 375 F       Bake for 30 minutes       Makes  one  Ham ‘n Swiss Bread

            Ingredients

  • white bread dough – enough for one bread, either made from scratch or purchased.  ++ Of course, if it’s frozen…. you’ll have to thaw it first.  Follow directions on the package.)
  • 3 cups chopped ham   (I used a 12 oz. packaged ham slice)
  • 1 cup chopped Swiss cheese
  • 1 Tbs. mayonnaise
  • 1 Tbs. grainy mustard    (I use Grey Poupon “Country Djion”)
  • a bit of oil to grease baking sheet
  • 1 egg, beaten – to be used right before baking

Place dough (after thawing, if necessary) in a medium-sized greased bowl. Cover with plastic wrap (or a dish towel).  Allow dough to almost double in size in a warm place. (I like to warm up the oven – just a tiny bit – and leave the dough to rise there  – out of any drafts.)

Ham and Swiss Bread - My Yellow Farmhouse

Once dough has risen, remove it from bowl and ‘punch it down’, which means punching or pressing the dough down until it’s, basically, hardly any bigger than when you first placed it into the covered bowl.   This rising is called (no surprise here..) – The First Rising.

Form the punched down dough into a log shape about 8″ long.

Ham and Swiss - myyellowfarmhouse.com

Place “dough log” onto a greased cookie sheet and flatten down with your hands – or a rolling-pin – into a rectangle about 11″ x 13′.    ++ The rectangle doesn’t have to be perfect. 

Once you begin working the dough, it’ll get softer and your job will be easier.  Here I am stretching the dough. Whatever works, right?      ++ I discovered purchased bread dough is harder to work with than homemade bread dough.

Ham and Swiss Bread - myyellowfarmhouse.com

Mix chopped ham and chopped Swiss cheese with 1 Tbs. mustard and 1 Tbs. mayonnaise. Spread the mixture in the center of the rectangle. Then, using kitchen shears (you can use a knife, but I think shears make the job easier), make cuts at 1″ intervals on both sides of the dough – cutting towards the center.

Ham and Cheese Bread - myyellowfarmhouse.com

One by one, take a strip from each side and bring them together in the middle of the loaf.  Twist the two ends together, using the photo of the finished bread as your model.  Don’t worry – it’s super easy.  And, actually, kind of fun!   ++ You might have to stretch some strips a little bit to make them ‘meet’.

Ham and Swiss Bread - myyellowfarmhouse.com (2)

After you’ve finished twisting – admire you handiwork for a minute – then cover bread with a dish towel. (Tea towel for my British, Maltese & Australian friends!!).   Allow bread to rise for the second time, which should take about 40 minutes.

When bread has risen sufficiently, meaning almost doubled in size,  heat oven to 375F.    ++ Don’t forget to remove bread from oven – if it’s been rising there.

Using a brush or your fingers (I always use my fingers…) spread beaten egg on the risen bread.

Bake for 25 – 30 minutes.  Bread should be golden brown, and should sound hollow when lightly tapped.      Enjoy!!