“Khobz’ – Moroccan Bread ++ Quick & Easy ++ Dough only needs to rise once!

Khobz - Moroccan Bread - myyellowfarmhouse.com (2)

I purchased this beautifully hand-painted blue and white platter in Casablanca.  It’s one of my favorites!

I truly enjoy making different kinds of bread!  It amazes me how something so comforting and delicious comes out of playing around with some flour, salt and sugar etc.  It also amazes me how many different types of bread there are in the world. One of my favorite memories took place in India on New Year’s Eve years ago, where we saw men (fearless men!) slapping Naan onto the sides of a tandoor oven with their bare hands.

And, on a visit to Cairo, we saw women sitting on the ground cooking bread on large, flat stones.  That bread was, like Naan, a flat-bread but with a whole different – and wonderful – taste.

Egyptian Flat Bread - courtesy of Egyptian Food Recipes.com

++  Curious about ‘Breads of the World’ – here’s a great site!    http://en.wikipedia.org/wiki/List_of_breads

Interestingly enough, bread in Malta is called ‘Hobz’ (Ħobż Malti).  Ħobż Malti is dense, heavy bread which makes wonderful sandwiches.  Malta was ruled by Arabs for quite a long time, and the Maltese language contains many words derived from (or exactly the same as) Arabic.  So, it’s not too surprising that the Arabic word for bread is ‘Khobz’ and the Maltese word is Hobz.

When we lived in Malta I wrote a small book about the country’s long and varied history.  And let me tell you, Malta’s history, including rule by the Knights of St. John (better known today as The Knights of Malta) is fascinating!

Maltese Hobz -  courtesy of 'honeyandmustard.wordpress.com

One of the best sandwiches I’ve ever eaten is called Hobz Biz-zejt.  There are times when The Whole Equals More Than the Sum of It’s Parts and this is sure one of those times!!   Hobz Biz-zejt can be recreated with another type of crusty bread, but it just won’t be quite the same…   Here’s a link if you’d like to make these sandwiches at home.  (I just started following this blog!)

https://honeyandmustard.wordpress.com/2011/05/13/maltese-traditional-hobz-biz-zejt/

I know you’re going to enjoy Khobz.  It’s easy to make.  The recipe makes two loaves.  And – best of all – Khobz only needs one rising.

– – – –

INGREDIENTS      Oven at 435F      Bake for 20 minutes     ++ Switch position of baking sheets after first 10 minutes

  • 4 cups flour
  • 2  tsp. salt
  • 2 tsp. sugar
  • 1 Tbs. yeast
  • 2 Tbs. olive oil
  • 1 1/4 cups warm water   ++  Water should feel warmer than your skin.  Try pouring a bit on your wrist to check.  If the water’s too cold – or too hot – the yeast won’t work properly and the bread won’t rise. 
  • olive oil  – – to spread on baking sheets – and – to drizzle on bread both before and after baking

METHOD

Prepare 2 baking sheets by pouring 1/2 tsp. olive oil in the center of each baking sheet.  Spread oil, using fingers, to make a 5″ – 6″ circle .     ++ You can skip the olive oil and use cornmeal…. but, to me, cornmeal doesn’t seem very authentic. Place 4 cups flour, 2  tsp. salt and 2 tsp. sugar in a large bowl.  Stir to combine.

Make a well in the center.   Place 1 Tbs. yeast in the center.  Gently pour 2 Tbs. olive oil and 1 1/4 cups warm water into the well and mix together to dissolve yeast.  Then mix entire contents of bowl until flour mixture has been incorporated.     

++  It may seem, at first, like you’ll never be able to get all the flour incorporated – just work at it a bit and it’ll all come together!   

Turn dough out onto a floured surface. Knead dough for 10 minutes, adding a bit more flour if necessary.  After kneading for 10 minutes dough should be soft and pliable. ++  Here’s an excellent link to learn how to knead bread –   http://bread.wonderhowto.com/how-to/knead-bread-dough-by-hand-355638/ After dough is kneaded, form into a ball.

              Divide dough into halves.         .

Khobz - Moroccan Bread - - www.myyellowfarmhouse.com

Shape each portion into a smooth, circular mound.

khobz - Moroccan Bread - myyellowfarmhouse.com (4)

Place dough onto prepared baking sheets.  Cover with towels.  Allow to rest for 10 minutes.

Khobz - Moroccan Bread - myyellowfarmhouse.com

After 10 minutes, flatten dough using the palm your hand to form two – 7″ circles.

Khobz - Moroccan Bread - www.myyellowfarmhouse.com (3)

Once again, cover dough with towels. Allow dough to rise for an hour – or until dough springs back when pressed lightly with a finger.

Khobz - Moroccan Bread - myyellowfarmhouse.com

After dough has risen, poke here and there with a fork.  Drizzle on a bit of olive oil and spread with your fingers (which is what I do) or use a spoon.

Khobz - Moroccan Bread - www.myyellowfarmhouse.com (4)

++ Raise bottom oven rack up one level     Bake bread at 435F for 20 minutes – – rotating baking sheets halfway through cooking time (at the 10 minute mark). Loaves should be browned and sound hollow when tapped.    ++  Don’t be afraid to take bread out a minute or two early  – oven temperatures can vary widely.

Remove loaves from baking sheets and allow to cool on wire racks.  At this point I like to drizzle on more olive oil and spread it over the crust – because I think it makes most-any bread look better.   Enjoy !!

Khobz - Moroccan White Bread -- www.myyellowfarmhouse.com (3)

—-

  ‘Moroccan Chicken Tagine with Sweet Potatoes’ 

Moroccan Chicken Tagine with Sweet Potatoes and Dates - - myyellowfarmhous.com

https://myyellowfarmhouse.com/2015/02/03/moroccan-chicken-tangine-with-sweet-potatoes/

And, to complete your meal, how about ‘Couscous with Raisins and Pine Nuts’

Moroccan Chicken and Couscous - myyellowfarmhouse.com

  https://myyellowfarmhouse.com/2014/03/10/moroccan-chicken-couscous-with-raisins-and-slivered-almonds/ 

Moroccan Chicken Tagine with Sweet Potatoes (Does NOT have to be cooked in a tagine!)

Moroccan Chicken and Rice Pilaf - - myyellowfarmhouse.com

Moroccan Chicken and Sweet Potatoes -- myyellowfarmhouse.com

Today it snowed almost all day long, so it was a perfect day to prepare a dish which simmers away in the oven, filling your kitchen with the scent of cardamom, cinnamon, turmeric and ginger!

I’m not proud to say I actually received my beautiful tagine as a gift LAST Christmas.  (I’ve told you I’m a procrastinator..)  There’s no excuse for waiting so long to ‘try it out’. It’s not as if I don’t see the tangine every day, sitting and waiting patiently on the lower shelf of the buffet in my kitchen…

tangine - kitchen buffet - myyellowfarmhouse.com

Moroccan Chicken Tagine can be be cooked several different ways; 1. In a tangine – cooked in the oven.  2.  In a tangine, cooked on very low heat on top of the stove.  3.  In a covered casserole – cooked in the oven.  4.  In a large saucepan or Dutch Oven – either in the oven (if pan has heatproof handles) or on top of the stove.

Whichever way you chose to cook Moroccan Chicken Tagine, you’re in for a treat.  And, except for frying up the onions and garlic in a skillet, you have a one pot meal with no mess in the kitchen. If you’re lucky enough to have a tagine, you can proudly present your Moroccan meal served right from your tagine.                

++  Tagines, according to my research, range in size from 8″ to 16″.  Actually, mine is only 7″ across at the base but it’s deep, so I was able to able to put in 8 boneless & skinless chicken thighs, plus 2 large cut-up sweet potatoes.

++ Be sure to learn how to use your tagine if you’ve never cooked with one before!  (The terracotta ones need special care.)   ++ Here’s a link to a great website which we could call “All You Ever Wanted to Know About Tangines” !  http://moroccanfood.about.com/od/moroccanfood101/f/How-to-Use-Tagine.htm

Love Moroccan? Here’s another recipe – plus Couscous with Raisins and Sliced Almonds

Moroccan Chicken and Couscous - My Yellow Farmhouse.com

‘Never Fail’ Armenian Rice Pilaf

Moroccan Chicken and Rice Pilaf - - myyellowfarmhouse.com

++ Start tagine in a cold oven

++ Place oven rack at 2nd lowest level. 

INGREDIENTS       Oven at 325 (F)      Cook for 2 hours.   If cooking on top of stove in a saucepan or Dutch Oven, be sure to just ‘simmer’ the tangine.

  • 6 – 8 boneless/skinless chicken THIGHS
  • 2 – 3 medium sweet potatoes – peeled and cut into eighths.   ++  My tangine is small, so I only used 2 medium sweet potatoes.  They turned out soo yummy cooked this way that I plan to try to cram more in next time!! 
  •  2 Tbs. olive oil
  • 1 medium onion, sliced      ++  About 2 cups
  • 4 large cloves of garlic, minced or finely chopped   ++  Warm garlic cloves in microwave for 10 – 15 seconds, which helps remove papery covering on garlic cloves.
  • 1 tsp. ground ginger
  • 1 tsp. ground cinnamon
  • 1/2 tsp. ground turmeric
  • 1 tsp. ground coriander      ++  I used 1 tsp. minced fresh cilantro, which are the leaves of the same plant.  In fact, coriander comes from the seeds.
  • 1/4 to 1/2 tsp. chili powder
  • 1/4 tsp. cardamom
  • 1 tsp. salt
  • 1/4 tsp. freshly ground pepper
  • 1/4 cup chopped dates    (You can purchase chopped dates – BIG time saver!)
  • 1 cup HOT chicken broth    ++  Can also use 1 CUP HOT water and one bouillon cube.

METHOD

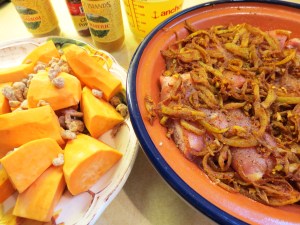
Arrange boneless/skinless chicken thighs in one layer on bottom of tagine.   ++  I folded the loose bits under, which looks a bit nicer and helps the chicken cook evenly.

Moroccan Chicken Tagine - www.myyellowfarmhouse.com

Put the following spices in a small dish or glass and set aside; 1/2 tsp. ground ginger, 1 tsp. ground cinnamon, 1/2 ground turmeric, 1 tsp. ground coriander (or 1 tsp. minced fresh cilantro), 1/4 to 1/2 tsp. chili powder, 1/4 tsp. cardamom, 1 tsp. salt and 1/4 tsp. freshly ground pepper.

Pour 2 Tbs. olive oil into a large skillet.  Add sliced onions and cook over medium heat until onions begin to brown a bit – between 5 to 6 minutes.

Add minced garlic.  Cook two to three minutes more, stirring occasionally.

Add the spices you’d set aside.  Stir to combine with the onions and garlic.  Cook one more minute, stirring.

Spread contents of skillet over chicken.

Moroccan Chicken Tangine - -  myyellowfarmhouse.com

Make one layer of the peeled and cut-up sweet potatoes.  Sprinkle 1/4 chopped dates over potatoes.  Pour 1 cup HOT broth over all.

Moroccan Chicken  Tangine - -www.myyellowfarmhouse.com

Cover on tagine.  Lower oven rack to second lowest level.  Place covered tagine in COLD oven.  Set temperature to 325F.

Cook for two hours.  ++  Chicken and sweet potatoes will be cooked after 1 1/2 hours but the extra 1/2 hour of cooking time REALLY makes the chicken thighs tender.  Enjoy !!

Moroccan Chicken and Rice Pilaf 2- - myyellowfarmhouse.com

Moroccan Chicken with Veggies & Couscous with Raisins and Slivered Almonds

When my husband & I lived in Malta we had a dear Libyan friend who had a Moroccan housekeeper who was a fabulous cook.  This recipe for Moroccan Chicken & Couscous with Raisins and Slivered Almonds tastes very, very much like the chicken and couscous my friend’s housekeeper used to prepare, although she used to add some turnip and, at times, green beans.  (She also used a couscousiere –  which I’ll talk about another time….)

This dish is easy and quick to prepare, and the flavors are subtle and delicious.  You may be surprised by how tender the chicken thighs become in 30 minutes!  The chicken and veggies can be made a day ahead and gently warmed while you prepare the couscous with raisins and slivered almonds right before serving.

Feel free add whatever type of vegetables you wish – just make sure the pieces are small enough to cook in about 30 minutes.  (Next time I make this, I’m going to add some – fully cooked – chickpeas.)

++  I love reading your comments/suggestions etc.  To comment,  scroll down past the recipe.

Ingredients              Serves between 4 – 5           Cooks on top of the stove

  • 8 chicken THIGHS – skin removed – seasoned with salt & pepper
  • olive oil
  • 1 large onion, cut into chunks
  • 4 – 6 large carrots, cut into 1/2′ slices –  OR – 1/2 lb. baby carrots, cut lengthwise   (If you decide to add other vegetables, reduce the amount of carrots.)
  • 2 tsp. paprika
  • 1 tsp. ground ginger
  • 1/4 tsp. turmeric
  • 1/8 tsp. cinnamon
  • 1 cup chicken broth – OR – 1 cup water and 1 Knorr bouillon cube.   (If using another type of bouillon cube, use two cubes !!)
  • juice of 1 lemon –  or – 3 Tbs. bottled lemon juice    (You can also cut the lemon into wedges and add it like that.   I have NOT…. I’m afraid of the bitterness of the lemon peel….)

 Ingredients for the Couscous

  • Use any brand of couscous you wish – just prepare enough for about 5 servings.  (I used one box of Near East – Original Plain, which makes 5 servings,  and just followed the directions.)
  • Instead of water, use the same amount of chicken broth.  (I used College Inn Chicken Broth.)
  • 1/4 cup raisins
  • 1/4 cup slivered almonds
  • 1 Tbs. butter

Directions for Preparing the Chicken Thighs

Add about 2 Tbs. olive oil to a large saucepan which has a lid – or Dutch Oven.  Lightly brown 4 chicken thighs over medium heat. Repeat with the last 4 chicken thighs, adding a bit more olive oil if necessary.  Set chicken thighs aside.  ++ Don’t brown the chicken too much – you don’t want to toughen it.    ++ Don’t worry if some bits of chicken stick to the bottom – those ‘bit’s will just add flavor to the dish.

Add 1 onion, cut in to chunks, and cook for 3 minutes.

Add carrots – cook for 2 more minutes.

Add 2 tsp. paprika, 1 tsp. ground ginger, 1/4 tsp. turmeric and 1/8 tsp. cinnamon.  Cook, stirring, for 1 minute.

Pour in chicken broth – OR – hot water and bouillon cube.

Add the lemon juice – OR – 1 lemon cut into wedges.

Place the 8 chicken thighs into the pot.

Moroccan Chicken and Couscous - My Yellow Farmhouse.com

Bring to a boil.  Lower heat to a simmer.

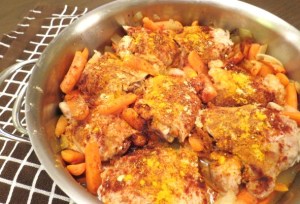
Cover pan and simmer for about 30 minutes, turning chicken at intervals.

++ About 10 minutes before chicken is finished – prepare the couscous.  (See directions and ingredients above.)  

Moroccan Chicken and Couscous - My Yellow Farmhouse.com

That’s it !  Your family and friends…. and maybe even your kids…. will be impressed — Enjoy!

Moroccan Chicken and Couscous - My Yellow Farmhouse.com

Chicken Tikka Masala with Basmati Rice

++ UPDATE   A few friends asked if this recipe is difficult. Actually, Chicken Tikka Masala does take a bit of of time, but each step is easy-peasy. 

I absolutely adore Chicken Tikka Masala and have ever since my very first mouthful at the Amherst (Massachusetts) Food Fair. It turns out Chicken Tikka Masala is NOT a real dish from India anymore than certain dishes served in Chinese restaurants are recognized as truly ‘Chinese’. It matters not.  If it’s delicious, who cares if it’s authentic?

Chicken Tikka Masala features chicken (obviously!) usually marinated in yogurt and spices, then broiled or grilled and mixed with a sauce of tomatoes, cream, cilantro and several spices.

Recipes for Chicken Tikka Masala vary enough to make your head spin, so I combined several different recipes and the end result could, I believe, rival my favorite Indian restaurant, Pintus, here in West Springfield, Massachusetts.

In India, meals are often served on large platters, and (depending upon the household) people use pieces of Naan to pick up small portions. I highly recommend buying yourself some authentic Naan (bread) to enjoy with your Chicken Tikka Masala.

P.S. Years ago my family and I traveled to Pakistan and India. We enjoyed our trip immensely.  Perhaps a month or so after I was preparing some type of curry. My twin sons walked in and exclaimed, “What are you cooking? It smells like Pakistan in here.”  I took that as a compliment!!

++  This recipe can be prepared the day before, then, at serving time, all you have to do is reheat it gently and prepare some Basmati rice.   

Ingredients                                  Serves 4 – 5

++ Adapted from     http://www.bonappetit.com/recipe/chicken-tikka-masala

  • 6 cloves garlic, minced –  OR –  use a garlic press
  • 4 tsp. finely minced – or grated – fresh peeled ginger
  • 4 tsp. ground turmeric
  • 2 tsp. garam masala  (Most stores now sell it in the spice area.)
  • 2 tsp. ground coriander
  • 1 tsp. paprika
  • 2 tsp. ground cumin
  •   ++  This makes 1/2 cup total.  Use 1/4 cup to marinate chicken.  Cover & refrigerate the other 1/4 cup for later.
  • 1 1/2 cups whole-milk plain yogurt.  (NOT Greek.  And – if you can only find ‘low fat’ plain yogurt, that’s OK.)
  • 1 Tbs. Kosher salt – or – use 1 Tbs. regular salt    (I thought 1 Tbs. salt was a mistake – but it was absolutely fine!)
  • 2 lbs. skinless, boneless chicken breasts, cut into thirds lengthwise
  • 3 Tbs. Ghee (clarified butter)  OR   3 Tbs. olive oil
  • 1/2 cup minced onion
  • 1/4 cup + 1 Tbs. tomato paste   (Freeze the rest in 1 Tbs. size portions in a small freezer bag.)
  • 6 cardamon pods – crushed   (I wrapped the cardamon pods in some plastic wrap and hit them with a hammer a few times.)
  • 3/4 tsp. red pepper flakes  OR  1/2 tsp. cayenne pepper
  • 2 cans (14 oz. each) Hunt’s Fire Roasted DICED Tomatoes with Garlic
  • 1 pint  (2 cups)  heavy/whipping cream
  • 3/4 cup chopped fresh cilantro   (I used my mini food processor.)   ++ Plus a few sprigs for garnish.
  • 1/2 cup yogurt     ++ If you plan to make this a day ahead – use  3/4  cup yogurt for this step !!
  • Basmati Rice & Naan (bread)   –  for serving

Combine 6 cloves garlic, minced, 4 tsp. finely minced – or grated – fresh peeled ginger, 4 tsp. ground turmeric, 2 tsp. garam masala, 2 tsp. ground coriander, 1 tsp. paprika and 2 tsp. ground cumin in a small bowl.

Chicken Tikka Masala - My Yellow Farmhouse1

Using a metal soup spoon, ‘smosh down’ the spices, garlic and ginger a bit.  (The ginger might seems a bit fibrous – that’s OK.)  Chicken Tikka Masala - My Yellow Farmhouse2

Whisk 1 1/2 cups yogurt, 1 Tbs. salt and HALF the spice mix (1/4 cup) together in a large bowl.  Cut chicken breasts into thirds lengthwise.

Chicken Tikka Masala4 - My Yellow Farmhouse

Add cut up chicken to bowl and turn to coat with yogurt mixture.  Cover and chill between 4 – 6 hours.     ++ Cover and chill remaining 1/4 cup spice/garlic mix.

Chicken Tikka Masala5 - My Yellow Farmhouse

Do This Part After Chicken Has Marinated

In a large, heavy pot heat 3 Tbs. olive oil –  OR Ghee – over medium heat.  Add 1/2 cup minced onion, 1/4 cup + 1 Tbs. tomato paste, , 6 cardamon pods, crushed, 3/4 tsp. red pepper flakes (OR 1/2 tsp.  cayenne pepper). Cook, stirring often, until tomato paste is darkened and onion is softened, about 5 minutes.

Add the remaining 1/4 cup spice/garlic mixture and cook, stirring often, until bottom of pan starts to brown – about 4 minutes.

018

Add 2 cans (14 oz. each) Hunt’s Fire Roasted DICED Tomatoes with Garlic. Mash diced tomatoes down a bit with a potato masher.  Bring to a boil, reduce heat and simmer, stirring often and scraping browned bits from bottom of pan, until sauce thickens, about 8 – 10 minutes.

Chicken Tikka Masala6 - My Yellow Farmhouse

Now add 2 cups heavy/whipping cream and 3/4 cup chopped cilantro. Continue to simmer (uncovered) for between 30 – 40 minutes, stirring occasionally.

Chicken Tikka Masala7 - My Yellow Farmhouse

While sauce is simmering, remove chicken from refrigerator and take out of marinade. Give chicken pieces each a little shake to remove some of the marinade.

Preheat broiler to HIGH.  Line a rimmed baking sheet with foil and set a wire rack inside. Arrange chicken strips on rack in a single layer.

Chicken Tikka Masala8 - My Yellow Farmhouse

Set oven rack at highest position.  Broil chicken pieces until they begin to brown, between 5 – 7 minutes.    ++ Chicken will NOT be thoroughly cooked – it will finish cooking in the sauce.

Chicken Tikka Masala - My Yellow Farmhouse

Place chicken on cutting board and cut into bite-sized pieces.

Chicken Tikka Masala10 - My Yellow Farmhouse

Add chicken to sauce and simmer, stirring occasionally, until chicken is cooked through, between 8 – 10 minutes.  Serve atop Basmati rice.     Enjoy !!

Chicken Tikka Masala - My Yellow Farmhouse.com

Maple Pecan Scones

I actually made, and photographed, these scones last night but I decided to make them again today because I wasn’t 100% satisfied with yesterday’s results. (Luckily I only had to re-photograph the final product.)

I have always liked this recipe but I decided it just to change the recipe just a bit – and I’m really pleased with “My Second Attempt” as these scones are g.o.o.d. !!  (Last night the dough was too sticky to work with, and I thought the scones had too much salt and not enough sugar.)

Actually, scones aren’t meant to be overly sweet. Usually the sweetness comes from the jam & clotted cream the British like to spread on their scones. I LOVE British High Tea. Here’s a typical High Tea menu – finger sandwiches, scones with clotted cream and preserves, plus cakes and pastries. All accompanied, of course, by a variety of teas.

Here’s a true story concerning scones. On one of my trips to London I stopped at a lovely but very casual tea room. While I was perusing a case full of various types of scones, I mentioned to the gentleman helping me, “There’s a fly in the case”. “Excuse me madam, those are raisins”. “OK”, says I, “Well then, one of your “raisins” is flying”.

Oven at 400F     Bake for 14 – 16 minutes

Ingredients  

Feel free to add some chocolate chips or raisins…. but I wouldn’t recommend adding any “flying” raisins !!

  • 1 cup chopped pecans – or walnuts   (You’ll need a bit of  chopped nuts to sprinkle on top once the scones are cooked.)
  • 1/4 cup maple syrup – or maple-flavored syrup
  • 2 cups …..PLUS 2 Tbs. flour    ++ The amount of flour used depends on many factors. You many not need the extra 2 Tbs.
  • 1/4 cup sugar
  • 2 tsp. baking POWDER
  • 3/4 tsp. salt
  • 1/2 tsp. baking SODA
  • 1/3 cup butter, softened just a bit
  • 3 Tb. milk
  • 2 large eggs
  • 1 Tb. distilled white vinegar – Don’t skip the vinegar !!
  • 1 cup confectionary sugar
  • 2 Tb. milk

Mix 1 cup chopped pecans with 1/4 cup maple syrup in a small bowl, and set aside. In a large bowl mix 2 cups PLUS 2 Tbs. flour, 1/4 cup sugar, 2 tsp. baking POWDER, 3/4 tsp. salt and 1/2 tsp. baking SODA. With a pastry blender – or two knives used scissor fashion – cut in butter until the flour mixture resembles tiny crumbs.

Add the pecan/maple syrup mixture to the bowl and throughly mix in.

Maple Syrup, Pecans and Flour Mixture

In a small bowl, mix 3 Tb. milk, 2 large eggs and 1 Tb. distilled white vinegar.

Egg, Vinegar and Milk Mixture

Stir milk/eggs/vinegar into flour/pecan mixture until ingredients are just blended. You don’t want to over mix and have the scones come out tough.

Preheat oven to 400 F. Turn out dough onto a dish towel which has been sprinkled with about 3 Tbs. of flour. Ready to Be Kneaded

Sprinkle a bit of extra flour on the dough. Gently knead the dough about 10 times. (To knead, push dough with the palm of your hand, turn dough a 1/4 turn and continue.)

Form dough into a ball.

Dough

Pat dough into a circle of between 6 1/2″ to 7″. The circle should be about 3/4″ high. Using a large, sharp knife, cut the circle into 8 equal pieces. If the knife sticks a bit, just CAREFULLY rub a bit of flour on it between cuts.

Cut Dough

Place the triangles on an ungreased cookie sheet. Don’t worry if they get slightly out of shape…

USE - Ready to Bake

Place the cookie sheet in the center of your oven. Bake for 14 – 16 minutes.

++ If you’re not sure the scones are done, here’s what I did…. I took the cookie sheet out of the oven, cut into one, saw it was still “doughy” inside and put the scones back into the oven for 3 more minutes.

Remove scones from cookie sheet and allow to cool on a cooking rack.

Glaze   – it’s not necessary to make a glaze – or to sprinkle on some chopped pecans, but the scones not only look prettier – I think they actually taste better!!

In a small bowl mix 1 cup confectionary sugar with 2 Tb. milk. If the glaze is too runny, add a bit more sugar….. if it’s too thick  – add a teeny, teeny bit of milk until you reach a good consistency. You can drizzle the glaze over the scones with a spoon OR you can fill a small baggie with the glaze, cut of a VERY TINY hole in one corner and then squeeze the glaze out just like a pastry chef!    Sprinkle on some chopped pecans, make a cup of tea – or a have a big glass of milk and …….  Enjoy !

Maple Pecan Scones - finished - last photo

Thai-Inspired Chicken and Noodles

It’s always hard for me to wait until I’ve finished photographing a new recipe before I can enjoy it eating it – I just want to “dive in”.  And that’s what I’m doing right now – happily eating some of my Thai-Inspired Chicken and Noodles. I’m also watching Haunted Collector, so between that and eating so late, I should be having some pretty strange dreams tonight!

I had planned to make Chicken-Ham Roll-Ups today but, instead, posted about our beautiful farm in Quebec. Then, I happened to come across a recipe I had created quite a while ago for Peanut Sesame Noodles, so I decided I’d make it and post the recipe. I’ve added some chicken to the recipe, so now it makes a complete meal. I must say, I’m pretty happy with the results!

Don’t be put off by the addition of peanut butter. Many countries cook with peanuts/peanut butter, so give this recipe I try. I think you’ll like it !!

I call this recipe “Thai-Inspired” because it’s not an authentic Thai recipe. For one thing, a true “Thai” recipe would probably not include this much peanut butter, so feel free to put in less.  This dish is neither overly spicy or hot, so adjust the Cayenne pepper to your taste if you prefer heat. (You could add some red pepper flakes.) That’s the beauty of cooking – you can make this as spicy or peanut-y as you wish!

I highly recommend using Gravy Master because it gives this dish a boost of both flavor and color. (Flavour & colour for my international friends.)  Actually, much of the enjoyment in eating comes down to how food looks, as well as how it tastes, so a bit of extra color can make a difference in a recipe.   Enjoy!!

Ingredients

  • 8 oz (1/2 package) linguine or angel hair pasta – any kind of long pasta or noodles, cooked according to directions and drained.
  • 1 large onion, cut lengthwise into slices
  • 1 Tbs. butter
  • 2 pieces chicken breast, cut into 1″ chunks
  • 1 tsp. Gravy Master – “Seasoning and Browning Sauce”
  • 1/4 tsp. ginger  (I used ground ginger but you could use fresh.)
  • 1 Tbs. butter
  • 1/2 cup water
  • 1/3 cup chunky peanut butter – (Feel free to use less – I just happen to like LOTS!!)
  • 2 chicken bouillon cubes
  • 2 – 3 pinches Cayenne pepper – (Add some red pepper flakes if you like.)
  • 1 1/2 tsp. Teriyaki sauce (I like Kikkoman’s)
  • 1 1/2 tsp. dark sesame oil
  • 3/4 cup “half ‘n half” (cream)
  • salt & pepper to taste
  • 2 tsp. chopped fresh parsley, plus some for garnish

Melt 1 Tbs. butter in a large skillet over medium heat. Add sliced onion and cook, stirring occasionally, for 5 minutes. Remove cooked onions to a bowl and set aside.

Melt another 1 Tbs. butter, and add chicken chunks which have been mixed with 1 tsp. Gravy Master and 1/4 tsp. ginger. Cook, stirring, over medium-high heat for 4 minutes. LOWER HEAT TO MEDIUM.

Add 1/2 cup water, 1/3 cup chunky peanut butter (Again – feel free to use less peanut butter), 2 chicken bouillon cubes, 2 – 3 pinches Cayenne pepper, 1 1/2 tsps. Teriyaki sauce, 1 1/2 tsps. dark sesame oil, 3/4 cup “half ‘n half”, 2 tsps. chopped fresh parsley and salt and pepper to taste.

Add cooked onion slices to skillet, and continue cooking and stirring just until everything is heated through. Adjust seasonings and serve.   Enjoy!!USE AS 2N PHOTO - Thai-Inspired

Grammy Brouillette’s French Canadian Meat Pie (Also known as Tourtière) – – Filling Can Be Used as a Stuffing

 Recipe makes TWO French Canadian Meat Pies  

OR

For French Canadian Meat Stuffing – Make half the recipe. 

OR

If you prefer having extra stuffing, prepare recipe as written. Warm in a covered casserole.

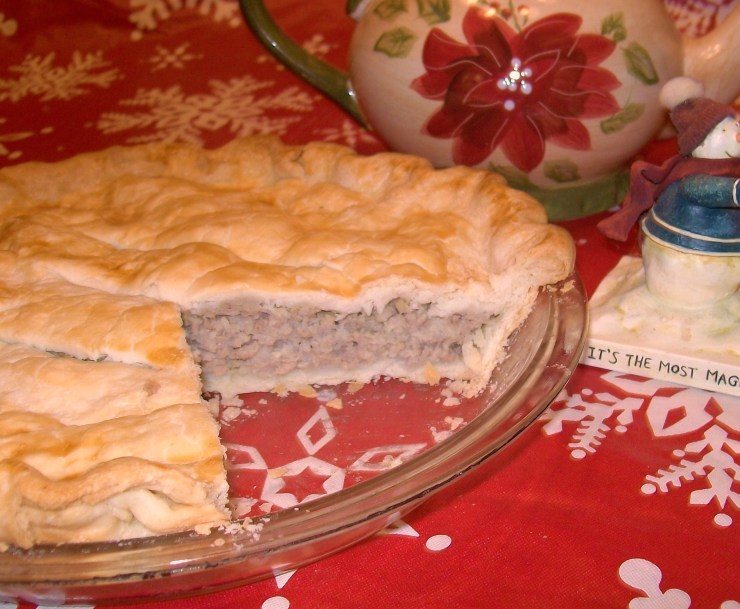
 Grammy Brouillette’s French Canadian Meat Pies  – Christmas 2016   According to my sons (and my twin brother) these were the best pies yet! 

This recipe is my mother’s mother’s and has been handed down for from mother to daughter for who-knows-how long. (My grandmother (Memere in French, but we called her Grammy) was born in Quebec in the late 1880’s. She and her family moved to Boston when she was young.  Of course our family thinks our handed-down recipe is ‘The Best French Canadian Meat Pie’.. but everyone believes their family recipe to be The Best!  Today most recipes call for a mixture of ground beef and pork.  In the Old Days, Tourtiere could be made using pork, beef, rabbit or other game, or, possibly, a mixture of different meats – whatever was available.

French Canadian Meat Pie – or Tourtiere – recipes can vary quite a bit from family to family – and each family believes theirs to be the best!!  I’ve found it extremely interesting just how many variations there are between different family recipes. My mother’s family uses ground pork, potatoes, onions – plus salt & pepper.  My husband’s family only uses hamburger, onions, salt & pepper and a bit of cloves.  And an aunt on my father’s side puts crushed cracker crumbs in her meat pies instead of potatoes.  I’ve found it doesn’t matter whose recipe you follow – to me, they’re all delicious!

 “à chacun son goût” – – ‘To each his own taste”

As far as seasonings go, except for salt & pepper, most of the flavor in Grammy Brouillette’s recipe comes from the ground pork, potato and onion mixture. My mother and my Grammy never added any spices, but I like to add a bit of poultry seasoning (Bell’s). Some meat pie recipes call for a bit of allspice, cloves or mace. Feel free to add/adjust seasonings to suit your own family’s tastes. And – if you’re lucky enough to live in Quebec – you can buy Meat Pie Seasoning!

Meat Pie is traditionally served on Christmas Eve (Réveillon) and New Year’s Eve. Our family still continues that time-honored tradition, and we look forward to it every year. I usually make four pies – two for Christmas Eve and one for each of my twin sons to take home. (And this year I’m going to ‘try’ to be organized and make the pies ahead and then freeze them.)

Joyeux Noel et une Bonne Année !! 

Oven at 400 F

Ingredients & Method

  • 2 large potatoes, peeled and cut into cubes  (About 2 1/2 cups)
  • 2 1/2 lbs. ground pork   ++ If you prefer, substitute ground beef for ground pork. Buy 80% lean.     ++  You also have the option to use half ground beef & half ground pork.
  • 2 cups chopped onion
  • 1 1/2 tsp. salt
  • 1/2 tsp. pepper
  • 1/8 – 1/4 tsp. poultry seasoning  – I like Bell’s.   ++  If desired, add a bit of allspice .. or a bit of mace .. or a bit of ground cloves.
  • crust enough for TWO pies – – – – – –  2 top crusts  & 2 bottoms crusts
  • one beaten egg – to spread on the 2 top crusts

– – – –

In a medium saucepan, cook the potatoes in a few inches of water until fully cooked. Once cooked. drain and mash. (Don’t add any butter or milk !!) Set aside.

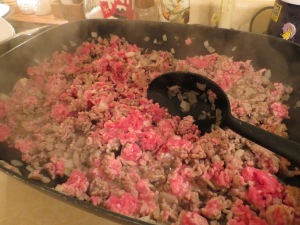
In a large frying pan, cook the ground pork and onions until the pork is no longer pink and the onions have become fully cooked – perhaps 10 minutes or so. While cooking the pork and onions, break up the pork so you have crumbles and not hunks. (If you don’t have a big enough frying pan, cook the pork and onions in two batches.)

Grammy Brouillette's French Canadian Meat Pie - My Yellow Farmhouse.com

Mix the cooked, mashed potatoes in with the pork/onion mixture. Add 1 1/2 tsp. salt and 1/2 tsp. pepper. At this point my mother used to, using a potato masher, “mash” down the mixture a bit to incorporate the potatoes into the pork/onion mixture.

Grammy Brouillett

If you wish, at this point, add 1/8 – 1/4 tsp. poultry seasoning (I like Bell’s)… or a bit of allspice .. or a bit of mace .. or a bit of ground cloves – or any combination you chose. (Feel free to adjust salt, pepper & spices to taste.)

How easy has this been – and you’re almost done!  Divide your pie filling equally between the TWO pie-crust lined pie plates. Cover each with the 2nd crust.

Crimp the edges of the pie crust with your fingers or with a fork.

++  Here’s a video which shows you how to ‘crimp’ a pie crust.  http://www.youtube.com/watch?v=sJRY1vdCMkQ

++  If you’re feeling really creative – here’s a video showing how to make ‘fancy’ crimps!  http://www.youtube.com/watch?v=ZcQGja6jpbE

Spread SOME of the beaten egg onto each crust, using your fingers (my personal choice!) or with a bit of paper towel. (This isn’t necessary, but it does give the crust a lovely, golden look!!)

Bake at 400F for about 30 – 40 minutes. The crust should be a nice golden brown and the filling should be nice and hot.   Enjoy !

++ If planning to make pies a few days ahead – –  Bake pies for only 25 minutes at 400F. Allow pies to cool.  Cover with foil and refrigerate.  To Reheat Pre-Baked Pies – remove foil. Bake pies at 350F for 30 – 40 minutes, until thoroughly heated through.

How to Freeze Prepared Pies

Below are two different directions concerning ‘freezing Meat Pies’.  One set of directions comes from my Uncle George and the other comes from my Godmother, my Aunt Yvonne – both of whom ‘inherited’ the recipe from my grandmother.

You chose if you want to cook the pies & then freeze them – or freeze them without baking them.

++ A few tips from my Uncle George – How to Freeze UNBAKED Meat Pies ++

Based on my grandmother’s directions (according to my uncle) you do NOT have to bake the pies before you freeze them!!  ++ Cover the unbaked pies with foil and freeze them.  While still frozen (but with foil removed) bake the pies at 400F degree for 25 minutes.   Then lower heat to 350F and continue to bake pies until crusts are browned and pie(s) are heated through.

++  A few tips from my Aunt YvonneHow to Freeze PRE-BAKED Pies ++

++ If planning to freeze the pies, bake them for only 25 minutes at 400F.   Allow pies to cool, then cover with foil and place them in the freezer.

++ To Reheat – Allow pies to thaw in the refrigerator, then bake (with foil removed) at 350F for 30 – 40 minutes, until thoroughly heated through.

Enjoy – – Bon Appetit !!

Grammy Brouillette's French Canadian Meat Pie - My Yellow Farmhouse.com