Hearty Cornmeal Pancakes with Cinnamon & Walnuts

This morning I woke up to about two inches of lovely, fluffy snow covering the ground and clinging to the tree branches.  We haven’t had much snow here in Western Massachusetts this winter and I was just thrilled when I opened my shades to such splendor!

Winter 2016  - My Yellow Farmhouse.com
These trees have grown sooo much since we moved here in 2004.
Winter 2016 - My Yellow Farmhouse.com
Sophie, the stray cat, lives in the barn.

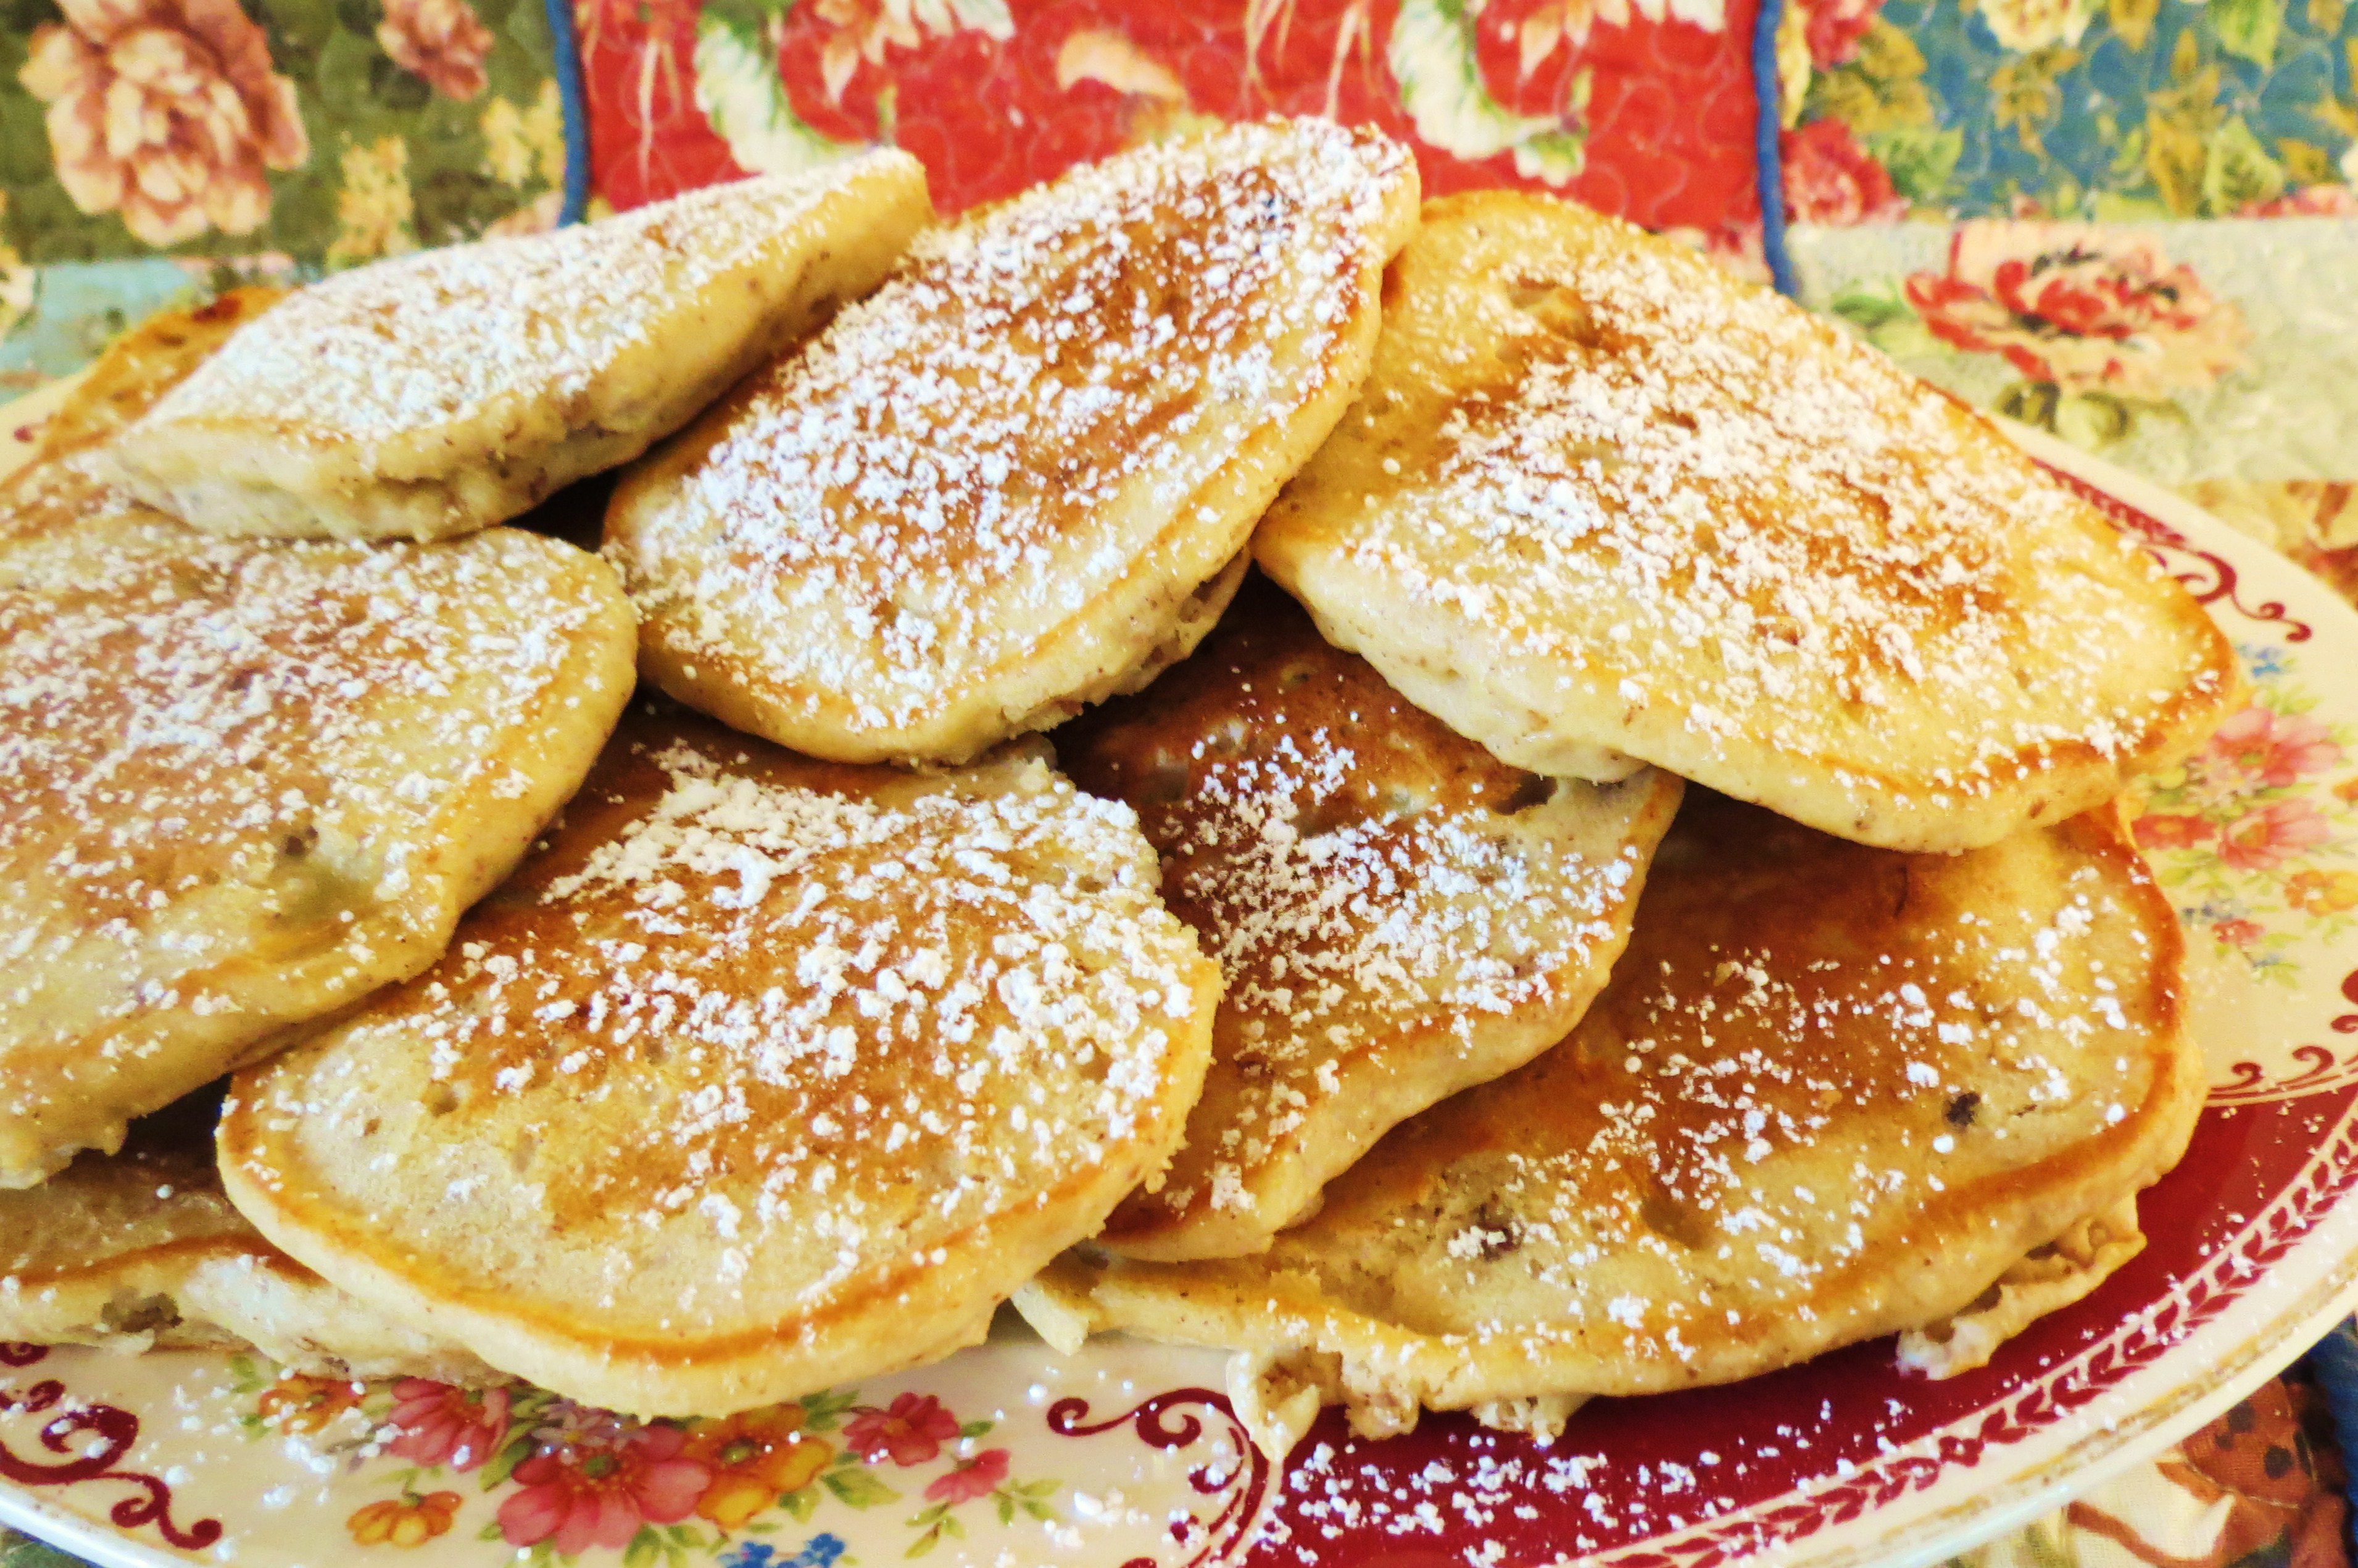
Padding around the kitchen in my favorite red plaid slippers, I decided a hearty, and delicious, breakfast was in order on this lovely snowy morning.  Hearty Cornmeal Pancakes with Cinnamon and Walnuts fit that bill perfectly – and they were one of my sons absolute favorites for breakfast when they were growing up.

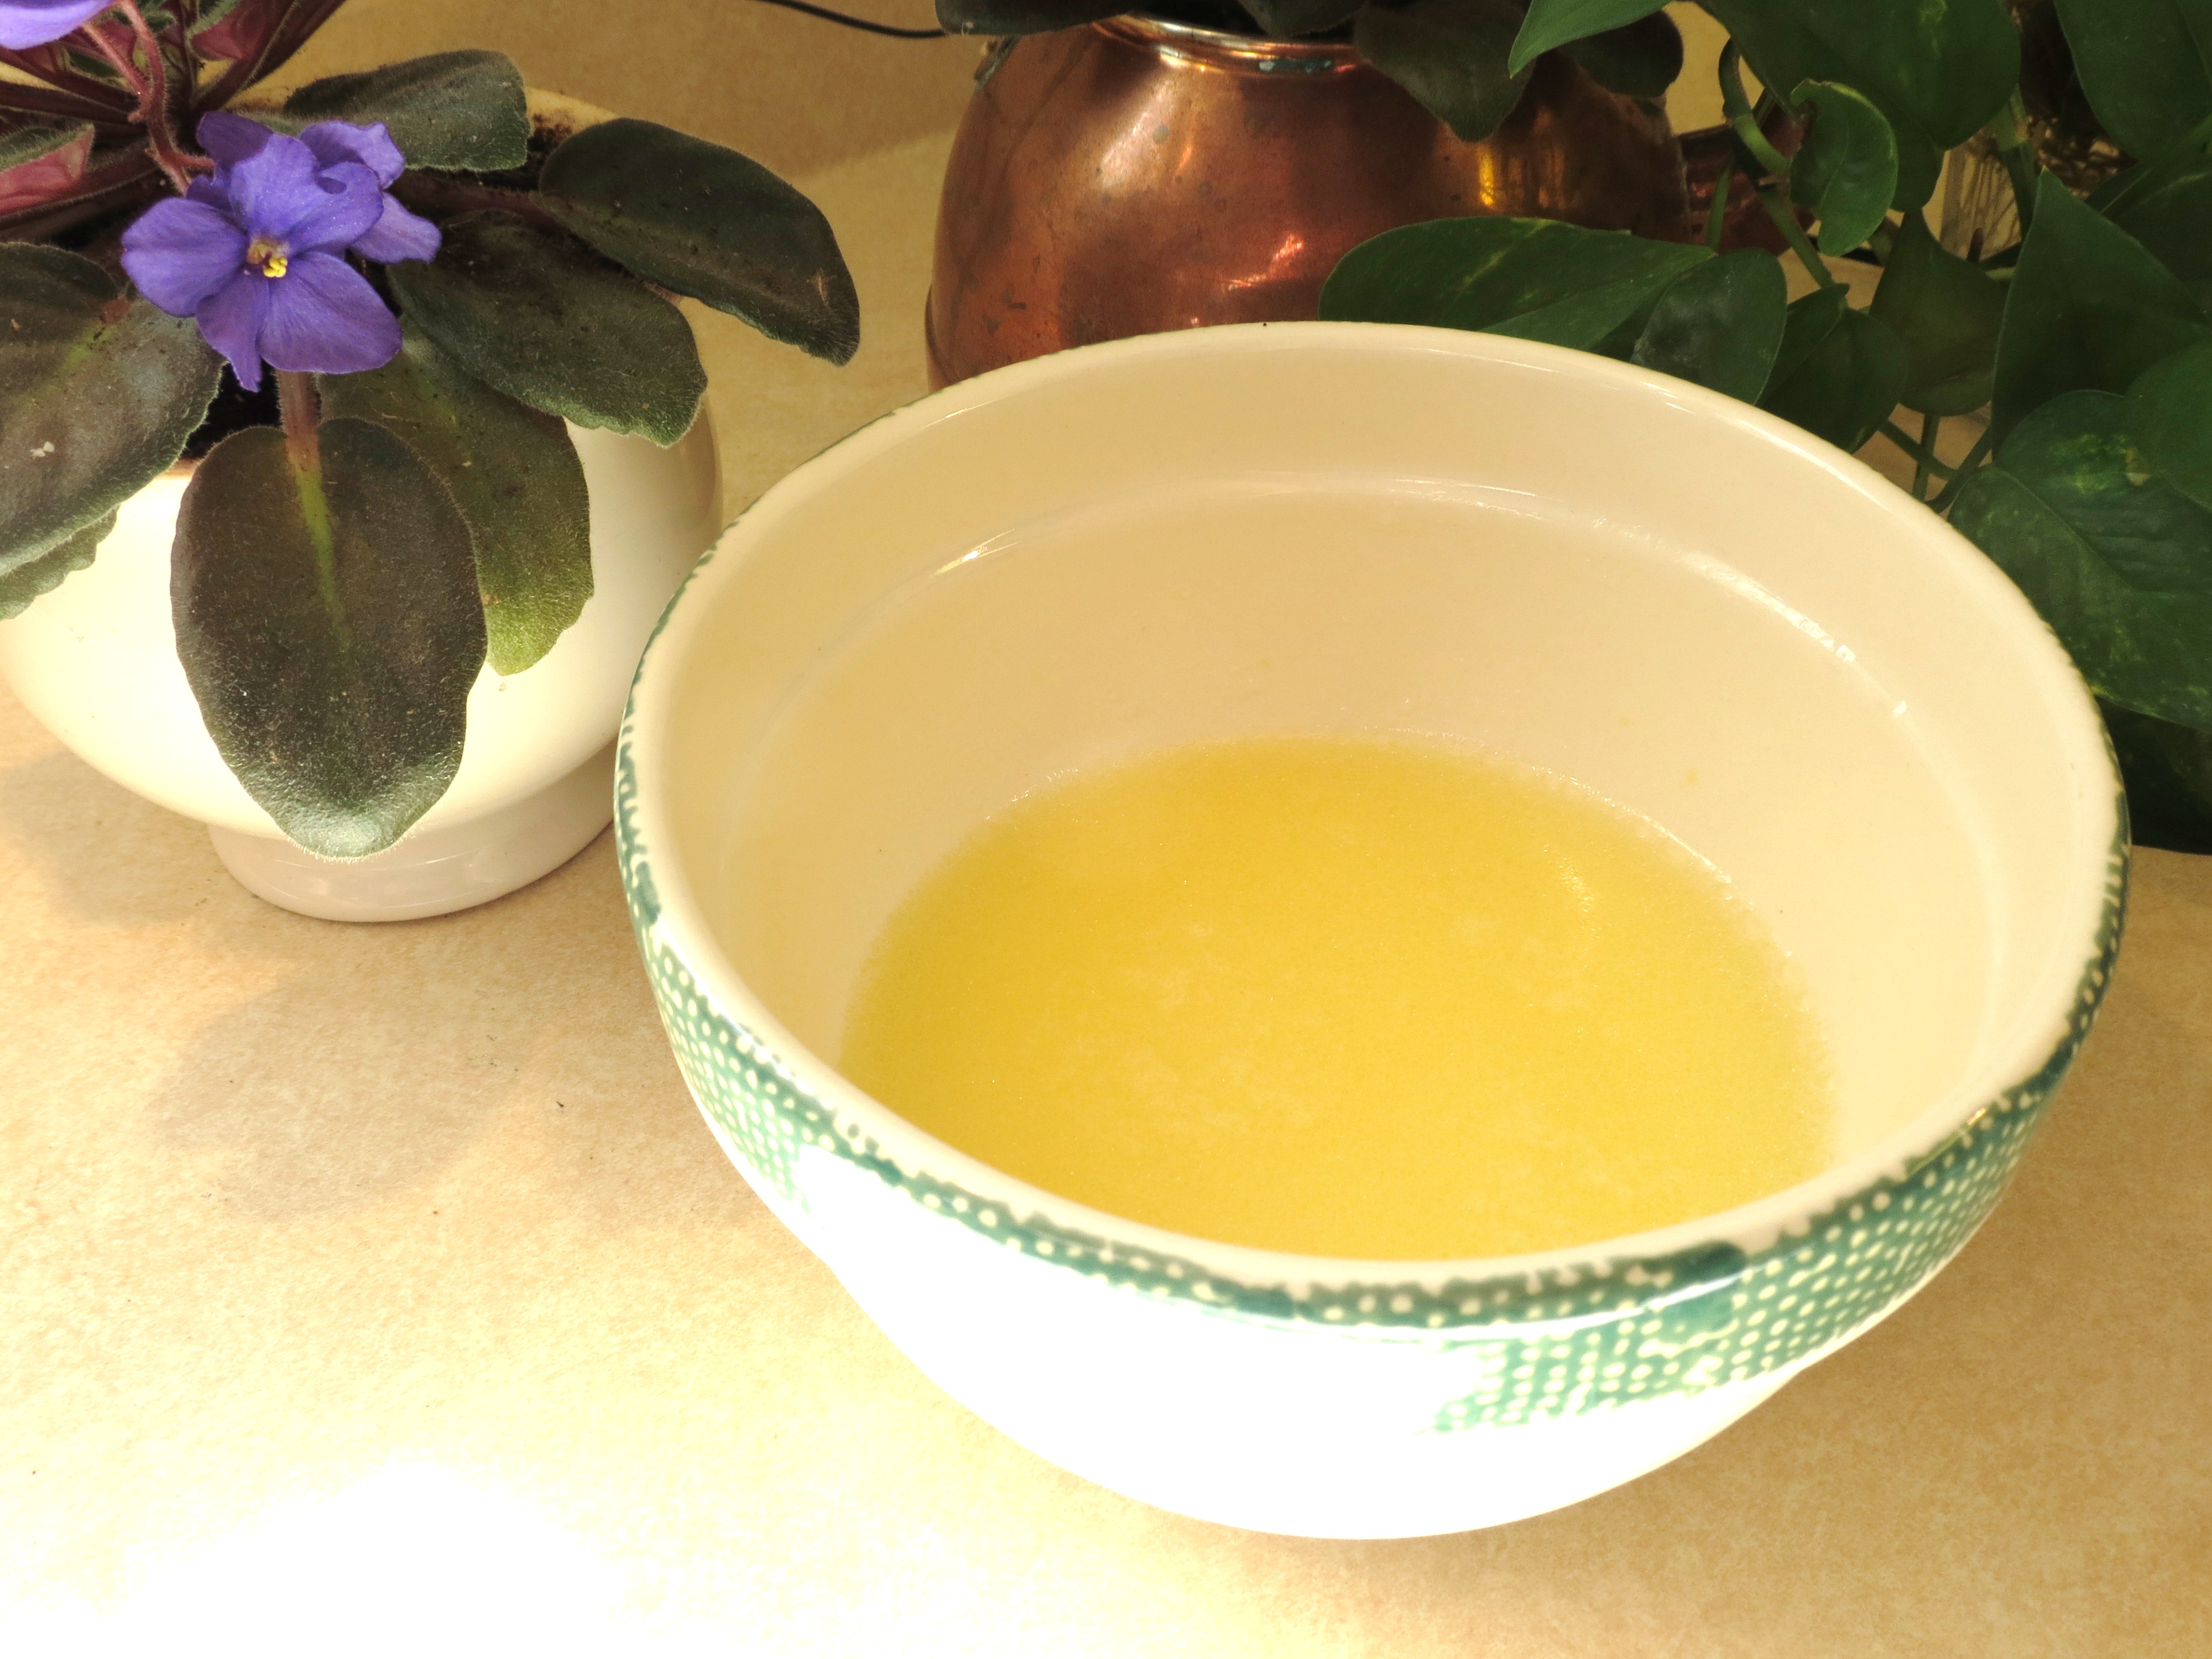
Photographing something as bland as pancakes is a real challenge, so I came up with the idea of thickening the maple syrup.  Otherwise the syrup would disappear into the pancakes, which would result in a very boring photo. First I boiled the syrup… but that didn’t make it thick enough.  So I added a bit of cornstarch, mixed in water.  Still not thick enough…  A bit more cornstarch and water was added, then I got caught up doing something else.. and forgot the maple syrup boiling away. (The older I get, the more forgetful I get..)

The end result of my forgetfulness was a REALLY thick syrup which photographed beautifully and I was happy with the results.  However, I was a bit less happy a few minutes later, once the unused portion of thickened syrup cooled and stuck to the pan with an vigorous tenacity!  (If this ever happens to you, just add water, heat to a boil and allow to sit for a while.)

Recipe makes about 12 small pancakes – enjoy!

small red heart

INGREDIENTS   

  • 1 cup yellow cornmeal
  • 2 Tbs. sugar     ++  You can substitute brown sugar
  • 1 tsp. salt
  • 1 cup boiling water
  • ½ cup flour
  • 2 tsp. baking powder
  • 1 tsp cinnamon
  • 1 egg
  • ½ cup milk
  • 2 Tbs. butter, melted
  • 1/2 cup chopped walnuts

METHOD

Mix 1 cup cornmeal, 2 Tbs sugar and 1 tsp. salt in a large bowl.  Add 1 cup boiling water and stir briefly.  Cover bowl and let stand for 10 minutes.  ++  I usually put a dinner plate on top.

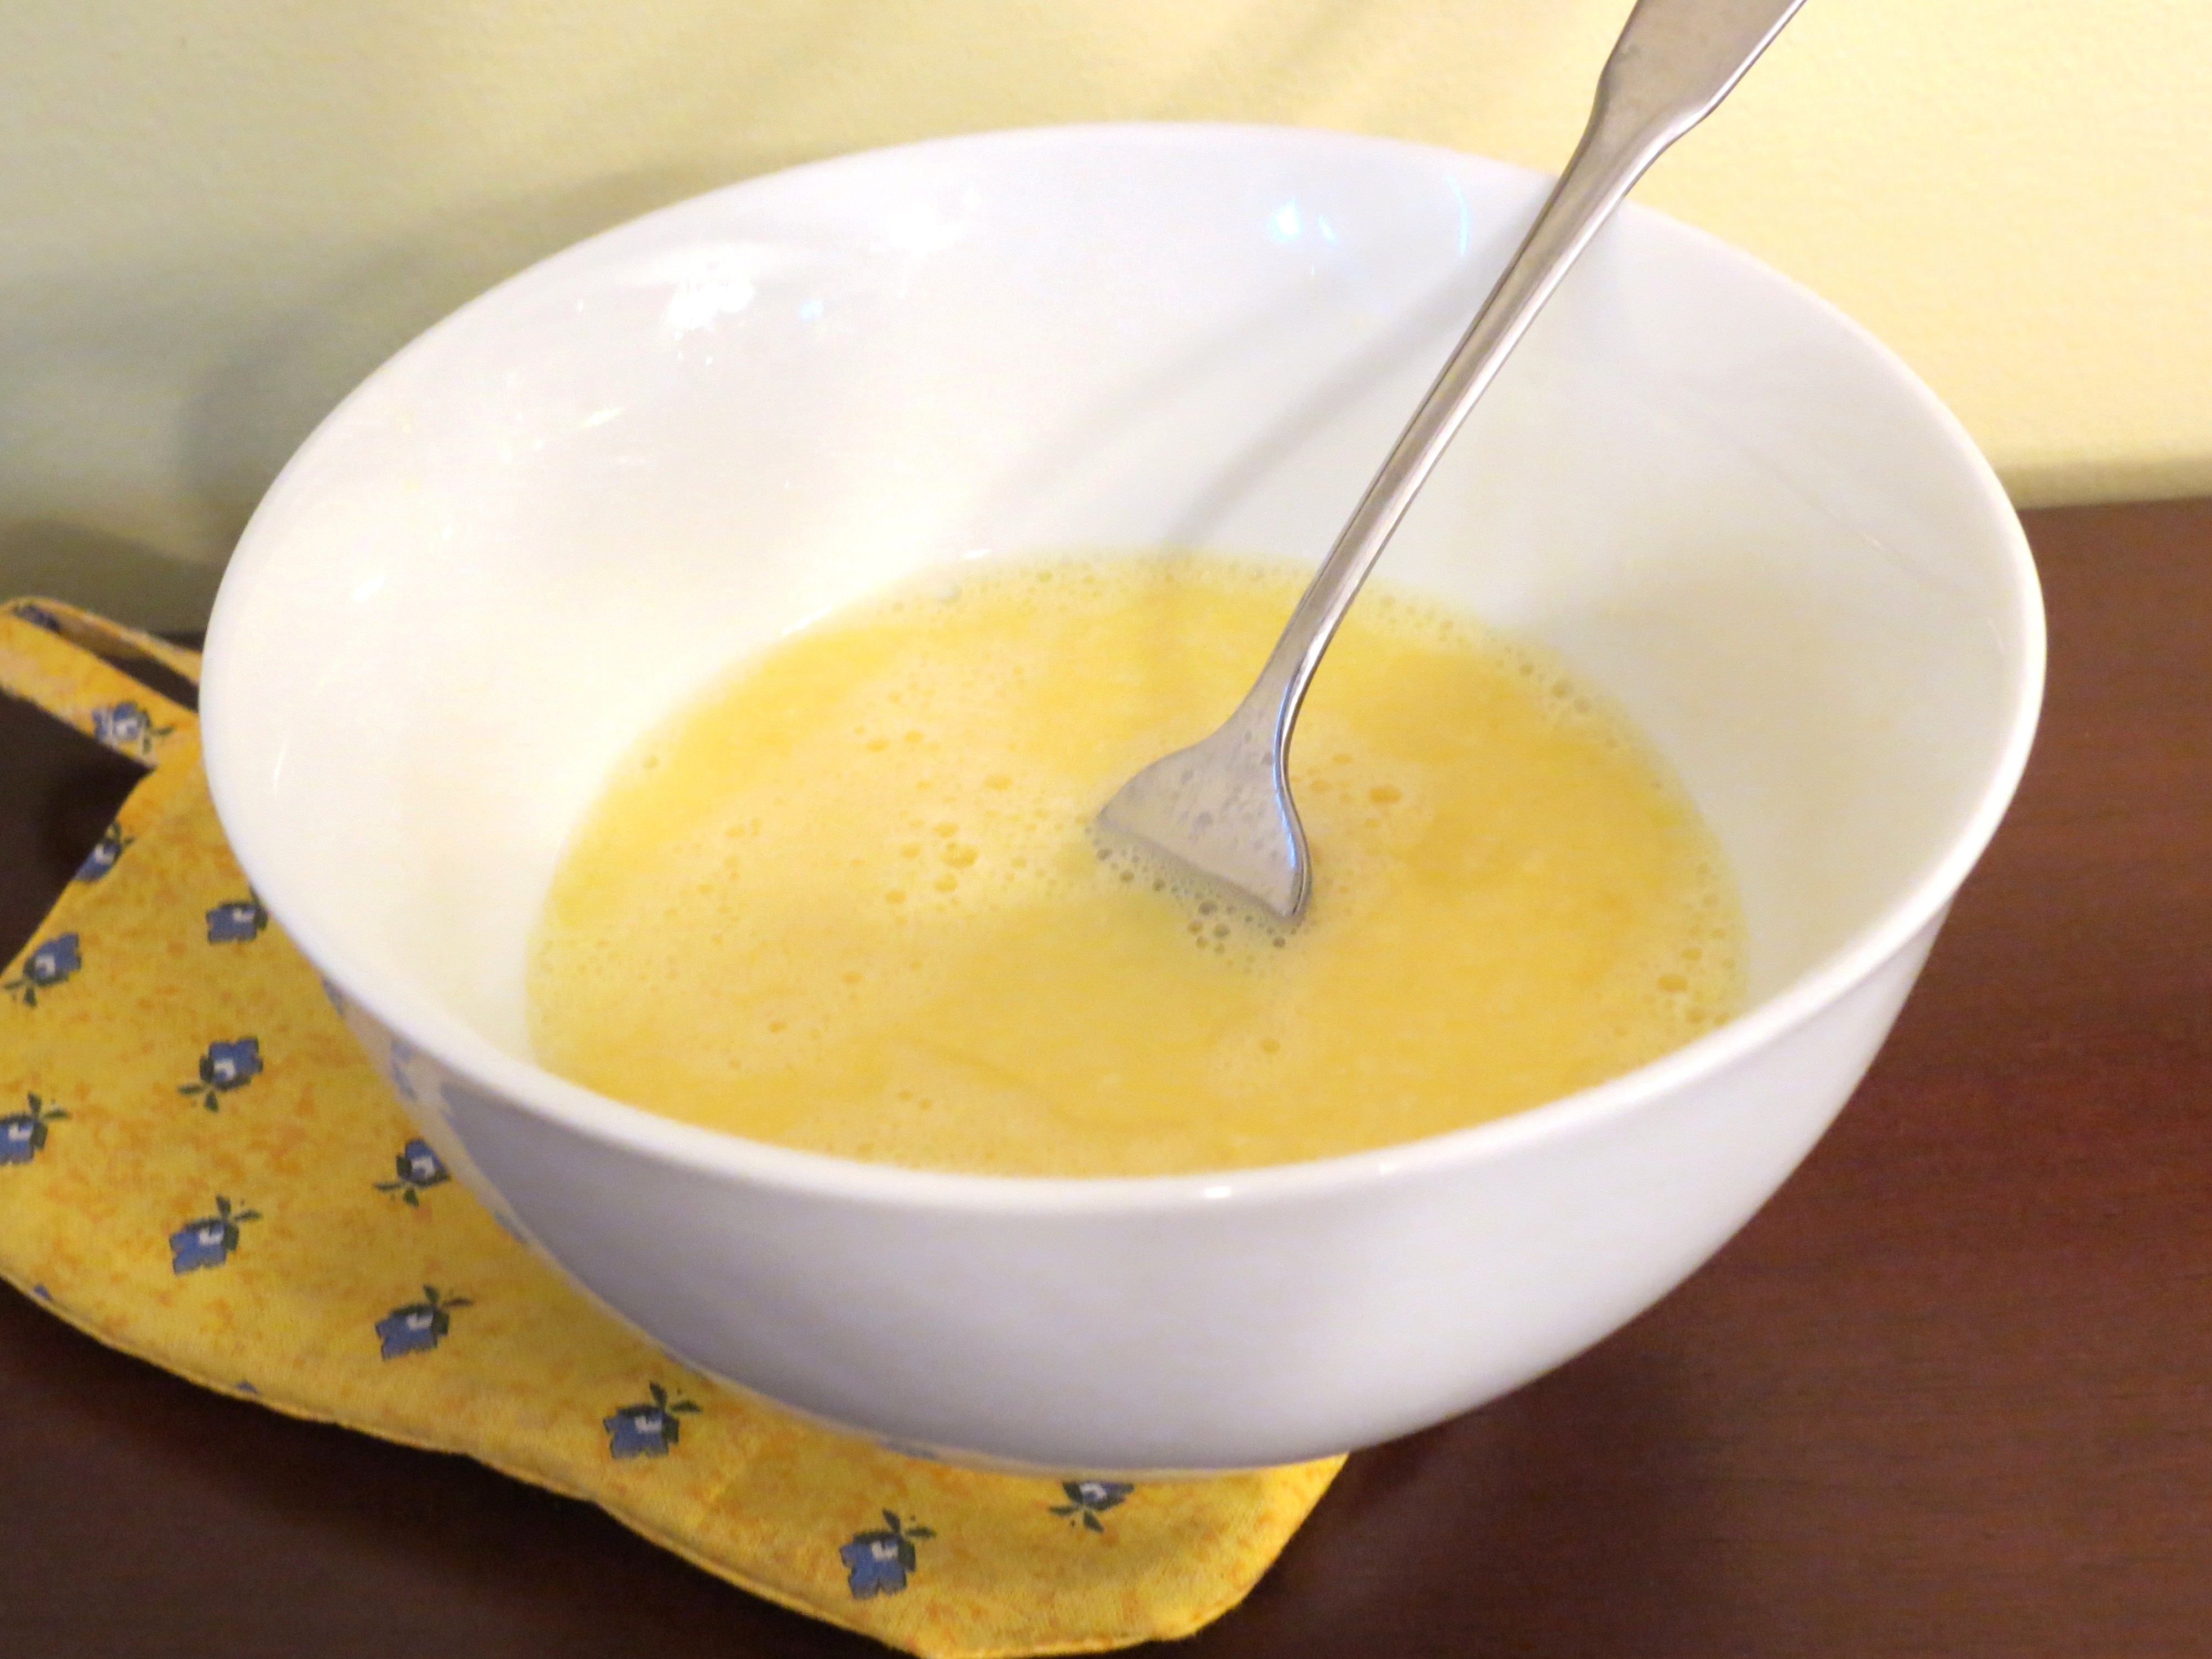
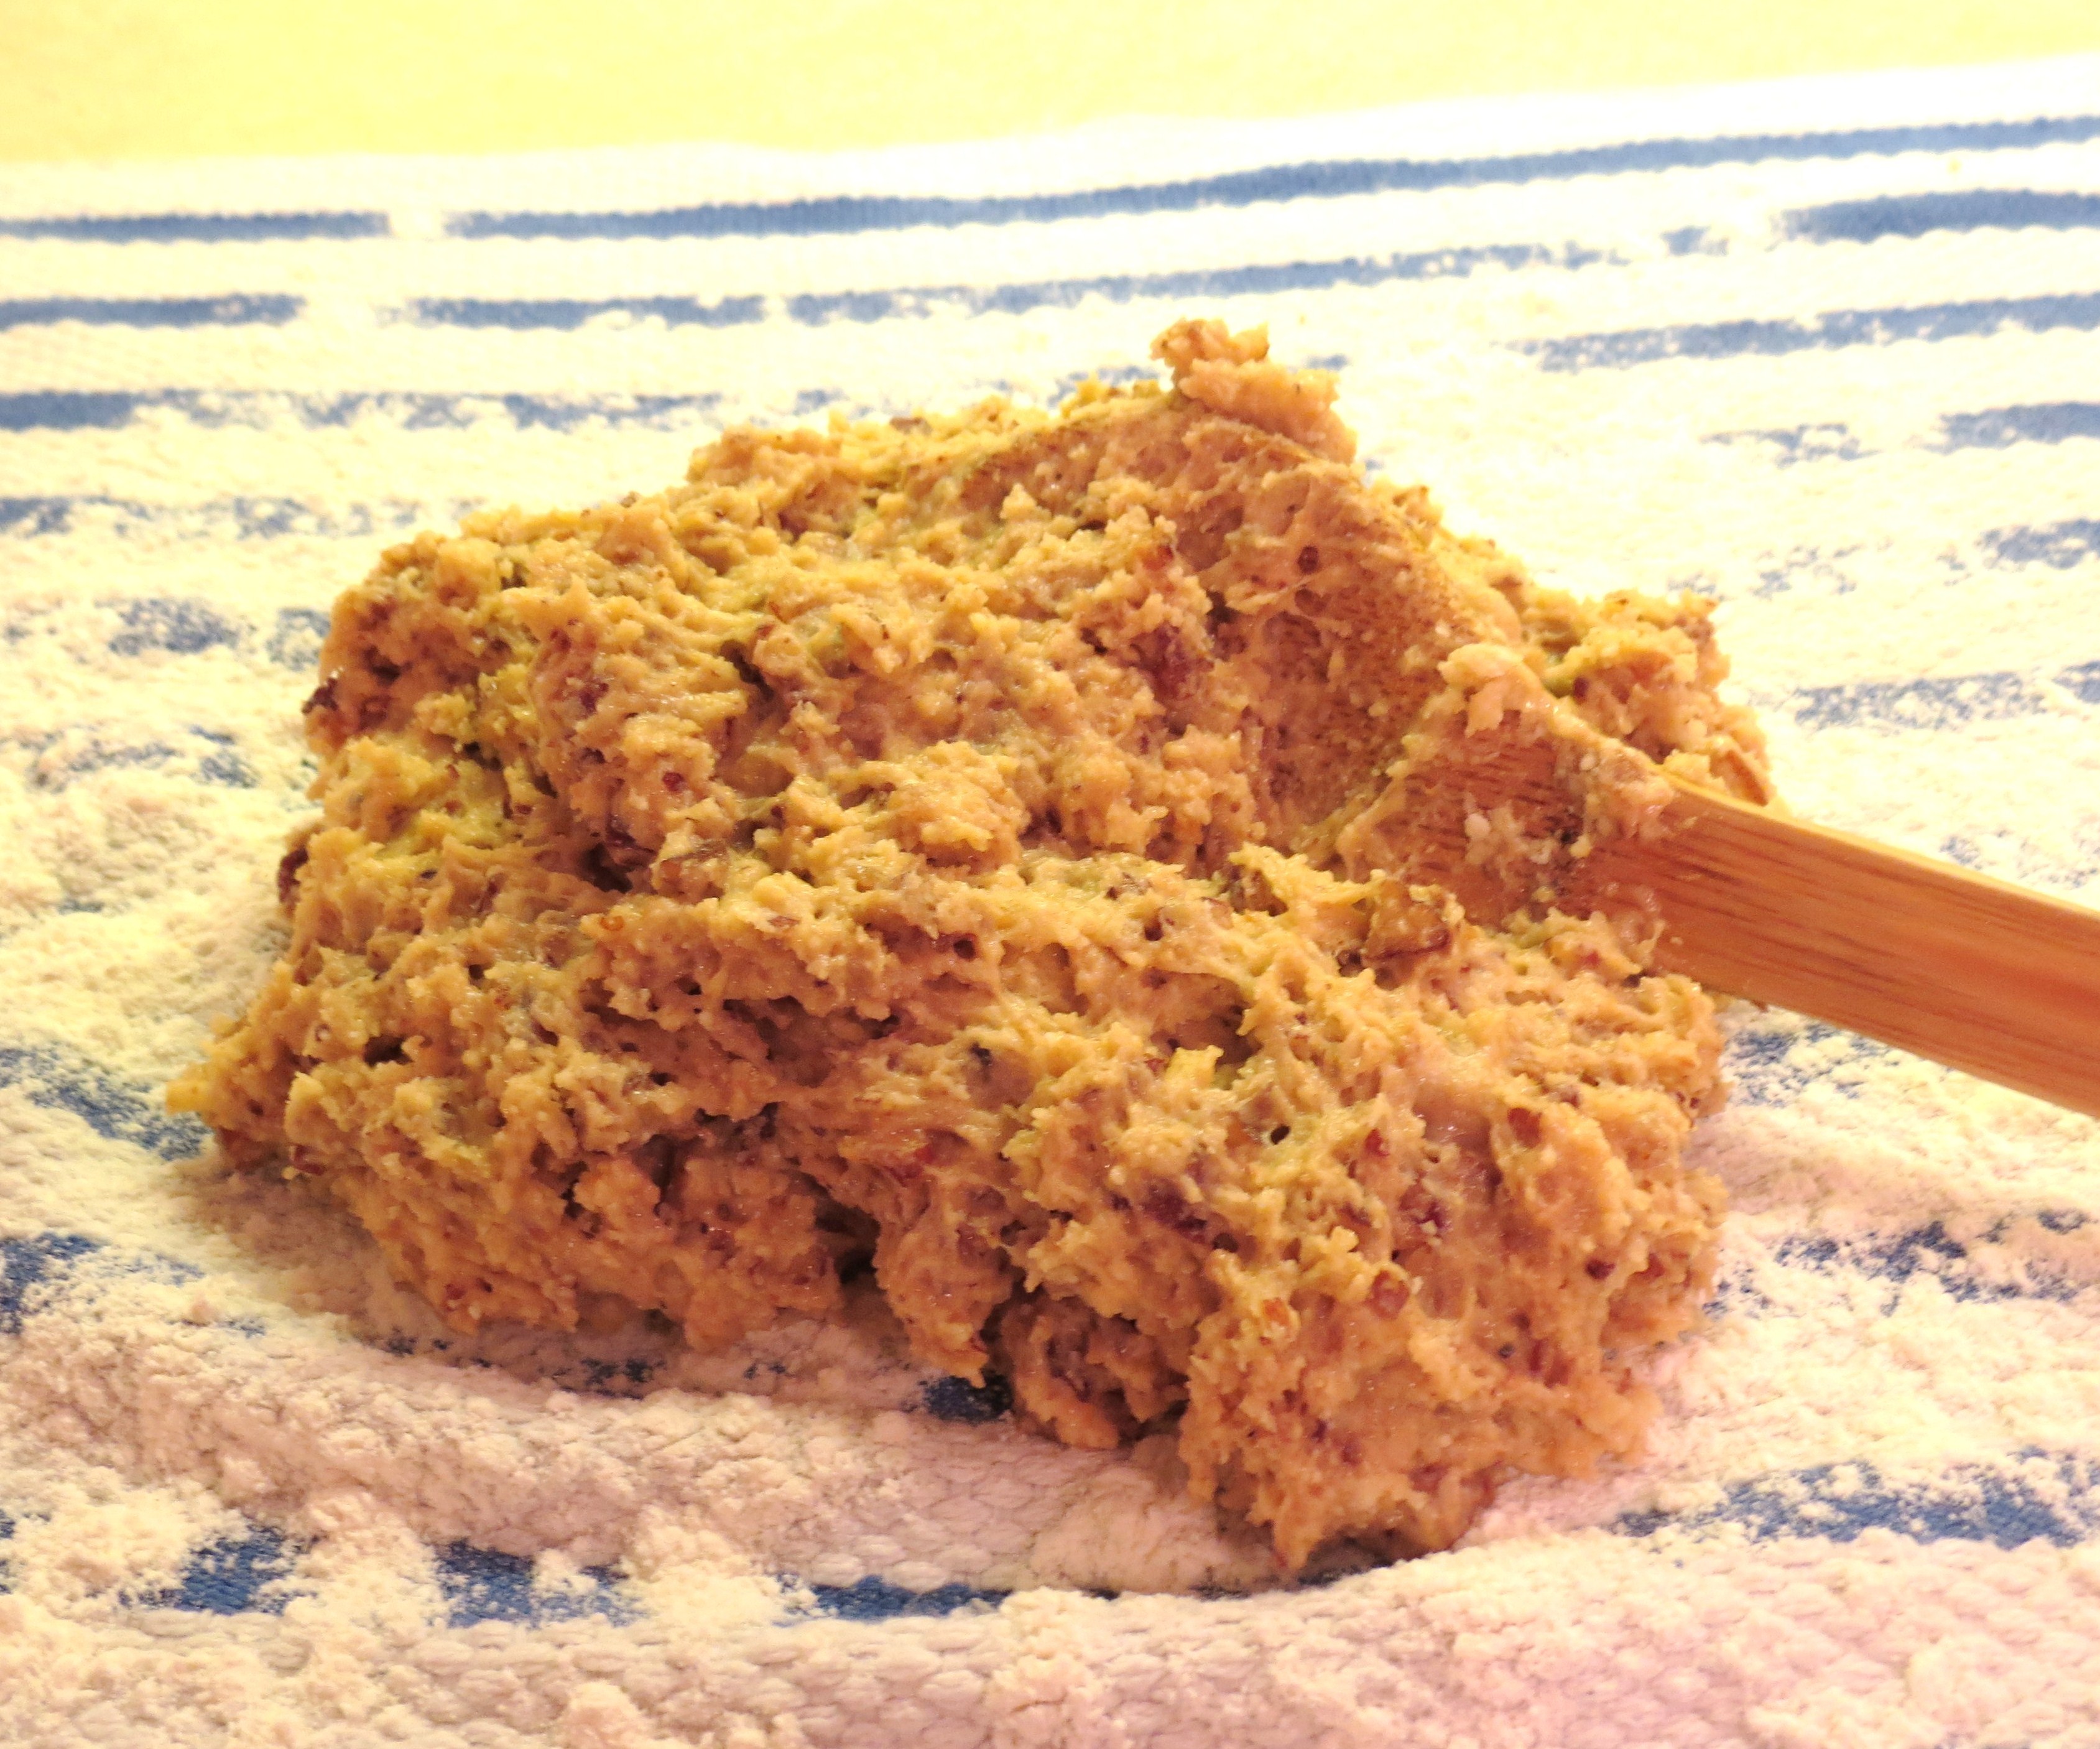
After 10 minutes add ½ cup flour, 2 tsp. baking powder, 1 tsp cinnamon to the softened cornmeal. In a small bowl, beat 1 egg, 1/2 milk and 2 Tbs butter until smooth and add to bowl. Stir ingredients quickly until just combined.  Add 1/2 cup chopped walnuts.

Heat a buttered skillet over medium heat.  (I use an electric skillet, which I love, because the heat is even throughout.)

++  I suggest using a 1/4 cup measure so each pancake is about the same size.

Cook pancakes until bubbles form on the surface and edges appear dry, then flip and cook just a bit little longer.

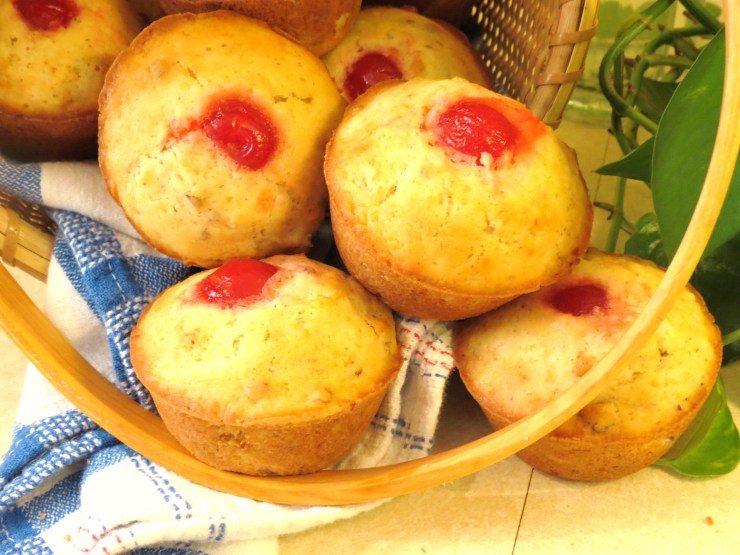
Hearty Cornmeal Pancakes with Cinnamon and Walnuts are especially delicious with a side of bacon and lots of maple syrup.   ; o )


Big, Fat, Fluffy Southern Style Biscuits – Prepared Two Ways!

USE - Southern-Style Biscuits No. 2 - myyellowfarmhouse.com
Makes 11 – 12 yummy biscuits!

This Massachusetts Yankee (of French Canadian descent) has been searching for a long, long time for a really good recipe for Southern Style Biscuits. I’m talking biscuits that are soft and flaky inside, with a slightly crunchy, buttery top.

Believe me, I’ve prepared enough ‘so so’ biscuits to know when I’ve finally found a great recipe – and, actually I found (and adapted just a bit) two excellent recipes! To quote a series of books – these recipes could be called ‘Southern Style Biscuits for Dummies’!

++ In true ‘Cecile Style’, the first time I prepared the 2nd biscuit recipe I didn’t have any vinegar.  So I substituted ‘Newman’s Own Balsamic Vinaigrette Dressing’.  And, how about this, the biscuits were wonderful !

Quick Story About My Cast Iron Skillet.

We usually went camping for our vacations when I was a child…. that is, when we actually went on a vacation.  (I grew up during the 1950s in a working class neighborhood.)  During one of those trips we woke up to find our cast iron skillet missing.

My Old Cast Iron Skillet - myyellowfarmhouse.com

My father followed the trail of the raccoon who had absconded with it.  At the end of the trail he found not only our cast iron skillet but another one as well, which he brought back.  And that’s the story of the cast iron skillet I use today – – which is the one my father found in the woods laying along side ours!

TIPS !!

Learn from my mistakes…..  1. Make sure the butter is super cold  2.  Ignore directions telling you to ‘ cut slivers of butter with a potato peeler’ … simply because the butter is far too warm (from your hands) by the time you’re done  3.  Cut the butter into the flour, baking powder, salt mixture quickly. If there’s tiny hunks of butter, so much the better.   4.  Keep the kneading down to a minimum.  The more you knead, the softer the dough  gets as the butter warms up.  5.  The VERY best way to bake Southern Style Biscuits is in a cast iron skillet.  I tried… several times… using a cookie sheet but I just wasn’t happy with the results.

biscuit cutter
Biscuit Cutter
pastry blender
Pastry Blend


 Biscuit Recipe No. 1 – ‘Southern Style Baking Powder Biscuits’

INGREDIENTS                     Yield = 11 – 12 biscuits

  • 2 cups flour
  • 1 tsp. salt
  • 1 tsp. sugar
  • 1 Tbs. baking powder
  • 1/2 cup (1 stick) butter, chilled
  • 3/4 cup milk  ++ At least 2%
  • ++ butter for greasing cast iron skillet – and for brushing on top of uncooked biscuits.

METHOD                 Preheat oven to 425 (F)           Butter a  cast iron skillet      

++  I used a 10″ cast iron skillet but a 12″ will work just as well !!    

In a medium bowl mix 2 cups flour, 1 tsp salt, 1 tsp sugar & 1 Tbs. baking powder.  Cut in 1/2 cup (1 stick) chilled butter, either with your fingers, a pastry blender or two table knives.  Mix milk (at least 2%) into flour mixture until just combined.

Turn dough out onto a floured surface.  I have a dish towel (tea towel) I use just for this. I shake it out after each use and put it away until the next time.  Knead dough very briefly… perhaps 30 – 40 seconds.

Pat down the dough using your fingers to form an 8″ circle.  Cut with 2 1/2″ biscuit cutter – or a glass of similar size.  Place biscuits around the edges of a buttered 9 1/2″ to 10″ cast iron skillet, then add others in the middle. (For this recipe, you should have three biscuits in the middle.)  Brush tops with melted butter.

Bake 18 – 20 minutes.  (Mine were ready in 18 minutes.)  To check for doneness, insert a knife or toothpick in the middle biscuits.  No dough should stick.  Let biscuits cool for a few minutes… that is… IF YOU CAN !!  Enjoy!!

 Biscuit Recipe No 2 – ‘Southern Style Biscuits’  

Recipe includes vinegar, baking powder & baking soda.

But…. if you have buttermilk.. or dried buttermilk, as shown below, then skip the vinegar!


No buttermilk?  This is a great product.  Just remember to refrigerate after opening!

SACO Cultured - DRIED - Buttermilk -

USE -Southern-Style Biscuits No. 1 - myyellowfarmhouse.com

USE - Southern-Style Biscuits No 1 - myyellowfarmhouse.com (2)
Makes 11 – 12 yummy biscuits!

INGREDIENTS               Yield = 11 – 12 biscuits

  • 2 cups all-purpose flour
  • 2 1/2 tsp. baking powder
  • 1/2 tsp. baking soda
  • 1/2 tsp. salt
  • 1 Tbs. white sugar
  • 1/2 cup (1 stick) butter, chilled
  • 1 Tbs. vinegar – plus enough milk (at least 2%) to make 3/4 cup
  •   ++ OR 3/4 cup buttermilk    
  •   ++ OR 3/4 cup 2% milk & add I Tbs. dried buttermilk to dry ingredients
  • butter for greasing cast iron skillet – and for brushing on top of uncooked biscuits.


METHOD              Preheat oven to 425 (F)           Butter a cast iron skillet

++  I used a 10″ cast iron skillet but a 12″ will work just as well !!

In a medium bowl mix 2 cups all-purpose flour, 2 1/2 tsp. baking powder, 1/2 tsp. baking soda, 1/2 tsp. salt and 1 Tbs. white sugar.  Cut in 1/2 cup (1 stick) chilled butter, either with your fingers, a pastry blender or two table knives.  Pour in 3/4 cup buttermilk.  (OR place 1 Tbs. vinegar (I used apple cider vinegar) in a measuring cup and add enough milk (not less than 2%) to make 3/4 cup).  Mix milk/vinegar (or buttermilk) into flour mixture until just combined.

Turn dough out onto a floured surface.  I have a dish towel (tea towel) I use just for this. I shake it out after each use and put it away until the next time.  Knead dough very briefly… perhaps 30 – 40 seconds.

Pat down the dough using your fingers to form an 8″ circle.  Cut with 2 1/2″ biscuit cutter – or a glass of similar size.  Place biscuits around the edges of a buttered 9 1/2″ to 10″ cast iron skillet, then add others in the middle. (For this first recipe, you should have two biscuits in the middle.)  Brush tops with melted butter.

Bake 18 – 20 minutes.  (Mine were ready in 18 minutes.)  To check for doneness, insert a knife or toothpick in the middle biscuits.  No dough should stick.  Let biscuits cool for a few minutes… that is… IF YOU CAN !!  Enjoy!!

Need a bit of inspiration for what to serve with your biscuits?   

How about Salisbury Steak from ‘Rufus’ Guide’ ?  

Greg - 'Rufus Guide' - Salisbury Steak

Here’s the link for the delicious Salisbury Steak recipe!

Breakfast Time?  Perfect white gravy from ‘Mom of the South’.

Gravy Over Biscuits - Mom of the South

Here’s the link to ‘Mom of the South’ and her recipe for perfect white gravy!

++ Biscuit recipe No. 1 adapted from ‘Mom of the South’.     Biscuit recipe No. 2 adapted from ‘Allrecipes.com’.  

‘Grab ‘n Go’ Crustless Quiche Squares

Above Photo  Shows Yield from Second (Smaller) Version of Recipe

Grab 'n Go' Crustless Quiche Squares - My Yellow Farmhouse.com

UPDATE – – Cathy from Australia told me she prepared Crustless Quiche Squares BUT she substituted cooked bacon for the broccoli. I love that idea!  Cathy calls them Bacon and Egg Squares and said they were a big hit with her four daughters!   'Grab 'n Go' Quiche Squares - with Bacon instead of Broccoli

When my twin sons were teenagers I had a repertoire (of sorts) featuring things they could ‘Grab ‘n Eat’  –  and by ‘they’ I mean my sons and their multitudinous friends … all of whom seemed to have bottomless stomachs.

Crustless Quiche Squares are a bit more ‘solid’ than most quiches due to the addition of a bit of flour, which is why they’re so easy to ‘grab and eat’ either for breakfast (as I did today), for a packed lunch or to serve as appetizers.  And they’re equally delicious eaten right from the fridge or at room temperature.

++  Today I made a smaller version of the original recipe, which works well for someone like me who doesn’t need to feed lots of teenagers!  That recipe follows the larger yield recipe below.

       THIS VERSION  MAKES A LOT   ……   USE A GREASED 13″ X 9″ PAN   

  (++ See below for recipe which makes fewer squares ++)     

Ingredients        

++ Oven temperature changes  – –    Bake at 400F for 15 minutes, …  then lower to 350F for 30 – 35 minutes.    

  • 10 eggs
  • 1/3 cup butter
  • 2 medium Bermuda onions, sliced
  • 1 1/2 cups chopped mushrooms
  • 1 1/2 cups chopped broccoli
  • 1/2 cup flour
  • 1 tsp. baking POWDER
  • 1/3 tsp. salt
  • 1 lb. (16 oz.)  small-curd cottage cheese
  • 1 lb. (16 oz.)  Monterey Jack Cheese – grated

In a large bowl, beat 10 eggs with an electric mixer for about a minute.  Set aside.

In a large skillet, over medium heat, melt 1/3 cup butter.  Add 2 medium Bermuda onions, sliced; 1 1/2 cups chopped mushrooms and 1 1/2 cups chopped broccoli. Cook, stirring occasionally, for 15 minutes.  Set aside.

'Grab 'n Go' Crustless Quiche Squares - My Yellow Farmhouse.com

Add 1/2 cup flour, 1 tsp. baking POWDER and 1/3 tsp. salt to the previously beaten eggs until combined.

Add 1 lb. small-curd cottage cheese and 1 lb. grated Monterey Jack Cheese and beat until combined.

Add sauteed onions, mushrooms and broccoli. Again, beat until combined.

'Grab 'n Go' Crustless Quiche Squares - My Yellow Farmhouse.com

Pour into greased 13′ x 9′ pan.    ++ Bake at 400F for 15 minutes………then REDUCE HEAT to 350F for 30 – 35 minutes.

Crustless Quiche Squares should be light brown when fully cooked, and a knife stuck in the middle shouldn’t stick.  Enjoy!

                                                                         + + + +

++ Directions for Making a SMALLER Batch of  ‘Grab ‘n Go’ Crustless Quiche Squares ++

++  Use a greased 9′ x 9′ pan

++ Oven temperature changes  – –    Bake at 400F for 15 minutes, …  then lower to 350F for 23 – 25 minutes.   
   

Ingredients

  • 5 eggs
  • 1/4 cup butter
  • 1 medium Bermuda onions, sliced
  • 3/4 cup chopped mushrooms
  • 3/4 cup chopped broccoli
  • 1/4 cup flour
  • 1/2 tsp. baking POWDER
  • 1/4 tsp. salt
  • 1/2 lb. (8 oz.) small-curd cottage cheese
  • 1/2 lb. (8 oz.) Monterey Jack Cheese – grated

In a large bowl, beat 5 eggs with an electric mixer for about 30 – 40 seconds.  Set aside.

In a large skillet, over medium heat, melt 1/4 cup butter.  Add 1 medium Bermuda onions, sliced; 1/2 cup chopped mushrooms and 1/2 cup chopped broccoli. Cook, stirring occasionally, for 15 minutes.  Set aside. 'Grab 'n Go' Crustless Quiche Squares - My Yellow Farmhouse.com

Add 1/4 cup flour, 1/2 tsp. baking POWDER and 1/4 tsp. salt to the previously beaten eggs until combined.

Add 8 oz. (1/2 lb.) small-curd cottage cheese and 8 oz. (1/2 lb.) grated Monterey Jack Cheese and beat until combined.

Add sauteed onions, mushrooms and broccoli. Again, beat until combined.

'Grab 'n Go' Crustless Quiche Squares - My Yellow Farmhouse.com

Pour into greased 9” x 9′ pan.    ++ Bake at 400F for 15 minutes………then LOWER HEAT to 350F for 22 to 23 minutes.

Crustless Quiche Squares should be light brown when fully cooked, and a knife stuck in the middle shouldn’t stick.  Enjoy!

++ Recipe adapted from ‘The Frugal Gourmet’

Grab 'n Go - Crustless Quiche Squares - My Yellow Farmhouse.com


Sharing Recipes from Some of My Favorite Bloggers – DESSERTS

About a year and a half ago I posted several yummy-looking appetizer recipes from some of my favorite bloggers.  I decided to do something similar today with dessert recipes because, sometimes, things are just too good NOT to share!

For a few weeks I was on a cleaning binge…. of sorts.  My cleaning binge is sooo over right now.  I think I’m going to go on a serious baking binge – starting tomorrow.   Enjoy !

                 Sharing Recipes from Some of My Favorite Bloggers – DESSERTS

This recipe for Heath Bar (or Chocolate Chip) Blondies, from Bits and Breadcrumbs, was my inspiration for sharing dessert recipes today.  Blondies are a lot like brownies in texture but the batter isn’t made with chocolate.  Usually made with chocolate chips and walnuts, this recipe gives you a choice to add either chocolate chips or Heath Bar chips. My suggestion – consider making these, at least once, with half Heath Toffee Bits and half chocolate chips!

Blonde Brownies = Bits and Breadcrumbs

http://bitsandbreadcrumbs.com/2014/01/31/snow-day-sweet-tooth/  

I love pound cake! This Coconut Pound Cake, from The Southern Lady Cooks, seems to be super easy to make: you use a a yellow cake mix, some vanilla pudding, coconut and evaporated milk, plus a few other things.  A rich coconut sauce is poured on top. YUMMY!  If you’re looking for some great southern recipes, be sure to visit The Southern Lady Cooks. You’ll see why she’s one of my favorite bloggers!

Coconut Pound Cake - The Southern Lady Cookshttp://thesouthernladycooks.com/2011/04/22/coconut-pound-cake/

I’ve never made New York Style Crumb Cake from scratch but I sure will now. From Uni Homemaker, this crumb cake has lots and lots of topping.  Doesn’t it look delicious?

from Uni-Homemaker - New York Style Crumb Cake

http://unihomemaker.com/2013/12/29/new-york-style-crumb-cake/

I’d planned to include only recipes from other bloggers – then I came across my own recipe for Apple Pie, which I’ve been ‘playing with’ for decades.  Everyone seems to really like my apple pie a lot, so I’m including it as well.

My Yellow Farmhouse - Apple Piehttps://myyellowfarmhouse.com/2012/11/18/my-yellow-farmhouse-apple-pie/

I haven’t eaten Oatmeal Scotchies in years. In truth, I’d forgotten all about them – until tonight when I found this recipe from Averie Cooks.  It seems that, like me, Averie hadn’t made these in years – she posted, “These cookies are a tasty trip down memory lane. My grandma used to make them and I hadn’t had them in ages. So I changed that.”  Averie, I intend to change that too !

oatmealscotchies-Averie Cookshttp://www.averiecooks.com/2013/04/soft-and-chewy-oatmeal-scotchies-cookies.html

ENJOY !!

Tropical Muffins Made with Crushed Pineapple, Shredded Coconut & Pecans

It does seem like I’m on a bit of a “baking kick” lately. I just realized why…. my dear friend and neighbor Frank recently returned from spending the summer at the mouth of the Connecticut River on his “boat”, which sleeps four and has more space than some apartments. (He’s always kind enough to have me as his guest several times each summer – maybe because I show up with food!)  And now he’s back. Frank is a Dessert Lover of The First Class – hence, my renewed interest in baking. So, without further ado – here’s the recipe for Tropical Muffins.

Tropical Muffins – Pineapple, Coconut & Chopped Pecans

Makes 12 Muffins

Grease a 12 unit muffin tin.     (You can also use cupcake liners…. but I, myself, am not crazy about them because, sometimes, the muffins stick to the liners. And I refuse to give up even a teeny, tiny bit of these muffins.)

++  Any leftover Tropical Muffins can be reheated the next morning in a toaster-oven. In fact, I’m enjoying two warmed-up muffins right now with a lovely cup of mocha coffee, which equals “Happy Tummy”!

Oven at 400 F     Bake for 20 – 25 minutes.       ++ Be sure to check at the 20 min. mark !!

Ingredients
  • 2 cups flour
  • 1/2 cup sugar
  • 1 TBS. baking POWDER
  • 3/4 tsp. salt
  • one can (8 oz.) crushed pineapple – drain & save the juice !
  • ++ add enough water to the pineapple juice to make 3/4 cup liquid
  • 1 egg
  • 1/3 cup oil
  • (The juice & water will be mixed with the egg & oil…)
  • 1/4 cup chopped pecans – or walnuts
  • 1/4 cup shredded coconut    (Desiccated coconut for my European etc. friends)
  • 12 maraschino cherries – drained on paper towel (These will go on the top.)

Set aside the drained crushed pineapple, 1/4 cup chopped pecans & 1/4 cup shredded coconut

Tropical Muffins - coconut, pecans and pineapple.jpg

Mix 2 cups flour, 1/2 cup sugar, 1 TBS. baking POWDER & 3/4 tsp. salt In a large bowl.

In a small bowl, add the pineapple juice from the drained crushed pineapple ( plus enough water to bring the total liquid to 3/4 cup ) 1 egg and 1/3 cup oil – mix briefly.

Tropical Muffins

Now place the pineapple juice/egg/oil mixture, and the 1/4 cup chopped pecans, 1/4 cup shredded coconut and crushed pineapple into the large bowl containing the flour/sugar/salt/baking powder. Mix gently – just until everything is combined. You don’t want to over-mix because you want your muffins light and fully!

Using a 1/4 cup measure, fill each muffin cup 3/4’s full. Place a maraschino cherry in the center of each. (Don’t poke down the cherry, or it’ll disappear as the muffin rises.

Tropical Muffins - USE - 3RDBake at 400 F for 20 – 25 minutes. ++ Be sure to check after 20 minutes. My muffins were ready in 20 minutes.

To ensure your muffins are fully cooked, insert a toothpick or a sharp knife into the center. If it comes out clean – they’re ready! 

Share these, warm from the oven, slathered with butter, with your family & friends. That is… if you’re feeling generous. Enjoy !!

Banana Nut Pancakes

banana nut pancakes - my yellow farmhouse

Banana Nut Pancakes were always a BIG favorite in our house when my boys were growing up. Unlike regular pancakes, which can be very dry when reheated, these pancakes are always dense and moist. And, they can be frozen, so you can enjoy them whenever you wish. As you may know, I’m a big believer in “Everything’s Better with Chocolate”, so I usually add chocolate chips to the batter, although I didn’t add them this time. (Perhaps I’m considering the fact that my high school reunion is only a month away….)

My friend Katie recently told me she could imagine these pancakes with a scoop of ice cream, with chocolate syrup drizzled on top. I told her, “Katie, I like the way you think!” Then, I added, how about imagining these pancakes with some slices bananas and chopped walnuts, along with the ice cream and chocolate syrup.    “Overkill”…. nah !!!

Totally off the subject of pancakes…. recently I hosted a pretty good-sized party but, due to problems with my separated left shoulder, I ended up ordering some fabulous Italian food from a local eatery. I did make a few items though. One was a green bean salad. But I was not happy with the results of my efforts, which doesn’t often happen…  Recently, Rufus, of Rufus’ Food and Spirits Guide, posted a lovely recipe for a green bean salad. I told him I’m going to provide the link because it looks so delicious. – so here it is.  http://rufusguide.wordpress.com/2013/09/13/green-bean-salad-2/

BANANA NUT PANCAKES  

Ingredients       Makes about 17      Recipe can easily be cut in half…

(I really believe a griddle or an electric skillet cooks pancakes or French toast much better than a ordinary skillet because the heat is even – right to the edge of the pan.)

  • 2 1/2 cups buttermilk pancake mix (I like Aunt Jemima)
  • 1 1/4 cups milk or water (I didn’t have any milk, so I used water & they were fine.) If you like your pancakes thicker, add less water. It you think the batter’s too thin, add more pancake mix.)
  • 2 eggs
  • 2 Tbs. oil
  • 1 banana  (Doesn’t have to be  super “ripe”.  Just mash it up a bit.  “Chunks” are OK !)         
  • 1/4 tsp. cinnamon
  • 1 Tbs. brown sugar, packed
  • 1/2 cup chopped walnuts
  •  1/4 – 1/2 cup chocolate chips – – optional
  • oil or butter – to grease the pan/griddle/electric skillet

In a good-sized bowl, mix 2 1/2 cups buttermilk pancake mix, 1 1/4 cup milk or water, 2 eggs, 2 Tbs. oil, 1 “mashed” banana, 1/4 tsp. cinnamon & 1 Tbs. packed brown sugar. thoroughly with a wooden spoon. (I prefer to hand-mix pancakes. Just like muffins, pancakes come out fluffier when mixed by hand.) Add 1/2 cup walnuts and 1/4 to 1/2 cup chocolate chips, if you so desire but it’s certainly not necessary.

Begin heating your pan/griddle to 275 F – 300 F. Use a generous amount of butter or oil (I prefer butter) to grease your pan. Using a 1/4 measuring cup (or 1/3 measuring cup, depending upon how big your want your pancakes), pour out enough batter for each pancake, leaving a bit of room between each one.

Banana Nut Pancakes - cooking

Very soon bubbles will begin to appear on the top but it’ll take about a minute after the bubbles appear before the pancakes are ready to turn over. (If you’re not sure when to turn them over, use a spatula to peak at the bottom of one to see if it’s browned,.) The second side usually cooks faster than the first. Here’s how I check to see (especially with the first ones), I just open one up a bit with a knife so I can be sure the inside’s cooked. ) As I said previously, these Banana Nut Pancakes are moister than others – so they are far less likely to dry out.

Banana Nut Pancakes - Cooked

Now the rest is up to you. You can sprinkle these babies with confectionery (icing) sugar or brown sugar or, of course, drizzle on some maple syrup. OR – you can go crazy and add ice cream, whipped cream etc. It’s your Breakfast Party !!

++  To reheat frozen pancakes – place a paper towel on a plate, then place three pancakes on top. Cover pancakes with a second paper towel. Heat on HIGH for 1 minute & 20 seconds…. of course, it depends on your microwave.                      Enjoy !!

possible - last photo

Maple Pecan Scones

I actually made, and photographed, these scones last night but I decided to make them again today because I wasn’t 100% satisfied with yesterday’s results. (Luckily I only had to re-photograph the final product.)

I have always liked this recipe but I decided it just to change the recipe just a bit – and I’m really pleased with “My Second Attempt” as these scones are g.o.o.d. !!  (Last night the dough was too sticky to work with, and I thought the scones had too much salt and not enough sugar.)

Actually, scones aren’t meant to be overly sweet. Usually the sweetness comes from the jam & clotted cream the British like to spread on their scones. I LOVE British High Tea. Here’s a typical High Tea menu – finger sandwiches, scones with clotted cream and preserves, plus cakes and pastries. All accompanied, of course, by a variety of teas.

Here’s a true story concerning scones. On one of my trips to London I stopped at a lovely but very casual tea room. While I was perusing a case full of various types of scones, I mentioned to the gentleman helping me, “There’s a fly in the case”. “Excuse me madam, those are raisins”. “OK”, says I, “Well then, one of your “raisins” is flying”.

Oven at 400F     Bake for 14 – 16 minutes

Ingredients  

Feel free to add some chocolate chips or raisins…. but I wouldn’t recommend adding any “flying” raisins !!

  • 1 cup chopped pecans – or walnuts   (You’ll need a bit of  chopped nuts to sprinkle on top once the scones are cooked.)
  • 1/4 cup maple syrup – or maple-flavored syrup
  • 2 cups …..PLUS 2 Tbs. flour    ++ The amount of flour used depends on many factors. You many not need the extra 2 Tbs.
  • 1/4 cup sugar
  • 2 tsp. baking POWDER
  • 3/4 tsp. salt
  • 1/2 tsp. baking SODA
  • 1/3 cup butter, softened just a bit
  • 3 Tb. milk
  • 2 large eggs
  • 1 Tb. distilled white vinegar – Don’t skip the vinegar !!
  • 1 cup confectionary sugar
  • 2 Tb. milk

Mix 1 cup chopped pecans with 1/4 cup maple syrup in a small bowl, and set aside. In a large bowl mix 2 cups PLUS 2 Tbs. flour, 1/4 cup sugar, 2 tsp. baking POWDER, 3/4 tsp. salt and 1/2 tsp. baking SODA. With a pastry blender – or two knives used scissor fashion – cut in butter until the flour mixture resembles tiny crumbs.

Add the pecan/maple syrup mixture to the bowl and throughly mix in.

Maple Syrup, Pecans and Flour Mixture

In a small bowl, mix 3 Tb. milk, 2 large eggs and 1 Tb. distilled white vinegar.

Egg, Vinegar and Milk Mixture

Stir milk/eggs/vinegar into flour/pecan mixture until ingredients are just blended. You don’t want to over mix and have the scones come out tough.

Preheat oven to 400 F. Turn out dough onto a dish towel which has been sprinkled with about 3 Tbs. of flour. Ready to Be Kneaded

Sprinkle a bit of extra flour on the dough. Gently knead the dough about 10 times. (To knead, push dough with the palm of your hand, turn dough a 1/4 turn and continue.)

Form dough into a ball.

Dough

Pat dough into a circle of between 6 1/2″ to 7″. The circle should be about 3/4″ high. Using a large, sharp knife, cut the circle into 8 equal pieces. If the knife sticks a bit, just CAREFULLY rub a bit of flour on it between cuts.

Cut Dough

Place the triangles on an ungreased cookie sheet. Don’t worry if they get slightly out of shape…

USE - Ready to Bake

Place the cookie sheet in the center of your oven. Bake for 14 – 16 minutes.

++ If you’re not sure the scones are done, here’s what I did…. I took the cookie sheet out of the oven, cut into one, saw it was still “doughy” inside and put the scones back into the oven for 3 more minutes.

Remove scones from cookie sheet and allow to cool on a cooking rack.

Glaze   – it’s not necessary to make a glaze – or to sprinkle on some chopped pecans, but the scones not only look prettier – I think they actually taste better!!

In a small bowl mix 1 cup confectionary sugar with 2 Tb. milk. If the glaze is too runny, add a bit more sugar….. if it’s too thick  – add a teeny, teeny bit of milk until you reach a good consistency. You can drizzle the glaze over the scones with a spoon OR you can fill a small baggie with the glaze, cut of a VERY TINY hole in one corner and then squeeze the glaze out just like a pastry chef!    Sprinkle on some chopped pecans, make a cup of tea – or a have a big glass of milk and …….  Enjoy !

Maple Pecan Scones - finished - last photo

“Eggs in a Frame” a.k.a. “Eggs in a Blanket”

Eggs in a Frame - cooked - FOR END OF POST

Whether you call these ‘Peek-a-Boo Eggs’, ‘Eggs in a Hole’, ‘Eggs in a Frame” or ‘Eggs on the Island’   – – – – they’re “good eats”!!

My sons used to love these!! The taste is truly (as the old expression goes) “more than the sum of its parts”, meaning eggs and toast prepared this way are so much tastier than eggs and toast cooked the usual way.

++ Someone recently asked, “When to flip over ‘Eggs in a Frame?’  I would say, ‘Use the above photo as your guide.” When the eggs are ‘almost set’ – as above – flip them over for just a few seconds. That is, unless you prefer your yolks very, very set – then let them cook a few seconds longer.

++ Be sure to fry one side of the bread first – THEN break the egg into the hole.  That way both sides of the bread are buttery and toasted, even if you don’t flip them over!

    Ingredients…. (I’m not even sure that a list this short can even be called “ingredients”!!)

  • eggs – allow 2 per person
  • bread – allow 2 slices per person
  • butter or margarine
  • salt & pepper
  • OPTIONAL – cayenne pepper, red pepper flakes etc.
  • OPTIONAL – sliced cheese

Eggs in a Frame - ingredients

If you’re making these for more than 2 people, then it’s really wonderful if you happen to have some sort of griddle. Otherwise just use 2 large nonstick skillets.

Butter one side of the bread. Using a biscuit cutter, if you have one (or a small glass which has an opening of about 2 1/2″), cut a hole in the center of each piece of bread. Don’t discard the centers – you’re going to fry those as well – actually, the centers might end up being your favorite part!!

On medium heat, warm up a large nonstick skillet. Add about 2 tsp. butter. Once the butter has melted, place the bread slices, butter side up, in the skillet.  Cook JUST THE BREAD until the bottoms of the bread are toasted.

Eggs in a Frame - bread in panFlip the toast over. Lower the heat a bit and gently break an egg into each ready-made hole. Sprinkle with a bit of salt & pepper – plus a bit of cayenne pepper etc if you choose.

Cook the eggs/toast until almost cooked through if you want “Sunnyside” eggs. Or, you can flip the “Eggs in a Frame” over to give you “Over Easy” eggs.

You can also place a slice of cheese on top once the eggs seem a few minutes away from being ready. I recommend covering the pan, if you’re adding cheese, so that the cheese melts without overcooking the eggs.   Enjoy !!

Eggs in a Frame - cooked

Mini Banana Chocolate Chip Muffins

I used to make these Mini Banana Chocolate Chip Muffins for breakfast when my sons were young. However, at that time I wasn’t topping the muffins with melted chocolate and nuts. A person only has some much time in the morning!

Breakfast has always been one of my favorite meals, so I used to love to cook all kinds of great things for breakfast, such as a really delicious breakfast custard. Or we used to have cornmeal pancakes, banana nut pancakes, apple pancakes, waffles, Egg Benedict, Eggs in a Frame and Goldenrod Eggs on toast etc.  Was I always on time for my job as a teacher….. nope. But I always arrived with a Happy Tummy!!

The original recipe didn’t call for chocolate chips – or melted chocolate on top – but I believe you can never have too much of a good thing.

Oven at 400 F     Makes 16 mini muffins      Makes 12 regular muffins

13 (or so) minutes for “mini” muffins – – – For the mini muffins, grease both the bottom & the sides of the muffin cups.

15 minutes (or so) for regular-sized muffins   You can use cupcake liners – or – grease the bottoms only.

Ingredients     I checked online and the recipe has been changed a bit since “way back when”, so I’m posting the latest amounts because I think the changes are good. There’s a bit more mashed banana, plus a little more sugar.

  • 1 egg
  • 3 Tbs. melted butter – microwave for 10 seconds — OR — 3 Tbs. oil
  • 1/3 cup sugar
  • 2 cups Bisquick
  • 1 1/4 cups mashed VERY RIPE banana
  • 1/4 cup chopped walnuts
  • 1/4 cup chocolate chips
  • 1/2 cup chocolate chips – for top of muffins
  • 1 tsp. Crisco
  • some chopped walnuts, to sprinkle on top of muffins

In a medium bowl, mix egg slightly with a fork. Add the 3 Tbs. melted butter, 1/3 cup sugar, 2 cups Bisquick and 1 1/4 cups mashed banana. Mix with large spoon until just combined.

Add 1/4 cup chopped walnuts and 1/4 cup chocolate chips. Fill muffin cups to 1/2 full. Bake according to the above directions, depending upon the size of your muffin pans. Check for doneness by inserting a toothpick or a knife into the center of a muffin. If it comes out clean, then your muffins are done. (Don’t get confused by the melted chocolate sticking to either the toothpick or the knife. As long as the batter’s cooked, then the muffins are done!)

Allow muffins to cool for a few minutes, then remove to a cooling rack. While muffins are cooling, melt 1/2 cup chocolate chips and 1 tsp. Crisco in the microwave for 1 minute. Stir. Return to microwave for another 20 – 35 seconds. Stir again, then, with a spoon, drizzle the melted chocolate over the muffins. Sprinkle with chopped walnuts.  Enjoy!!

Mini Banana Chocolate Chip Muffins - bottom photo

Bacon and Egg Cups

These are easy and fun to make – in fact, the kids or grandchildren might want to help make them!

Don’t worry if you don’t have maple syrup. They’ll still be excellent but I do highly recommend making these Bacon and Egg cups with maple syrup ’cause it gives the bacon a real flavor boost. I know I always included the maple syrup when we had our own “maple sugar shack” on our farm in Quebec, Canada. (I’ll have to post a photo of it someday…)

This recipe makes six but you can make 12 just as quickly, which is great when cooking for a crowd. Plus the Bacon and Egg Cups are baked in the oven, so you can enjoy your coffee – or Bloody Mary – while they’re cooking!!

PS – The next morning I heated a few up in my microwave for about 30 seconds – they were still delicious!!

Makes 6                 Oven at 400 F                     15 – 20 minutes – keep an eye on them! 

May 2013  —  I made these with my grandchildren at our home in the Pocono Mountains and decided that 3 Tbs. of butter and 3 Tbs. of syrup was just tooo much.  Of course, as always – it’s up to you. Add as little or as much as you like!

My son asked us to make these using SPAM and, because it was his birthday, his wish was granted. The “SPAM and Egg Cups” were really good with cut up and fried SPAM instead of bacon!!  (I know SPAM is sometimes laughed about but it’s basically just cut up pork with spices. It tastes like ham – what’s not to like?!)

Ingredients

  • 6 slices bread without crust  (Use thinly sliced bread.)
  • 1 1/2 Tbs.butter, melted – previously was 3 Tbs.
  • 1 1/2 Tbs. maple syrup – previously was 3 Tbs.
  • 3 strips bacon, cooked until crisp and then crumbled 
  • 6 eggs
  • salt & pepper

Grease 6 muffins tins or spray with Pam. Cut crusts off bread, flatten down a bit with your fingers. Press one piece of bread into each of the 6 muffin cups. Mix 1 1/2 Tbs. melted butter with 1 1/2 Tbs. maple syrup and brush the mixture onto the bread.  Sprinkle crumbled bacon into bread cups. Break an egg into each cup and sprinkle with salt and pepper. (Actually, I made these with one piece of crumbled bacon per serving – instead of a half a piece. A few of the eggs “overflowed” the muffins cups due to the extra bacon, so I just cleaned up the extra with some paper towel.)

Bake at 400 F for 15 to 20 minutes, until eggs are set and bread is toasted. After 15 minutes, keep an eye on them because you don’t want to over cook ’em the yolks should be a bit runny.  Enjoy!

Bacon and Egg Cups - Use for Blog