“Khobz’ – Moroccan Bread ++ Quick & Easy ++ Dough only needs to rise once!

Khobz - Moroccan Bread - myyellowfarmhouse.com (2)

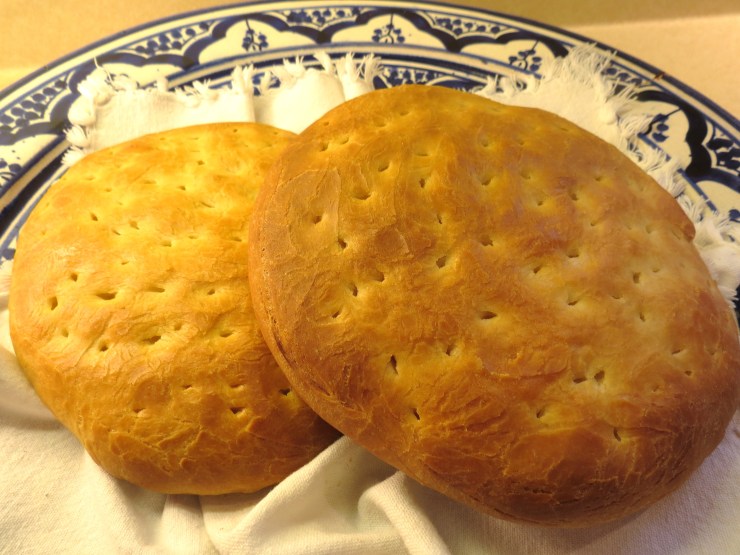
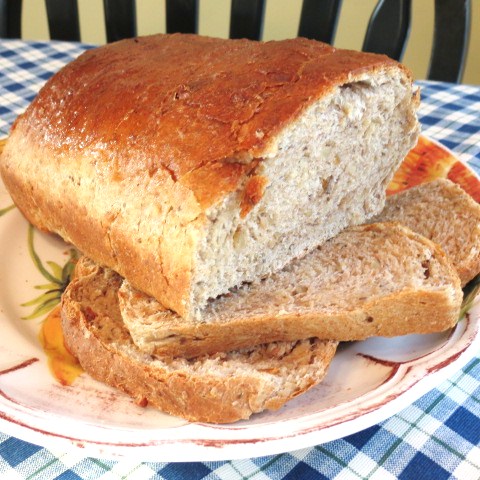
I purchased this beautifully hand-painted blue and white platter in Casablanca.  It’s one of my favorites!

I truly enjoy making different kinds of bread!  It amazes me how something so comforting and delicious comes out of playing around with some flour, salt and sugar etc.  It also amazes me how many different types of bread there are in the world. One of my favorite memories took place in India on New Year’s Eve years ago, where we saw men (fearless men!) slapping Naan onto the sides of a tandoor oven with their bare hands.

And, on a visit to Cairo, we saw women sitting on the ground cooking bread on large, flat stones.  That bread was, like Naan, a flat-bread but with a whole different – and wonderful – taste.

Egyptian Flat Bread - courtesy of Egyptian Food Recipes.com

++  Curious about ‘Breads of the World’ – here’s a great site!    http://en.wikipedia.org/wiki/List_of_breads

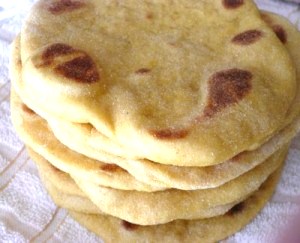
Interestingly enough, bread in Malta is called ‘Hobz’ (Ħobż Malti).  Ħobż Malti is dense, heavy bread which makes wonderful sandwiches.  Malta was ruled by Arabs for quite a long time, and the Maltese language contains many words derived from (or exactly the same as) Arabic.  So, it’s not too surprising that the Arabic word for bread is ‘Khobz’ and the Maltese word is Hobz.

When we lived in Malta I wrote a small book about the country’s long and varied history.  And let me tell you, Malta’s history, including rule by the Knights of St. John (better known today as The Knights of Malta) is fascinating!

Maltese Hobz -  courtesy of 'honeyandmustard.wordpress.com

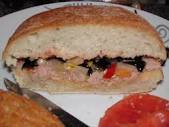
One of the best sandwiches I’ve ever eaten is called Hobz Biz-zejt.  There are times when The Whole Equals More Than the Sum of It’s Parts and this is sure one of those times!!   Hobz Biz-zejt can be recreated with another type of crusty bread, but it just won’t be quite the same…   Here’s a link if you’d like to make these sandwiches at home.  (I just started following this blog!)

https://honeyandmustard.wordpress.com/2011/05/13/maltese-traditional-hobz-biz-zejt/

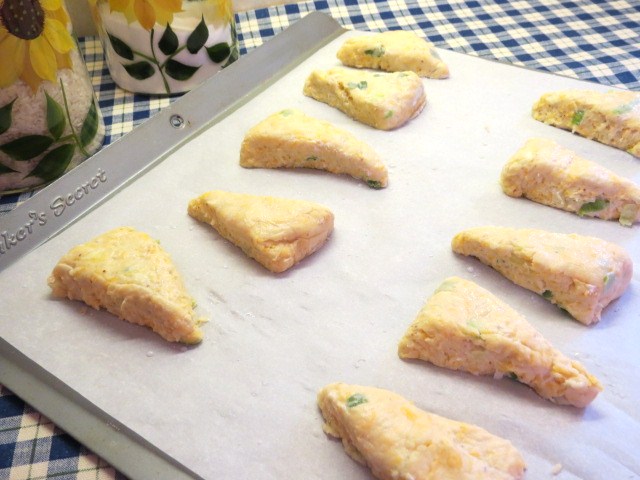
I know you’re going to enjoy Khobz.  It’s easy to make.  The recipe makes two loaves.  And – best of all – Khobz only needs one rising.

– – – –

INGREDIENTS      Oven at 435F      Bake for 20 minutes     ++ Switch position of baking sheets after first 10 minutes
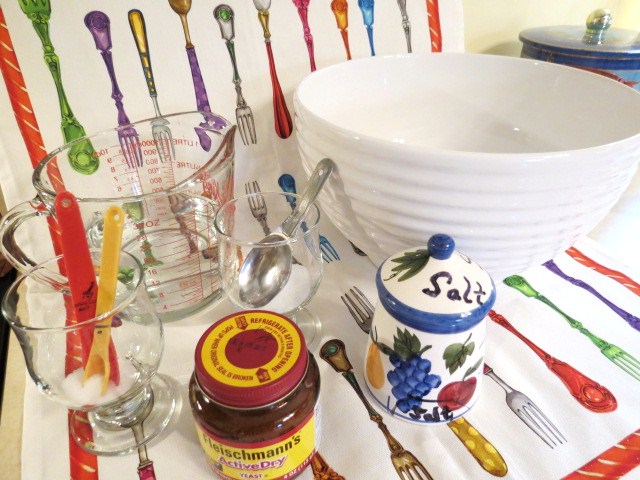
  • 4 cups flour
  • 2  tsp. salt
  • 2 tsp. sugar
  • 1 Tbs. yeast
  • 2 Tbs. olive oil
  • 1 1/4 cups warm water   ++  Water should feel warmer than your skin.  Try pouring a bit on your wrist to check.  If the water’s too cold – or too hot – the yeast won’t work properly and the bread won’t rise. 
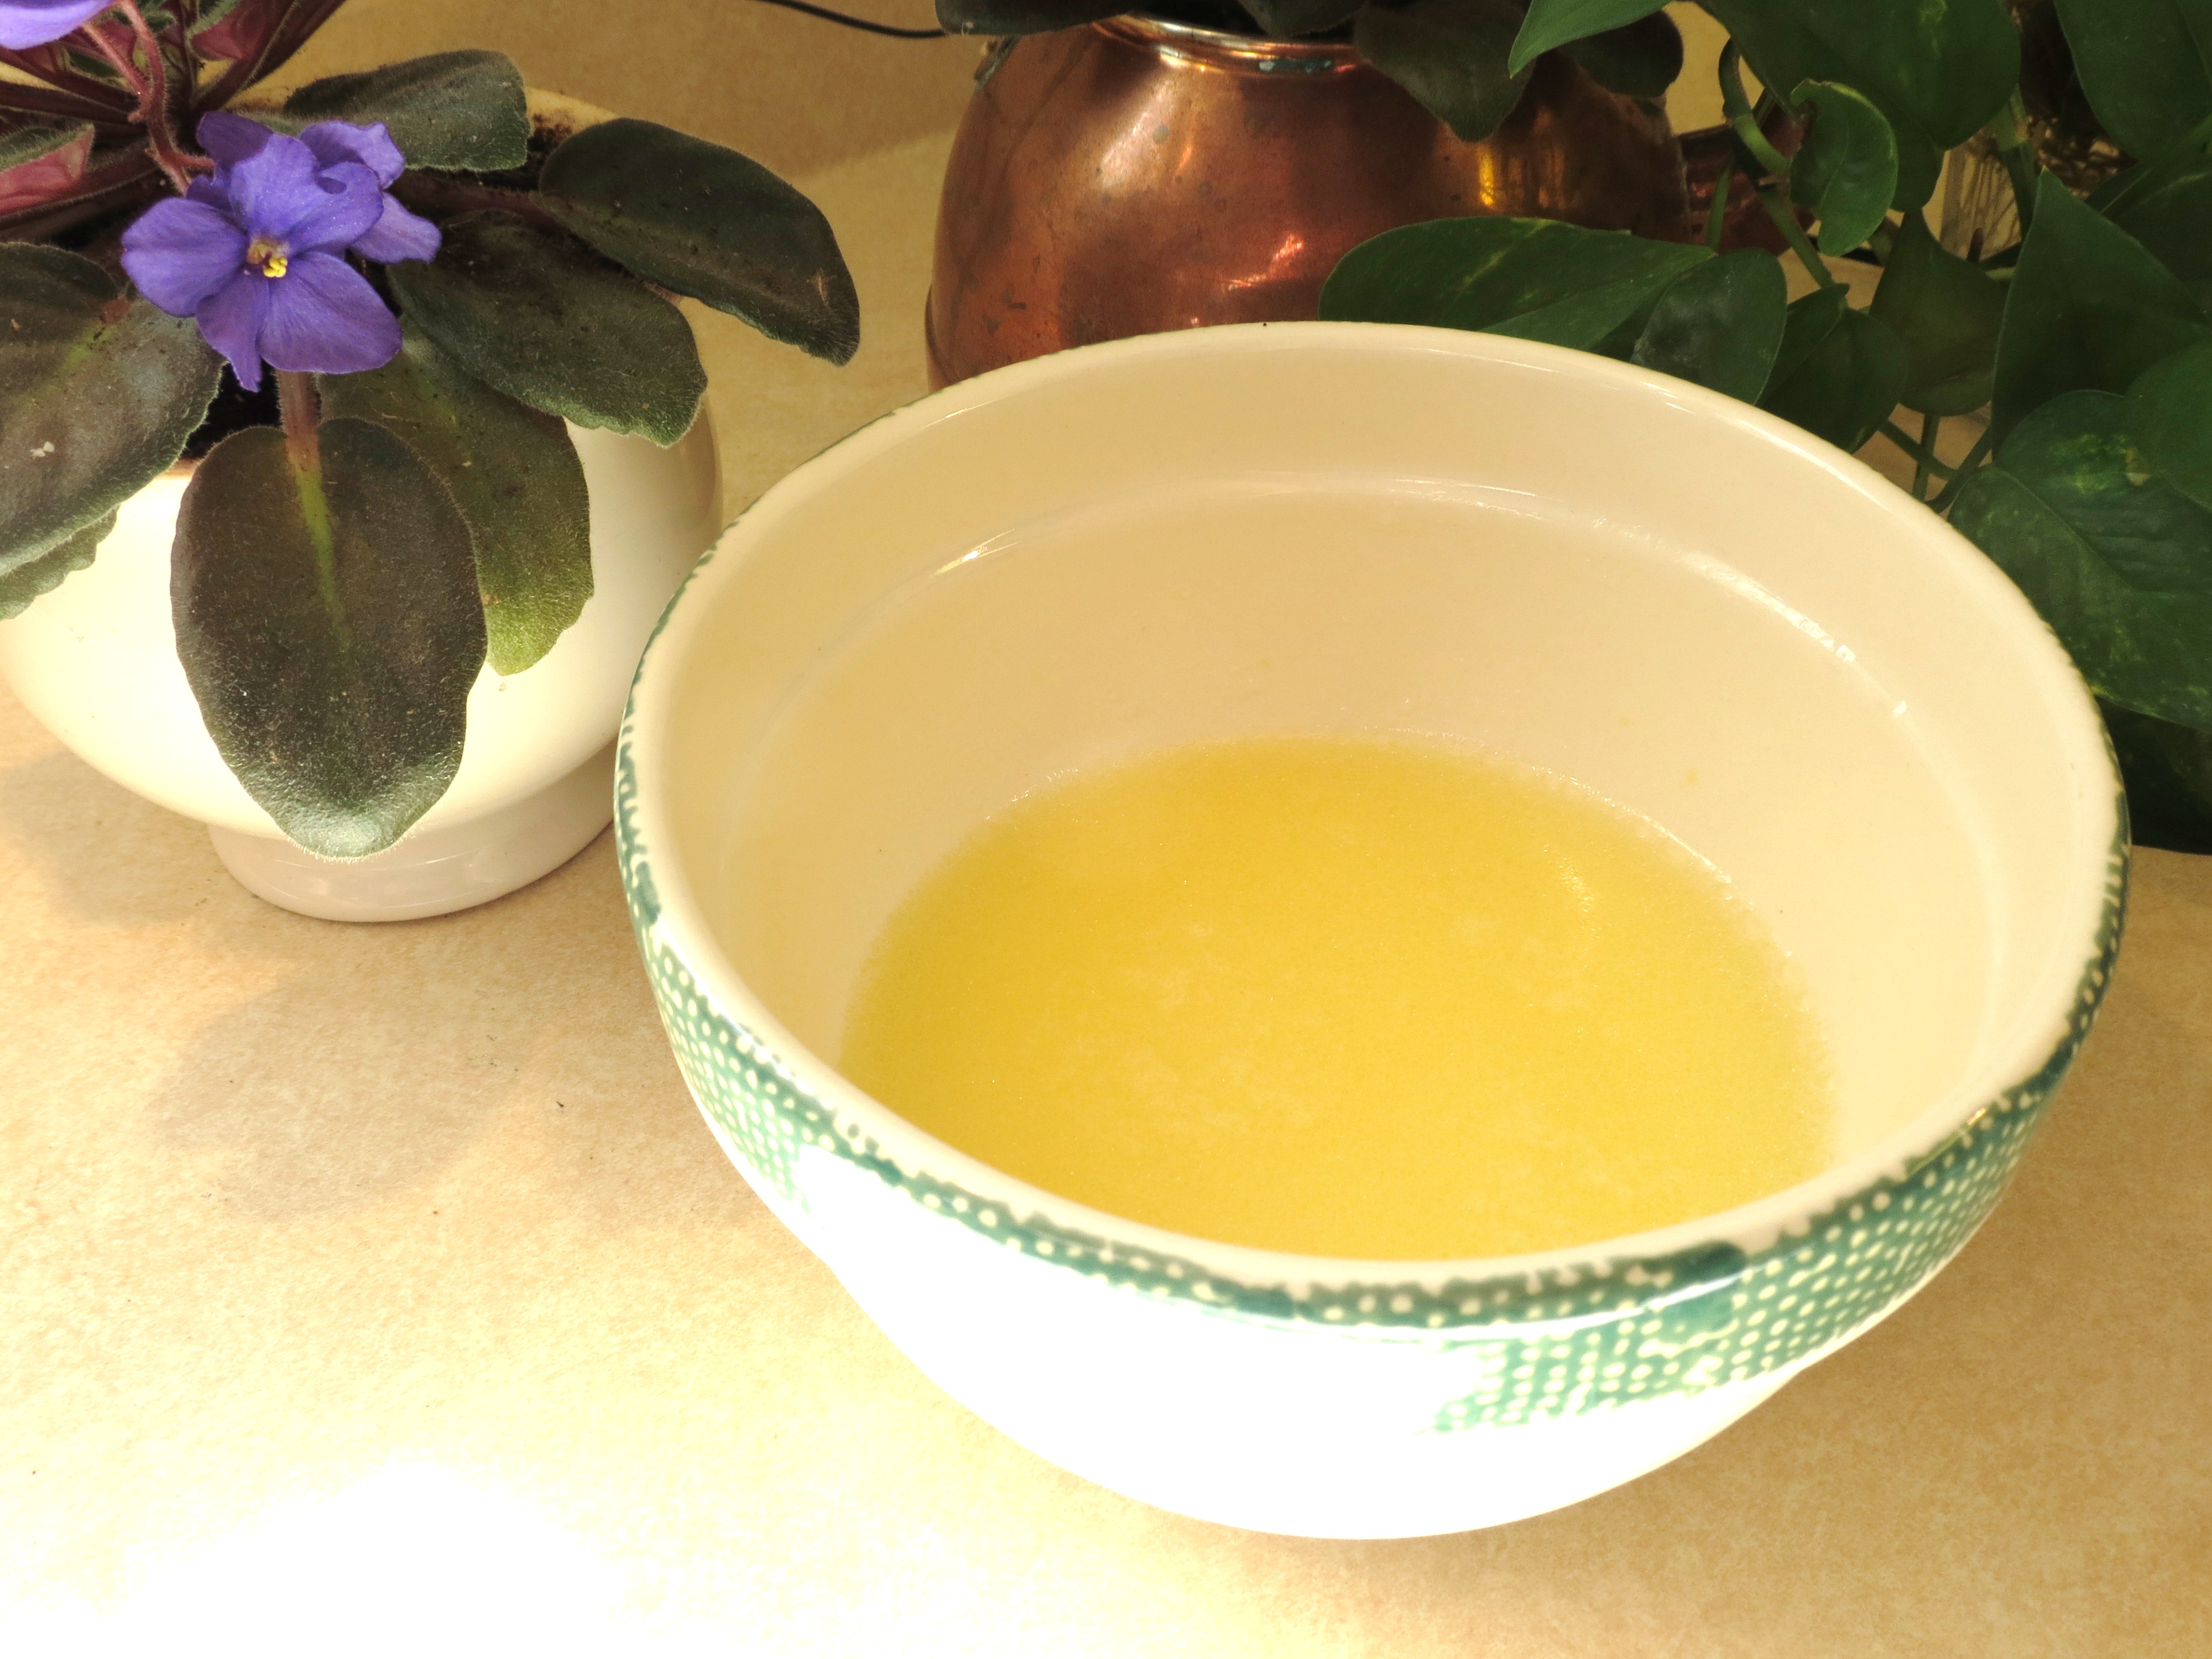
  • olive oil  – – to spread on baking sheets – and – to drizzle on bread both before and after baking

METHOD

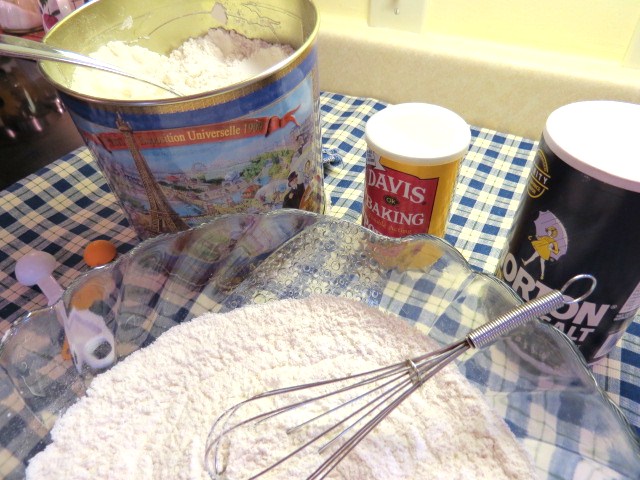
Prepare 2 baking sheets by pouring 1/2 tsp. olive oil in the center of each baking sheet.  Spread oil, using fingers, to make a 5″ – 6″ circle .     ++ You can skip the olive oil and use cornmeal…. but, to me, cornmeal doesn’t seem very authentic. Place 4 cups flour, 2  tsp. salt and 2 tsp. sugar in a large bowl.  Stir to combine.

Make a well in the center.   Place 1 Tbs. yeast in the center.  Gently pour 2 Tbs. olive oil and 1 1/4 cups warm water into the well and mix together to dissolve yeast.  Then mix entire contents of bowl until flour mixture has been incorporated.     

++  It may seem, at first, like you’ll never be able to get all the flour incorporated – just work at it a bit and it’ll all come together!   

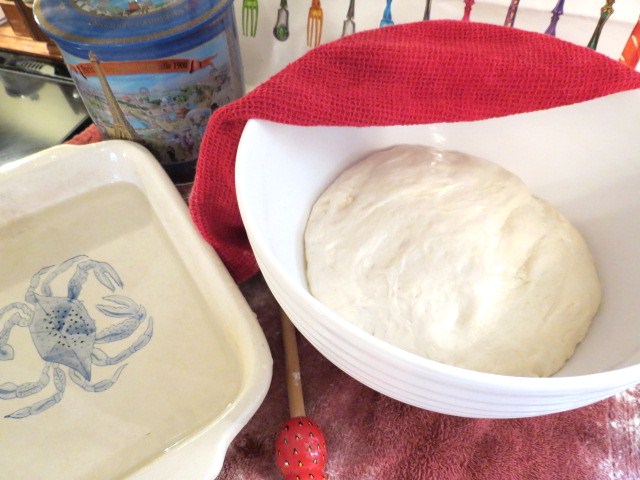
Turn dough out onto a floured surface. Knead dough for 10 minutes, adding a bit more flour if necessary.  After kneading for 10 minutes dough should be soft and pliable. ++  Here’s an excellent link to learn how to knead bread –   http://bread.wonderhowto.com/how-to/knead-bread-dough-by-hand-355638/ After dough is kneaded, form into a ball.

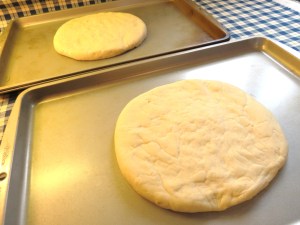
              Divide dough into halves.         .

Khobz - Moroccan Bread - - www.myyellowfarmhouse.com

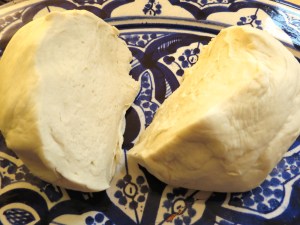
Shape each portion into a smooth, circular mound.

khobz - Moroccan Bread - myyellowfarmhouse.com (4)

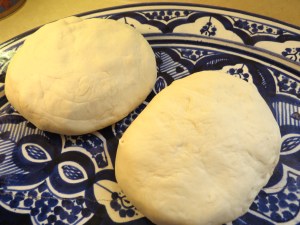
Place dough onto prepared baking sheets.  Cover with towels.  Allow to rest for 10 minutes.

Khobz - Moroccan Bread - myyellowfarmhouse.com

After 10 minutes, flatten dough using the palm your hand to form two – 7″ circles.

Khobz - Moroccan Bread - www.myyellowfarmhouse.com (3)

Once again, cover dough with towels. Allow dough to rise for an hour – or until dough springs back when pressed lightly with a finger.

Khobz - Moroccan Bread - myyellowfarmhouse.com

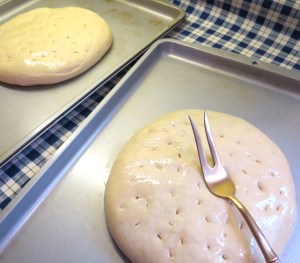
After dough has risen, poke here and there with a fork.  Drizzle on a bit of olive oil and spread with your fingers (which is what I do) or use a spoon.

Khobz - Moroccan Bread - www.myyellowfarmhouse.com (4)

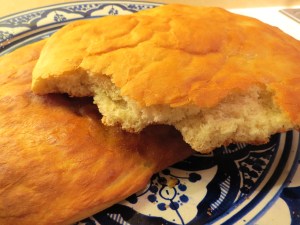
++ Raise bottom oven rack up one level     Bake bread at 435F for 20 minutes – – rotating baking sheets halfway through cooking time (at the 10 minute mark). Loaves should be browned and sound hollow when tapped.    ++  Don’t be afraid to take bread out a minute or two early  – oven temperatures can vary widely.

Remove loaves from baking sheets and allow to cool on wire racks.  At this point I like to drizzle on more olive oil and spread it over the crust – because I think it makes most-any bread look better.   Enjoy !!

Khobz - Moroccan White Bread -- www.myyellowfarmhouse.com (3)

—-

  ‘Moroccan Chicken Tagine with Sweet Potatoes’ 

Moroccan Chicken Tagine with Sweet Potatoes and Dates - - myyellowfarmhous.com

https://myyellowfarmhouse.com/2015/02/03/moroccan-chicken-tangine-with-sweet-potatoes/

And, to complete your meal, how about ‘Couscous with Raisins and Pine Nuts’

Moroccan Chicken and Couscous - myyellowfarmhouse.com

  https://myyellowfarmhouse.com/2014/03/10/moroccan-chicken-couscous-with-raisins-and-slivered-almonds/ 

Nutty Oatmeal and Wholewheat Bread

Oatmeal and Wholewheat Bread - My Yellow Farmhouse.com

For Bread Machine directions, follow this link – https://myyellowfarmhouse.com/2015/01/22/nutty-oatmeal-wholewheat-bread-bread-machine-version/

– – – –

This is the latest recipe in my Eating Healthy series.  And I’m happy to say that after only a week of ‘eating healthy’ I’m back in my jeans – and I can actually sit here and work on this post without having to unzip them.  If I’m hungry, I eat.  I just watch what I eat.  Believe me – I have a long, long way to go weight-wise.  But I’m motivated and enjoying the process.

It took me two tries to get this recipe the way I wanted it… and it was definitely worth the effort.  Nutty Oatmeal & Wholewheat Bread has a delicious, nutty taste.  And it’s good for you! There’s a cup of oatmeal and a cup of wholewheat flour, plus a cup of regular bread flour (because I don’t like heavy bread).  I added 1 tablespoon of chia seeds, which are so very good for you – or – you could add some bran in place of the chia seeds.  I  also added 1/3 cup of chopped walnuts, which, like chocolate, make everything taste better.    ++ This bread makes wonderful toast!

small red heart

INGREDIENTS                    Makes One Loaf

  • 1 cup very warm water
  • 2 1/4 tsp. active dry yeast
  • 2 Tbs. honey            ++  Or brown sugar
  • 1 1/4 tsp. salt
  • 2 Tbs. butter             ++  Or Olive oil
  • 1 cup quick-cooking oats
  • 1 cup wholewheat flour
  • 1 cup flour      ++  In the United States, bread flour is different than regular flour.  In Canada, regular flour has the same qualities as bread flour.  I use bread flour but this recipe works with either.
  • 2 pinches nutmeg
  • OPTIONAL    –    1 Tbs. Chia seeds    ++  Or wheat germ
  • OPTIONAL    –    1/3 cup chopped walnuts  ++  Walnuts will be added once dough has been kneaded a while.

METHOD

3 - Nutty Oatmeal and Wholewheat Bread - My Yellow Farmhouse.com (3)

Measure 1 cup very warm water.    ++  The water should feel warm on your wrist – not hot.  Too hot and you kill the yeast.  Too cold, and the yeast just sits there. 

Add 2 Tbs. honey and stir briefly.  Add 2 1/4 tsp. active dry yeast.  Again stir briefly.  I’ve never seen directions to ‘stir’… it’s just what I do.)

Allow water, honey and yeast to sit for 15 minutes.

++  I usually give the mixture a little stir after about 7 minutes.

++  During cold weather you may want to place the measuring cup somewhere out of drafts.  I use my microwave!

After 15 minutes the water, honey and yeast should’ve bubbled up to resemble the photo above.  ++ If it does NOT – your water may have been too cold or too hot – or – your yeast may not be good anymore.  Just dump the contents out and try it again.  DO NOT GIVE UP!  The first bread I made was heavy as a brick!!

++  The quality of yeast goes down the longer you have it.  Use ‘6 months’ as your guide for when it’s time to discard it BUT your bread won’t fail if the yeast is older.  Your bread will just not rise quite as much and will have less flavor.  (I buy small jars of yeast but the same applies to packets.)

Pour the liquid into a medium-sized bowl.  Add 1 1/4 tsp. salt, 2 Tbs. butter, 1 cup quick-cooking oats, 1 cup wholewheat flour, 1 cup flour (see note above), 1 Tbs. Chia seeds and 2 pinches nutmeg.  ++  You’ll be adding the walnuts a bit later.

Using your hands (or a large spoon if you wish) mix the ingredients until combined, which should only take about a minute.

KNEADING THE DOUGH

Place dough on lightly floured work surface.  ++  I usually use a ‘tea towel’ (a.k.a. ‘dish towel) but this dough is a bit sticky, just I just used the counter.

Knead dough about 5 minutes.  ++  To knead dough, push away from you with the palm of your hand, turn dough, fold over and repeat. If dough is too sticky, add a bit more flour.

++ Now add 1/3 chopped walnuts and knead just until walnuts are incorporated.  Form dough into a ball.

++  Here’s an excellent link to learn how to knead bread –  http://bread.wonderhowto.com/how-to/knead-bread-dough-by-hand-355638/

Dough After Kneading

6 -  Nutty Oatmeal and Wholewheat Bread - My Yellow Farmhouse.com (5)

ALLOWING THE DOUGH TO ‘RISE’    

8 - Nutty Oatmeal and Wholewheat Bread - My Yellow Farmhouse.com (7)

After dough has been kneaded, place it in a greased bowl.  Turn dough over to grease top.  Cover bowl with a dish towel or plastic wrap.  Let rise in warm place for 30 to 40 minutes, or until double in size. 

++ During cold weather, place a 10′ x 13′ pan half-full of VERY HOT water on the bottom rack. of your oven.  Place the covered bowl containing the dough on the top rack.

7 - Nutty Oatmeal and Wholewheat Bread - My Yellow Farmhouse.com

ALLOWING THE DOUGH TO RISE A 2nd TIME

Once dough has risen, you’re going to ‘punch it down’, which seems pretty counter-intuitive…but allowing the dough rise a 2nd time will make the bread much lighter.  ++  If you like dense bread – then just skip this step!

Cover bowl with dishtowel and repeat step above for rising the dough.  Again – allow to rise for 30 – 40 minutes or until double in size.

 FORMING THE DOUGH  –  This is fun and easy!!

9 - Nutty Oatmeal and Wholewheat Bread - My Yellow Farmhouse.com (8)

10 - Nutty Oatmeal and Wholewheat Bread - My Yellow Farmhouse.com (9)

Remove dough from bowl.  Place on a lightly floured surface.  Using fingers, press dough into an 8′ x 12′ rectangle.  Beginning at short end, roll up tightly.  Place in a greased (I use olive oil) 9′ x 5′ loaf pan.

Bake in a 375 (F) oven for 35 – 40 minutes.  Allow the Nutty Oatmeal and Wholewheat Bread a few minutes to cool off due to the denseness of the bread…. that is….if you can wait.  (I didn’t!)     Enjoy!

2 - Nutty Oatmeal and Wholewheat Bread - My Yellow Farmhouse

Nutty Oatmeal & Wholewheat Bread – Bread Machine Version

2 - Nutty Oatmeal and Wholewheat Bread - My Yellow Farmhouse

Follow this link for Nutty Oatmeal and Wholewheat Bread made without a bread machine –   http://myyellowfrmhouse.com/2015/01/22/nutty-oatmeal-and-wholewheat-bread/

This is the latest recipe in my Eating Healthy series.  And I’m happy to say that after only a week of ‘eating healthy’ I’m back in my jeans – and I can actually sit here and work on this post without having to unzip them.  If I’m hungry, I eat.  I just watch what I eat.  Believe me – I have a long, long way to go weight-wise.  But I’m motivated and enjoying the process.

It took me two tries to get this recipe the way I wanted it… and it was definitely worth the effort.  Nutty Oatmeal & Wholewheat Bread has a delicious, nutty taste.  And it’s good for you! There’s a cup of oatmeal and a cup of wholewheat flour, plus a cup of regular bread flour (because I don’t like heavy bread).  I added 1 tablespoon of chia seeds, which are so very good for you – or – you could add some bran in place of the chia seeds.  I  also added 1/3 cup of chopped walnuts, which, like chocolate, make everything taste better.    ++ This bread makes wonderful toast!

small red heart

INGREDIENTS        ++  According to my bread machine directions, this is the order of the ingredients as they’re put into the bread machine.  Check the directions for your bread machine, just in case they differ.

  • 1 cup warm water
  • 2 Tbs. honey            ++  Or brown sugar
  • 1 1/4 tsp. salt
  • 2 Tbs. butter             ++  Or Olive oil
  • 1 cup quick-cooking oats
  • 1 cup wholewheat flour
  • 1 cup bread flour      ++  In the United States, bread flour is different than regular flour.  In Canada, regular flour has the same qualities as bread flour.  Follow your manufacturer’s directions.
  • 1 Tbs. Chia seeds    ++  Or wheat germ
  • 2 pinches nutmeg
  • 2 1/4 tsp.active dry yeast  ++  I use Bread Machine yeast but regular yeast may be used
  • 1/3 cup chopped walnuts   ++  The walnuts should be added during your machine’s ‘add’ cycle, which is part way through the kneading process.  Your machine should give you a signal.  If not, add the walnuts after machine has had time to knead the dough for awhile.


use - Nutty Oatmeal and Wholewheat Bread - My Yellow Farmhouse.com (2)

Set bread machine on ‘grain’ cycle.   ++  Your machine’s grain cycle will allow for the bread to rise twice, which gives the bread a lighter texture.  Enjoy !!

++  This step is NOT necessary but if you want a darker, crisper crust, up-end your baked bread into a 9’x 9′ square pan.  Remove bread machine pan from bread.  Turn bread over so crust side faces up.  Place in a 400′ oven for 5 – 6 minutes. 

Oatmeal and Wholewheat Bread - My Yellow Farmhouse.com

Pull-Apart Breakfast Biscuits with Caramel Sauce, Pecans and Maraschino Cherries

Pull-Apart Breakfast Biscuits with Caramel Sauce, Pecans and Maraschino Cherries could be called Deconstructed Monkey Bread with Caramel Sauce, Pecans and Maraschino Cherries but that seemed pretty pretentious for this simple re-working of good old Monkey Bread.

Because I’m endlessly curious, I did a quick check on the meaning of a ‘deconstructed dish’.  “Deconstructed dishes may take foods that are normally combined in the dish, change their forms, and then plate them together in a different way. It’s not just about taking the dish apart, but putting its elements back together.”  So, I guess I did deconstruct what we usually think of as Monkey Bread… how about that?!

I had fun making this and I had even more fun sharing it with my neighbors.  I actually took the last two photos at their house – and even talked Lad into being my ‘hand model’!!

Monkey Bread - My Yellow Farmhouse.com

Ingredients & Method

Oven at 350F       Bake for about 35 minutes, or until biscuits in middle are fully cooked

Lightly grease a 10″ x 13″ pan with shortening or cooking spray

Two 9′ round or square cake pans can be used.  Just divide sugared biscuit quarters, pecans, cherries and sauce evenly between each pan.  Bake about 25 minutes, or until biscuits in middle are fully cooked.

– – – –

  • 2 cans (16.3 oz.) Pillsbury Grands Homestyle refrigerated buttermilk biscuits
  • 1/2 cup granulated sugar
  • 2 tsp. cinnamon
  • 1 cup packed brown sugar
  • 3/4 cup butter or margarine  ++  I recommend butter !!
  • 1/2 cup chopped pecans – – or walnuts   ++  I used pecans
  • 1/2 cup chopped maraschino cherries    ++  I chopped the cherries pretty small.  However, when I make this again, I’ll roughly chop the cherries.   ++  For Christmas you may want to use both red & green maraschino cherries!

Arrange 1/2 cup chopped pecans and 1/2 cup chopped maraschino cherries evenly on the bottom of a greased 10″ by 13″ pan.

Open both cans of biscuits.  Separate biscuits.  Cut each biscuit into quarters.  ++ I found it went faster if I stacked two biscuits together and then cut them into quarters.

Place 1/2 cup granulated sugar and 2 tsp. cinnamon in a gallon food storage bag.  Shake to mix.

Place biscuit quarters in the bag and shake to coat.  ++  I found it worked well if I shook about 1/4 of the biscuit pieces at a time.  Repeat until all pieces are coated with sugar/cinnamon mixture.

Arrange the biscuit quarters on top of the pecans and cherries, squeezing them together a bit to fit in one layer.  ++  As I went along, I added a bit more cinnamon to the bag because the first biscuit pieces seemed to have picked up all the cinnamon. 

Monkey Bread - My Yellow Farmhouse.com (4)

Now it’s time for the caramel sauce. Place 1 cup packed brown sugar and 3/4 cup butter or margarine in a small microwavable bowlHeat in microwave just until butter melts.  Using a fork or whisk, mix butter and brown sugar together well.  Pour over the biscuits.    ++  Don’t worry if the sauce isn’t poured evenly over the biscuits  – it’s going to end up at the bottom of the pan, where it’ll blend with the pecans and cherries to form a yummy, sticky topping for the biscuits.

Monkey Bread - My Yellow Farmhouse.com1

Bake 350F for 35 to 37 minutes – or until biscuits in middle are fully cooked.  ++  To check for doneness, lift up the top of a middle biscuit to see if it’s cooked.  If not, continue to bake a few minutes longer.

Monkey Bread - My Yellow Farmhouse.com (2)

Allow to cool in pan for 5 minutes, then turn upside down onto a large serving platter. ++ If you don’t have large enough platter, cover a cookie sheet with aluminum foil and serve from there.  Enjoy!

++ Quote  http://www.cheftalk.com/

Monkey Bread - My Yellow Farmhouse.com (6)

  Monkey Bread - My Yellow Farmhouse.com (7)

Farmhouse Bread – Possibly the EASIEST Bread You’ll Ever Make !

++ UPDATE  My fellow blogger friend John, who I mention below, recently made one loaf of ‘Farmhouse Bread’. He was very pleased with the results – in spite of the fact he forgot the dough rising in the oven… for 4 hours! I recently read bloggers should not begin a post by apologizing for having been out-of-touch.. that is.. unless you’ve been doing something noteworthy, such as vacationing. So, I’ll use that as my excuse because I did just return from a trip to Mexico.  I spent a week at Sandos Playacar Beach Resort in Playacar Del Carmen, Mexico, and it was all-inclusive and totally wonderful. I baked these loaves and took the photos before I left, planning to post the recipe while in Mexico….but I left the recipe at home…  Liz, who writes the excellent food blog ‘My Favorite Pastime‘, wrote to me (after I whined to her how I’d forgotten the recipe), “Have a great time. You can always post the recipe once you get home”. And John, ‘From the Bartolini Kitchens‘, told me, “You’ll find the recipe when you least expect it”.  It turns out they were both right & I thank them for their words of wisdom. So – without further ado – here’s the recipe for ‘Farmhouse Bread‘, which makes two beautiful loaves quicker than any bread recipe I’ve ever seen simply because you don’t have to wait for the bread to rise twice!

** If you have any questions or comments, keep scrolling down. I love to hear from you !!

INGREDIENTS

  • 1 TABLESPOON (1 packet) active dry yeast    ++ NOT ‘quick rise’ yeast
  • 1 TABLESPOON sugar
  • 1 TABLESPOON salt
  • 2 cups warm water     ++ The water should not be over 110F.  ++ Heat up your measuring cup first by running hot water over it, then fill it with warm water  ++ Check the water temperature by pouring a bit on your wrist – it should feel slightly warm.
  • 5 1/2 to 6 cups All-Purpose Flour    ++ Some bread recipes in the States ask for ‘Bread Flour’.. but not this particular recipe.
  • Cornmeal, to spread on bottom of a cookie sheet – OR – use parchment paper, which I prefer.

Possibly the Easiest Bread You'll Ever Make! - My Yellow Farmhouse.com

In a large bowl mix together 1 Tbs. active dry yeast, 1 Tbs. sugar, 1 Tbs. salt and 2 cups warm water. Allow mixture to stand 4 – 5 minutes while the yeast ‘eats up the sugar’, the combination of which will make the bread rise!

++ Everything will foam up a bit, which means the yeast is working.  If you don’t see any ‘bubbling’, your yeast is too old.  (Been there…. done that…)

Gradually add the flour to the liquid and mix thoroughly until the dough pulls away from the sides of the bowl.

Adding Flour to the Yeast, Sugar, Salt & Water Mixture

Possibly the Easiest Bread You'll Ever Make! - My Yellow Farmhouse.com

++ Making bread is not an exact science. One time you may need a bit more flour and another time you may need a bit less.  I ended up adding a bit more warm water because my dough was too dry and some of the flour wouldn’t incorporate into the dough. Don’t be afraid to ‘play around’ until the dough just feels right. You can always add a bit more flour when you’re kneading the dough.

Remove the dough and place on a lightly floured surface.

++ I like to use a floured dish towel.  (Tea towel for our British friends!) Knead dough 5 minutes. 

++ To knead dough, push away from you with the palm of your hand, turn dough, fold over and repeat. If dough is too sticky, add a bit more flour. If it’s still sticking to the floured surface.. yup.. add a bit more flour.

++ If you’re interested, here’s why kneading is necessary. (Adapted from ‘The Wise Geek’.) “One of the most important things taking place during the kneading process is the development of gluten, a type of protein. As the flour is moistened and stirred, gluten begins to form. This protein (gluten) acts as a binding agent within the dough, allowing the loaf to take on a cohesive texture so it doesn’t fall apart during baking.”

Let the dough rest while you wash & dry the bowl.  Using your hands, spread some oil (I use olive oil) around the inside of the bowl. Knead dough again for 2 to 3 minutes.  Place dough in the oiled bowl and turn dough over once to oil the top.

Kneaded Dough & Baking Pan with Hot Water

Possibly the Easiest Bread You'll Ever Make! - My Yellow Farmhouse.com

Cover bowl with a damp towel and keep warm until dough doubles in size – between 1 – 2 hours. SEE TIP BELOW !!

++ Here’s what I do to speed up the process.  Place a large baking pan containing HOT water on the bottom rack of your oven. Place the covered bowl containing the dough into the oven and close the door. Check between 45 minutes to an hour – your dough may have risen enough.  If the dough has doubled in bulk, then it’s ready for the next step. If not, just wait a bit longer.  (The original directions, from King Arthur Flour, say to let dough rise between 1 – 2 hours.)

Risen Dough – Ready to be ‘Punched Down’

Possibly the Easiest Bread You'll Ever Make! - My Yellow Farmhouse.com

Dough After Being ‘Punched Down’ (I think it looks a bit sad…)

Possibly the Easiest Bread You'll Ever Make! - My Yellow Farmhouse.com

Once you’ve punched down the dough with your fists, knead the dough briefly right in the bowl to get out any large air bubbles.  Return dough to lightly floured surface.  ( I thought this bread was so much fun to make.  The dough begins to rise again almost immediately after being punched down.)

Ready to be Formed into Loaves

Possibly the Easiest Bread You'll Ever Make! - My Yellow Farmhouse.com

Cut dough in half using either a knife or kitchen shears.  You don’t have to be overly fussy with it. Just try to end up with two pieces of dough pretty much the same size. Form each half into Italian or French styles loaves.  I went for a more rustic Italian look – if you’d like the same look, form dough into two 8″ – 9″ loaves. Place the loaves on a cookie sheet generously sprinkled with cornmeal OR use parchment paper, which I prefer.  Allow loaves to rest 5 minutes.

++ If the cookie sheet is lined with parchment paper, you can form the loaves right on the cookie sheet – which is what I do. Slash the tops 3 or 4 times diagonally. Brush loaves with cold water.  ++ I sprinkled my loaves with sesame seeds but it’s not necessary.

Shaped, Slashed and Ready to Rise ‘n Bake.

As you can see, the dough has already risen quite a bit since I formed it into loaves!

Possibly the Easiest Bread You'll Ever Make! - My Yellow Farmhouse.com

This is the coolest thing I’ve ever seen in bread making. You don’t have to wait for a 2nd rising. Your loaves are going to rise in the oven!  Place the cookie sheet containing the loaves into a COLD OVEN!!  Refill the baking pan you’d use before with BOILING WATER and return it to the bottom rack of the oven.

++ Caution – – don’t fill the baking pan too full with boiling water. The water’s going to slosh around a lot and you could get burned !

Place shaped loaves on the center rack of your oven – then set temperature to 400F.

++ As your loaves are rising, don’t be alarmed if they get so big the sides touch. That happened to me, so I just broke them apart after they cooled a bit.

Bake bread for 35 to 45 minutes, until the crust is golden brown and the bread sounds hollow to the touch.

++ For a softer crust, which I like, spread butter on the still-warm loaves.  (The butter gives the loaves that lovely sheen.)

Remove loaves from baking sheet and allow to cool.. not for long… just until it’s cooled enough so you can hold on to the bread while you cut a nice, big piece and slather it with butter. Enjoy!

P.S. My neighbor said this is the best bread she’s ever eaten! Of course, she might’ve just said that so I keep coming over with ‘goodies’!!

Possibly the Easiest Bread You'll Ever Make! - My Yellow Farmhouse.com

** Adapted from King Arthur Flour’s – “Hearth Bread”.  King Arthur Flour’s ‘Flagship Campus’, as they call it, is located in Norwich, Vermont.  It’s a wonderful place to visit, so drop by if you’re ever in the area!

Savory Cheese and Scallion Scones

My recipe for Maple Pecan Scones was one of several featured on the blog Fig Jam & Lime Cordial’s International Scone Week 2013, which made me happy as a little kid eating an ice cream cone!! Fig Jam and Lime Cordial is written by Celia, who happens to be from Australia. Drop by her blog because it’s jam-packed with excellent recipes!

Click here to see all the wonderful scone recipes from ‘International Scone Week 2013’.

For International Scone Week 2014 I’m submitting this recipe for Savory Cheese and Scallion Scones. (Savoury – for the rest of English speaking world.) I believe you’re going to like these scones!

Oven at 375F     Bake for 20 – 23 minutes

  • 2 cups all-purpose flour
  • 1/2 tsp. salt
  • 1 Tbs. baking powder   (Yes – a tablespoon!)
  • 6 Tbs. cold butter, cut into small pieces
  • 1 cup grated sharp cheddar cheese
  • 1/3 cup chopped scallions a.k.a. green onions   (Use both white and green parts.)
  • 2 large eggs
  • 1/3 cup milk
  • 1 tsp. Dijon mustard (You can add up to 1 Tbs. if you like.)
  • several shakes of hot sauce

Savory Cheese and Scallion Scones - My Yellow Farmhouse.com

In a medium-sized bowl mix 2 cups flour, 1/2 tsp. salt and 1 Tbs. baking powder.  Work in the cut-up 6 Tbs. of butter with your fingers until there’s an evenly crumbly mixture and you don’t see any pieces of butter.

Savory Cheese and Scallion Scones - My Yellow Farmhouse.com (3)

Add 1 cup grated cheese and 1/3 cup chopped scallions.

Savory Cheese and Scallion Scones - My Yellow Farmhouse.com (4)

In a small bowl whisk 2 large eggs, 1/3 cup milk, 1 tsp. Dijon mustard (You can add up to 1 Tbs. of mustard if you like.) and several shakes of hot sauce. Add the liquid to the dry mixture. Stir with a large spoon ONLY UNTIL the dough is moistened. (The dough will be very sticky…)

++ UPDATE  My friend Liz, who blogs on “My Favorite Pastime” recently posted a recipe very much like mine, and Liz recommends “Knead the dough very briefly and lightly, folding it back over itself and pressing down (about 10 seconds). It should just lose its stickiness.” THANKS LIZ !! To see Liz’s recipe for Cheese and Chive Scones, click here!

Scrape dough onto a well-floured area of the counter top. OR (and I recommend this) use either a well-floured sheet of waxed paper or parchment. (I usually use a well-floured dishtowel BUT this dough was so sticky that ended up not being a good idea…)

Flour your hands – and flour them often. Also, feel free to sprinkle on a bit of flour while working with the dough. Pat dough into a 10″ by 3″ rectangle.

Cut into five squares. (I found cutting every 2″ worked out perfectly.) Then cut each square diagonally to form 10 triangles

Savory Cheese and Scallion Scones - My Yellow Farmhouse.com (5)

++ This dough can be a bit hard to work with. If you like, scoop out large dollops of dough to make 9 – 10 ‘free form’ scones. If you do choose to have triangular scones, don’t worry too much about them getting out of shape when you’re transferring the scones to the baking sheet. You can always ‘fix them up’ a bit with your hands.

Place scones on a greased baking sheet a least 1″ apart – OR – (I recommend this) place a sheet of parchment paper on the baking sheet.

Savory Cheese and Scallion Scones - My Yellow Farmhouse.com (6)

Bake scones for 20 – 23 minutes, until they’re nicely browned. (I’d ‘err’ on the side of ‘less brown’ rather than ‘more brown’ because you don’t want your scones to dry out.)

Remove scones from oven and sprinkle each with a bit of shredded. Return scones to oven for 10 seconds, which is just long enough to slightly melt the sprinkled cheese!

These Cheddar Cheese and Scallion Scones are best eaten right out of the oven and slathered with lots of butter. Any leftovers should be placed in a plastic food storage bag.    Enjoy!!

Savory Cheese and Scallion Scones - My Yellow Farmhouse.comOriginal Recipe from “King Arthur Flour’ – click here to see it.

Not Your Grandmother’s Banana Bread with M&Ms, Nuts & a Smidge of Peanut Butter

Pretty much everyone loves Banana Bread, especially when its just out of the oven and slathered with butter.  My ‘Not Your Grandmother’s’ Banana Bread’ gives you the extra kick of melted chocolate and nuts, not to mention just a hint of peanut butter flavor.

++  Here’s a great link with all the info. you’d ever need to know about pan sizes!  http://www.joyofbaking.com/PanSizes.html

Ingredients & Directions               Oven at 350F             Bake for 50 – 55 minutes

++ Use a 9 x 5 x 3 loaf pan, if possible !!   If using a smaller pan, you may have to increase cooking time & the banana bread might be a bit crumbly… but still delicious!!

  • 2 medium – VERY RIPE – bananas…. enough to equal 1 cup
  • 1 Tbs. lemon juice   ++ If you don’t have any lemon juice.. that’s fine.
  • 1/4 cup buttered, SOFTENED  ++Put in microwave for a few seconds.
  • 1/4 cup chunk-style peanut butter
  • 1/4 cup sugar    If you don’t have brown sugar, use a total of 1/2 cup regular sugar.
  • 1/4 cup brown sugar    ++ DON’T pack down the brown sugar. 
  • 1/4 tsp. cinnamon
  • 1 large egg
  • 1/3 cup milk
  • 1 3/4 cup flour
  • 1 1/2 tsp. baking POWDER
  • 1/2 tsp. baking soda
  • 1/2 tsp. salt
  • 1/2 tsp. vanilla
  • 1 cup M&Ms
  • 1/4 chopped peanuts OR chopped walnuts

Put bananas in a small bowl and mash with a fork until smooth. Measure out 1 cup and place mashed banana in a large bowl. Add 1 Tbs. lemon juice, 1/4 cup softened butter, 1/4 cup chunk-style peanut butter, 1/4 cup sugar, 1/4 cup brown sugar (NOT packed), 1 large egg, 1/3 cup milk, 1 3/4 cups flour, 1 1/2 tsp. baking POWDER, 1/2 tsp. baking soda, 1/2 tsp. salt and 1/2 tsp. vanilla.

Mix with electric mixer until ‘just combined’.  Stir in 1 cup M&Ms and 1/4 cup chopped peanuts OR walnuts.

Banana-Peanut Butter Bread with M and Ms and Nuts - My Yellow Farmhouse.com

Pour into greased loaf pan (I suggest a 9 x 5 x 3).   ++ I like to sprinkle the top with 2 tsp. of sugar, which gives the banana bread a nice look.

Banana Peanut Butter Bread with M and Ms and Nuts - My Yellow Farmhouse.com

Bake for 50 – 55 minutes until a knife (or toothpick) comes out clean when stuck into the center of the loaf.  Cool banana bread (still in the pan) on a rack for about 10 minutes, then turn it out onto the rack to cool further.  (I bet the bread won’t last more than two minutes before someone cuts into it.)  Enjoy!

'Not Your Grandmother's' Banana Bread with M&Ms and Nuts - My Yellow Farmhouse.com

Tropical Muffins Made with Crushed Pineapple, Shredded Coconut & Pecans

It does seem like I’m on a bit of a “baking kick” lately. I just realized why…. my dear friend and neighbor Frank recently returned from spending the summer at the mouth of the Connecticut River on his “boat”, which sleeps four and has more space than some apartments. (He’s always kind enough to have me as his guest several times each summer – maybe because I show up with food!)  And now he’s back. Frank is a Dessert Lover of The First Class – hence, my renewed interest in baking. So, without further ado – here’s the recipe for Tropical Muffins.

Tropical Muffins – Pineapple, Coconut & Chopped Pecans

Makes 12 Muffins

Grease a 12 unit muffin tin.     (You can also use cupcake liners…. but I, myself, am not crazy about them because, sometimes, the muffins stick to the liners. And I refuse to give up even a teeny, tiny bit of these muffins.)

++  Any leftover Tropical Muffins can be reheated the next morning in a toaster-oven. In fact, I’m enjoying two warmed-up muffins right now with a lovely cup of mocha coffee, which equals “Happy Tummy”!

Oven at 400 F     Bake for 20 – 25 minutes.       ++ Be sure to check at the 20 min. mark !!

Ingredients
  • 2 cups flour
  • 1/2 cup sugar
  • 1 TBS. baking POWDER
  • 3/4 tsp. salt
  • one can (8 oz.) crushed pineapple – drain & save the juice !
  • ++ add enough water to the pineapple juice to make 3/4 cup liquid
  • 1 egg
  • 1/3 cup oil
  • (The juice & water will be mixed with the egg & oil…)
  • 1/4 cup chopped pecans – or walnuts
  • 1/4 cup shredded coconut    (Desiccated coconut for my European etc. friends)
  • 12 maraschino cherries – drained on paper towel (These will go on the top.)

Set aside the drained crushed pineapple, 1/4 cup chopped pecans & 1/4 cup shredded coconut

Tropical Muffins - coconut, pecans and pineapple.jpg

Mix 2 cups flour, 1/2 cup sugar, 1 TBS. baking POWDER & 3/4 tsp. salt In a large bowl.

In a small bowl, add the pineapple juice from the drained crushed pineapple ( plus enough water to bring the total liquid to 3/4 cup ) 1 egg and 1/3 cup oil – mix briefly.

Tropical Muffins

Now place the pineapple juice/egg/oil mixture, and the 1/4 cup chopped pecans, 1/4 cup shredded coconut and crushed pineapple into the large bowl containing the flour/sugar/salt/baking powder. Mix gently – just until everything is combined. You don’t want to over-mix because you want your muffins light and fully!

Using a 1/4 cup measure, fill each muffin cup 3/4’s full. Place a maraschino cherry in the center of each. (Don’t poke down the cherry, or it’ll disappear as the muffin rises.

Tropical Muffins - USE - 3RDBake at 400 F for 20 – 25 minutes. ++ Be sure to check after 20 minutes. My muffins were ready in 20 minutes.

To ensure your muffins are fully cooked, insert a toothpick or a sharp knife into the center. If it comes out clean – they’re ready! 

Share these, warm from the oven, slathered with butter, with your family & friends. That is… if you’re feeling generous. Enjoy !!

Raspberry Surprise Muffins

Raspberry Surprise Muffins

I gotta admit it, I had a hard time waiting until I finished photographing these muffins before gobbling up at least one! Based on an older recipe, these aren’t the enormous muffins we’ve gotten used to in the last few years. Although they’re smaller in size, they’re packed with spicy flavor and the goodness of oatmeal – not to mention the delicious surprise of the raspberry jam center!

As an aside, isn’t the platter in the photo lovely? It’s from my mother’s old “everyday set”, circa 1949!

Oven at 400 F      Bake for 20 minutes

In a medium-sized bowl, mix until combined:

  • 1 1/2 cups flour (If you don’t have oatmeal, just use a total of 2 cups flour.)
  • 1/2 cup old fashioned oatmeal
  • 1/3 cup sugar
  • 1/2 tsp. cinnamon
  • 1/2 tsp. nutmeg
  • 3 tsp. baking powder
  • 1 tsp. salt

Add to bowl and mix until just combined:   (It’s never good to overmix muffins.)

  • 1 egg, slightly beaten
  • 3/4 cup water
  • 1/2 cup vegetable oil

After mixing, allow batter to rest 10 minutes. (Not necessary if you don’t include oatmeal in the batter.)

Lightly grease 12 muffin cups.  Using 1/4 cup measure, place about 1/4 cup batter into each muffin cup.

Drop 1 tsp.raspberry jam – or any jelly or jam – on top of the batter.

Again, using 1/4 cup measure, use remaining batter to fill each muffin cup about 3/4s full.

Bake at 400 F for 20 minutes – or until a sharp knife inserted comes out clean.

Allow muffins to cool about 5 minutes, then remove from muffin tin and place muffins onto cooling rack.   If you wish, make a glaze by mixing about 1/2 cup confectionary sugar with a bit of water. Drizzle over muffins and sprinkle with chopped walnuts.  Enjoy!