‘My Yellow Farmhouse Popovers’ – Chewy Outside – Fluffy & Moist Inside
++ UPDATE – – It’s ironic, sometimes, how something small may turn into something rather special. I had a huge urge for popovers, so I started preparing some about 9:00 tonight. A really good neighbor/friend who NEVER comes over late showed up…. with some problems. Let me tell you – two of these popovers, smothered in butter, and a glass of red wine – plus a good chat – seemed to be exactly what was needed!!
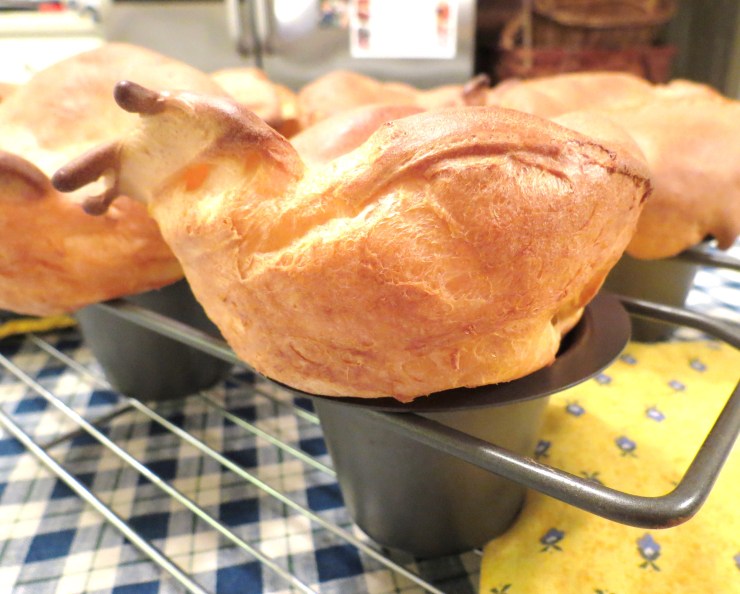
This is the final recipe of ‘The Popover Experiment’. I hope my little experiment enticed you to not only make popovers, but also to try a bit of experimenting on your own. As it turns out, these particular popovers – which I’m calling ‘My Yellow Farmhouse Popovers’ – are my favorites. My neighbor Frank, who’s sometimes a bit hard to please, said these are his favorites too. And I quote…”.. best popover yet. Nice buttery flavor, crispy on the outside and smooth & chewy on the inside.” Thanks Frank !!
I adapted this popover recipe from one featured on FLEUR de SEL, one of my favorite blogs. (The original recipe comes from Neiman Marcus.) FLEUR de SEL‘s popovers look yummy, so check out her recipe as part of your own ‘Popover Experiment’. (Mine look a bit “weird” compared to hers!) http://fleurdeselsf.com/2013/10/08/popovers-with-strawberry-butter/
If you’ve been following ‘The Popover Experiment’, you know I sometimes mess up when it comes to lowering the oven temperature approximately half way through the baking time…. well…. I did it AGAIN. The original recipe calls for the temperature to be lowered to 375F, yet, once again, I set the temperature at 350F. No matter, the popovers turned out great. I also changed the cooking time at 350F down to 20 minutes. The popovers looked done after 20 minutes at 350F – a nice dark, golden brown – so I took them out!
Tip !! If using older popover pans without nonstick coating, butter each section.
Tip !! If using muffin tins or ramekins, butter each section. You’re going to have too much batter for a six-cup muffin pan, so use a 12-cup pan. Fill each section 1/3 full, and fill any empty sections with water. The popovers won’t be as big as those made in the new style popover pans but they’ll be wonderful.
Yield – 6 popovers, if using a popover tin. 8 to 10 popovers, if using ramekins/muffin tin.
Ingredients & Method
+ Grease pans – recipe contains NO BUTTER !!
+ Oven at 450F for…. 15 minutes Then lower heat to 350F…. for 20 – 25 minutes
- 3 large eggs
- 1 3/4 cup whole milk (You can try 2% if you wish but I recommend whole milk.)
- 2 cups flour
- 3/4 tsp. salt
- 1/2 tsp. baking POWDER
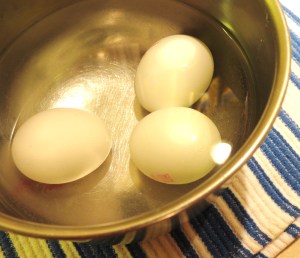
 Put some very warm water in a small bowl and place in the 3 eggs. Allow the eggs to sit in the water while you organize your ingredients.
Warm up 1 3/4 cups milk a bit in the microwave and set aside. (You don’t want the milk HOT, you’re just trying to take the chill out.)
In another bowl, stir together 2 cups flour, 3/4 tsp. salt & 1/2 tsp. baking POWDER.
 Remove the eggs from the warm water and break into a small bowl. (I suggest using a small bowl because the small size helps incorporate air into the eggs.) Beat eggs on HIGH speed for 3 minutes. The eggs will become foamy with a light lemon color.
Pour the well-beaten eggs into a large bowl. With the mixer now set on LOW, stir in the warmed milk. Mix the eggs and milk briefly. With the mixer again set on LOW, gradually combine the flour/salt/baking powder mixture.
Raise the mixer speed to MEDIUM and continue to beat for 2 minutes longer. By this time the batter will have become slightly thicker & nice and smooth.
 Fill the 6 GREASED sections of your popover pan equally – they’ll be about 3/4’s of the way full.
Now this is important – and I didn’t remember to do it!
++ Place a baking sheet on the lower shelf below the popovers. (To help with clean up, you might want to cover the baking sheet with aluminum foil.)
If you don’t place the pan on a baking sheet, you’ll end up will some lovely spills on the bottom of your oven – like I did !
Place your pan – set on a baking sheet – into the center of a 450F preheated oven. Bake for 15 minutes. Lower the temperature to 350F and bake for another 20 minutes. ++ Don’t be surprised if there’s a lot of steam coming out your oven vent when you bake these popovers. ++ If you popovers don’t look browned enough – bake for another 5 minutes. Ovens vary, so always be prepared to be flexible!
Pierce popovers with a sharp knife once you remove them from the oven so the steam can vent, then remove them from the pan. (I like to lay the popovers on their side to cool.) These are excellent at room temperature but, of course, they’re always best eaten right out of the oven.
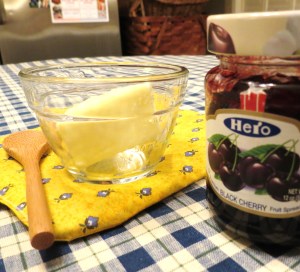
 Here’s an idea for a lovely fruit butter you can spread on your nice, warm popovers. Believe me, I sure had a Happy Tummy when I was eating a few of these.
Beat 1 stick softened butter until light & fluffy. Add 1/4 cup preserves. I used cherry preserves but you could use strawberry or blueberry or even orange marmalade. Enjoy!!
+


Hi Stefan! About the popover pan – for ages people have been baking popovers in either buttered muffins tins or buttered small ramekins. In fact, many people still make them that way. I recommend the first recipe in ‘The Popover Experiment’ if you’re using muffin tins but all my popoever recipes will work well. You should end up with between 8 – 10 popovers. Fill each tin/ramekin 1/3 full and bake as usual. Here’s the link for the first recipe (which has directions for using ramekins etc.) https://myyellowfarmhouse.com/2013/11/01/the-popover-experiment-recipe-no-1-brown-n-crusty-on-the-outside-soft-creamy-on-the-inside/
LikeLike
I’ve only seen popovers on (American) blogs and have never seen them in real life. Your recipe is very detailed, which is great. Don’t think I can get a popover pan around here. They look very tasty!
LikeLike
[…] https://myyellowfarmhouse.com/2013/11/12/the-popover-experiment-recipe-no-3-chewy-outside-fluffy-insi… […]
LikeLike
These look awesome Cecile! Love these!
LikeLike
Thanks so much Anne !!
LikeLike
I love your popover experiments! This looks great.
LikeLike
Thanks Pamela – I had guests over for dinner last night and they were so bummed I wasn’t serving popovers. I now feel that I’ve become ‘slightly addicted’ to popovers !
LikeLike
Thanks for your comment – I agree with you…. which one to make first! I
LikeLike
This one sounds like a winner too. I have no idea which recipe I’d start with.
LikeLike